Monday, November 17, 2014
Peace Town
Took a walk today with Pi dog in Sebastopol near the Laguna. They have a nice park with baseball diamonds and kids play equipment and a teen memorial garden. They also have a section of the park dedicated to peace. Here is the entrance to that section:
The photo at the top shows the section for plants. I guess it is just getting started because right now there is a section next to that with s "Community kale garden" with about a dozen kale plants, but not much else at the moment. Still it is fun to see bright and colorful public art dedicated to peace.
Down the road from there I purchased some tubers that look like garnet yams. They turn out to be something else. Tomorrow I'll share the recipe for some rolls I made with them.
Happy Monday!
Sunday, November 16, 2014
Layered Flat Bread From Dhaka, Bangladesh
Our gracious kitchen of the month for the Bread Baking Babes is Aparna from My Diverse Kitchen. This month she asked us to make "bakharkhani, a layered and very rich bread, made in the manner somewhat like puff pastry...(it) is popular in Bangladesh, India and Pakistan. In India, it is typically found in states where history, food and culture are influenced by the Mughal rule like Lucknow, Hyderabad and Kashmir.
This flat bread seems to be different in different parts of the world where it exists. It can be a savoury or slightly sweet, leavened or unleavened, soft or crisp, eaten for breakfast or served with tea, and even like a paratha (Sylheti Bakharkhani from Bangladesh). The softer leavened versions of Bakharkhani are usually served with kebabs and meat curries."
This recipe makes a great, flaky baked good that is a cross between puff pastry and a biscuit. I love the nice crust that developed on the bottom and how it contrasted with the rich, flaky, moist interior. I had mine with a cup of hot tea and a little cherry jam and it was delicious! I only made a half recipe to avoid being tempted to eat too many. Sweetie likes them, too.
One of the ingredients that took me three tries to secure is the mawa, which is a milk curd like ingredient. Elizabeth figured out how to make a faux mawa with dried powdered milk, melted butter and milk. After trying to make it in the slow cooker and failing (a skin formed, so the water in the milk didn't evaporate and that evaporation is a crucial part of making mawa), a half-hearted attempt to make it in a pan on the stove (I ran out of energy and it takes a lot of stirring for a long time), it was great to see how easily Elizabeth's version went together. I used the microwave instead of the toaster oven and put the mixture back in the microwave for a few more minutes once the powdered milk had be mixed into the liquid mix because it was too plastic and I wanted it to be more crumbly. Worked like a charm. Thanks Elizabeth! I owe you.
I've made ghee in the past but actually went with melted and partially browned butter instead. With the milk solids already part of the bread due to the mawa, it didn't make sense to me to eliminate them for the brushed on butter part. I used a fine screen sieve to sprinkle the flour as evenly as possible over the rolled out dough.
Give this a try and become a Buddy. It is always fun to try something different and the flavor and textures of this should encourage you, too. Be sure to go to Aparna's blog HERE to see how she wants you to let her know you are a buddy and to see the original recipe and how to make the real mawa and to make ghee. Thank you Aparna for such a lovely recipe. I think these would be great accompaniments the next time I make the spiced butternut squash that Sweetie loves.
Dhakai Bakharkhani
(half recipe - makes about 5-6)
1 cup flour, plus more for rolling out the dough and sprinkling over the ghee
2 tablespoons mawa (Elizabeth's recipe below)
2 tablespoons ghee or melted unsalted butter, plus more for spreading on the dough while rolling out and folding
1/8 teaspoon salt
1 teaspoon sugar
1/3 cup water (a little less or more if needed)
sesame seeds, to sprinkle - optional
Elizabeth's faux mawa:
1 tablespoon unsalted butter
1 tablespoon milk
4 tablespoons (1/4 cup) skim milk powder
In a heatproof bowl, heat the cold butter and milk until butter is melted and mixture starts to bubble...you can use the microwave like I did, or the toaster oven like Elizabeth did. Remove from heat and stir in the milk powder and stir vigorously until well combined. Heat and additional minute or two if needed. The mixture should be moist but crumbly.
For the Bakharkhani:
In a large bowl, put the flour, salt and sugar into a large bowl. Crumble the mawa (see recipe above for faux version or HERE for actual recipe) into it and mix in. Than add the ghee and use your fingers to rub it into the flour. Add the water, a little at a time, and knead well until you have a smooth and elastic dough that can be rolled out very thin.
Cover the bowl with cling wrap or a damp kitchen towel to prevent it from drying. Let it rest for about 30 minutes to an hour. Then lightly coat the dough with a little ghee and then let it rest for another 10 to 15 minutes.
Preheat the oven to 325 degrees F.
Lightly coat your rolling pin and board or working surface with some ghee or oil.
Roll out the dough as thin as possible into a rectangle, without adding any flour. It should be thin enough for you to see your work surface through the rolled out dough.
Brush some ghee (not too much) all over the surface of the rolled out dough with your fingers (I used a pastry brush). Sprinkle some flour evenly over this, enough so that the ghee is absorbed when spread out. The flour layer should be thin. Brush some more ghee, again, over this and then sprinkle some flour this like previously.
Fold the dough into half and once again repeat the process of brushing the ghee and sprinkling the flour over this twice, as before. Fold the dough for a second time and repeat the brushing with ghee and flouring, twice. (I did one layer, folded, one layer, folded, one layer, folded, then rolled it all out, did one more layer, folded and rolled it up.)
Roll up the dough into a long cylinder and let it rest for about 10 minutes. Pinch off lemon sized balls and roll each one into a small, round flat bread about 1/8" thick and approximately 4" in diameter. If using sesame seeds, sprinkle them on and lightly press into the dough. Make three cuts centrally and lengthwise on each flat bread using a knife.
Place on parchment lined baking sheets and bake in preheated oven for about 20 - 25 minutes or until they're light brown on top. Do not over bake.
Let them cool and serve with coffee or tea.
Labels:
bakharkhani
,
flaky bread
,
ghee
,
Indian bread
,
mawa
,
Pakistani bread
Saturday, November 15, 2014
And Now For The Coconut Pie...
I used the same crust for the coconut cream pie as I used for the pecan pie (Martha Stewart's food processor recipe), but I baked the shell at 425 degrees F for 12 minutes, well weighed with lentils for pie weights, with the lentils sitting on top of a piece of parchment paper fitted into the pie shell. I also put the shell back in the oven for 5 minutes after I had removed the pie weights and paper and after I took the pecan pie from the oven and turned the oven off. That let it crisp up just a bit more.
This is a pretty classic cream custard, flavored with the coconut, but also with vanilla and just a bit of rum. It is rich and not too sweet.
I brought it to room temperature before serving,
decorated it with whipped cream and some toasted coconut shavings and it make the perfect birthday pie with four candles. The birthday girl is older than 4, but we'll never tell how old.
Coconut Cream Pie
1 envelope unflavored gelatin (7 gr.)
1/4 cup cold water (60 ml)
1/2 cup + 2 Tablespoons sugar (130 gr)
½ cup all-purpose flour (70 gr)
1/4 teaspoon salt
5 egg yolks
2 cups whole milk (500ml)
1 tablespoon rum
¼ cup whipping cream (57 gr)
1 3/4 cups lightly toasted fresh coconut, divided
1 9-inch blind baked tart or pie crust, cooled to room temperature
Soak the gelatin in the 1/4 cup of cold water.
Put the sugar, flour, and salt into a saucepan and stir together with a whisk. Add the yolks and enough milk to make a paste. Whisk in the remainder of the milk.
Place over low heat and stirring constantly, cook until thick. Remove from heat and stir in the vanilla and the gelatin. Stir until the gelatin is completely dissolved.
Stir in the whipping cream (and rum if using). Set the mixing bowl in cold water and stir until the cream is cool. Fold in 1 1/2 cups of the coconut. Pour into tart or pie crust and spread evenly. Chill until set. Garnish with whipped cream rosettes and rest of coconut. Serve at or close to room temperature for the best flavor.
1 envelope unflavored gelatin (7 gr.)
1/4 cup cold water (60 ml)
1/2 cup + 2 Tablespoons sugar (130 gr)
½ cup all-purpose flour (70 gr)
1/4 teaspoon salt
5 egg yolks
2 cups whole milk (500ml)
1 tablespoon rum
¼ cup whipping cream (57 gr)
1 3/4 cups lightly toasted fresh coconut, divided
1 9-inch blind baked tart or pie crust, cooled to room temperature
Soak the gelatin in the 1/4 cup of cold water.
Put the sugar, flour, and salt into a saucepan and stir together with a whisk. Add the yolks and enough milk to make a paste. Whisk in the remainder of the milk.
Place over low heat and stirring constantly, cook until thick. Remove from heat and stir in the vanilla and the gelatin. Stir until the gelatin is completely dissolved.
Stir in the whipping cream (and rum if using). Set the mixing bowl in cold water and stir until the cream is cool. Fold in 1 1/2 cups of the coconut. Pour into tart or pie crust and spread evenly. Chill until set. Garnish with whipped cream rosettes and rest of coconut. Serve at or close to room temperature for the best flavor.
Friday, November 14, 2014
Pecan Pie
The first pie is the classic Pecan Pie, made with dark cane sugar syrup, eggs, sugar, butter, vanilla and pecans. It is a translucent custard type of pie and is very sweet. The pecans float to the top of the filling so they get toasted along with the crust. It is Natasha's favorite thing to have for her birthday and a great addition to a Thanksgiving dessert array.
Pecan Pie
recipe originally from the Karo Syrup label
but this one is directly from my cookbook, Classic Comfort Food
3 eggs, beaten lightly
1 cup sugar
1 teaspoon vanilla
1 cup dark Karo corn syrup
2 tablespoons butter, melted
1½ cups pecans, shelled
one 9” unbaked pie shell
Preheat oven to 3500 F. Stir together the eggs, sugar, vanilla, corn syrup, and butter until well blended.
Stir in pecans.
Pour into unbaked pie shell.
Bake on a cookie sheet for 50 minutes or until a knife inserted into the center comes out clean. Do NOT overbake. Cool pie before serving.
Very rich! To “gild the lily,” serve with whipped cream or vanilla ice cream.
Thursday, November 13, 2014
Turkey Day Early
Here in the States the normal day to celebrate Thanksgiving is the last Thursday of the month. We will still be doing that, but for my family turkey day will be coming early since we have the opportunity to celebrate a birthday and an early Thanksgiving with my grand-niece this coming weekend.
Everyone attending has a dish or beverage to bring. I'll be making two kinds of pie, which is great since I now have the excellent food processor pie crust recipe that I posted a few days ago.
I'm going to keep the kinds of pies secret until tomorrow, but I can tell you that the crust discs are in the fridge, ready to be rolled out and fit into the pie pans.
Will one of the pies be pumpkin, sweet potato, or chess? Maybe it will be walnut maple or pecan? Perhaps apple or cherry? Of course it could be a cream pie, couldn't it? Chocolate, banana, coconut, caramel cream...the choices are all so tempting.
Check back tomorrow to see what I chose.
Wednesday, November 12, 2014
A Day Off
Life sometimes hands you an unexpected day. Mine was today. I thought that I had a day off...nothing scheduled on the calendar. That happens less frequently than you might think. Then I read my e-mail and made a phone call to an old and very dear girlfriend who was not feeling well on Monday (I took her to her doctor's office at her request) but was feeling even worse today.
Sweetie waved me off with a smile as I went to pick my friend up to take her to the hospital emergency room. He was happy that I was able to help her out since it was a day off. He also was planning on crawling around below the house seeing what he could do for something with straps and knew that he would have lots of time to do so without interruption.
My friend and I headed to the new Sutter hospital in Santa Rosa. She wasn't ill enough to need an ambulance, thank heavens. Neither of us had been to this facility but it is right next door to a place where my daughter used to work, so I knew the way.
Everyone was outstanding in the ER, and the equipment is brand new and does everything but stand on it's head and clap. My friend is doing better and they figured out what was wrong, but we were there from 9:20 am and I left at about 4:15 pm. A long day off, but a satisfying one. I was able to help explain her symptoms, to help with the hospital gown, to keep her company, tuck in the blanket when her feet got cold, keep her from getting bored by telling her Pohnpei stories that Sweetie told me, and get her to laugh later in the day. We have over ten years of friendship so we know each other pretty well.
All in all, it was an interesting day off. I know she would do the same for me, anytime. A good day.
No food today...too tired to cook.
Tuesday, November 11, 2014
Fresh Red Peppers Stuffed with Barley and Mushrooms
Things have been busy in my neck of the woods. On Sunday Sweetie and I decided to take some cars for test drives. We have been looking at cars in parking lots and as we drive around for about a year, knowing that our beloved Toyota 4Runner is getter older and might need to be replaced. Sweetie has also done lots and lots of research on recent car statistics and I even spent time reading about different ones in a magazine and Consumer Reports and online at Edwards (or is it Edmunds?) so that I had a small amount of knowledge for the search. The last time we actually did the test driving dance was about 22 years ago when we bought the Astro van that was put to good use for many years carrying kids to volleyball and soccer games, plus taking us all on trips and some of us on camping trips. That time I was suffering through a head cold and just wanted to buy something and go home.
This time I was excited about trying different cars, but we promised each other that we wouldn't buy anything on Sunday. Silly us, we always buy the same day. Turns out we did this time, too, and are now the happy owners of a Honda Ridgeline, which is a combination of a car and a truck. Sorry no photo yet, but I'll post one tomorrow. It has a car like ride but a truck back window and truck bed for hauling stuff. Will be selling the 4Runner soon, although it seems to be running just fine. I think the idea was to choose a car while we didn't have too so that we could choose what we wanted.
Yesterday was full of doctor's visits, all benign checkups really, and a nice lunch with a friend.
So, finally, today I can tell you about the great stuffed peppers we had for dinner last night. I had the leftover half for lunch today and it may have been even better. The following will serve as a recipe since the amounts can be varied to suit your own taste. The photo up top show the baked pepper and the photo below shows them stuffed, right before I added the cheddar cheese.
Our local farm stand had these lovely peppers for sale this week, plus some small zucchini squash. I cooked barley in veggie broth, adding diced celery, carrot and green onion. While it was cooking I sauteed chopped zucchini and mushrooms in a little olive oil, then added salt, pepper and dried thyme. The cooked barley was mixed with the cooked zucchini mixture, then it was all stuffed in the halved and de-seeded peppers. A sprinkle of chopped parsley and shredded cheddar cheese finished them off. I put them into a baking dish and a small baking dish and added more veggie broth to the bottom. After covering the dishes with heavy duty foil, I put them into a preheated 425 degree F oven and baked them for 20 minutes.
They were outstanding. The pepper was softened, but still kept its shape. The barley mixture was delicious and chewy in a good way. They were amazingly filling and the perfect dinner for a chilly evening.
Labels:
barley
,
car shopping
,
mushrooms
,
red peppers
,
zucchini
Monday, November 10, 2014
There Will Be Barley
It's gotten late and I was hoping to post tonight's veggie extravaganza, stuffed red peppers. Looks like it will be tomorrow after all. One thing I can promise you, there will be barley in the recipe...and it was delicious.
Sunday, November 09, 2014
Cafe of Change
A number of years ago I wrote about a favorite cafe of mine.
It's still a favorite, but during the last couple of years the owners have made
substantial changes, so it's almost like a different place. We went there this
morning for breakfast and the line to order (because it is a place where you
place your order, get your drinks, sit down, and then the meal is brought to
you) was down the cold cases, past the coffee station (where you can serve
yourself free refills!) and almost to the fireplace. That used to happen mostly
on Mother's Day, so more people are coming and enjoying the great food.
One of the changes is that they have focused on being an
evening entertainment venue and a center of community activities. One of the
big changes has taken place outside. There is a ramp toward the back of the
building that used to lead to a paved parking area. Now it is a Beer Garden,
with bamboo in galvanized troughs, an overhead shade sail and strings of
lights, a new counter for beer service, new fencing, a stage for live music performances,
crushed gravel underfoot and lots of picnic tables. An upper level is shaded by
lively red umbrellas. Some of the walls have recycled wood cladding for an
urban chic look. Last, but not least, there is a serving area for bar snacks to
go with the beer.
Out of time. Will have to tell you about the inside
improvements another day.
XO, Elle
Redwood Cafe and Beer Garden
8240 Old Redwood Highway
Cotati, CA 94931
8240 Old Redwood Highway
Cotati, CA 94931
707- 795-7868
Saturday, November 08, 2014
Amazing Overnight Cinnamon Coffee Cake
I was overjoyed when I discovered this recipe on the King Arthur Flour website. It is really great to be able to wake up in the morning knowing that the breakfast treat you want to serve your family and friends is mostly made, with little or no more work required other than baking. I've come to depend on the Amazing Overnight Waffle for those times when I know we will want waffles in the morning, so now I have a great coffee cake that requires nothing more in the a.m. than preheating the oven, taking the pan out of the fridge and sliding it into the preheated oven. Piece of cake, literally.
This make a lot of coffee cake. I took mine to a meeting this morning, so that helped, about three quarters was gone by the time the meeting was finished. Of course if you cut it into bigger pieces it might not take much time at all to polish it off. It has a tender crumb, lightly flavored with vanilla, a ribbon of cinnamon sugar and cocoa running through the middle and a topping of crumbly streusel. Delicious!
My only complaint was that it took a lot of bowls to make since you have one for melting the butter, one for the topping, one for the filling, and at least one more for the batter. I'm going to think about the instructions and see how I could reduce that pile of dirty bowls a bit. I know there has to be a way.
Don't let the dirty bowls deter you from making this. There are also lots of ways to doll it up...nuts and/or dried fruit mixed in the batter or piled on top of the filling, grated apple to put on top of the filling...you get the idea. Nuts could also be added to the streusel. I used the version where you can weight the ingredients on a scale, using the pound version. There is also one for grams and one by volume on the King Arthur site, plus great photos.
Cinnamon-streusel
Coffeecake
Streusel
Topping
8 3/4 ounces granulated sugar
1/4 teaspoon salt (if you use unsalted butter)
6 1/4 oz. all-purpose flour
1 tablespoon ground cinnamon
3 oz. butter, melted
6 1/4 oz. all-purpose flour
1 tablespoon ground cinnamon
3 oz. butter, melted
Filling
7 1/2 ounces brown sugar, light or dark
1 1/2 tablespoons ground cinnamon
1 teaspoon unsweetened cocoa powder
Cake
6 oz. butter
1 teaspoon salt (1 1/4 teaspoons if using unsalted butter)
10 1/2 oz. granulated sugar
2 1/2 oz. brown sugar
2 1/2 teaspoons baking powder
2 teaspoons vanilla extract
3 large eggs
6 oz plain yogurt (or sour cream)
10 oz. milk (anything from skim to whole...or even milk mixed with buttermilk, which is what I used)
16 oz. all-purpose flour
10 1/2 oz. granulated sugar
2 1/2 oz. brown sugar
2 1/2 teaspoons baking powder
2 teaspoons vanilla extract
3 large eggs
6 oz plain yogurt (or sour cream)
10 oz. milk (anything from skim to whole...or even milk mixed with buttermilk, which is what I used)
16 oz. all-purpose flour
·
· 1) Preheat the oven to 350°F. Lightly grease a 9" x 13"
pan, or two 9" round cake pans. (If you are going to bake the next day, skip the preheating of the oven until before you bake, but allow enough time for the oven to heat up to 350 degrees F.)
2) Make the topping by whisking together the sugar, salt, flour,
and cinnamon. Add the melted butter, stirring till well combined. Set the
topping aside.
3) Make the filling by mixing together the brown sugar, cinnamon,
and cocoa powder. Note that the cocoa powder is used strictly for color, not
flavor; leave it out if you like. Set it aside.
4) To make the cake: In a large bowl, beat together the butter,
salt, sugars, baking powder, and vanilla until well combined and smooth.
5) Add the eggs one at a time, beating well after each addition.
6) In a separate bowl, whisk together the sour cream or yogurt and
milk till well combined. You don't need to whisk out all the lumps.
7) Add the flour to the butter mixture alternately with the
milk/sour cream mixture, beating gently to combine.
8) Pour/spread half the batter (a scant 3 cups) into the prepared
pan(s), spreading all the way to the edges. If you're using two 9" round pans, spread 1 1/3
cups batter in each pan.
9)
Sprinkle the filling evenly atop the batter.
10) Spread the remaining batter atop the
filling. Use a table knife to gently swirl the filling into the batter, as
though you were making a marble cake. Don't combine filling and batter
thoroughly; just swirl the filling through the batter.
11) Sprinkle the topping over the batter in
the pan.
12) Bake the cake until it's a dark golden brown around the edges;
medium-golden with no light patches showing on top, and a toothpick or cake
tester inserted into the center comes out clean, about 55 to 60 minutes for the
9" x 13" pan, 50 to 55 minutes for the 9" round pans. When
pressed gently in the middle, the cake should spring back. (I started checking 10 minutes before time and was glad I did.)
13) Remove the cake from the oven and allow it to cool for 20
minutes before cutting and serving. Serve cake right from the pan.
Want to prepare this coffeecake the night before, then bake in the morning? It's easy; simply cover the unbaked cake with plastic wrap and put into the refrigerator overnight. Next morning, bake the cake as directed. Start testing for doneness before the end of the suggested baking time, but you'll probably have to add 5 minutes or so to the total time, to account for the batter being chilled.
Friday, November 07, 2014
Orange and Crispy
November 7th used to be the date we celebrated my sister's birthday. She was actually born on Pearl Harbor Day, but the horrors of the Second World War were still too fresh for that day to be celebratory, so my parents moved it up a month. So Happy Birthday Sis, if you read this. Now the you celebrate in December I never know which date to use, so I tend to use them both. Must be because I like birthdays, right?
This past Wednesday I was lucky because our P.E.O. scholarship group met and one of the members sent a big basket of persimmons along for us to share. I was lucky because I was able to bring home any of them that were left after circulating around and passing them out. Sweetie isn't a big fan of the Hachiya variety, which is ready to eat only after it has turned soft. He likes his fruit crisp. He loves these Fuyu persimmons because they are as crisp as an apple when ripe and you can eat them with the skin still on, so they are easy to prepare. They are a reasonable source of vitamin A and of fiber, but not of the vitamin C that make the hachiya persimmons such a nice addition to early winter recipes.
The persimmon fruit originated in China where endless varieties are available, and was brought to California in the late 1800‘s where two main varieties - the Fuyu and the Hachiya - survived and have
proliferated. Today, California is the largest producer of persimmons in the United States, harvesting over 2,800 acres and producing over 17,000 tons of fruit each year.
Do you have a preference for one or the other? A favorite recipe?
Thursday, November 06, 2014
Mini Cranberry Walnut Soda Bread Loaf
There they sat on the counter, reminding me that I had left them out of the scones; a half recipe of bourbon soaked cranberries and a similar amount of chopped walnuts. What to do with them? I'm out of pumpkin at the moment, although I do have some sugar pumpkins ready to be cooked with, just no pumpkin puree, so no pumpkin recipe this time.
A check of the fridge showed that I have buttermilk and butter, so an obvious and delicious choice was Irish soda bread enhanced with cranberries and walnuts instead of currants and caraway. The lovely thing about soda bread is how quickly it goes together. I grated a little clementine zest into the sugar and rubbed it in a la Dorie Greenspan, then added that to the mixture of all-purpose and white whole wheat flour, plus baking soda, baking powder and salt. The butter was sliced and worked into the dry mixture, the buttermilk added and mixed in about half way, then I dumped in the cranberries and walnuts and mixed the rest of the way, with just a bit of the dry mixture staying dry...don't want to overwork the gluten on this quick bread. Onto the silpat lined baking sheet with the dough, a quick shape with floured hands, then I cut a cross into the center with a bench scraper. A sprinkle of sanding sugar and into the oven it went.
This is a delightful version of my Aunt May's soda bread. I only made half the recipe because that was the right proportion for the cranberries, but just double it to make a big loaf. The cranberries, walnuts and clementines are all fall flavors and great with the tang the buttermilk gives. This makes a lovely afternoon snack with a cup of tea. Sweetie enjoyed a slice with some fresh persimmons and he said that the bread went perfectly with that autumn fruit. I just love autumn afternoons!
Mini Cranberry Walnut Soda Bread Loaf
Makes on mini loaf
1 cups all-purpose flour
1 cup white whole wheat flour
½ teaspoon baking soda
1/4 teaspoon baking powder
½ teaspoon salt
1/4 cup tablespoons sugar
zest from half an orange or a whole clementine or tangerine
4 oz. (½ stick) cold butter, in thin slices
1 cup buttermilk
1/3 cup dried cranberries, plumped with hot water or bourbon, then drained
1/3 cup chopped walnuts
Mix the dry ingredients, except sugar, in a bowl. Put the sugar into a small bowl and rub the citrus zest into it with your clean fingers. Mix sugar into the dry ingredients. Add the butter slices and cut in well with a fork or pastry blender. Add the buttermilk and mix just until partly moist - don’t over-
handle. Add the cranberries and walnuts; mix well. Some dry stuff is OK but the dough should be sticky. Pat into a round on a parchment-lined or silpat lined cookie sheet. Cut a cross on top. Bake 30-35 minutes at 350 degree F. Tap bottom to make sure bread is cooked through. It will sound hollow. Cool a bit before slicing.
Labels:
buttermilk
,
dried cranberries
,
Irish Soda Bread
,
walnuts
Wednesday, November 05, 2014
Scones Shine With Pumpkin
It really is pumpkin season. It's also the time of year when we 'fall back' in the U.S. and go back to standard time instead of daylight savings time. I've been doing without a watch for the past few months, so I have had a general sense of time. Now I find that my sense of time is off. I think it is actually harder for Pi, our wonderful black lab. He has gotten used to dinner being at 5 pm. Just because we decided over the weekend that 5 pm should become 4 pm doesn't change the fact that he expects to eat at that time. He really doesn't care what time we call it. So today he was fed dinner at 4:10. Tomorrow it might be 4:15 and so in about 10 days he will be eating at 5 pm again.
Because we are used to eating earlier, I decided yesterday that we should have tea around 4 pm (after I fed the dog) and to go with the tea I made pumpkin scones. I found a recipe at King Arthur Flour, but changed it around so that the scones had both all-purpose and white whole wheat flour, it contained some buttermilk and brown sugar instead of white, and I also added some bourbon soaked dried cranberries and chopped toasted walnuts. Actually only half the scones were treated to the cranberries and walnuts. The other half of the dough was just plain pumpkin. I actually like both version about equally. The one with the cranberries smells a lot like Christmas fruitcake, so I think I'll make them for Christmas morning this year. The plain ones allow the pumpkin to shine more, which is a wonderful thing if you like pumpkin as much as I do. The next time I make them in either version, I plan to increase the spices a bit. It could use a bit more cinnamon for sure. Still, both Sweetie and I managed to eat one of each kind.
This recipe makes tender but slightly dense scones. If you use the sparkling sugar you get a nice crunch, too. I like the slight tang that the buttermilk imparts, but I think I'll use a full teaspoon of salt next time.
Don't like cranberries or walnuts but want to have add-ins? Try mini chocolate chips, butterscotch chips or similar things.
Pumpkin Cranberry Walnut Scones
based on a recipe found at the King Arthur Flour website
1/4 cup dried cranberries
1/4 cup bourbon
1 1/2 cups all-purpose flour
1 1/4 cups white whole wheat flour
1/3 cup brown sugar
2 teaspoons baking powder
1 teaspoon baking soda
3/4 teaspoons salt
3/4 teaspoon ground cinnamon
1/4 teaspoon ground ginger
1/4 teaspoon freshly ground nutmeg
1/2 teaspoon ground cloves
1/2 cup cold butter, cut into small cubes
2/3 cup canned pumpkin
2 large eggs
1/4 cup buttermilk
1/4 cup chopped walnuts
1 tablespoon half and half
coarse white sparkling sugar, for topping
In a small bowl soak the dried cranberries in the bourbon for at least an hour, overnight is even better. Drain and reserve the bourbon for another use. Set cranberries aside.
In a large mixing bowl whisk together the flours, brown sugar, baking powder, baking soda, and spices.
Work the butter into the dry ingredients just until the mixture is unevenly crumbly (best done using a pastry cutter or two knives); it's OK fore some larger chunks of butter to remain unincorporated.
In another bowl whisk together the pumpkin, eggs and buttermilk until smooth.
Add the pumpkin mixture to the dry ingredient mixture and stir gently until all is moistened and holds together.
Line a baking sheet with parchment or grease the sheet. Scrape the dough onto a lightly flour surface. Use a bench scraper or knife to divide the dough into two. Gently knead the cranberries and walnuts into one half.
Take one of the chunks of dough and gently round into a 5-6 inch circle. Gently flatten circle to about 3/4-inch thick. Use a bench scraper or knife to divide the circle into 6-8 wedges. Place those wedges on the prepared baking sheet.
Take the second chunk of dough and repeat. Place those wedges on the baking sheet, too. Place the baking sheet into the freezer, uncovered, for 30 minutes. (I left mine in overnight and baked them the next day and they were fine.)
While scones are in the freezer, preheat the oven to 425 degrees F.
Bake the scones in the preheated oven for 22-25 minutes, or until they're golden brown and a toothpick inserted into the center of one comes out clean, with no wet crumbs.
Remove the scones from the oven and serve right away while warm. Wrap any leftovers airtight and store at room temperature. Reheat very briefly in the microwave if desired. If you prefer, you may leave the scones in the freezer until ready to bake, baking only as many as you wish to eat. They should be well wrapped in the freezer if you plan to bake them any longer than about 4 hours after putting them in the freezer.
Tuesday, November 04, 2014
The Sweeter Side of Squash
It's entirely possible that I have one or more pumpkin pie recipes on this blog, but I have to post about the pie I made last Monday. Sweetie loves pies much more than cake. When he mentioned that on Sunday, I asked what kind was his favorite. He said that any pie was good pie, so I made a traditional pumpkin pie. The only thing unusual was that I used a 10-inch pie pan for it and I used a butter based crust instead of refrigerated crust or a shortening-based one. He claims it was the best pumpkin pie ever made. He might be biased. You can find the crust recipe HERE or on yesterday's post.
Not sure about it being the best, but it was an excellent example of its kind. The crust was flaky and crisp and not only tasted grand, but smelled wonderful. The filling was silky, creamy, not too sweet, and not too rich, but fully pumpkin flavored. I used the ingredients on the back of the Libby solid pack pumpkin for the ingredients, but I changed it a bit. I used brown sugar for the sugar, added nutmeg to the spice mix and cooked it slightly less than the recommended time. My recipe below has the changes. If at all possible, use evaporated milk. It provides a really creamy texture. There seems to be less water in it than in regular milk, so that might be the reason.
This is another one you may want to bookmark for the upcoming holidays. I know I will.
Pumpkin Pie
3/4 cup brown sugar
1/2 teaspoon salt
1 teaspoon cinnamon
1/2 teaspoon ginger
1/4 teaspoon cloves
1/4 teaspoon nutmeg, freshly ground
1/2 teaspoon salt
1 teaspoon cinnamon
1/2 teaspoon ginger
1/4 teaspoon cloves
1/4 teaspoon nutmeg, freshly ground
2 large eggs
15 oz pureed pumpkin
12 oz. evaporated milk
1 unbaked pie shell
15 oz pureed pumpkin
12 oz. evaporated milk
1 unbaked pie shell
Preheat oven to 425 degrees F with the rack in the center of
the oven.
In a small bowl mix together the sugar, salt and spices.
In another bowl, whisk the eggs and then whisk in the pumpkin and sugar spice mixture. Gradually add the evaporated milk.
Pour pumpkin mixture into the unbaked pie shell.
Bake the pie for 15 minutes in the preheated 425 degree F
oven, then reduce heat to 325 degrees F and bake another 35 - 50 minutes.
Center should be barely set. Knife inserted in the center will come out almost
clean or clean. Don't over bake.
Cool Pie on a cooling rack for 2 hours. Refrigerate then, or
serve.
Monday, November 03, 2014
Pie Crust
There are many ways to handle the need for a pie crust. Pillsbury makes rolled out pie dough circles that are pretty good in a pinch. The really old way is to use lard, but most lard available is hydrogenated and I suspect that hydrogenated lard is no better for us than hydrogenated vegetable oil (like Crisco) due to probably trans fats. Julia Child would recommend butter and that is the way I usually go if I'm making pie dough from scratch.
When I was about 9 or 10 years old I wanted to make pies. Pie was my Dad's favorite dessert after all. Before I even set foot into the kitchen, my Mom had me read the four or five pages, with photo illustrations, on how to make a good pie crust. I think the book was the Fannie Farmer one.
I remember that attention was paid to using ice water, being gentle in handling the ingredients, cutting the shortening into the flour mixture until it looked the size of dried peas and sprinkling on the ice water a tablespoon at a time while gathering the moistened flour bits with a fork. It does make a nice flaky crust.
Recently, within the last few years, I've been using a Martha Stewart recipe that uses very cold butter, cut into very small dice, with part frozen and part not, and it uses a food processor. It makes a delicious and flaky crust that browns nicely. Some of the butter bits end up being tiny and some are larger than those dried peas of old, but it ends up producing a crust that gets raves.
Since this is the holiday season, you may want to bookmark this for those holiday pies.
Food Processor Pie Crust from Martha Stewart Test Kitchen
makes 2 disks
2 sticks unsalted butter, chilled and cut into small pieces, divided
2 1/2 cups all-purpose flour
1 teaspoon salt
1 teaspoon sugar
1/2 cup ice water
2 1/2 cups all-purpose flour
1 teaspoon salt
1 teaspoon sugar
1/2 cup ice water
Freeze 3/4 of the butter pieces in a single layer on a parchment-lined baking sheet until hard, at least 30 minutes. Refrigerate the other 1/4 of the pieces. The frozen pieces stay chunky after being pulsed, creating steam pockets when baked (the key to flakiness) and the refrigerated bits get worked into the pastry, giving it a tender texture.
Combine flour, salt, and sugar in a food processor work bowl. Add refrigerated butter (the smaller amount of the butter bits). Pulse to combine, about 10 times. Add frozen butter and pulse until mixture resembles coarse meal, with some blueberry-sized clumps.
With the processor off, add the ice water. Immediately pulse until water is just incorporated, about 10 times. Squeeze a small amount of dough to make sure it holds together. Pulse a few times more if needed. When you squeeze the dough it should remain crumbly, but come together. Don't pulse it so long that it forms a ball. Adding water while the processor is running and over-pulsing are bad ideas... could lead to tough dough.
Lay out 2 pieces of plastic wrap. Empty half the dough onto each piece. Bring edges of wrap together to gather dough and form a round mass. Press the dough this way to form a rough round mass, and press on top of the wrap to form a disk. The processed dough should resemble uneven crumbs. When you empty the mixture from the processor bowl out onto the plastic wrap, some pieces will be tiny, others will be in clumps. That is perfect! The gathered plastic wrap method of forming the disk simultaneously has you gathering the crumbs into a cohesive dough and shaping it.
Roll out disks, still wrapped in plastic, to 1/2 inch thick rounds, about 8 inches in diameter. Rounds this size will chill more quickly that hockey-puck sized ones and will soften more uniformly when removed from the refrigerator.
Sunday, November 02, 2014
Just Like Home
It has been noted in literature that certain smells can instantly bring recall of past events, often in great detail. With the autumn chill finally here, I decided to make beef stew and used my Mom's recipe, with a few small changes. By the time the stew was simmering on the stove, my house smelled just like home when I was young. This made me happy and inspired a phone call to my Mom to tell her about it. That completed the circle I think, although maybe that happened when the finished stew was shared in the evening with friends. New memories rich with fragrance were created, keeping the feelings of warmth and comfort going.
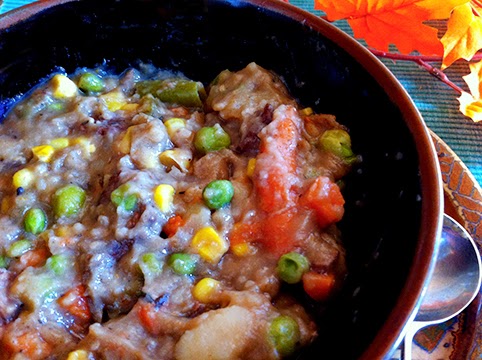
Beef stew is a great dish to make a double recipe of, which I did. You end up with wonderful leftovers which often taste better a day or two later than the original stew did freshly made. This one is full of onions, celery, carrots, mushrooms, potatoes and three kids of frozen veggies. You could do fresh veggies, but I like frozen and that's what I grew up with.
Mom would serve this stew with biscuits, but we had slices of baguette and some nice red wine. The perfect end of the week meal on a chilly evening.
Family Beef Stew
2 lbs. beef chuck, cut into 1½ inch cubes
2 tablespoons fat (I used olive oil)
1 cup boiling water
3 cups beef broth
½ teaspoon Worcestershire sauce
1 clove garlic
a dash allspice or cloves
1/4 teaspoon dried thyme
1 medium onion, sliced
2 stalks celery, washed and diced
6-8 oz. sliced mushrooms
1-2 bay leaves
6 each carrots and potatoes
salt and pepper to taste
leftover or mixed vegetables (I used frozen peas, mixed vegetables and corn)
flour and water (about 3 tablespoons flour whisked with 1/2 cup water)
Brown meat in fat. Remove browned beef to a bowl. Add more fat if necessary. Over medium heat, cook onion, celery, mushrooms until tender. Add boiling water, Worcestershire sauce, garlic, allspice, thyme, and bay leaves. Add the beef back into the pot. Stir to combine ingredients. Cover. Simmer 2 hours.
Remove bay leaves. Add carrots and potatoes which have been cut into bite sized pieces. Cook, covered, until vegetables are tender.
Season to taste with salt and pepper. Add frozen or leftover vegetables if desired. Cover and heat through. Make a paste with flour and water to thicken the gravy. Add to stew and
simmer until thickened. Serves 6 - 8.
Saturday, November 01, 2014
Apple Cake Chez Moi
When Dorie Greenspan's wonderful cookbook Baking; from my home to yours came on the scene it soon generated rave reviews and its own blog event, Tuesdays with Dorie. I've baked quite a few of the recipes and bookmarked a bunch more. Every one I made was well received and the recipes are beautifully written, often with ideas for changing things to make interesting variations.
Yesterday Sweetie and I were at a Petaluma bookstore and I saw a new Dorie Greenspan baking book called Baking Chez Moi. I was going to ask for it for Christmas, but I started browsing and was less than 50 pages into the recipes and had found four I wanted to bake as soon as possible. It's that kind of book for people who love to bake. Knowing that I needed a dessert for dinner that evening, I bought myself and early present and in the late afternoon baked the Custardy Apple Squares. They were a hit served at room temperature with a dollop of freshly whipped cream and the leftovers were excellent this morning served cold with a hot cup of coffee.
As usual I did make a few alterations, adding Meyer lemon zest and freshly grated nutmeg to the flour mixture. I know that Dorie recommends adding zest to the sugar and rubbing it in, but it was late afternoon and I had just finished making a big pot of beef stew and then talking to my Mom since the stew is her recipe and my kitchen smelled like home, so I wanted to share that with her, along with the fond laughter we always share.
In truth, I messed up a little with a number of pieces of the recipe. I forgot to melt the butter until it was needed, I didn't take the eggs out early enough to warm up, so had to place them in tepid water to warm faster to room temperature, I forgot to bring the milk out of the fridge, too, so warmed that up in the microwave to room temperature. Then I forgot to add the flour mixture to the egg mixture until after I had dumped in all the apple slices. Using my clean hands I removed the soaked apples, letting the batter run off, put them into another bowl, then whisked in the flour in the batter bowl. Back in went the apples, then I turned them enough to fully coat with the better batter. Now we were back on track! Usually I'm much more focused when baking. Guess I need to bake more!
The new Dorie Greenspan book will help there. The recipe below is very close to the one in the book, but I give my changes and the directions are my own. I'll leave out my mistakes, OK? Do consider buying Baking Chez Moi. I think it is another classic that I'll use for a long, long time. Not only are the recipes great, but there are plenty of tips and tricks. Want to learn how to form a dough log that is tight so there are no little holes in the middle of your slice and bake cookies. Dorie has photos showing just what to do by using a piece of parchment or waxed paper. Ever wonder what the difference is between Patisserie, Confiserie, Boulangerie and Viennoiserie or what those words mean? Check out page 209. Want the skinny on toasting, roasting and browning nuts? See page 320. If you read carefully you'll also find out what she means by 'French baked' and so much more.
This lovely bake with custard and thinly sliced apples goes together quickly (if you have your ingredients at room temperature of course) with the peeling and slicing the the apples the most time consuming part except for the baking. I used my food processor with the 4mm disc and that worked beautifully. The dessert is not too sweet and the lavish use of vanilla brings both fragrance and flavor to this simple dessert. The lemon zest and nutmeg are just hints of flavor and they enhance the apple flavor so nicely. Use apples that hold their shape while baking. I used Galas and they worked well. For a less mellow apple flavor consider Granny Smiths or Pippins. It's apple season here in the Northern Hemisphere, so use your favorites and make the Custardy Apple Squares your own. You can cut rectangles, too, as I did. Such a rebel.
Custardy Apple Squares
adapted from Dorie Greenspan's Baking Chez Moi
3 medium, juicy sweet apples like Gala, peeled
1/2 cup all purpose flour
1 teaspoon baking powder
2 large eggs at room temperature
1/3 cup sugar
grated zest from 1/2 a Myer lemon or regular lemon
pinch sea salt
1/8 teaspoon freshly grated nutmeg
2 teaspoons pure vanilla extract
6 tablespoons whole milk, at room temperature
2 tablespoons unsalted butter, melted and cooled, plus more butter for the baking pan
confectioners sugar or whipped cream for topping (optional)
If you have forgotten like I did, bring the eggs, and mild to room temperature, melt the butter and let it cool.
Preheat the oven to 400 degrees F. Butter an 8-inch square baking pan. Set aside.
Slice the peeled apples in uniform thin slices. I halved the apples, used a melon ball tool to remove the core, then used a paring knife to remove the stem and blossom ends. Once all the apples were prepared, I used a food processor with a 4 mm disc to slice them, filling the large feed tube tightly with the apples (two halves plus a about a third of another half). Set aside.
Whisk the flour, baking powder, sea salt and nutmeg together in a small bowl or on a sheet of waxed paper.
Rub the lemon zest into the sugar with your fingers. I use a cup measure to hold the sugar, which gives enough room to rub in the zest.
Using the stand mixer and beater attachment, beat together the eggs and sugar for two minutes. The sugar will dissolve and the eggs will be pale and fluffy. Beat in the vanilla, then the milk and then the melted butter. Finally, beat in the flour mixture. Add the apple slices. With a flexible spatula or your clean hand, turn the apple slices gently so each is coated with the batter. Turn the mixture into the prepared pan and use the spatula to even the top as much as possible. The top will still be bumpy, but that is O.K.
Bake for 40-50 minutes (although I suggest checking sooner...this is one batter you don't want to overcook), or until golden brown and puffed. To check for doneness, you can insert a knife in the center...it will come out clean. Cool for at least 15 minutes on a cooling rack, then run a sharp knife around the sides. Cut squares or rectangles and serve with a cake server or pancake turner. Dust with confectioners sugar or give served slices a dollop of whipped cream. Serve and enjoy.
Labels:
apples
,
Baking Chez Moi
,
custard
,
dessert
,
Dorie Greenspan
Subscribe to:
Posts
(
Atom
)