Friday, November 30, 2012

Creamy - Coconutty - Bliss!


I've rarely thought of myself as competitive but sometimes it creeps up on me. Sweetie tried a small single-person size coconut cream pie at a cafe' near here and went on and on about it. I tried a bite and was not convinced. I told him I could make a much better one (which is about as competitive as you can get!) and yesterday and today I did. This pie...actually a tart in the final version...was going to be part of a late Thanksgiving dinner at dear Natasha's near Sacramento. That never happened since Sweetie wasn't thrilled with the idea of driving for about three hours each way in heavy rain. Rain is wonderful if you don't have to drive a lot in it, right? So I had all the ingredients for the pie/tart and some of them don't keep well. I also have a dear friend with a birthday coming up, so we invited her, and her hubby, to join us for coffee and pie/tart today to celebrate her birthday a little early. Good thing, too, because otherwise Sweetie and I may have eaten a half tart each. It really was that good.

There are various ways to make the cream filling for coconut cream, banana cream, ginger cream or similar flavors. Basically you are making pastry cream. I decided to make a variation on the pastry cream that we put into cream puffs when the Daring Bakers made Gateau St. Honore' in 2007.

It uses both egg yolks and flour, both whole milk and whipping cream. Some gelatin is added, too, which helps stabilize the filling. The recipe calls for whipping egg whites and folding them in but I skipped that step since I wanted the filling to be denser than that. I also added some vanilla. To make it coconut cream I also folded in fresh coconut that had been hand grated a few days before, then stored in the 'fridge.

For the tart shell I used a recipe in Dorie Greenspan's book Baking, from my home to yours. It makes a nice shortbread type crust. This would have been perfect for surviving a trip past Sacramento since it is pretty sturdy, but it is also perfect because the buttery crispness makes a wonderful contrast to the creamy, coconutty bliss of the filling. Once the filling had chilled after being spooned into the tart shell, I topped it with dollops of whipped cream and a sprinkle of toasted coconut for garnish...and flavor. This really is a special occasion dessert, but worth the effort. Sweetie agreed that it was far better than the one at the cafe'. The good news is that I'll be making another for the trip to Sacramento area in early December. The bad news (for my waistline if nothing else) is that now I know I can make a killer coconut cream tart and will want to prove that again and again. Ah, competition.


Coconut Cream Tart

1 envelope unflavored gelatin (7 gr.)
¼ cup cold water (60 ml)
½ cup + 2 Tablespoons sugar (130 gr)
½ cup all-purpose flour (70 gr)
¼ teaspoon salt
5 egg yolks
2 cups whole milk (500ml)
1 tablespoon rum
1 teaspoon pure vanilla extract
¼ cup whipping cream (57 gr)
1 3/4 cups lightly toasted fresh coconut, divided
1 9-inch blind baked tart crust, cooled to room temperature

Soak the gelatin in the 1/4 cup of cold water.

Put the sugar, flour, and salt into a saucepan and stir together with a whisk. Add the yolks and enough milk to make a paste. Whisk in the remainder of the milk.

Place over low heat and stirring constantly, cook until thick. Remove from heat and stir in the vanilla and the gelatin. Stir until the gelatin is completely dissolved.

Stir in the whipping cream (and rum if using). Set the mixing bowl in cold water and stir until the cream is cool. Fold in 1 1/2 cups of the coconut. Pour into tart or pie crust and spread evenly. Chill until set. Garnish with whipped cream rosettes and rest of coconut. Serve at or close to room temperature for the best flavor.

Thursday, November 29, 2012

Rainy Weather Comfort Soup


The rains have come. Well, actually, they have been coming, now and then, during October and November, but this time we are having heavy precipitation that is going to continue for days in a row. That's exactly what should happen in late fall here in Northern California. The trees, shrubs and grasses are happy. The new dog, not so much. Perhaps being out in the rain reminds Pi of his time on the streets. Perhaps he has become spoiled by his new 'parents'. For whatever the reason, he really tries to avoid the rain, even going close to the house to take advantage of the eaves when he can.

I enjoy rainy weather as long as I don't have to do a lot of driving in it. I much prefer to stay at home baking bread and simmering soups and stews. One of my favorite rainy weather comfort soups comes from the Classic Comfort Food cookbook. It is Split Pea Soup. It makes enough for a couple of meals and can be doubled if you have a group for lunch or dinner. I usually add a ham hock for flavor but it is delicious without it. Onions and carrots add their own flavor notes and the dried peas cook up nice and tender with lots of simmering. You can take off the pot lid towards the end and simmer enough to make the consistency as thick or thin as you prefer. I like mine on the thick side so I allow an extra 45 minutes to an hour to get there.

I rarely find any debris in the dried split peas, but do check as you are rinsing them. You can jazz this up with herbs, too.

By the way, Classic Comfort Food cookbook, written by yours truly, contains lots of great recipes for fall and winter, including some classic Christmas cookies. It would make a great gift! You can order copies to be mailed directly to your loved one from Blurb, the online publisher. Click HERE. Between now and December 3rd, add the code HOLIDAY25 at checkout and save 25%! There is also a link at the top right of this blog. It is also the link to go directly to the Blurb store. This is not a moneymaker for me, dear reader. I think my profit is something like 50 cents. The reason I'm suggesting it as a gift is that it really will be a great one for friends and family who like sweet and savory classic dishes like macaroni and cheese and fresh coconut cake (both great recipes for this time of year).


Split Pea Soup
from Classic Comfort Food

2 cups dried split peas
8 cups hot water
1-2 lbs. ham bones or hocks
1 clove garlic, chopped
1 medium onion, minced
1 stalk celery and tops, chopped
1 tablespoon salt
¼ teaspoon pepper

Pick over and rinse the dried split peas. Combine ingredients. Heat to boiling, reduce heat, and simmer for one hour and fifteen minutes, or until peas are very soft. Remove ham bones and put soup through food mill or blend. Reheat and serve. Often served with croutons made from stale bread cubes baked until dry. Serves 8.

Monday, November 26, 2012

Buttery Ravioli

I'm not a big fan of standard time, having decided years ago that daylight savings time is far better and should just be the time we use year 'round. It makes no sense to me that as the days grow shorter we switch to  standard time where an extra hour at the beginning and end of the day is in darkness or nearly so. Sweetie has been playing tennis with his friends after they finish work for most of the spring, summer and fall. Once the time was moved to standard they had to quit playing an hour earlier. If that meant that in the morning it would be light maybe I could understand but the days are so short by the time that daylight savings time ends that it is still pretty dark at 7 am, which became 6 am. Does that mean that there is more light at 8 am, which became 7 am? A little but hardly enough to warrant switching.

For me the worst part is that my photos of food suffer. I mostly use natural daylight for my shots and so that means middle of the day photos. When I'm trying to get a good photo of breakfast or dinner food I turn on all the lights I can, but everything takes on a golden tone. Sometimes that is pretty, sometimes not.

Tonight I cooked a lucious dish for dinner. It closely resembled one I had for lunch at a Santa Rosa restaurant a week before. The photo makes it look more orange than it really was, but those round butternut squash ravioli were a bit orange to begin with. You can't see it, but underneath there is a bed of fresh baby spinach. On top of that there is a warm mixture of fresh white corn, cut off the cob, mixed with diced red and yellow bell pepper and just a hint of finely chopped red onion. Next come the just cooked ravioli and a sprinkle of cubed fresh butternut squash which had been roasted until very soft and tender inside and a bit crusty on the outside. A drizzle of melted butter to which a lot of fresh, minced, sage was added and you have the dish. It was a wonder of contrasts...crisp chilled spinach, warm, soft, buttery ravioli, crunch but warm corn, zesty red bell pepper, zingy red onion, very herby sage. Sweetie loved it and ate every last bit. I served it with some sliced heirloom tomatoes and corn muffins. It was almost comfort food and seemed very much a harvest meal.Totally delicious!

The key for this dish is planning. The squash needs to be roasted first. The spinach has to be washed and dried and put in the fridge to crisp up. It doesn't take lond to cut the corn from the cob or dice the peppers or chop the onion and sage, but those are good things to do while the water comes to a boil for the ravioli. While they cook you can melt the butter and add the sage, slice and arrange and dress the tomato slices and heat the corn mixture. Just before the pasta is done is the best time to layer the spinach in the bowls. While the cooked pasta drains you can add the warm corn mixture on top of the spinach, then the pasta, the roasted squash and the butter drizzle. It's a good idea to serve it right away while the pasta is still warm and the spinach hasn't wilted from the warm elements in the dish.

Butternut Squash Ravioli with Warm Corn Salad, Spinach, Butternut Squash and Sage Butter

2 cups peeled and cubed butternut squash, seeds and stringy parts removed
1 tablespoon olive oil
salt and pepper to taste
4-5 cups fresh baby spinach
2 ears fresh corn, husks and silks removed
1/2 medium red bell pepper, seeds and ribs removed
1/4 medium yellow bell pepper, seeds and ribs removed
1 tablespoon finely chopped red onion
4 tablespoons salted butter, melted
2 teaspoons finely chopped fresh sage
1 5-oz. package fresh butternut squash and cheese ravioli, uncooked

Toss the butternut squash cubes in a plastic bag with the oil, salt and pepper. Spread on a parchment lined baking sheet and roast in a preheated 450 degree oven for 10 minutes. Stir and roast another 10 minutes. Remove from oven and keep warm.

Wash and drain and dry the baby spinach. Wrap in a tea towel and refrigerate until ready to serve.

Using a sharp knife, cut the corn from the cobs. Dice the red and yellow peppers into 1/4 inch dice. In a microwave safe bowl combine the corn kernels, all the peppers, the red onion. Set aside.

Heat 4 quarts water in a large pot over high heat until it comes to a boil. About 10 minutes before you plan to serve the dish, slide the ravioli into the water and stir. Continue to stir and/or turn the ravioli over as the pasta cooks, with the heat on medium-high, for 5-6 minutes or until pasta is tender.

While pasta cooks, mix the melted butter and fresh sage and keep warm.

Heat the corn mixture in the microwave on HALF power for 2-3 minutes, until just barely warm.

In a large bowl, like a soup bowl, layer the fresh spinach, topped by the corn mixture. Gently remove the pasta from the simmering water when it is cooked and drain in a collander. When drained, place about 5 ravioli for each serving on top of the corn mixture in the bowl. Scatter the warm squash cubes over and drizzle with the sage butter. Serve at once. Serves 2.

Friday, November 23, 2012

Say Cheese

Do you like having your picture taken? I don't care one way or another but it amazes me how many people cringe when the camera is aimed their way. Often these are good looking people, too. I know that the mental picture I have of myself usually doesn't match up with what the camera sees, but I think it's fairly usual to have a different view of ourselves than others do. I'm hoping you'll tell me if that isn't true. Anyway, I hope you ignore the photo-phobes now and again because one thing I do know is that it is a great comfort to have nice photos of loved ones when they are no longer with us.  Can't guarantee you will get a smile in that photo, but you might. Sweetie dislikes having his photos taken, but recently I went though lots of old digital photos to find some choices for him to use for his Facebook page and I discovered a few that I took when he wasn't aware of it and even some where he was smiling. Now he is glad to have 'em. See.

While we are on the subject of cheese (you DO have everyone say 'cheese' when you snap their picture, right?) let me tell you about an appetizer we had yesterday for our Thanksgiving feast. It was a big hit with everyone (all 5 of us!) and was easy to do. I was inspired by a recipe in the catalog of a local company, Kozlowski Farms. They make wonderful jams, jellies, salad dressings, mustards, pies, cookies and more goodies. The recipe was for a cheese ball coated with toasted pistachios. First they layered softened, whipped cream cheese with some of their yummy fig and muscat wine preserve. Since I had neither the nuts nor the preserve I went with what I did have. I also added a tablespoon of Greek style plain yogurt so that the cheese ball would stay just a little softer, which makes it easier to serve.

I had a delicious fig and caramelized red onion confit in the 'fridge which I used in place of the Kozlowski preserves. You could also use a pepper jelly. For the nuts I used toasted pine nuts. I also used reduced fat cream cheese and you would never know the difference in this kind of recipe. It was delicious on toasted baguette slices...the crunch of the toasts was a nice contrast with the creamy cheese. I only have a photo of the cheese ball before it was served. Once we started digging in no thought was given to taking pictures.

Fig and Caramelized Red Onion Cheese Ball with Pine Nuts
Base on a recipe from Kozlowski Farms

5 oz. Fig and Caramelized Red Onion Conserve
(or use a pepper jam)
2 -8 oz. packages lower fat cream cheese, softened to room temperature
1/4 teaspoon herbs de Provence
1 tablespoon nonfat, plain Greek yogurt
3/4 cup pine nuts, toasted
1 bread baguette, sliced thin and toasted in the oven

Toast pine nuts in a pan over medium heat, stirring often, for about 2 minutes until golden. Set aside.

With a mixer, whip the cream cheese, herbs de Provence, and Greek yogurt until smooth and creamy.

Spread a length of plastic wrap at least 12 inches long over a clean counter or cutting board. Using a spatula spread on some of the cheese mixture. Using a teaspoon, spoon on some of the conserve. Repeat, with the top layer being cheese, until all the cheese mixture is used up. Some of the conserve may remain and can be used for another purpose.

Lift the edges of the plastic wrap, creating a ball of the cheese/conserve mixture. Tightly wrap the plastic wrap around the ball. Secure the plastic wrap. Place the ball in a bowl and refrigerate about 15 minutes to help the ball retain its shape.

Lay another two layer of plastic wrap on a clean counter or cutting board, with the second layer perpendicular to the first. Sprinkle the pine nuts in a circle in the middle. Take the chilled cheese ball and put it in the middle of the circle of nuts. Bring up the sides of the plastic wrap. If necessary, use your hands to help coat the sides and top with pine nuts. Wrap the cheese and nut ball in the plastic wrap and return it to the bowl. Chill until the ball is firm, about 3 - 4 hours.

Unwrap cheese/nut ball. Arrange on a platter and serve garnished with figs and slices of toasted baguette slices. Be sure to include a spreader for serving the cheese.

Tuesday, November 20, 2012

Making Progress


I used to think that I would love to have the time to just loaf around and do nothing. When you are working full time and have a couple of kids to look after, a great guy to build a life with, and the usual errands and cleaning and shopping that building a life, or just having a life, entails, it's easy to daydream about a carefree time in the future without all those time eaters.

Turns out I'd rather have projects to do and even the occasional deadline than too much time doing nothing. I like having enough things to do that I need a list to keep track of them. It usually means that I'm interacting in some way with other people (which I usually love) and that I'm making progress on something that is meaningful to me. Somewhat surprising, but not a lot. I've always enjoyed the process more than the product and you have to have things to do in order to have processes, right?

So the carpet was installed, lots of stuff found new homes and some of the old stuff returned to it's place (like this computer), although there is more to do.

The book I'm doing for my InDesign class was uploaded to the publisher today *Yay!* and will be a real book at my doorstep in early December. There is still lots more to do for the class but it feels good to have the book part of it to print.

Thanksgiving will be at our house this year so I have lists and more lists and couldn't be happier! I made the Pocketbook Rolls again, this time with my sourdough starter, so we will have puffy, slightly sour, tender rolls to go with the turkey dinner. Since I have been fairly successful with my weight loss program so far I think I'll even allow myself a good size piece of pumpkin pie!

In no time Christmas will be here, too, so there will be more fun stuff to do to get ready. That will likely mean an increase in posts as I find new recipes to try for entertaining and for gift giving. I'm stoked!

Today I have a new and simple pasta recipe that I threw together one evening. It had to be simple because my eyes were still crossed from too much time proofing the book. It starts with a bed of fresh tri-color pasta (from a package in the refrigerator section of the grocery store...any good brand will do), topped with a melange of sauted onion and garlic, wilted fresh spinach, fresh chopped tomatoes, leftover grilled chicken, and some herbs and spices. Over it all I sprinkled a generous amount of toasted pine nuts. It was wonderful! If you don't have any leftover chicken, you could substitute some rotisserie chicken, cut into bite sized pieces and dinner can be on the table before you know it!

Chicken and Spinach Pasta with Pine Nuts
my own recipe
1/2 onion, chopped
1 clove garlic, finely chopped (or more, to taste)
1 tablespoon olive or grapeseed oil
4 oz. sliced mushrooms
1/2 cup chicken broth
2 cups diced tomatoes and their juice...fresh tomatoes if possible
1 - 2 cups cooked chicken, cut into bite sized pieces
4 cups fresh baby spinach, rinsed well
2 tablespoons finely chopped flat leaf parsley
1/4 teaspoon dried thyme
salt and pepper to taste
1/3 cup pine nuts
Hot, freshly cooked, drained, fresh pasta ribbons - I used tri-color, but any fresh pasta will work

In a large saute pot, saute the onion and garlic in the grapeseed oil, stirring often, until onion is translucent, about 5 minutes. Add the mushrooms, cover the pot, and cook over low heat for 5 minutes. Uncover the pot. Add the chicken broth and deglaze the pan, stirring to release any bits stuck to the side of the pot. Add the tomatoes and cook over medium-high heat uncovered, stirring often, until sauce has thickened, about 5 minutes. Add the chicken and stir to combine. Heat 2 minutes. Add the baby spinach, stirring until it wilts. Stir in the parsley and thyme, salt and pepper.

On a dinner plate pile a serving of fresh pasta. Top with some of the sauce. Sprinkle with the pine nuts. Serve at once. Serves 4.

Sunday, November 18, 2012

In With the New

Perhaps it is the result of growing up on a restricted budget, followed by being married to someone who couldn't keep a job (which led, eventually to divorce), so learning to be frugal was necessary. Thank heavens my marriage to Sweetie has none of those problems.


Perhaps it is due to my natural aversion to sorting. Who knows why, but for many years we have needed new carpeting in the upstairs of our home and I never focused on taking care of that.

Whatever the reason, the wait is over. The old carpet is gone and the new one installed. I wish that process has been as quick as the telling.

One of the first things I did in preparation was to finally paint our master bedroom. Every other room in the house has gotten at least one coat of paint but never the bedroom. The only way it happened at all was that I painted some of the walls last spring, some in October and the final wall two days before the carpet was due. The trim was painted bright, shiny white and the walls a mellow pale gold.


Another obstacle was that I am a pack-rat. I love to collect things and am terrible about sorting out things that should be donated to charity or just plain be discarded. Since I wanted this carpet it was worth doing all that hated sorting. Many, many bags went to Goodwill. Fewer but more than I had thought it would be went to the dump. Sweetie is much better at throwing things out but he found he had over 40 ties to donate to Goodwill. Another of the joys of being retired...no need to wear ties almost every day. We probably could have just moved all our things to other places and avoided the sorting, but I'm glad we didn't. Things feel lighter somehow.

When we re-did the bathroom a few years ago we never figured out how to organize the linen closet. It doesn't have a door so I see the contents, however they look, every time I use my computer. As part of "in with the new", we took everything out of the linen closet (which is also carpeted) and replaced what was there with a new storage unit from Costco which has cloth bins. Each bin has a sleeve for a label. Now everything is in the proper bin and easily found. There is even space (and a new hook) to hang a few table cloths so they are ready to put on the table. Should have done all this years ago!

We still have to return some of the things to the closet but I can only take just so much organizing at a time. I start to get stressed if I have to make too many decisions at once. I also have more trouble these days remembering where I put stuff, so I have been taking photos of some of the items that will be hidden from view and have made up sheets with the photos so that I can find things 6 months from now. Lately I have understood the old adage "Out of sight, out of mind" all too well.

Another new-ish situation  is that we have some great neighbors who have been in their new home less than a year, and they live right across the street from us. Even though they are not old foggies like us, we have a lot in common and enjoy each others' company. We had dinner with them last night, sort of spur of  the moment since it all came together late Friday. The main dish was a savory and delicious stew with dove breasts, something I've never eaten. The meat was sort of dark, like duck but a milder flavor althoughs till rich. Perfectly cooked, too. I'm afraid that it is unlikely I'll ever have the main ingredient to cook, so no recipe here, unless my neighbor wants to share.

I offered to bring a dessert and it was a hit. It's a very seasonal tasting recipe with nuts and cranberries and spices. A rich, nut infused shortbread is topped with a slightly gooey mixture that includes maple syrup and those nuts and dried cranberries. It makes 16 pieces and is rich enough that I only needed on cookie to satisfy me. The guys, on the other hand, polished of a few more. A true baker just loves that many men really appreciate quality baked goods and let you know it, too. Makes it worth the time to bake. I started with a recipe from Sunset magazine but changed the nuts, added dried cranberries and made lots of changes to the method for making the shortbread, using a technique that I've been successful with before...but you do need a food processor. Give it a try for yourself, or for a nice gift.

    Mixed Nut and Cranberry Shortbread Cookies Based on a recipe in Sunset magazine, November 2012

The Nuts
1 1/2 cups walnuts, divided
1 1/2 cups pecans, divided

Preheat oven to 350 degrees F. Spread the nuts on a baking sheet and bake until golden, about 10-15 minutes. Watch the nuts as they burn easily at the end. Remove from oven and stir together. Divide mixed nuts into 1/2 cup to go into the crust, 1/2 cup to chop for the topping, and 1 cup whole to go in the topping.

The Pan and the Oven

Grease a 9-inch square baking pan, line with foil (let it hang over edges), then grease foil. Set aside. Preheat the oven to 325 degrees F. (Or just turn down the heat to 325 degrees F. if you just toasted the nuts.)

The Crust
1/2 cup granulated sugar
1/2 teaspoon cinnamon
2 cups flour
1 cup cold butter, cubed
1/4 teaspoon salt

Put the 1/2 cup oven toasted nuts for the crust and the granulated sugar into a food processor. Pulse until nuts are finely chopped. Add the cinnamon, flour and salt and pulse to mix completely. Place the cubed cold butter around the work container, on top of the flour mixture. Process until the mixture forms a dough ball. Press the dough evenly into the bottom of the prepared pan. Bake in preheated oven until golden and firm, about 45 minutes.

The Topping
1/4 teaspoon cinnamon
3 tablespoons butter, cubed
1/4 cup granulated sugar
1/4 teaspoon salt
7 tablespoons pure maple syrup
3 tablespoons packed light brown sugar
1/2 cup dried sweetened cranberries

When crust is almost finished baking, bring cinnamon, butter, granulated sugar, salt, maple syrup and brown sugar to a boil in a small saucepan, whisking frequently. Remove from the heat and stir in the 1 cup whole oven toasted nuts and the 1/2 cup chopped oven toasted nuts. Stir in the dried cranberries. Pour over baked crust and spread evenly. Bake until set when pan is tilted, about 18 minutes.

Cooling

Let cool on a rack. Lift foil with cookie to a board. Cut cookie into 16 squares, then cut each square in half diagonally. (I found the cookies to be crumbly enough that I stopped when I had cut the squares.)

Friday, November 16, 2012

Pucker Up


One of the delights of the Bread Baking Babes (thank you Tanna and Karen for creating the group!) is that you never know from month to month what sort of bread you will be making.


This month our Kitchen of the Month hostess is delightful Astrid of Paulchens FoodBlog. She chose the perfect recipe for this month and next when family gathers around the table and nice hot dinner rolls are part of the feast. These, called Pocketbook Rolls, look so much like lips that you just want to pucker up and give them a kiss.

I have a sad tale to go with my rolls. Sometimes the posting day falls on the wrong day for the other things going on in my life. Thursdays are busy for me due to a class I take in the evening. I often leave homework for the last minute, too. Yesterday I baked the rolls but I had gotten so caught up in working on classwork that I forgot to preheat the oven as early as I should have, so the rolls were only baked 5 minutes, although I did put the dough in the fridge overnight and allow plenty of time for rising. Here they are rolled, cut, shaped, brushed with butter and ready to rise.


 Using the information on freezing the rolls that Astrid provided, I decided that wasn't a bad thing since half the recipe needed to be frozen and baked the rest of the way for Thanksgiving. I put those in the microwave for safekeeping. The second sheet of rolls I left on top of the microwave with a note to Sweetie that he should bake them for 4 mintues in a preheated 400 degree oven. Sweetie was off playing tennis as he usually does on Thursday afternoons, but I knew he would enjoy some rolls with his dinner.

When I arrived home from class after 9 pm I found out that he had misunderstood the directions and baked both sheets of rolls. I suspect that he didn't preheat the oven and that he baked them far longer than 4 minutes because they were almost flat (which baking them the rest of the way in a cool oven might do) and dark brown on the bottom (which probably meant too long in the oven as it got hotter). They are still tasty rolls, but don't look so great and when they sank the puffy lips went away, too. The results can be seen in the photos on this post. I wish I'd had time to photograph the rolls when they came out of the oven the first time...pale gold, puffy and beautiful!

Do check out the post for the other Bread Baking Babes because I know theirs will be gorgeous!Some may not have posted yet, but keep checking, OK?
If you would like to be a Buddy, bake these and do a post with photo, then e-mail Astrid a link so she can send you a Buddy badge.

Here is what Astrid said:
These rolls are so named because the folded dough resembles small purses or pocketbooks.
In the book it says it is essential that you let rise them at least 2 hours to attain the right feathery texture they are famous for.
They also suggest that these rolls are easily stored in the freezer: if you intend to do so you should bake them no longer than 5 minutes, cool them and then store in an airtight container in the freezer until further use. When you want to serve them bake them in preheated oven at 400°F about 5 minutes or until golden.


Pocketbook Rolls
makes about 2 dozen rolls
recipe adapted from The Glory of Southern Cooking by James Villas

1 packet active dry yeast
1/2 cup lukewarm whole milk
1/4 cup vegetable shortening, room temperature
4 tablespoons butter, room temperature
1/4 cup sugar-
1/2 cup boiling water
1 large egg, beaten
3 cups all purpose flour (I used King Arthur Flour White Whole Wheat flour)
1 1/2 teaspoons salt
8 tablespoons butter, melted
Proof the yeast in the lukewarm milk until bubbly. Should take about 5 minutes, depends on your yeast though.

Meanwhile cream the shortening, butter and the sugar in a large mixing bowl. Gradually beat in the boiling water.
Add the yeast mixture and stir until well blended.

Add   the egg and stir until well blended.

Add  the flour and salt and mix very well. (I used about another 1/2 cup flour).
--- from here you can keep the mixture up to one week in the fridge covered lightly with plastic wrap for further use.

Three hours before ready to use:
Roll out the dough. About 1/2 inch thick.
Cut into rounds with a 2 to 2 1/2 inch biscuit cutter.
Fold each round in half and place on greased baking sheet.
Brush each roll generously with melted butter, cover with a towel.
Let rise in a warm place for about 2 1/2 hours.

Preheat the oven to 400°F.
Bake the rolls until golden brown. Should take about 7-8 minutes (but slightly longer OK if needed to get golden brown).
Serve hot. 

Sunday, November 04, 2012

Pumpkin Season

Not only does fall bring spectacular color to the trees and a nip to the air, but it brings pumpkin season, a time when my thoughts turn to pumpkins and winter squash in general. Before we get to pumpkins and apples, however, I want to let anyone reading this who knows our daughter that she has a new job (in Oakland) and a new house not far from her boyfriend's work...and only about an hour from us! Looking forward to spending more time with them once they are moved in.

 It is also the silly season, otherwise know as election time. Although I know that it is fashionable to be cynical and to not vote, maybe because it seems that it doesn't make much difference, I urge you, (if you have the right to vote in the U.S.A.) no matter what party or cause you support or dislike, to vote this time. In many ways we are at a crossroads in the United States, so it is your opportunity, right, and obligation  to participate in our political system. That is the only way that it can stumble along and the other political systems that might replaced our current one if too many of us stay home will probably not allow you a voice...so exercise that voice now before you lose it. Even if you don't particularly care about the Presidential contest, there are still important local issues being decided and they are often the ones that impact your day-to-day life the most. So vote! 'Nuff said.

Back to pumpkins! Since good quality pumpkin puree is available in cans, the quickest way for me to get a pumpkin fix is to throw something together using that instead of fresh pumpkin. I did get one small pumpkin from the garden this year...the gophers got the others when they were still small (and they nibbled on the one I have before I protected it with chicken wire), plus I have a couple of butternut squash still in the garden, encased in chicken wire while their skins harden up a bit, so there will be recipes in the future using fresh squash.


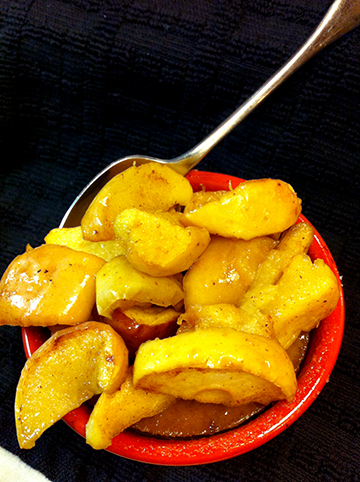
Today's recipe also uses the last of the Gravenstein apples. I roasted them with just a sprinkle of cinnamon and drizzle of maple syrup. The roasting intensified their flavors and softened them, too.


I love pumpkin pie but decided to just do the filling part and bake it in small ramekins in a water bath to keep the texture nice and creamy. I used non-gat evaporated milk and reduced the sugar, plus I used brown sugar. The spices were the same as usual but I used egg substitute and that canned pumpkin, so the final pudding was surprisingly healthy and quite delicious. With a good sized scoop of warm roasted apples on top of the chilled puddings it was like eating the essence of fall. Sweetie wanted some whipped cream on his but mine was without and I enjoyed it just the way it was.


This recipe goes together quickly, although you do need to allow time for the puddings to chill. You can roast the apples while the pudding chills, or you can do it the day before like I did and reheat the apples at serving time. Since the apples don't need to be peeled, they go pretty quickly, too. Imagine how delighted your family or friends will be when you serve up this delicious dessert!

Individual Pumpkin Puddings
1/2 cup dark brown sugar
1 teaspoon ground cinnamon
1/4 teaspoon salt
1/2 teaspoon ground ginger
1/4 teaspoon ground cloves
2 large eggs or equivalent egg substitute (about 1/2 cup)
1 can (15 oz.) canned pumpkin puree', not pumpkin pie mix
1 can (12 fl. oz.) non-fat evaporated milk
cinnamon sugar
boiling water
Roasted apples (see recipe below)
Whipped cream (optional)

Directions
Mix brown sugar, cinnamon, salt, ginger and cloves in small bowl. Beat eggs in large bowl (not necessary with egg substitute). Stir in pumpkin and sugar-spice mixture. Gradually stir in non-fat evaporated milk.

Spray 6 ramekins with baking spray. Sprinkle with cinnamon-sugar (optional). Pour the pumpkin mixture evenly among the ramekins, leaving at least 1/2 inch room at the top.

Place a baking pan with 3 inch high sides which is large enough to hold all the ramekins in the oven. Add boiling water to at least an inch. Carefully place the ramekins in the pan, leaving space between them. Add additional boiling water so that ramekins sides are at least half covered by the water. Bake in preheated 350° F oven for 40-45 minutes or until knife inserted near center comes out clean. Cool on wire rack for 20 minutes, then chill in the refrigerator at least 2 hours or until completely cold.

Remove from the refrigerator and put each ramekin on a small plate. Top generously with the roasted apples. Serve. If desired, top with whipped cream before serving.

Roasted Spiced Apples with Maple Syrup
apples
cinnamon
nutmeg
maple syrup

I didn't have measurements for this recuoe, Cut apples in half and use melon-ball tool to remove the core in each half. Use a sharp knife to remove any stem or blossom end debris. Cut each half in 4-5 wedges and lay, cut side down on a baking sheet lined with baking parchment or a silicon mat. Once all the apples have been placed on the baking sheet, sprinkle with cinnamon and nutmeg. Drizzle with maple syrup. Bake in preheated 400 degree oven for 20-30 minutes or until apples are cooked and edges are beginning to brown. Cool on pan. Remove to a bowl and chill if not serving right away. Reheat if necessary when serving.

Friday, October 26, 2012

Irish Music in West Virginia

Now there is a face that isn't too hard to look at for the better part of four days, right? A dual citizen of Ireland, where he was born, and U.S.A., where he has lived and worked since the late 1960s, Mick Moloney was the one who took a roomful of about 50 men and women on a visual and aural journey to learn about Irish culture and history through music.

I was a Road Scholar neophyte and so was my Mom, but my older sister, who took the great photo of Mick, has been to a few before, so she was our guide in all things Road Scholar. The population of these classes tends to be gray haired but also well read, educated, and often well-traveled.

One of the delights of our time there at the beautiful Cedar Lakes Resort (the large lake is in the photo above) was watching my Mom enjoy meeting and getting to know new people who were invariably kind and interesting folks. No one sent me a personality profile before registering so I don't know how it is that each person we met was someone I wished I'd met sooner. The other great pleasure (well, besides not having to menu plan, cook, clean up, etc for most of 6 days) was getting to spend quality time with my sister and my Mom. Nothing earth-shattering, but some deeper conversations than can usually be had during my flying visits east. A true pleasure in fact.

I wasn't quite sure what to expect from the classes, but was pleased to find that we were given a sort of sampler about various aspects of Irish culture, beginning with a bit about the Celts, about the Irish in Ireland and in America, about the similarities in the experiences of the Irish, Jews and African-Americans of being at the edge of the dominant cultures (which Mick maintains is where artists should be to create great art) and of being looked down on, too, and often abused. He is a skilled and enthralling folklorist so the days just flew. We ended with a little about the current peace between the opposing sides of Ireland and Northern Ireland. Each sampler was illustrated with film and music, some recorded and some live.

Joining Mick was his assistant Joey Abarta, an accomplished young Uilleann pipes player and 'a mighty man', especially with the electronics.

Mick Moloney is a master of banjo, guitar, and (I think) lute or mandolin, plus a delightful singer.
He is also a professor at NYU, an impresario and has recorded many, many CDs. If you want to know more his website is found HERE. He is leading a few tours in Ireland in 2013. Classmates who have toured with him before say that it is a not-to-be-missed experience. Wish I had the funds to join them.

I've often thought that the best thing I learned in college was to always ask more questions and try to find out more. At the end of this set of classes there were many new things learned which led me to want to find out lots more. Now that my cold is starting to retreat I'll have more energy to do just that. Finding the time may be more difficult, but there is no actual rush. Thanks Mick!

So there was plenty of food, cafeteria style food, but with a great salad bar, good conversation, beautiful fall color, a covered bridge (photo below), and lots of great music and information about Ireland and the Irish in America. No cooking, so no recipe this time. But just think, you got a tiny bit of 'culture' this time.

P.S. Thanks sister #1 for many of these photos!

Thursday, October 25, 2012

Another Year

Looks like this blog's birthday passed by while I was traveling. Heading into the seventh year...what an exhilerating time it's been!

The early years included more community with other bloggers, especially when I was part of the Daring Bakers enormous group. At that time I went through a heavy sweets phase, learned lots of new techniques and tried new recipes, for fancy desserts especially.

Once I discovered sourdough the bread phase began and it is still going, but not as strongly. The Bread Bakers Dog is gone and so is the dog it was named for. Our new dog, Pi, isn't given 'people food' so there is no begging when we sit down to eat...a nice change.

These days I spend less time visiting other blogs or even surfing the Internet. Since starting my page layout and design for books business I seem to have less time for other forms of computer fun. My cookbook, Classic Comfort Food, continues to sell on Blurb's site. It would be a great Christmas gift for friends who love to cook! If you want to order a copy or two, just click on the photo of the cover at the top right of this blog...you will go right to the sales page and in no time could have your own copy!

The Bread Baking Babes posts are still a monthly source of fun and learning, but I'm also experimenting more with savory dishes, especially ones that have healthy ingredients. It's a whole new world with things I haven't tried like Isreal couscous, dinosaur kale, quinoa and more.

Hope you'll keep stopping by to see what's new on the journey. Here's to another six or seven years! Cheers!

Wednesday, October 24, 2012

Pesto Rose at Last


Have just returned from a wonderful trip to the East coast. It was so enjoyable seeing family and then seeing fall color on the trip to West Virginia. Loved the class on Irish culture at Cedar Lakes in Ripley and met so many delightful people and heard lots of great Irish music. The drive home via a different route was magical, full of more autumn shades of red, gold, burgundy and rust as the hardwoods welcomed the cold nights. Photo above is of Seneca Rocks, taken along the way by my talented sister. (I'll be posting more about the trip in future posts.) The only fly in the ointment is that I also came home with a cold, so will be spending time in bed that I'd wanted to spend at the computer.

Before I fall asleep again, here is the late-in-posting, but delicious Pesto Rose bread. Last week many Bread Baking Babes posted their version of this Caucasian Rose bread.

Hope you had time to check them out, but, if not, the links are to the right. Our kitchen of the month was the delightful Tanna of My Kitchen in Half Cups. She is enjoying trying new ways to shape bread. This one sounds difficult, but is actually easy.

You are going to want to bake this bread! I know it looks complicated, but it really isn't. If you can roll out a pie crust, you are 1/3 of the way there. If you can roll up dough to make pinwheel cookies or cinnamon rolls, you are the second 1/3 along, if you can braid hair you will have no trouble with the final part of the recipe. See, you can do it.


Find a place to roll out the dough where you can roll it waaaay out. Smear all except the outside inch of dough with pesto. Roll it up like a jelly roll/pinwheel cookies/cinnamon rolls into a nice long log. Pinch the edges and ends (the parts without the pesto on them) to keep that luscious pesto inside.

Now for the fun part! Take a sharp knife and slice down the log, like you would to tuck cheese into a slit in a hot dog...only slice the log in half. The two sides will sort of fall to the sides with the pesto insides showing. Pick up one side and cross it over the other to make a big 'X'.

Then, it is just like braiding with two strands: lift and cross, lift and cross, lift and cross until you get to one end. Tuck the ends under. Go to the other end, life and cross, lift and cross until you get to the other end. Tuck the ends under.

Make a snail of the braided log. Plop the snail into a springform pan. Now it is just the usual rising and baking. The nest to best part? Your kitchen smells heavenly of pesto and you'll get to eat a luscious bread. The best part? Everyone will be SOOO impressed...and will want a piece.

Now you want to make this bread, right? You can also use another filling...cinnamon and sugar, Nutella, apricot jam and ground almonds...you get the idea. Here is what I did:


Pesto Rose
Adapted from http://www.thefreshloaf.com/node/19320/caucasian-bread
Yield: 1 loaf - shown above unbaked, right before it went into the springform ring.

Ingredients:
Filling - 1 cup fresh pesto using basil from my garden.

Dough:
200 grams bread flour
200 grams whole wheat flour
200 grams all-purpose flour, unbleached
2.25 teaspoons dry yeast (Fresh Yeast 28g (1oz)
10 grams Sugar 10g (0.35oz)
10 grams Salt 10g (0.35oz)
50 grams Olive Oil 50cc (1.7 fl oz)
300 grams Water 300cc (10 fl oz) this is approximate

Note: I added almost an additional 1/2 cup water, a tablespoon at a time

Directions:

1. Set oven to 210c (410F) Prep: Baking Pan - 26cm (10") springform (no bottom), take a piece of parchment paper and crimp tightly around the bottom of the springform, oil the sides. Place on top of a baking sheet. Set aside. Note: I placed the springform pan directly onto a Silpat lined, rimmed sheet pan.

2. Add all ingredients to a mixing bowl, add the water carefully as you start mixing. Use the dough hook 2-3 mins. on low speed and 2-3 mins. on medium speed. Dough should be supple and not sticky to the touch. Add water or flour if dough is too stiff or too loose (respectively). When dough is ready, spray a bowl with oil and gently put the dough in the bowl. Spray a little more oil on top and cover. Let rise (80%) about 40 minutes to an hour.

3. Lightly flour your work area. Flatten the dough gently with your hands.
Roll the dough as thin as you can using a floured rolling pin.
When rolling out the dough, try not to lift and move it too much. You can try and gently pull the dough to stretch it thin like with Strudel.

Note: I used the largest bread board I have and rolled the dough out to the edges.

Apply a thin layer of your filling on top of the dough (leave the edge clear 1/4").
Slowly, tightly and very gently roll the dough into a roulade (pinwheel ). You will now have a very long roulade.

4. Take a sharp chef's knife (not a serrated knife) and cut (not saw) the roulade lengthwise trying to keep the knife in the middle so you end up with two equal parts (you can cut down from the seam but it is not make or break).

5. Place the two halves crossing each other (open roulade layers facing up) to create an X shape. Gently pick up the two ends of the bottom half, cross them over the top half, and place them back down. Continue this process, taking the two bottom ends and crossing them over the top until all the roulade has been used. This taking up and crossing is just like a three strand braid, except there are only two strands to cross.

6. You now have a two strand rope shape. If for some reason some of the open roulade layers are pointing down or sideways, carefully turn them so they are facing up. Gently pinch the ends to seal. Look at the braid. If one end looks a little thinner make that your starting point. If not, just start from either end. Slowly and very gently, roll the braid sideways (horizontally) without lifting your hands from the table. You should keep those open roulade layers facing up. Pinch the end delicately. The end result should look like a giant snail shell or a very large cinnamon bun.

7. Carefully pick up the braid and place in the prepared springform. Keep it flat on the parchment. The bottom of the braid should set nicely. Cover. Let rise until the braid hits three quarters the way up the springform. Depending upon the temp in your kitchen this may take from 20 to 40 minutes.

8. Bake at 210c (410F) for 5-10 mins., lower oven to 180c (355F) and bake for another 20-30 mins.

There should be a decent amount of oven spring. The bread should rise above the springform edge.
When the bread is out of the oven lightly brush olive oil or butter on top and sides.

Note: I omitted any extra oil...the pesto had enough.

Let cool on a rack.

9. Elle's changes: I used 200 grams each all-purpose flour, whole wheat flour and bread flour, weighed with the digital kitchen scale. I used a full packet of dry yeast, adding it to 1/4 cup of the water to 'bloom' before adding the rest of the water to it then adding dry ingredients to the wet (which is how I prefer to work), using the stand mixer to mix and knead. I did need to add a little less than 1/2 cup more water to make a nice dough. Used olive oil instead of canola oil. Did not wrap springform in parchment; put the springform ring onto a small rimmed cookie sheet that had a silicon mat on the bottom. That worked well. The oil did seep out during baking, but then was soaked up again into the loaf. Did not use anything other than fresh pesto for the filling; no butter, extra Parmesan, etc. Really didn't need anything else. Did not brush baked loaf with anything...it was plenty oily. Also didn't sprinkle anything over the snail-rolled roll. It was excellent and made a nice base for chopped up tomatoes, too.

Now we know you are going to bake this bread, so why not be a Bread Baking Buddy, too? Send Tanna an e-mail with a photo, link and your baking experience so she can send you a Buddy Badge for your post. Thanks, Tanna for a great recipe! Also, don't forget to visit the other Bread Baking Babes (links on the sidebar) to see their beautiful roses. Au revoir mes amis.

Here is what Tanna gave us to work from:
Recipe Caucasian Rose By: Adapted from http://www.thefreshloaf.com/node/19320/caucasian-bread

Yield: 1 loaf - shown above unbaked, right before it went into the springform ring.

Ingredients:
Filling - the options are only limited by your imagination and what's in your kitchen!

butter , softened
garlic, pressed
parmesan, finely grated
salt , to taste
rosemary or basil

Dough

300 grams bread flour
200 grams white whole wheat flour
100 grams sprouted wheat flour
considering different flour to replace some of above
2-3 tablespoons ground flax seeds or wheat germ or a combo
2.25 teaspoons dry yeast (Fresh Yeast 28g (1oz)
10 grams Sugar 10g (0.35oz)
10 grams Salt 10g (0.35oz)
50 grams Canola Oil 50cc (1.7 fl oz)
considering replacing canola with olive oil & part butter
1 tablespoon White Vinegar 1 tbls, where is this used???
300 grams Water 300cc (10 fl oz) this is approximate
will use some potato water as part of above water

Original recipe called for

AP Flour 600g (21oz) total

seasoning was pesto, dusted with sumac

Directions:

1. Set oven to 210c (410F) Prep: Baking Pan - 26cm (10") springform (no bottom), take a piece of parchment paper and crimp tightly around the bottom of the springform, oil the sides. Place on top of a baking sheet. Set aside.


2. Add all ingredients to a mixing bowl, add the water carefully as you start mixing. Use the dough hook 2-3 mins. on low speed and 2-3 mins. on medium speed. Dough should be supple and not sticky to the touch. Add water or flour if dough is too stiff or too loose (respectively). When dough is ready, spray a bowl with oil and gently put the dough in the bowl. Spray a little more oil on top and cover. Let rise (80%) about 40 minutes to an hour.

3. Lightly flour your work area. Flatten the dough gently with your hands.
Roll the dough as thin as you can using a floured rolling pin.
When rolling out the dough, try not to lift and move it too much. You can try and gently pull the dough to stretch it thin like with Strudel.

Apply a thin layer of your filling on top of the dough (leave the edge clear 1/4").

Slowly, tightly and very gently roll the dough into a roulade (pinwheel ). You will now have a very long roulade.

4. Take a sharp chef's knife (not a serrated knife) and cut (not saw) the roulade lengthwise trying to keep the knife in the middle so you end up with two equal parts (you can cut down from the seam but it is not make or break).

5. Place the two halves crossing each other (open roulade layers facing up) to create an X shape. Gently pick up the two ends of the bottom half, cross them over the top half, and place them back down. Continue this process, taking the two bottom ends and crossing them over the top until all the roulade has been used. This taking up and crossing is just like a three strand braid, except there are only two strands to cross.

6. You now have a two strand rope shape. If for some reason some of the open roulade layers are pointing down or sideways, carefully turn them so they are facing up. Gently pinch the ends to seal. Look at the braid. If one end looks a little thinner make that your starting point. If not, just start from either end. Slowly and very gently, roll the braid sideways (horizontally) without lifting your hands from the table. You should keep those open roulade layers facing up. Pinch the end delicately. The end result should look like a giant snail shell or a very large cinnamon bun.

Depending on your filling you may want to sprinkle on something (paprika, sumac, brown sugar & cinnamon). Keep in mind you don't want to cover up the effect of the shaping.

7. Carefully pick up the braid and place in the prepared springform. Keep it flat on the parchment. The bottom of the braid should set nicely. Cover. Let rise until the braid hits three quarters the way up the springform. Depending upon the temp in your kitchen this may take from 20 to 40 minutes.

8. Bake at 210c (410F) for 5-10 mins.,

lower oven to 180c (355F) and bake for another 20-30 mins.
There should be a decent amount of oven spring. The bread should rise above the springform edge.
When the bread is out of the oven lightly brush olive oil or butter on top and sides.
Let cool on a rack.


ORIGINAL RECIPE
Caucasian Bread - Julia's Rose
Recipe By: http://www.thefreshloaf.com/node/19320/caucasian-bread
Yield: 1 loaf

Summary: This beautiful braided bread is made with a rich straight dough, layers of pesto and a generous sprinkle of Sumac.

I made this bread a couple of months ago. This bread is tender, rich, nutty, salty (evoo, toasted pine nuts and parmesan) and a little sour (Sumac). This bread requires moderate braiding skills, time and attention.

I have been baking for quite some time now. I love bread making.

Ingredients:
Pesto - I use evoo, basil, toasted pine nuts, parmesan (consistency should be not too thin and not too thick). Keep refrigerated until needed.
Sumac - for sprinkling

Dough ingredients:
AP Flour 600g (21oz)
Fresh Yeast 28g (1oz)
Sugar 10g (0.35oz)
Salt 10g (0.35oz)
Canola Oil 50cc (1.7 fl oz)
White Vinegar 1 tbls
Water 300cc (10 fl oz) this is approximate

Directions:

1. Set oven to 210c (410F) Prep: Baking Pan - 26cm (10") springform (no bottom), take a piece of parchment paper and crimp tightly around the bottom of the springform, oil the sides. Place on top of a baking sheet. Set aside.

2. Add all ingredients to a mixing bowl, add the water carefully as you start mixing. Use the dough hook 2-3 mins. on low speed and 2-3 mins. on medium speed. Dough should be supple and not sticky to the touch. Add water or flour if dough is too stiff or too loose (respectively). When dough is ready, spray a bowl with oil and gently put the dough in the bowl. Spray a little more oil on top and cover. Let rise (80%). My kitchen was at about 22c (72F), 35-45% humidity and proofing was about 40 minutes. Lightly flour a work bench or a large table. Put the dough on top and flatten gently with your hands. Use a floured rolling pin to roll out the dough to a very thin circle, as thin as you can. When rolling out the dough, try not to lift and move it too much. You can try and gently pull the dough to stretch it thin (like bakers do with Strudel dough), this requires some skill. Apply a thin layer of pesto on top of the dough (leave the edge clear 1/4"). Sprinkle Sumac generously on top of the layer of pesto. Slowly, tightly and very gently roll the dough into a roulade (pinwheel ). You will now have a very long roulade . Take a sharp chef's knife (not a serrated knife) and cut (not saw) the roulade lengthwise trying to keep the knife in the middle so you end up with two equal parts (you can cut down from the seam but it is not make or break). Place the two halves crossing each other (open roulade layers facing up) to create and X shape. Gently pick up the two ends of the bottom half, cross them over the top half, and place them back down. Continue this process, taking the two bottom ends and crossing them over the top until all the roulade has been used. You now have a two strand rope shape. If for some reason some of the open roulade layers are pointing down or sideways, carefully turn them so they are facing up. Gently pinch the ends to seal. Look at the braid. If one end looks a little thinner make that your starting point. If not, just start from either end. Slowly and very gently, roll the braid sideways (horizontally) without lifting your hands from the table. You should keep those open roulade layers facing up. Pinch the end delicately. The end result should look like a giant snail shell or a very large cinnamon bun. Lightly sprinkle Sumac on top of the braided loaf. Carefully pick up the braid and place in the prepared springform. Keep it flat on the parchment. The bottom of the braid should set nicely. Cover. Let rise until the braid hits three quarters the way up the springform. In my kitchen conditions it proofed for a little over 30 mins.

3. Bake at 210c (410F) for 5-10 mins., lower oven to 180c (355F) and bake for another 20-30 mins. Their should be a decent amount of oven spring. The bread should rise above the springform edge. When the bread is out of the oven lightly brush evoo on top and sides. Let cool on a rack.

Friday, October 12, 2012

Fall Fling

Not sure why but October and May seem to be the months when wanderlust really hits. Since it has been a while since I've seen the fall color on the east coast, I'm leaving Sweetie and Pi for a few days to visit with my Mom and other family members and get my fall color fix. Won't be doing much blogging while I'm gone but I'm sure to have some stories when I get back. Hope you have some good times in the kitchen until then!

Here is some fall color nearer to home, at the place where we like to walk the dog. Those are wild grape leaves...very colorful!

XO Elle.

Sunday, October 07, 2012

At Gabriel Farm

It all started with an apple, as some very interesting stories do. Of course I was so fascinated with what I was learning that I forgot to take any apple photos, but the story is good enough.

My friend Arcadia heard from a friend that there was a stupendous yellow apple called the Gabriel Apple that was grown in nearby Graton and she was told that she should go to the farm and try it out. Since she knows of my interest in fancy food, she sent me a link to Gabriel Farm and suggested a day trip. When I visited the site I became excited, not because of the apple, but because they were harvesting Asian pears, one of Sweetie's favorite snacks. They also have an Asian pear and apple juice that looked mighty good.

 Turns out that juice is amazingly good, the Asian pears are the best he has ever had, and the farm visit was a hit...


And so, a couple of weeks ago, Arcadia and I had a farm visit day. I had planned to blog about it much sooner but life has been super busy with all manner of good things. I had hoped to blog about a recipe of something made with some of the Asian pears but they were all eaten for snacks, with great gusto.

Gabriel Farm has been around for a long time. The original family was named Gabriel and they developed a yellow apple called the Gabriel apple (more on that later), but the current owner is a former science teacher named Torrey.

He and his wife run the farm and do both wholesale and farmers markets, plus school kids love to visit the farm. There was a group of them finishing up, buying some things from the farm store,

 when we arrived. Torrey is a natural teacher and imparts a lot of information in a gentle, easy to understand way. Thanks to him I now know how many seeds you'll find in almost all apples...ten...and that if you slice an apple horizontally those seed form a sort of flower shape. The Gabriel apple is a descendent of a sport found in the middle of an old apple grove in Missouri that had been planted by Johnny Appleseed. Apple growers came from all over to purchase scions of that apple to graft onto their own trees. The Gabriel apple is the product of one of those grafts and, perhaps, some cross-pollination. A good apple like the Gabriel has layers of flavor when you eat it, sort of like the layers of flavor in a fine wine. They have many more apples besides the Gabriel and all are farmed organically like the Asian pears.

Before you get the idea that you can just wander over and have a farm tour, let me explain that since it is a working farm, that just isn't possible. I exchanged a number of e-mails to arrange for a time and also became a CSA member by purchasing a case of that fabulous Asian pear-apple juice...no hardship there. Members can have a farm tour if a time can be arranged.

We did notice how busy the workers were with sorting, packing, and moving cases of Asian pears around using a forklift, getting them ready to ship.

When you walk through the rows and row and rows of fruit trees and learn that they have over 20 varieties of Asian pears growing there, it is easy to see that there is little time for too many tours.


The Asian pears are really beautiful on the tree and you can see that some are bright gold, ready to pick, and some are still greenish.

Torrey said that one of the reasons Asian pears cost a bit more is that they bruise easily but also that they need to be picked three or four times as they ripen, adding to labor costs.

 I loved how they were planted in blocks and he said that Asian pears self-pollinate and that the pollen is very fine and light so having the trees grouped makes sense.

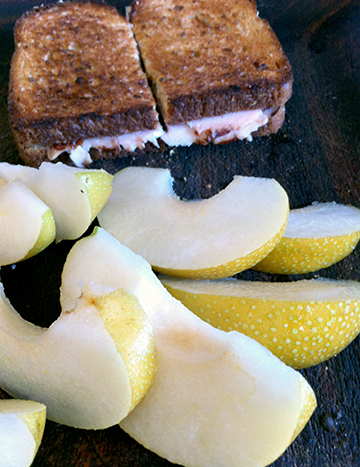
Knowing my Sweetie, I chose a russet Asian pear to bring home. It was crisp, sweet, very juicy and not as gritty in texture as some you find in the stores. I cut one up as soon as I got home and he munched right through it in no time. So, no recipe, but there is a photo of the gorgeous Asian pear (above) and of the jar (even further above) of juice. Here is the one I cut up for Sweetie to go with his sandwich.

You may want to ask your grocer (if you live in the S.F. Bay area especially) to carry some of these Asian pears, apples and juice. It might not be as fun as a farm visit, but it could be a great way to have some of this locally sourced and amazing fruit and juice yourself. You can also check out the website at: http://gabrielfarm.com/portal/home


By the way, I'm not receiving any benefits from doing this post...I already had the pleasure of that tour which was a treasure in itself.

Sunday, September 30, 2012

September Zipped By


Some months seem to drag...like August does for me. Some just fly by. September did that this year. Between being careful of the arm, doing the InDesign class and homework,  and having a couple of weeks at the end which were full of social occasions, it just blew through, with not enough time to blog much. I noticed that there was nothing posted this month in the way of sweets, so let's end with an update on an old cookie.

Saucepan Fruit Bars has been a family favorite for many, many years. It is easy, mixed in a saucepan, uses buttermilk, has dried fruit, a dense crumb, and a zingy lemon glaze to wake up the fairly plain cookie.

Spicy Updated Saucepan Fruit Bars keeps all of the above but subs out some all-purpose flour for whole wheat flour, adds finely chopped walnuts and a dose of chocolate chips and increases the spice a bit. The texture is still dense and a bit dry and it still needs the lemon glaze but it is much more complex in flavor and quite delicious with a cup of tea or coffee.

Remember this one when you need a quick pan of bar cookies, need to ship cookies to servicemen or students or your favorite friend who lives far away. These cookies are speedy to put together and travel well, too. I think they are really yummy, too, so you just might want to invite a neaby friend or neighbor over for an afternoon cuppa and these cookies.

Spicy Updated Saucepan Fruit Bars

1 cup butter, melted

3/4 cup brown sugar
3/4 cup sugar
2 eggs
2 cups all-purpose flour, sifted
1 cup whole wheat flour
½ teaspoon baking soda
½ teaspoon salt
1 teaspoon each nutmeg, cinnamon, and cloves
¼ cup buttermilk
½ cup golden or brown raisins
½ cup dried currants
½ cup finely chopped walnuts
½ cup chocolate chips

Melt butter in saucepan. Add sugars and stir to combine. Cool mixture, then add the eggs; beat well. Add sifted dry ingredients, spices, and buttermilk and mix well. Stir in fruit, walnuts and chocolate chips. Spread in greased 15” x 1O” x 1” pan. Bake in a 350 degree F. oven for 25 minutes. Brush with glaze (see below) while hot; cool in pan. Cut into 2” x 1” bars. Makes 45 cookies.

Glaze: Mix 1 cup confectioners sugar and 4 teaspoons fresh lemon juice.