Showing posts with label shaped bread. Show all posts

Sunday, November 20, 2022

A Star Bread


Sometimes you need a bread that is a showstopper, but isn't actually too difficult to make. This star-shaped braided bread seems to me to fit that description. Check out the recipe and see if you agree.

It's useful to have a working kitchen scale for this one, although I tend to use my scale for baking as much as possible. Baking is all about the proportions of one ingredient to each of the others, so weighing the ingredients is a sure way to keep the proportions solid. In this recipe it also makes it easy to keep the dough amounts for each of the five star points even so that you end up with a nice shape.

This dough is a classic Anadama Bread, which is a bread with cooked cornmeal, molasses, some whole wheat flour and some regular flour. It has lots of flavor and the dough is easy to work with, which is a must when you are making a shaped bread like this. Best of all, it's delicious! A bonus is that with this recipe you also get a loaf, so you can have the shaped bread for a special occasion and still have slices for toast. It makes great toast!

You start by cooking some cornmeal and water. If you use coarsely ground cornmeal or stone ground whole meal cornmeal, you'll want to cook it until the grains soften, so just keep stirring and be patient.

Never a good idea to add really hot cooked grains to a yeast mixture, so let the mixture cool down, but be sure to add in the butter first. I forgot to do that, so I had to warm up the mixture in the microwave a few seconds so that the butter would mix in well.

Take your time with the kneading, too. Any time that you are going to braid bread dough it helps to have plenty of gluten developed...which is the whole point of kneading as far as I know. This bread is an old New England favorite but in colonial times they had to do all the kneading by hand. We can use a stand mixer, if we desire, to do some of the work.

After the dough rises and it's time to shape it, use your scale and a bench scraper to divide the dough into six pieces that all weight within a couple of grams of each other. You can pinch off a bit from a heavy lump and add it to a light lump of dough if you need to adjust to even them out. Use the same process when you divide each lump into three pieces. The closer in weight that each piece is, the easier it will be to make a nicely shaped star.

When you are braiding the dough for each arm of the star, roll the dough pieces in a tapered long cone shape. You'll gather each pointed tip end of the cone together and braid towards the fatter end. That way the three fatter ends will create a great 'upper arm' for that point of the star. When all five are done, you place them so that those fat ends barely touch and each point is pointing out; it becomes a star shape. The final part is to roll the sixth piece of dough into a long snake, with the whole length the same thickness. Once that is formed in a spiral over the center, it ties all five arms together. Here is a photo of mine at that point. I shaped mine on a 12-inch pizza pan, which worked well. 


Unfortunately, I forgot to take a photo of the finished star, but it was a bit puffier and much browner but otherwise looked the same.


Anadama Bread and Star
Star shaping from Festive Baking by Sarah Kelly Iaia
makes two loaves or one loaf and one big star

1/2 cup regular corn meal
2 cups water, divided
1/3 cup molasses
6 tablespoons butter, softened,
1 cup sourdough starter
1 cup whole wheat flour
3 1/2 cups (about) all-purpose flour
1 teaspoon salt
oil for greasing
1 egg beaten with 1 tablespoon water for egg wash

In a bowl, whisk together the cornmeal and 1 cup of the cold water. In a saucepan over medium-high heat, bring another cup of water to a boil. Add cornmeal mixture and cook, stirring constantly, until mixture is very thick, about 3 - 4 minutes. Stir in the molasses and the butter.
Add the whole wheat flour and stir until all is combined. Transfer mixture to bowl of an electric stand mixer and cool to tepid. (Or transfer to a mixing bowl large enough to mix the dough by hand and then knead in the rest of the flour.)

Add the 1 cup sourdough starter to the mixing bowl with the tepid cornmeal mixture. Mix on low speed with dough-hook attachment ( or a wooden spoon) for several seconds. With dough hook in place on the stand mixer add flour 1/2 cup at a time, mixing for several seconds after each addition. Sprinkle in the salt, and continue mixing until dough completely comes away from sides of bowl, about 7 minutes.

Lightly oil a bowl. Form dough into a ball and place it in the bowl. Oil a sheet of plastic wrap and loosely cover dough. Allow dough to rise for 1 1/2 to 2 hours, or until it has doubled in size. (At this point I punched the dough down, recovered it, and put it in the fridge overnight. The next day I let the dough warm up and then did the shaping.)

Lightly grease 1- 9 x 4 inch loaf pan. Line a sheet pan with silicon mat or parchment for the star. Press down dough and divide it into 2 equal pieces. Shape one piece loosely into a loaf and place in the prepared pan pan. Cover with oiled plastic wrap and allow to rise for 30 minutes, or until loaf has doubled.

For star, take second half of dough (all the dough remaining) and divide it into six equal pieces (using a scale really helps with getting the pieces about the same size). Set one piece aside. Each of the other five pieces is used to make one of the star 'arms'.


Take one of the pieces and divide it into three equal pieces. Roll each of those three pieces into a rope about 8 inches long, with a taper at one end. Join the three ropes at the tapered end and braid the ropes. Repeat with each of the next 4 pieces.

Place the braided pieces on the prepared baking sheet with the tapered end pointing out, to shape a five-point star. The ends at the middle should touch and so pinch them together.

Take the last piece of dough and roll into a long rope, about 20 inches long. Starting at the center of the star, wind the rope around in a spiral over the center of the star. Tuck the end under the spiral.

Cover the star with oiled plastic wrap and set aside to rise, until doubled in bulk. When almost to that point, preheat the oven.

When oven is fully preheated, brush the star and the loaf with a wash of 1 egg beaten with 1 tablespoon water. Make sure that the wash goes into the crevices of the star. Slash the top of the loaf.

Bake in preheated 350 degrees F oven. Bake loaves for 35 minutes to 1 hour, or until bread is dark golden brown and sounds hollow when tapped. Star may take a shorter baking time than the loaf. That's OK.

Allow bread to cool in pans for 5 minutes, then turn out onto wire cooling rack. Serve warm if possible.


This bread is mellow and soft, barely sweet from the molasses and makes really good toast.
Saturday, October 16, 2021

Babes Bake Pumpkin-Shaped Bread


You know fall has arrived when everywhere you turn there is pumpkin spice this and pumpkin spice that...and lots of actual carving pumpkins at the market, too.

For October, the Bread Baking Babes have been given a seasonal challenge by Cathy of Bread Experience, our Kitchen of the Month. She asked us to make boules (round loaves of bread) shaped with string to resemble pumpkins. She gave us a recipe for the bread, but I struck out in another direction, making a bread that I last made in 2007. It's a potato bread, with the potato part being boiled and mashed garnet yams. They impart a light orange color to the bread and contribute both flavor and moisture as well. In 2007 I made the bread with garlic as the recipe called for, but this time I wanted a more neutral bread so I skipped the garlic and added just a touch of...wait for it!...pumpkin spice.


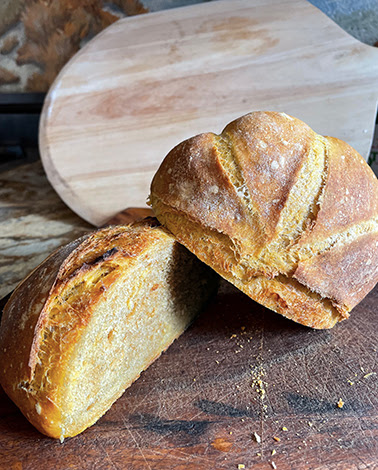
Shaping these little loaves was fun if challenging. Mine had quite a bit of oven spring, so they tore a bit. The first one did that and I blamed it on my forgetting to cut any slashes to allow for expansion, but I did quite a few slashes on the second one and still had it tear . Fortunately, they both still had shape from the string and looked somewhat pumpkin-like. I used bakers twine which I marinated in olive oil for a while and I had no trouble removing the string once the loaves were done. The crust was thin but crisp and the crumb was moist and tight. I loved the flavor. It wasn't sweet, had a taste of yam and a hint of the spice mix. I liked it best with just a bit of non-dairy butter, but tried it toasted, too. Both were delicious. Sweetie says this is the best bread yet, but I think it's because its been so long since I baked bread.


Do try this yourself. The given recipe can be found on Cathy's site, and she also has great photos of the process of laying out the strings that shape the ball into a squash shape (after oiling the strings), and all the information you need to be successful.

Be sure to visit the other Babes sites, too, to see what they did with this fully fall bread! 


Yam Bread 'Pumpkins'

based on a recipe by Narsai David

1 cup warm water (preferably the water the yams were boiled in)
1 cup mashed yams (boil until tender, then peel and mash and cool to room temperature)
2 teaspoons sugar
1 package active dry yeast
3 - 4 cups white bread or all-purpose flour (about)
1 teaspoon salt
1/4 teaspoon pumpkin pie spice (optional)
spray oil

Place the water, sweet potatoes (yams), sugar, and yeast in a mixing bowl. Let rest for 5 minutes. Add half the flour and all the salt, and pie spice if using. Mix well with a dough hook or heavy paddle. The dough will be quite soft and sticky. Add another cup of flour. If using a dough hook, you may need to add a little more flour to keep the dough around the hook and to make the dough firm enough to shape. Continue mixing for 4-5 minutes if you are using a mixing machine, knead about the same amount of time if kneading by hand.  Spray oil (I use olive oil spray) to coat a large bowl or rising container. Put in the dough and turn to coat the dough with oil. Cover with oiled plastic wrap or with a clean shower cap.

Place the dough in a warm place to rise.. When the dough has doubled in volume, anywhere between 1 and 2 hours, turn it out onto a floured surface and punch it down to get out the air that has inflated it. Kneading a few times also helps in this step. Divide the dough into two equal pieces. Shape each piece of dough into a ball, pulling the dough to the 'back' of the ball repeatedly to form a skin of dough. This is a very soft dough, so use plenty of flour to keep it from sticking to the board.

Now it's time to shape these balls into pumpkins! Use a round piece of parchment - either a pre-cut one or one that you cut to fit your Dutch oven or other baking pot.

Use a food safe string for tying. I used baker's twine. The key thing is to oil your string well. I cut eight lengths (four for each 'pumpkin') that would encircle the dough ball with a fair amount left over for tying, then put these, one by one, into a bowl. I added olive oil and pushed the string down into the oil and let them soak until it was time to use them. I had no trouble peeling the string off the pumpkins once the breads were baked, but if you do, use a sharp paring knife to help loosen the string if it sticks.


Lay four pieces of string on the parchment circle with the ends beyond the parchment paper. Lay two in a cross and the other two between those. Put the dough ball right where the strings all cross, then pick up the ends of the strings and gather them together and tie at the top. Don't tie the string too tight in order to give the loaf room to expand in the oven. However, you don't want it to have too much oven spring because it could tear and mess up the shape. (I had too much oven spring, so mine did tear and the pumpkin shape wasn't as clear, but it was still pretty.

Put each shaped and tied dough ball (boule) into a lined and floured banneton or flour two tea towels well and use them to line two bowls, then put the dough balls in those. Cover lightly with oiled plastic wrap and allow to rise for about half an hour. Balls will get puffy. Reserve the parchment circles for baking time.

When it is about 45 minutes before baking time, preheat the oven and a deep cast iron pot or Dutch oven, with lid, to 450 degrees F. If you don't have that kind of pot, a baking stone with either a deep sauce pan or an overturned metal bowl will work. You are creating a mini-oven for each 'pumpkin' to bake in, in turn.

When ready to bake, return the bread to the parchment circles,  Score the bread in a pattern (I used a short vertical slash three time for each section) and then carefully remove the pot to a heavy towel.  Using hands protected with oven mitts, remove the lid and lower the 'pumpkin' loaf on the parchment paper into the pot. Immediately put on the lid and return the pot to the oven. Bake for 15-20 minutes, then remove the lid and bake an additional 15-20 minutes. Loaf will be golden to medium brown and when the bottom of the loaf is tapped, it will sound hollow. Immediately remove the strings and set the loaf to cool on a wire rack. Repeat the baking with the second shaped ball of dough.

Makes two medium-sized pumpkin shaped rustic loaves. 

Tuesday, April 16, 2013

Babes Bake Italian


The colors of the Italian flag...red, green and white...are all on display in this month's delicious bread, Pane Bianco with Garlic, Basil and Sun-Dried Tomatoes, brought to us by Kitchen of the Month Natashya of Living in the Kitchen with Puppies. The fragrance that fills your kitchen when you bake this seems very Italian, too. The best part about this bread isn't the colors or the fragrance, but the taste. It is savory and you can really taste the sun-dried tomatoes, followed by the herby basil, warm garlic and wonderful melty cheese. I used some roasted garlic, as suggested by fellow Babe, Elizabeth, and it brought a depth of flavor that was delightful. Otherwise I pretty much followed the recipe as written (shocking!) until it came time to shape the second half of the dough. (Well, my dough did take longer to rise, but it was a chilly day.)


For the first half I made the lovely 'S' shape that the recipe gave directions for. I really enjoyed working with this dough. It was easy to shape.


For the second half I decided to make mini-buns to take to a morning meeting the following morning. I baked them a little less than golden (see photo), then reheated them in the morning until they were warm and golden. They were a hit!

The key to the mini buns is to roll the dough very thin and about twice as wide as the shaped loaf. Since you are spreading the same amount of filling ingredients over twice the amount of rolled dough, the buns don't get too filled and stay small. The last 'trick' is to then divide the filled dough in half (I used my bench scraper) so that each piece is about the same width (8 1/2 inches) as the big loaf, then roll up the dough from that point, one roll to the right, one to the left, which gives you two thin snakes of rolled dough. Cut each snake in pieces about an inch thick and lay those pieces cut side down in a greased cake pan...or two. Cover and let rise as you do the big loaf, but bake them for a shorter time, about 25 - 30 minutes. You should end up with a nice tray of savory, cute mini-buns with all the flavor and cheesy goodness of the big loaf.

Thank you Natashya for choosing this great recipe, and for giving us recipes by weight, volume, etc. I used the one by grams and it worked out perfectly.
Also sending this over to Susan at Wild Yeast for the wonderful weekly Yeastpotting event. Check it out!

With a bread this delicious and fun to play with, I'm sure you want to be a Bread Baking Buddy, right? Just bake this bread, take a photo or two to share, and e-mail Natashya with a short description of your experience that that photo or two. She'll get a Buddy Badge to you and include you in the round-up. You have until April 29th, so do consider making Pane Bianco with Tomatoes, Basil and Garlic!
Tomato Basil Garlic Filled Pane Bianco
Ingredients by grams: (direct from King Arthur Flour website)

• 113g warm water
• 50g sugar
• 4 teaspoons instant yeast
• 227g warm low-fat milk
• 67g extra-virgin olive oil
• 2 large eggs
• 2 teaspoons salt
• 723g bread flour
• 1 (241g) jar oil-packed sun-dried tomatoes
• 4 cloves roasted garlic (or more if you really like garlic) my change
• 170g shredded Italian blend cheese, divided
• 14g chopped fresh basil

Directions
1) Combine the water, sugar, yeast, milk, olive oil, eggs, salt, and flour, and mix and knead by hand, stand mixer, or bread machine until you've made a cohesive, soft dough. If you're kneading in a stand mixer, it should take 5 to 7 minutes at second speed, and the dough should barely clean the sides of the bowl, perhaps sticking a bit at the bottom. In a bread machine (or by hand), it should form a smooth ball. Place the dough in a greased bowl, and turn to grease the top. Cover and let rise in a warm place until double, about 45 minutes.

2) Meanwhile, thoroughly drain the sun-dried tomatoes; lay them on a paper towel to absorb any excess oil. Using kitchen shears, finely chop the tomatoes.

3) Line two baking sheets with parchment. Gently deflate the dough and divide it in half. Roll one piece into a 22" x 8 1/2" rectangle. Sprinkle on half the garlic, cheese, basil, and tomatoes.


4) Starting with one long edge, roll the dough into a log the long way.


 Pinch the edges to seal.

5) Place the log seam-side down on a baking sheet. Using kitchen shears, start 1/2" from one end and cut the log lengthwise down the center about 1" deep, to within 1/2" of the other end.


6) Keeping the cut side up, form an "S" shape. Tuck both ends under the center of the "S" to form a "figure 8"; pinch the ends together to seal.
Cover and let rise in a warm place until double, 45 to 60 minutes. Repeat with the remaining dough.

7) While the loaves are rising, preheat the oven to 350°F.

8) Bake the first loaf for 35 to 40 minutes. Tent the loaf with foil after 15 to 20 minutes to prevent over-browning. Bake the remaining loaf.

9) Remove loaves from their pans; cook on racks. Store any leftovers well-wrapped, at room temperature.
Yield: 2 loaves.

For mini-bun directions, see the post, above the recipe.