Friday, December 29, 2006

Christmas in Seattle


Although I figured out how to have a almost-like-home Christmas while staying in a hotel room the first time seven years ago, each time it's a bit different.

This year our daughter K is living in Seattle in a tiny but beautiful studio condo. We stayed in a hotel with a suite that was as large as a one bedroom apartment, including a small kitchen and good sized living room. Since we had more room, lots of family time was spent in our suite.

The kitchen had a microwave and a stove, but didn't have an oven, so we ordered our favorite Christmas morning breakfast of sweet roll, muffins and scones from the Macrina Bakery in Belltown. As you can see above, it was seriously yummy. Lots and lots of coffee, a bowl of fruit salad, and smoked salmon omlettes rounded out a breakfast that took us into the afternoon as we opened gifts and watched old movies.

The same bakery was the source of our post-stroll late afternoon snack of baked brie in pastry, accented with herbs and dried fruits. Serious comfort food which I served with apple slices and stoned wheat crackers. Sorry no photo but you can imagine golden pastry, warm (from the microwave) brie and the juicy snap of crisp apples.

Dinner was a Northwest affair with fresh coho salmon from the new Whole Foods market, cooked in the microwave, then finished in a frying pan, plus blackened fresh tuna, expertly cooked by Sweetie. I had brought along herbs and garlic salt in the suitcase. Trader Joe's was the source for the rest of the meal of mashed potatoes and peas. Both were easily cooked in a tiny kitchen that didn't have very many cooking tools. Finishing it off was tea and Grandma's crescent cookies. You don't have to be home to have a Christmas almost as good as at home, but it's a little more challenging. The most difficult part was cleaning up. There was no dish soap, so I improvised with the small bottle of shampoo from the bathroom.

Hope that your Christmas was fun and that you had your fill of good food and good times with family and friends.

Cloudy Space Needle skies in Seattle on Christmas Day


Thursday, December 28, 2006

Blogging by Mail - Package from Japan


Returning home yesterday from a week in Seattle, I discovered that a package from Amy Piesse of Impossible Juxtapositions had arrived while I was gone.

Amy is a teacher in Japan but originally hails from Perth in Australia. My Sweetie's college room mate Jon and his family lived in Perth until recently and we visited them a few years ago. Perth is in Western Australia and has fewer tourists than Sydney, Melbourne and the Barrier Reef on the east coast, but it is a lovely city. Amy went home for the holidays (for turkey and pudding according to her card), but before she left she sent the wonderful collection of things shown in the photo.

Some things, like the Kit Kat bars and Hello Kitty toy were familiar, but others, like the packets of amezake are a new treat. Amy writes that amezake is a by-product of sake, non-alcoholic, and good with some freshly grated ginger for kick. I'm looking forward to trying it. The package also contained some yummy chocolates and nuts, some pocky sticks, a sweet note pad kit, a lovely felt snowflake trivet, and a pancake ring that I can use to make Christmas tree shaped little pancakes. I've trained as a graphic artist, so part of the fun was seeing the great packaging. The Hello Kitty microwaveable cake package is super bright and all the directions are in Japanese, so it should be interesting to try baking it. A great seasonal collection and a nice connection to both Japan and Australia. Thank you Amy! Loved your letter, too.

And thank you Stephanie at Dispensing Happiness for organizing the Blogging by Mail event!


Tuesday, December 19, 2006

Great Joy


Of all the things that bring me great joy, giving something I've made is right up there.


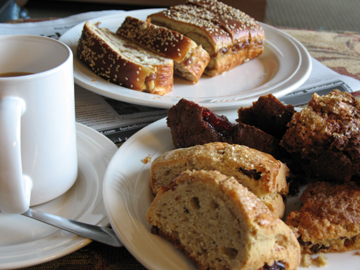
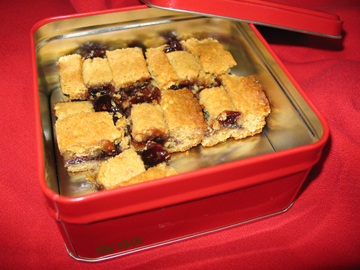
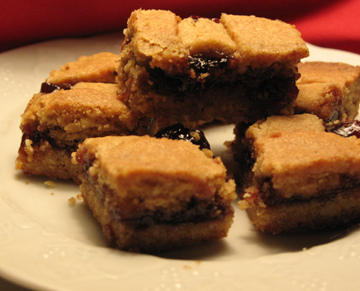
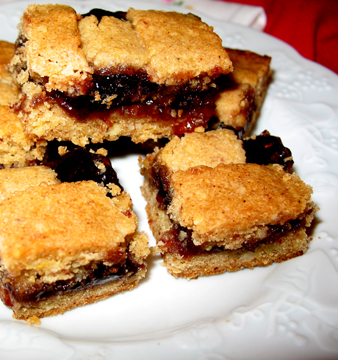
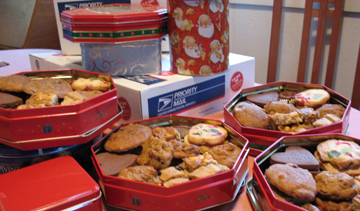
The Christmas cookies have been a good example. Time spent baking is almost always fun, but planning the collection for these tins and then making them, storing them, and...at last...packing them up to ship has kept me in the Christmas spirit for weeks.


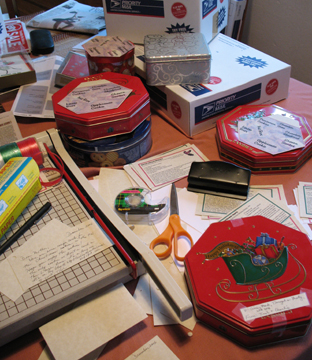
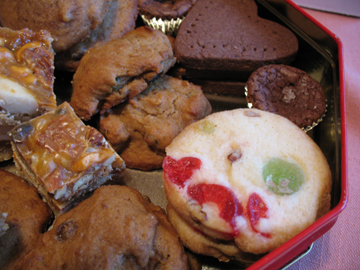
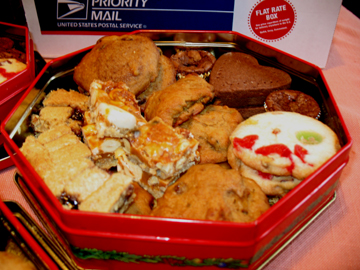
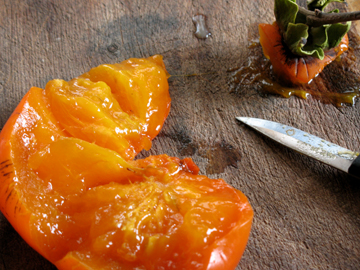
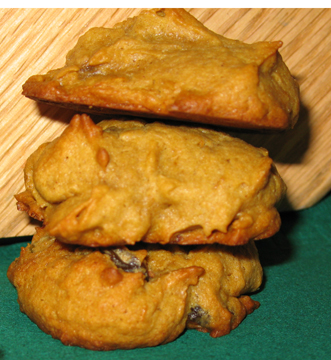
Never let something relatively simple stay that way, right? So these tins of cookies also included a cardstock insert printed with a photo of the filled interior of one of the tins, with cookie names on top of the appropropriate part of the photo. Mostly I wanted to do it to help distinguish between the persimmon cookies and the applesauce cookies. They sure looked alike to me. Then, to further gild the lilly, I printed out sets of recipe cards for each kind of cookie, punched a hole in the corner of the set and tied it up with ribbon, then placed it into the cookie tin. On top of each set of recipe cards was a blank card on which I wrote the date and a message for each family getting the cookies. It took a little more time, but I'm hoping that some of the cards will be saved and used to bake more cookies later. Maybe the joy will continue that way long past this Christmas.


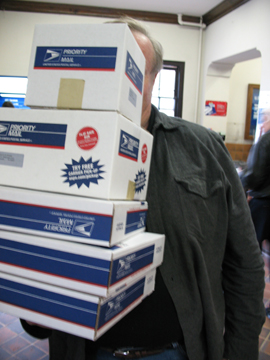
A frenzy of packing followed and then a trip to the Post Office to mail 'em all off! Thanks to Sweetie (above) we were able to do it in only two trips from the car. It's great to be part of a large family.

A commentary in the paper today also made me grateful for the continuity (so far) of some simple things for the holidays. The person writing the article was complaining that the hand knit sweater from the aunt was now totally replaced by the high tech item for all ages. Just yesterday I saw that handmade is still appreciated. I attended a holiday potluck lunch with a group of fellow watercolorists. A few weeks earlier we all agreed to bring something that we had made, wrapped, to exchange as gifts. The delightful thing is that each of us picked an item that was hand made and beautiful and appreciated. I was particularly pleased with my luck in picking a small handmade box which contained morning glory seeds. Most years I grow morning glories and save the seeds, but this year there wasn't time to garden, so no flowers this year and no seeds for next year. Morning glories are also a flower I've shared with my daughter when she was living near by. Now that she has moved to Seattle, into a tiny urban condo with no balcony, I'll have to grow the morning glory flowers for both of us. Thank you Rhoda! You could not have created a more appreciated gift. Better yet, it doesn't require batteries.

Wishing each of you who read this a very happy holiday season, full of peace and joy, fun with friends and family, and lots of goodies to eat. I'll be away and not able to post for a week or more, but will have lots to blog about then.


(This edit is taking place in 2008 in order to keep track of the beginnings of the group that became the Daring Bakers)

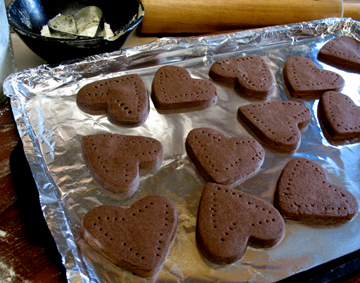
Now the baking group, which still went by various names like 'The Little Baking Group That Could', 'Bakers in Crime' and 'Team Tasty' has increased by three more. For December 2006 they baked Chocolate Biscotti.

Chocolate Biscotti

2 cups all-purpose flour
1/2 cup unsweetened cocoa powder
2 TBSP instant espresso powder
3/4 tsp baking soda
1/2 tsp baking powder
1 tsp salt
3/4 stick unsalted butter
1 cup sugar
2 large eggs, lightly beaten
1 tsp vanilla extract
1 cup chopped nuts
4 ounces bittersweet chocolate, coarsely chopped

White Chocolate for dipping

Preheat oven to 350F.

Sift together the flour, cocoa, espresso powder, baking soda, baking powder and salt.

Working together with a stand mixer, preferably fitted with a paddle attachment, or with a hand mixer in a large bowl, beat the butter and sugar together on medium speed until pale, about 2 minutes; the mixture may be crumbly.

Scrape down the sides of the bowl , add the eggs and vanilla and beat for another 2 minutes; don’t worry if the mixture looks curdled.

Reduce the mixer speed to low and mix in the dry ingredients in 3 additions, mixing only until dough forms. Scrape down the sides of the bowl.

Mix in the chopped nuts and chocolate, then turn the dough out onto a work surface and knead un any dry ingredients that might have escaped mixing.

Divide the dough in half. Working with one half at a time, roll the dough into a 12 inch long logs.
Flatten both logs with the palm of your hand, so that they are 1/2 to 1 inch high, about 2 inches across and sort of rectangular, then carefully lift the logs onto the baking sheet. Sprinkle each log with a little sugar.

Bake the logs for about 25 minutes, or until they are just slightly firm. The logs will spread and crack-and that’s fine. Remove the baking sheet from the oven, put it on a cooling rack and cool the logs for about 20 minutes.(Leave oven on)

Working with one log at a time, using a long serrated knife, cut each log into slices between 1/2 and 3/4 inch thick. Stand the slices up on the baking sheet-you’ll have an army of biscotti-and bake the cookies again, this time for just 10 minutes.

Transfer the biscotti to a rack to cool.

If you want you can melt some white chocolate in a double boiler. Pour it into a shallow baking dish. Take the biscotti and dip which ever part you would like to be covered in chocolate. Set on a rack to harden.

Source: Adapted from Baking: From My Home to Yours by Dorie Greenspan, Houghton Mifflin Company, Nov 2006

Wednesday, December 13, 2006

Hollywood Diva


Now it was just a matter of waiting for the limo to arrive. She turned from the view of L.A. spread out below and took a moment to admire herself in the mirror over the fireplace. Blond hair piled high to show the elegant curve of long neck graced with borrowed Henry Winston diamonds. Just enough cleavage showing and the white satin column of her gown shouted, “Star”. Barely enough time to enjoy her Bombshell Parisienne in its tall champagne glass and a bite or two of the hors d’oeuvre. There would be more nibbles at the post-Award parties, but mostly she was too nervous to eat. Being nominated, no matter what you said later, was not enough, but it was exciting.
As she waited for her handsome escort Ryron Gracie, who had taught her Women Empowered class at the Gracie Jui-Jitsu Academy, to ring the bell she took another tiny bite of the blini, savoring the smoky salmon and the tang of sour cream. A sip of the champagne and clementine cocktail was divine; similar to a mimosa, but with a twist. Fabulous.
Ah, here’s the limo and Ryron coming up the walk.
Well, just enough time to dab the sour cream smudge from that last bit of Buckwheat Blini with Smoked Salmon and Sour Cream from her lips, repair her lipstick, answer the door and sweep down the stairs on his arm to the waiting limo and glory…


This bit of Hollywood fantasy brought to you as part of The Happy Sorceress's Blog Party#17 at Dispensing Happiness, which this time is a Hollywood party (perhaps one of those our diva is going to after the awards). Get on over there and have some fun.

Bombshell Parisienne
Pour the juice of half a clementine into each champagne glass. Pour a good dry champagne into the glass to almost fill. Add a clementine peel garnish if desired.

Buckwheat Blini with Smoked Salmon and Sour Cream
Inspired by the recipe in Monday Night at Narsai's

1 cup Bisquick
1/2 cup buckwheat flour
1 egg
buttermilk
smoked salmon
1/2 cup sour cream
parsley or dill to garnish

In a bowl mix together the Bisquick, buckwheat flour, egg and enough buttermilk to make a batter that is a little thicker than regular pancake batter. Pour by tablespoon onto a heated, buttered griddle. Cook on the first side until the edges start to firm up, then turn to other side and cook until browned.
While still warm, layer with shards of good quality smoked salmon, garnishing with a dollop of sour cream and bit of parsley leaf or dill. Serve warm.


Sunday, December 10, 2006

Remembering Edith


All of this cookie making reminds me of cookie parties and the best cookie parties around here were hosted by my neighbor, Edith. Every year for more years than I can remember, she sent out cute invitations and invited a group of mothers whose children were usually friends and in the same grade level. Not everyone could come each year, but in later years it was sometimes the only time of year we gathered as a group. Edith organized secret pal exchanges and decorated her house in true holiday style. She made great meatballs and lots of finger food and we added potluck dishes. We brought plates with a half dozen cookies for each guest, usually about five dozen cookies total. We always played a silly game to pass the wrapped gifts around the circle. None of us will forget Mrs. Right.
None of us will forget Edith, either. She died this year in Utah, not having reached the age of 50. She had been ill, but it was still a shock. I'm glad that I can share her recipe for Persimmon Cookies with the blogosphere. I think she would have been pleased to be remembered with a cookie after all those great Christmas cookie parties.

Edith's Persimmon Cookies
1 cup shortening
1 cup persimmon pulp, from ripe persimmons
1 egg
1/4 cup molasses
2 1/2 cups all-purpose flour
1/2 teaspoon cinnamon
1/4 teaspoon nutmeg
1 teaspoon baking soda
1/2 teaspoon baking powder
1 cup golden raisins

Cream shortening and sugar. Add pulp, egg and molasses and mix well. On a sheet of waxed paper combine dry ingredients and mix. Add to pulp mixture and mix well to combine. Stir in raisins.
Drop a generous teaspoonfull for each cookie on a greased cookie sheet.
Bake in a pre-heated 325 degree F. oven for 10 minutes or until lightly golden. Makes about 4 dozen.


It's Amazing How Good My Kitchen Smells


Cookie Madness continues. Sugar and spice and apples and nuts. We move from the difficult to the super easy; drop cookies.
Today I'm making Applesauce Spice Cookies. The kitchen, actually the whole house, smells so good. Apple, cinnamon, cloves, nutmeg, nuts and raisin fragrances are everywhere as the cookies bake. These are a variation of the Pumpkin Cookie recipe from The Fannie Farmer Baking Book. I made some minor changes, as I usually do.

These are easy drop cookies with a soft, cakelike crumb and the toothsome appeal of chewy raisins and crunchy walnuts. The apple flavor is subtle and the spices are fully present. I use freshly ground nutmeg, so I use a little less than in the recipe. If you can, invest in some fresh baking spices at the beginning of Christmas baking season. It makes such a difference in the taste.

Applesauce Spice Cookies

1/2 cup (1 stick) butter, softened
1 cup brown sugar
1 egg
1 teaspoon vanilla extract
1 cup applesauce
2 teaspoons fresh lemon juice
2 cups flour
1 teaspoon baking soda
1/4 teaspoon salt
1 teaspoon cinnamon
1 teaspoon nutmeg (or 1/2 teaspoon freshly grated or ground nutmeg)
1 teaspoon ground cloves
1/2 cup chopped walnuts
1 cup raisins
Spice and Lemon Glaze (optional)

Preheat the oven to 350 degrees F.
Cream the butter and sugar together in a mixing bowl, then add the egg and vanilla and beat until light and fluffy. Beat in the applesauce and lemon juice.
On a sheet of waxed paper, stir together the flour, baking soda, salt, and spices. Add to the mixing bowl and beat until the dough is completely mixed. Stir in the nuts and raisins.
Drop by heaping teaspoonfuls about 1 inch apart onto greased cookie sheets. Bake for about 10 minutes, until lightly browned around the edges. Cookies spread a bit.
If desired, brush the cookies with the glaze while they are still hot, then transfer the cookies to racks to cool. Makes about 4 dozen cookies.

Spice and Lemon Glaze
Combine 1 cup confectioners sugar, 1 teaspoon lemon juice, 1/4 teaspoon cinnamon and 2 tablespoons water until well mixed. Brush or spoon over hot cookies. Hardens as cookies cool.


Christmas Cookie Madness


The flour canister, which usually hides behind the cabinet door, has been front and center on the counter for days. The stack of washed zesters, cookie cutters, measuring cups, measuring spoons, spatuala and other baking utensils grows ever larger as each kind of cookie is in the oven and clean up takes place. Cookie madness has taken over and I love it.

So far I've blogged Barbered Santas, Chocolate Shortbread Hearts and, a while back, Saucepan Fruit Bars. The latter are long gone and a new batch will be made soon for the cookie tins. The next cookie is one of my very favorites. I only make it once a year for Christmas because it takes time and patience, two items not always easily found the rest of the year. Actually it's hard to find time at this time of year, too, but I make the effort because these are fantastic.

Viennese Linzer Bar Cookies are another great cookie from cookie maven Maida Heatter. These are found in Maida Heatter's Book of Great Cookies, another cookbook to purchase if you don't own it already. This recipe only makes 24 fairly small bars, but they are rich with raspberry jam and almonds and butter, keep well (so they can be made far ahead of Christmas and still be yummy), and ship well. They are the classic Linzertorte transformed into bar cookies. I've made these with blanched almonds as the book suggests, but found that lightly toasted almonds with the skins on seem even better to me. It is a long recipe, but each step makes sense. Try these soon. They are that good.


Viennese Linzer Bar Cookies
1 1/2 cups, plus 2 tablespoons sifted all-purpose flour
1/2 teaspoon double-acting baking powder
1 teaspoon cinnamon
1/8 teaspoon powdered cloves
1/4 teaspoon salt
1/4 cup granulated sugar, divided
Finely grated rind of 1 large lemon
1/2 cup dark brown sugar, firmly packed
1/4 pound (1 stick) butter, chilled
2 1/2 oz. (1/2 cup) almonds, lightly toasted
1 egg
3/4 cup thick red or black raspberry preserves, seedless if possible

1) Adjust oven rack one-third up from the bottom and preheat to 375 degrees F.
2) Sift together 1 1/2 cups of the flour (reserve remaining 2 tablespoons), baking powder, cinnamon, cloves, salt, granulated sugar (minus 1 tablespoon), and lemon rind into a large mixing bowl. Add the brown sugar and stir to mix well.
3) Slice the butter into pieces. With a pastry blender, cut it into the dry ingredients until the mixture is fine and crumbly.
4) Grind the almonds and the reserved one tablespoon of sugar to a fine powder in a blender, or a food processor. (If you have a nut grinder, put all of the sugar into the flour spice mixture, not with the nuts.) Watch carefully and pulse so that the nuts stay powdery. Add the ground almonds to the dry ingredients and butter, and stir to mix well.
5) In a small bowl stir the egg lightly with a fork just to mix. Add the egg to the dough and, with a fork, stir well until the dry ingredients are evenly moistened. (I wash my hands and finish the mixing with them if needed.)Remove and reserve 3/4 cup of the dough.
6) Place the remaining dough in an unbuttered 9-inch square pan and set aside.
7)Replace the reserved 3/4 cup of dough in the mixing bowl. Add the reserved 2 tablespoons flour. Stir together (or mix with hands) until the flour is all incorporated. Form the dough into a flattened squaare and place between two large pieces of wax paper. With a rolling pin, roll over the wax paper to roll the dough into a 9-inch square, (or as close to a square as you can manage). Slide a cookie sheet under the paper and transfer the dought to the freeezer for a few minutes.

8) Flour your fingertips and press the dough that is in the pan to even it out on the bottom of the pan. In a small bowl, stir the preserves slightly just to soften. Spread them evenly over the layer of dough in the pan, keeping the preserves 1/4 to 1/3 inch away from the edges.
9) Remove the chilled dough from the freezer. Remove and replace one piece of waxed paper just to loosen it. Turn the dough and both pieces of wax paper over. Then remove and do not replace the other piece of paper. With a serrated knife, cut the dough into 1/2 inch wide strips; you will have 18 strips, each 1/2 inch wide and 9 or so inches long. Place half of the strips over the preserves, placing them 1./2 inch apart and parallel. Work carefully as dough strips are delicate. If they break, put the pieces in line and press ends together gently. Turn the pan and place the remaining 9 strips crosswise over the first ones, again placing them 1/2 inch apart. This forms a lattice top. If the strips become too soft to work with, rechill as necessary.
10) Bake for 30 minutes or until the top is a rich golden brown.
11) Cool completely in the pan, then use a small, sharp knife to cut around the pan to release the cake. Cut it into quarters, cut each quarter in half, then cut each strip into thirds. With a metal spatula, transfer the bars to a tray, serving plate, or storage tin, with waxed paper between the layers. You can cut them into smaller bars if you wish. You can also wrap each cookie in plastic wrap or waxed paper if desired.


Saturday, December 09, 2006

It's Beginning to Feel A Lot Like Cookies


With the return of colder weather, frost in the mornings made the grass crackle underfoot. The persimmons are finally ripening. The birds have found the first soft ones, but I'll get a few for baking, too. I have everything ready to bake, bake, bake. I love baking cookies, with the warmth from the oven and the seasonal smells of cinnamon, cloves and ginger. Now the frost is past for now, winter rains have begun, Christmas is coming, and it's time for me to bake cookies.

Before I get to the persimmon cookies I'm going to make some usual suspects from years past.

Chocolate Shortbread Hearts have been a family favorite for many years. The recipe is very close to the one in Maida Heatter's Book of Great Chocolate Desserts, 1980. If you don't have a copy and ever see one, buy it. There are many, many truly delicious chocolate recipes. She also does a superb job of explaining things, so that even recipes with lots of steps are not too challenging. I'm a chocolate addict, so you can imagine my delight in having more recipes than I'll likely ever make, all with chocolate.

These cookies are great for gift giving, which is why I'm making them right now. I'm going to be giving many tins of cookies for Christmas and I like to have a mix of flavors and textures in the selection. These cookies are buttery, very chocolate, crisp and dry. The flavor is so intense that no icing is needed. Use a good quality cocoa because the flavor of the cocoa is paramount. Dutch processed is best. I add some coffee flavor now and then because it really brings out the chocolate flavor.

Chocolate Shortbread Hearts
2 cups sifted all-purpose flour
1/2 cup strained unsweetened cocoa powder
1/2 teaspoon salt
A) On a sheet of waxed paper, mix these 3 ingredients together until well mixed.

1 cup (2 sticks) butter, softened
1 cup confectioners sugar
1 teaspoon vanilla extract
1 teaspoon coffee extract or 1 tablespoon espresso powder (optional)

B) Preheat oven to 300 degrees F. Adjust two racks to divide oven into thirds.
C) Cream the butter in a large mixer bowl. Add the confectioners sugar, vanilla, and coffee flavor or espresso powder and beat to mix. On low speed add the flour and cocoa mixture, scraping the bowl and beating only until the mixture holds together. If the dough is not smooth, place it on a board or smooth work surface and knead it briefly with the heel of your hand. Form the dough into a ball and flatten it slightly.
D) Flour a pastry cloth or board and rolling pin. Place the dough on the floured surface and turn to flour both sides. Roll the dough until it is 1/4 inch thick, or slightly thicker, with the same thickness all over. Re-flour rolling pin as needed while rolling out dough.
E) Dip a 1 1/2 inch or 2 inch heart shaped cookie cutter in flour, tap off excess. Cut the cookies as close to each other as possible. Place the cookies 1 inch apart on unbuttered cookie sheets. Gather scraps of dough together, knead once or twice, and re-roll, then cut more cookies. With skewer or tines of a fork, pierce cookies in a pattern. Bake 20 to 25 minutes until cookies are firm to the touch. Check often. These burn easily. Transfer to racks to cool. Makes about 3 dozen.


Tuesday, December 05, 2006

Good Home Cooking


The post lady came by yesterday with a good sized box. It's always fun to get mail and, even though I had requested a copy of The Good Home Cookbook, I had forgotten, so it was a nice, unexpected treat. Thank you Amy!

A browse through the cookbook shows that the recipes really are classics, many something that you would have found on the table in the mid-1950s. There are also casseroles that have graced pot lucks to this day, lots of basic breakfast things, including a number of variations on omlette fillings. Lunch sandwiches include the dependable Tuna Melt and Patty Melt, as well as the Hot Brown so popular for Derby Day weekends. Good directions, pretty standard pots and pans and spices make this a good cook book for novice cooks, too.

Although you don't find as many references to canned creamed soups as I found when I assembled old family favorites a decade ago, you'll still find frozen vegetables, bacon, cheese, butter and cream in use a bit more heavily than I generally do now.

The recipe I tried tonight, Chicken Picatta, was really good. Olive oil was used for sauteing the chicken. In the old days, this would have been butter or margarine. The combination of chicken, lemon, parsley, capers and butter was a hit with my Sweetie. He didn't even add soy sauce, which is a rare thing in our household. I think the capers helped.

Although the previous recipe, Chicken Parmesan suggested pasta and marinara sauce on the side, my recipe and a number of chicken recipes following had no suggestion for side dishes. I decided to go with fusilli pasta to catch the sauce, and steamed zucchini and carrots. I used a little of the chicken broth and lemon juice for steaming them, so their flavors went well with the chicken and pasta. I took the chicken breasts and butterflied them rather than pounding them. It worked fine. Otherwise, I followed the recipe as given, although I used canned broth.

I would recommend this book if you'd like a good compendium of classic recipes. The reason they are classic is they are still popular after many years and most of them are not too complicated to cook. The Chicken Piccata was delightful, the directions were clear and, once the prep work was done of preparing the breasts for sauteing, chopping the parsley and juicing the lemon, it went together fairly quickly. Check out the photo. Don't you want to just sit down and dig in? Thank you Richard J. Perry and The Good Home Cookbook Team.

Chicken Piccata
4 boneless, skinless chicken breast halves
1/2 cup all-purpose flour
Salt and pepper
3 tablespoons olive oil
3/4 cup chicken broth 3 tablespoons lemon juice
2 tablespoons chopped fresh parsley
1 tablespoon capers, drained
3 tablespoons butter

1. Trim the fat fromt he breasts and remove the white tendons running through the tenderloins. Place each breast between sheets of wax paper and gently pound witha meat mallet until less than 1/4 inch thick. Dust the chicken with the flour until well coated on all sides. Sprinkle with salt and pepper.

2. Heat the oil in a large skillet over medium-high heat until very hot but not smoking. Use tongs to add the chicken breasts ina single layer and saute for 3 to 4 minutes on each side, until firm. Remove to a serving platter and cover with aluminum foil to keep warm.

3. Add the broth and lemon juice to the pan. Cook, stirring with a wooden spoon to loosen all of the browned bits stuck to the pan. Bring to a boil and cook until the mixture is reduced to about 1/3 cup, 3 to 4 minutes. Stir in the parsley and capers. Season to taste with salt and pepper. Remove from the heat and whisk in the butter, 1 tablespoon at a time.

4. Pour the sauce over the chicken and serve immediately. Serves 4