Despite my best intentions to do a monthly post about the lovely books from Thomas Nelson Publishers, time has gotten away from me so it has been a while. This time I'm reviewing My Southern Food, A Celebration of the Flavors of the South.
You may not know it, but I grew up in Virginia, a true Southern state even if we lived in the northern part of it and were hence considered somewhat suspect by Virginians living further south. This wasn't snobbery exactly because northern Virginia had so many people from all over the world living the the Washington, D.C. area part of it that it was far more diverse than the rest of the state.
Later, after college, I traveled for business and pleasure in Virginia, Maryland, North Carolina, Georgia and West Virginia, plus a few states north of the Mason-Dixon line, so I had the opportunity to get to know some lovely Southerners. My favorite bread pudding recipe was given to me by Gail in Frederick, Maryland. Brings to mind Barbara Fritchie...if you don't recognize the name it might be fun to Google it.
My Dad grew up all over the South so my Mom learned how to cook Southern to please him. We had black -eye peas and cabbage with corn bread, hush puppies to go with our fried fish, cole slaw to top our Carolina style pulled pork sandwiches, and so much more. This book captures the flavors and sensibilities of good Southern food, from iced tea and that Southern staple grits to Red Velvet Cake and sweet Pralines. My grandmother taught us how to make Pralines and reading the recipe brought back fond memories.
The only downside is that there are few photos of the results of the recipes. I don't find that to be a hindrance since the cookbooks of my younger days rarely had photos, but I know that some bloggers are so used to photos being a big part of a post that I felt I should mention it. That said, the book is graphically beautiful. For instance on page 100 there is a darling photo of a young girl near a cranked ice cream maker, grinning in anticipation. The recipe on the next page for Vanilla Ice Cream may not show the actual ice cream, but the cute photo really adds to the quality of waiting for freshly churned ice cream...and really makes you want to create some home made ice cream right away!
The recipe I'm showcasing is one I've never made myself, although I've certainly consumed more than my share of 'em at potlucks. This is a super sweet cookie which is almost candy and goes by the name of Hello Dolly Bars.
I'm not sure where the name came from, but the cookbook author tells us that her mother made these every Christmas. They are amazingly easy, especially if you have a box of graham cracker crumbs on hand as I did (purchased for a cheesecake that never was made...but that's another story) and some pecans in the 'fridge and coconut and chocolate chips in the baking section of the pantry. I did have to purchase the sweetened condensed milk because I rarely use it but once I had that the bars went together quickly...they took longer to bake than to assemble.
Hello Dolly Bars
1 1/2 sticks butter
1 1/2 cups graham cracker crumbs (the recipe calls for 1 1/4 cups but Sweetie like graham crackers, so I added an extra 1/4 cup)
2 cups semisweet chocolate chips
1 cup flaked coconut
1 cup chopped pecans
1 (14 oz.) can sweetened condensed milk
Preheat the oven to 350 degrees F. Melt the butter and pour into a bowl. Blend in the graham cracker crumbs and pat into the bottom of a 13 x 9-inch glass baking dish to form a crust. Layer the chocolate chips evenly across the crust, followed by the coconut, then the pecans. Drizzle the condensed milk over everything, but do not mix or stir. Bake for 25 minutes on the center rack of your oven. When done the pecans will just be stating to brown a little. Remove from the oven and cool before cutting into bars. Makes 2 dozen bars.
Just like last time, Katherine at Thomas Nelson Publishers has offered to give away three copies of this great book.
You can also purchase it online or request it in your bookstore. The author is Devon O'Day, with a forward by Faith Ford , published in 2010. You're going to want a copy so that you discover the mysteries of PBR Bread and Cider House Ham among other great recipes. By the way, although I did recieve a courtesy copy of the cookbook to review it, I've not recieved, nor will I, any financial or other consideration for reviewing this book and I'm free to say whatever I like about it.
To be eligible for the random drawing, just leave a comment. The comment link can be found at the bottom of this post. I'll need an e-mail adress so that I can notify you if you are a winner and get your mailing address to give to the publisher. They mail the cookbook directly to you.
Better practice saying "y'all" for when you serve some of My Southern Food's delicious dishes.
Monday, May 30, 2011
Sunday, May 29, 2011
Buddies Bake Stromboli
A big 'Thank you!' to all the bakers who joined the Bread Baking Babes around the kitchen table this month and baked Stromboli. Some experienced the lava-like eruption of melted cheese, some changed it up by changing the fillings and shape. Everyone's loaves, long or short or in between looked so delicious that I wanted a slice when I read each post.
Here, in the order I received their e-mails, are the Buddies for May. Each of them received a Buddy Badge which they can display with their post and on their blog.
Connie
Heather
Kydoime
Ana
Kelly
Michelle
Judy
Please visit the blogs (you can click on the name of the blogger to take you there) and make a nice comment..blogger love it when you comment, especially favorably. Check back in Mid-June to see what the next challenge recipe it...and maybe you'll be a baking Buddy next month!
Sunday, May 22, 2011
May Cake Slice Is Orange and Caramel and Almonds
I missed last month's Cake Slice Bakers altogether and am late this month, mostly due to travels. This cake sounded soooo good that I had to make it late or not.
This is a fairly simple cake, single layer, orange flavored and the topping is a yummy delight with toasted almonds, honey and caramel dripping down the sides when I removed it from the pan. We ate our slices while warm and enjoyed the orange fragrance (I tripled the amount of orange zest) and the moist, delicate crumb of the cake.
The topping is a bit heavy for the texture of the cake but it is very fine topping. I added some tiny clumps of orange zest all over the top of the topping once the almonds were on top of the sticky stuff. I think that helped tie the orange flavor in the cake with the orange flavor in the topping. Bet this topping will show up on some yeasted sticky buns one day. Since we vote each month to choose the cake, I want to thank everyone who voted for this delicious cake!
Do use a deep pan so that the batter doesn't overflow. I used a 2 inch deep 9 inch round cake pan and the batter rose a tiny bit above the rim. The batter goes together quickly and it only takes about 35 minutes to bake. You can have the whole thing begun and on the table in about an hour. Sweetie went back for a second piece and he doesn't generally enjoy cake, so you might want to try it yourself.
In case you are one of the readers who want to know what Sweetie and I are up to, we started demolition today on the summer project. Since I usually love to make things I don't know what the appeal is about tearing buildings apart, but I really love to wield the crowbar. Sweetie removed the ledger board we were concerned about and, indeed, there is dry rot aplenty. Looks like our 'small' project will take most of the summer. At least we are working on the north side of the house this time, so it is a bit cooler and shady. Besides we can stop every now and then and enjoy the view. The garden roses are in their spectacular first bloom of the year, the veggies are all growing about as well as normal and this year I have daises which have overwintered, plus two poppy plants that self seeded. It will be fun to see what colors they have.
Back to cake! DO visit the other Cake Slice Bakers if you haven't already. The ones I've seen have been wonderful. Check back on the 20th of June (I plan to be on time despite the project) to see what cake comes next, OK? Also, my camera is still in the mail so these photos were taken with an iPhone (thanks Sweetie!) and I'm not terribly good taking photos with it, but they do show that there were LOTS of almonds in the topping.
Orange Almond Caramel Upside-Down Cake
Recipe from Cake Keeper Cakes by Lauren Chattman)
Makes one 9 inch round cake
Ingredients – Topping
1 cup sliced almonds
6 tbsp (3/4 stick) unsalted butter
2/3 cup packed light brown sugar
¼ cup honey
For the Cake
1½ cups unbleached all purpose flour
1 tsp baking powder
½ tsp baking soda
¼ tsp salt
½ cup sour cream
2 large eggs
¼ cup orange juice
1 tsp vanilla extract
½ cup (1 stick) unsalted butter
¾ cup granulated sugar
1 tbsp grated orange zest (I used the zest of one large orange...1 tablespoon scattered in clumps over the topping once the almond were on, and the rest, about 2 tablespoons, in the batter.)
Method - Topping
Heat the oven to 350F. Grease a 9 inch round non stick cake pan and line the base with parchment paper. Dust with flour.
Spread the nuts on a baking tray and toast until golden, 8 to 10 minutes. Heat the butter in a medium saucepan over medium heat until foaming. Whisk in the brown sugar, turn the heat to low, and cook, whisking constantly, for 2 minutes. Scrape the mixture into the prepared pan and smooth with a spatula. Drizzle over the honey and scatter over the toasted nuts. If using, scatter tiny clumps of orange zest over the almonds.
Method - Cake
Combine the flour, baking powder, baking soda and salt in a medium mixing bowl. Combine the sour cream, eggs, orange juice and vanilla in a glass measuring cup and beat lightly.
Combine the butter and granulated sugar in a large mixing bowl and cream with an electric mixer on medium high speed until fluffy, about 3 minutes, scraping down the sides of the bowl once or twice. Stir in the orange zest.
With the mixer on medium-low speed, pour the egg mixture into the bowl in a slow stream, stopping the mixer once or twice to scrape down the sides.
Turn the mixer to low speed and add the flour mixture, ½ cup at a time, scraping down the sides of the bowl after each addition. Then mix of 30 seconds on medium speed.
Pour the batter over the almonds, gently spreading it into an even layer.
Bake until the cake is golden and a toothpick inserted into the centre comes out clean, 35 to 40 minutes. Transfer the pan to a wire rack and let stand for 5 minutes.
Holding the pan and a plate together firmly with oven mitts, invert the hot cake onto the plate. Peel away the parchment paper. If necessary, replace any almonds stuck to the base of the pan. Let the cake cool for 20 minutes and serve warm or at room temperature.
Store uneaten cake in a cake keeper or wrap and store at room temperature for up to 2 days.
Labels:
almonds
,
brown sugar
,
butter
,
Cake Slice Bakers
,
oranges
Thursday, May 19, 2011
Cheesey Potato Casserole
Have returned from the East coast where I had fun with my Mom and Sweetie, helped Mom with some organization in the sewing room, enjoyed face time with Next Sister Down and lots of family time at our Mothers' Day celebration, the wedding weekend, and the days following it back in Virginia.
By the way, I guess I was so immersed in good feelings that I stopped being careful. I left my camera in Virginia, so subsequent posts will have bad photos for a while. The one at the top was taken with a phone camera. Sorry.
Each time I spend time with the family members I'm reminded again how fortunate I am to be one of them even if now and then I find it hard to believe that I'm inside the circle of love and not outside looking in. With a few exceptions, I seem to lean further toward the intuitive and less toward the logical than my relatives. I often don't 'get' the humor but I sure enjoy watching the fun and joining in the laughter, not because I got the joke but because I love the merriment. It is never all sweetness and roses in families...we all know each other too well...but spending time with loved ones is often the most satisfying of times, ones I am grateful for.
By the way, I guess I was so immersed in good feelings that I stopped being careful. I left my camera in Virginia, so subsequent posts will have bad photos for a while. The one at the top was taken with a phone camera. Sorry.
One of the fun things about visiting my Mom is that there is usually at least one recipe made that I want to keep for making later at home.
This casserole is one that Mom says she always gets requests for, especially when it is pot luck time, so bookmark it if you do lots of pot luck events. We had it as part of a ham dinner for a mid-week celebration of Mothers Day...who says you have to celebrate it on Sunday, other than Hallmark?
This is not low-cal food, but it is delicious and a bit decadent, but also easy. Like the recipe that follows, it uses sour cream. You can choose to use full fat or low fat sour cream and it might even work to use Greek yogurt instead of the sour cream. We used light sour cream for both recipes.
The potato casserole uses frozen hash brown potatoes, grated cheddar cheese, chopped onions and some condensed cream of mushroom soup (although you could use cream of celery instead). It serves a crowd and is fairly addictive. People kept going back for 'just one more spoonful' until the dish was pretty much gone.
Potato Casserole
1 bag frozen hash brown potatoes, thawed
1 can cream of mushroom (or cream of celery or cream of chicken) soup, low sodium if possible
1/2 stick butter, melted and cooled
1 -16 oz. container sour cream or light sour cream
1 cup chopped onions
2 cups (8 oz.) grated cheddar (reduced fat is fine as long as it is extra sharp cheddar)
salt and pepper to taste
Set hash browns out to thaw beforehand, if possible. Preheat the oven to 375 degree F.
In a large mixing bowl mix the soup, melted butter and sour cream until thoroughly blended. Add the chopped onions, all the cheese except for 1/2 cup, and the hash browns, plus salt and pepper to taste, and mix thoroughly.
Put mixture into a greased 9-inch x 13-inch baking pan. Sprinkle the 1/2 cup cheese on top. Bake in preheated 375 degree F oven for about 1 hour, until bubbly and nicely browned on top.
Serves 8 - 10 people.
Monday, May 16, 2011
Bread Baking Babes May Stromboli
There are entirely too many bread books and blogs with bread recipes...or not enough. One of my favorites is Carol Field's The Italian Baker. I was thinking of having the Babes bake her very complicated Panettone con Dotteri e Noci, a recipe that has intrigued me for a while. Once I realized that it is a laminated dough and that April and May can be too hot for laminated dough, I looked elsewhere for May's bread.
I'm inviting ya'll to gather round the kitchen table in May of the Bread Baking Babes 4th year and bake Stromboli. It's still Italian and should be delicious! It's getting to be picnic time, or will be by the time this bread gets posted, so I hope you'll enjoy it. The challenge for me with this one is to roll it up so that the whole thing doesn't unravel when sliced, a problem I've encountered with cinnamon breads.
The dough itself is pretty basic but maybe that's OK because we can enjoy the product as much as the process this way.
I found the recipe at Girlichef's blog. Heather has been a buddy in the past and this recipe was part of her celebration when she conquered her fear of yeast. If you go to her blog you can see the nice tight slices I hope for and look at that gorgeous sea salt and rosemary on top to say nothing of the filling. Bet this bread would go well with a glass of a hearty red wine. Join me?
Here is the link to Girlichef's post. I used her photo, too, but will post my own once I get back home to my own computer in a couple of days. I brought a thumb drive with me on vacation, but it seems to be lost. It had the post I was going to do for this challenge and the photos, too.
I do hope that you, dear reader, will be a Buddy this month. Just bake this lovely bread by June 26th and send me an e-mail (plachman at sonic dot net) with a link so that you can be included in the round-up at the end of May.
In that spirit, I'm sending this over to Susan at Wild Yeast for Yeastspotting, the weekly yeasted bread extravaganza. Be sure to go there after this Friday for this week's entries.
Also, be sure to check out the other Bread Baking Babes' blogs to see what they have done with this yummy and fairly easy bread. The links are to the right on the sidebar. Picnic anyone?
XO Elle
P.S. After baking it myself, have added weights for most of the ingredients...in italics after the measured ingredient.
Stromboli
adapted from Ultimate Bread by Eric Treuille & Ursula Ferrigno
Ingredients:
2 tsp. dry yeast (1 packet dry yeast...I used fast acting) (7 grams)
1 ¼ c. water (268 grams)
3 ½ c. unbleached flour (470 grams)
1 ½ tsp. salt (11 grams)
3 Tbs. olive oil (38 grams)
For the filling and topping:
8 oz. smoked swiss cheese (226 grams)
3 cloves garlic, minced 8 oz. Prosciutto, sliced thin (226 grams)
4 oz. pepperoni, sliced thin (113 grams)
Handful of fresh basil leaves
~1 tsp. coarse salt
3 sprigs rosemary, stems removed
~1 tsp. freshly ground black pepper
Sprinkle yeast into 1 c. of the water, in small bowl. Leave for 5 minutes to then stir to dissolve.
Mix the flour and salt in a large bowl. Make a well in center and pour in dissolved yeast and the oil. Mix in flour from sides of well. Stir in reserved water, as needed, to form a soft, sticky dough.
Turn dough out onto a lightly floured surface. Knead until smooth, silky, and elastic...~10 mins. Pour dough in a clean, oiled bowl and cover with clean kitchen towel. Let rise until doubled in size, 1 1/2-2 hours.
Punch down and chafe* for 5 minutes. Let rest 10 minutes.
Shape into a 14" x 8" rectangle. Cover w/ clean towel and let rest another 10 minutes.
Spread your cheeses, meats, garlic and basil evenly over dough. (You can use your own combination of meats and cheeses, or roasted veggies and garlic or whatever you like for filling.) Roll up the dough like a swiss roll, starting at one of the shorter sides, but without rolling too tightly.
Place on oiled baking sheet. Use a skewer or a carving fork to pierce several holes through the dough to the baking sheet. Sprinkle with 1 Tbs. of olive oil, salt, rosemary and pepper.
Labels:
baking
,
baking bread
,
Bread Baking Babes
,
Strombolli
Wednesday, May 04, 2011
Strawberry Season
The ripe, red berries of late spring, strawberries!, are the perfect jumping off point for Mothers' Day desserts (and breakfasts).
Top of my list when strawberries are finally here locally is strawberry shortcake. When I was young, my Dad made a special effort to have good strawberries to treat Mom on Mothers' Day since it is one of her favorites, too. We usually had a vanilla sponge cake with the berries and whipped cream, but I like scones for my version.
This time I took the classic Cream Scone recipe found in Dorie Greenspan's Baking: from my home to yours book and changed it up a bit. I added a bit of almond extract and substituted some almond flour (meal) for some of the all-purpose flour. I also substituted some cake flour for some of the all-purpose flour for a more delicate scone. Unfortunately I was so focused on getting the proportions of the all-purpose, cake and almond flours right that I neglected to add the baking powder and sugar to the dry ingredients, although I did remember the salt. Fortunately I caught my mistake while mixing in the wet ingredients, so I sprinkled some baking powder over the partially mixed dough so that it got stirred in with the liquid ingredients and kneading. To help with the lack of sugar I sprinkled sanding sugar on top of each wedge once it was on the baking sheet.
Since these scones will be served with sweetened sliced berries and sweetened whipped cream I suspect that the lack of sugar will not even be noticed. When you make 'em don't follow my example...follow the recipe.
Almond Cream Scones
Cream Scones enriched with both almond flour and almond extract
a variation of two recipes in Dorie Greenspan's Baking: from my home to yours
"Perfect for every scone-able occasion"
1 large egg
2/3 cup cold heavy cream
1/8 teaspoon almond extract
1 cup all-purpose flour
1/2 cup cake flour
1/2 cup almond flour
(or grind 1/2 cup blanched almonds and the following sugar in a food processor until finely ground)
2 tablespoons sugar
1 tablespoon baking powder
1/4 teaspoon salt
5 tablespoons unsalted butter, cut into small pieces and chilled
Center a rack in the oven and preheat the oven to 400 degrees F. Line a baking sheet with parchment or a silicone mat.
Stir the egg, cream and almond extract together. Set aside.
Whisk the flour, cake flour, almond flour, sugar, baking powder and salt together in a large bowl. Drop in the butter and, using your fingers, toss to coat the pieces of butter with flour. Quickly, working with your fingertips or a pastry blender, cut and rub the butter into the dry ingredients until the mixture is pebbly. You'll have pea-size pieces, pieces the size of oatmeal flakes and pieces the size of everything in between...and that is just right.
Pour the egg and cream over the dry ingredients and stir with a fork just until the dough, which will be wet and sticky, comes together. Don't overdo it. Still in the bowl, gently knead the dough by hand, or turn it with a rubber spatula 8 to 10 times.
Lightly dust a work surface with flour and turn out the dough. Divide it in half. Working with one piece at a time, pat the dough into a rough circle that's about 5 inches in diameter, cut it into 6 wedges and place it on the baking sheet. (at this point, the scones can b e frozen on the baking sheet, then wrapped airtight. Don't defrost before baking - just add about 2 minutes to the baking time.)
Bake the scones for 20 -22 minutes, or until their tops are golden and firmish.
Transfer them to a rack and cool for 10 minutes before serving, or wait for them to cool to room temperature.
Every now and then I take a look back at some of the past posts I've done. Changing seasons are a natural for retrospect. It turns out that I have a lot of strawberry related recipes so I'll give you some, including the link. Some suggestions for using strawberries beyond strawberry shortcakes are Strawberry Mirror Cake if you want a show-stopping dessert that really showcases the beauty of the berries,
Berry Good Ice Cream Cake Roll which uses berries and cake for an ice cream roll that is great when it gets hot, as it sometimes does for Mothers' Day,
Brown Sugar Bundt Cake with Strawberries which can be made ahead since the berries keep the cake moist and luscious,
Rhubarb Strawberry Streamed Pudding for the perfect spring combination of strawberries and rhubarb,
Strawberry Rhubarb Pound Cake which would be lovely for a Mothers' Day tea party,
Strawberry Topped Cheesecake, another impressive showy dessert that is sure to please,
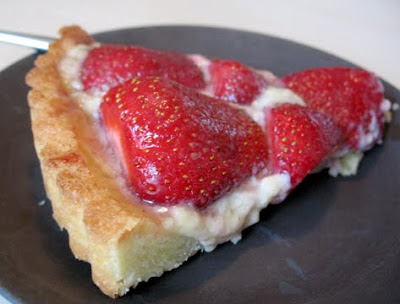
Strawberry Tart if you are more of a tart person than a cheesecake person,
and a simple but sweet dessert, Fresh Strawberries Dipped in Chocolate. Yum!
You can have a great breakfast in bed for Mom with a nice bowl of Strawberries with Yogurt and Lemon Zest,
or even Crispy Overnight Waffles to pile high with sliced fresh strawberries.
California Strawberry Scones can be the perfect treat for breakfast or tea time and are really easy, too.
Dinner can include strawberries if you make Strawberry Chicken Salad for your Mom.
There are lots and lots of things to do with the seasonal wonder of strawberries. Just be sure to enjoy them now because soon all that will be available will be woody, tasteless 'strawberries' that your mother would tell you to just leave at the market.
Happy Mothers' Day to all you Moms, Grandmothers, Great-Grandmothers and to all of them who are with us in spirit if not in fact! I'll be away from my computer on Mothers' Day so I'm getting a jump on the holiday...and giving you some ideas for ways to celebrate with strawberries, too.
Sunday, May 01, 2011
Spring Thanks
It's May! It's May! the lusty month of May!
And finally we are getting sunshine and warmer weather. Sweetie's SF sister generously gave me some lovely bulbs. Due to the injured knee they went into the ground later than usual, but have now put forth cheerful, delightful blooms. First were the tiny white narcissus that have at least two and sometimes three flowers per stalk. They start out with a pale yellow glow but turn pure white in time.
Just yesterday the first of the daffodils arrived and I love its pale apricot trumpet and pure white petals. A big 'Thank You' to her. Flowers and May just seem to go hand in hand, don't they.
We also bought the first local strawberries of the season, which will get eaten neat. Sorry, no recipes right now because they need no adornment they are so perfect as is. Later there will surely be strawberry recipes and probably rhubarb recipes, cherry recipes and so on as the season unfolds. Happy May dear reader!
Subscribe to:
Posts
(
Atom
)