Starting something new is always a little scary...exciting, but scary. That holds true for bread baking, too. It's double if the bread is made with yeast. It's too easy to end up with a doorstop instead of the desired lovely, light, delectable loaf. This month our wonderful Kitchen of the Month, Kelly of A Messy Kitchen chose a recipe for an approachable loaf...one that isn't too hard, doesn't have a million ingredients, and, if all goes well, let's you have a nice loaf of wheat bread that makes great toast and sandwiches and French toast...you get the idea.
So the first thing that you do...and don't freak out...is you make a starter of sorts. That means that you take flour, water, and a little yeast and mix it together a day or two before you want to make that loaf of bread. This does two things: it gets you going and committed to making the loaf, and it allows for extra flavor as that mixture sits (part of the time in the fridge) and the yeasties get busy.
The recipe we were given assumes that you have a sourdough starter. I don't, but if you make this starter a few days in advance, it works just as well.
So one thing to remember is that you can't kill those yeasties with cold, but you can kill them with too much heat. Use barely warm water when you are making the starter and when you are making the loaf dough. You will need a warm place for the loaf to rise, but you don't do real heat until it goes into the oven. Another tip: knead a lot. I suppose you can knead too much, but if you are doing it by hand that is unlikely to happen because your muscles will complain before you over knead. The kneading creates these long elastic-like strands that help the loaf to rise in the oven. If you have kneaded enough, your dough in this recipe will feel very smooth.
So follow the recipe as given below. The top one uses my version of the starter (levain) and the one below it is the one we were given, which uses a sourdough starter. If you don't have access to Edison flour or a good white whole wheat flour, use regular whole wheat flour...it will be fine, just a bit darker.
Have fun with this. Allow the dough enough time to rise. Oh, by the way, you are in charge of the rising timing. I made my dough early in the morning, did the first 90 minutes with the fold half way through, then lightly oiled the top of the dough (I used a spray olive oil), put a clean shower cap over the bowl and put the whole thing in the fridge. About three hours before I wanted to serve it, I took the dough out, shaped it and put it in the greased loaf pan. By the time it rose and I baked it, it was just in time for dinner. If you want to make the dough one day and bake it the next day, no problem...just leave the covered dough in the fridge overnight. Remember...cold doesn't kill yeast. You do need warmth for rising, but cold allows you to bake when it works for you!
If you do bake this lovely bread and want to be a Buddy, simply email Kelly by the end of August to be included in the round-up and get a Buddy Badge. Include your URL and a photo for her for the round-up.
Be sure to visit the other Bread Baking Babes, too, to see what they have done with this great bread!
The Approachable Loaf - My Variation
from the WSU bread lab
Levain:
60g flour ~½ cup (I used all purpose)
60g water~½ cup + 1 tsp
dry yeast ~¾ tsp (I use RapidRise)
30g flour ~1/4 cup (I used all purpose)
27g water~1/4 cup
Final dough:
290g white whole wheat flour ~2¼ cups (I used King Arthur Baking White Whole Wheat Flour)
247g water ~1 cup + 1 tbsp + 1¾ tsp
7g sea salt ~1 tsp sea salt
2.4g yeast ~¾ tsp + tiny pinch
23g honey ~ 1 tbsp
17g olive oil ~1tbsp + 1 tsp
80g levain ~generous ⅓ cup (Add the rest back to your starter) (If you use all the levain, add another 50g or more flour to the final dough)
Levain:
A few nights before baking, mix levain ingredients until well incorporated. Cover and let rest 12-15 hours at room temperature. After that, cover and put into the refrigerator for a couple of days. The morning you plan on baking, remove from the fridge, uncover, add a mixture of 1/4 cup all-purpose flour and 1/4 cup water and mix well. Let sit, uncovered for a couple of hours. You will have more than is required for the final dough.
Final Dough:
Add all ingredients to the bowl of a stand mixer, holding back about 10% water. Mix on low for a few minutes to combine. Increase speed to medium low and knead until the gluten begins to develop some stretch, about 5 minutes. Slowly add in the remaining water and knead for another 5 minutes until the dough is well developed.
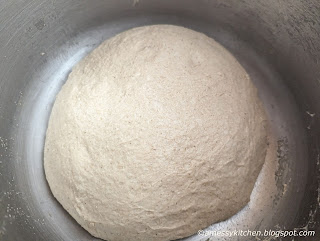
Let the dough proof for about 90 minutes, folding after 45 minutes by bringing up the sides to the center all the way around.
 |
After a fold.
|
 |
After rising a bit.
|
Shape into a loaf and place in a greased 8x4" loaf pan.
Let rise for 60-90 minutes until the dough has doubled and/or risen above the edge of the pan by about ¾-1".
Score if desired.
Preheat oven to 425°F. Load the bread and reduce the temperature to 375°F. Bake for 40-45 minutes. (If browning too quickly, lower to 350°F.)
Remove to wire rack to cool for 10 minutes, then remove from pan to finish cooling. Slice when completely cool.
The Approachable Loaf - Original Recipe
from the WSU bread lab
Levain:
60g flour ~½ cup (I used all purpose)
60g water~½ cup + 1 tsp
2g starter ~¾ tsp
Final dough:
290g white whole wheat flour ~2¼ cups (I used fresh ground Edison and reground the sifted bran a few times)
247g water ~1 cup + 1 tbsp + 1¾ tsp
7g sea salt ~1 tsp sea salt
2.4g yeast ~¾ tsp + tiny pinch
23g honey ~ 1 tbsp
17g olive oil ~1tbsp + 1 tsp
80g levain ~generous ⅓ cup (Add the rest back to your starter) (If you use all the levain, add another 50g flour to the final dough)
Levain:
The night before baking, mix levain ingredients until well incorporated. Cover and let rest 12-15 hours at room temperature. You will have more than is required for the final dough.
 |
Flexible: this was pushing 18 hours.
|
Final Dough:
Add all ingredients to the bowl of a stand mixer, holding back about 10% water. Mix on low for a few minutes to combine. Increase speed to medium low and knead until the gluten begins to develop some stretch, about 5 minutes. Slowly add in the remaining water and knead for another 5 minutes until the dough is well developed.
Let the dough proof for about 90 minutes, folding after 45 minutes by bringing up the sides to the center all the way around.
|
After a fold.
|
|
After rising a bit.
|
Shape into a loaf and place in a greased 8x4" loaf pan.
Let rise for 60-90 minutes until the dough has doubled and/or risen above the edge of the pan by about ¾-1".
Score if desired.
Preheat oven to 425°F. Load the bread and reduce the temperature to 375°F. Bake for 40-45 minutes. (If browning too quickly, lower to 350°F.)
Remove to wire rack to cool for 10 minutes, then remove from pan to finish cooling. Slice when completely cool.


