Friday, October 24, 2014

Second Mural


Went through some of my recent posts and saw that I had a whole post about the mural in the baking center and nothing about the mural in the main kitchen. An oversight, I assure you.

The mural in the main kitchen takes me to the beach, one of my favorite places to visit and spend some time. On the far left, near the fridge, we climb the dunes. There is a sliver of ocean visible to make the climb more enticing. To the right is a swath of dune grasses, with another path up through them. At the bottom of the path, just waiting to head up to the top, is a black Lab. We have had a few black Lab dogs over the years, so it could be any one of them. Further to the right we look out to the beach and far to the right you can just see some headlands poking out into the bay. I discovered that painting water, especially as it washes up on shore, is very difficult. It took some experimentation to get it right. I also decided that painting over the switches for the lights and the outlet covers was better than leaving them white, even though that was also not the easiest thing to do.

What I find interesting is that originally the mural was planned with the dune climb on the left and the beach on the right only. In between, on the wall behind the stove and below the stove hood, there was going to be a sheet of stainless steel. It would have looked great, but Sweetie convinced me that the mural needed to go all the way across. What was I supposed to put in that huge space? At first I was just going to add some more dune grass and dune, but that seemed boring. Then I had the idea to add the dog and suddenly it all seemed like a good idea.

The challenge was to paint that middle section so that it looked like it belonged with the other two sections which were already painted. I no longer had the paint color I had mixed for the ocean, so this dune had to be higher, with no ocean showing at the top. Mixing the colors for the dune grasses was a bit of a challenge, but I managed. Painting the dog was harder than I had thought it would be. I ended up painting the legs at least twice. Still, it was worth it and so now I can go to the beach any time I'm facing that wall as I cook. It adds character to the kitchen that is unique and delightful.

Here is the progression:

Background painted in, left and right:


The first layer over that sketches in the design in broad areas of color:


 The area in between will be behind the stove. I painted well past the area that will be seen once the cabinets are in because I think it will strengthen the design in the end.

The next layer builds up the details in sky, water and land. I used the paint samples that I had thought might work for the walls, so it was wall paint. Acrylic paints were added as needed.


The next layer really adds detail. There are shadows, you can really see the surf washing up on the beach and the colors have been deepened so it resembles Sonoma County beaches instead of the white sands of the Caribbean. At this point I'm thinking of keeping the switch plate and outlet covers white.


At this point the cabinet installer came and began their work, so I took a break. Sweetie convinced me to consider painting the middle section behind the stove. I had planned to have the stove back splash be stainless steel, running up the wall to the stove hood. The dilemma was how to fill in the middle. I was afraid that lots more dune grass would be boring. Once Sweetie suggested painting in a dog I was able to see how I might tie the right and left sides together.


First we had to finish up the wall behind the stove area and paint it with drywall paint and then the gold color. Then I started as usual with the base color.We took care not to get paint on our nice, new cabinets. If you look closely, you'll see that I decided to paint over the switch and outlet covers and blend them into the painting. It was a good decision.


Then I followed pretty much the same layers as with the right and left sides. I made sure that the sky was the same, but made sure that there was no ocean for the middle because I had thrown out the old ocean paint from the two side areas and wasn't convinced that I could match them. Lots of dune and grass instead.


Some of the colors from painting the right and left side dunes were still available and some had to be mixed again, but since the dune grass has lots of colors in it, I wasn't worried that it would look OK.


Finally the dog was added and all the details were right. Everything was given a couple coats of clear urethane to protect the painting and allow for scrubbing. After all, a kitchen is for cooking, so that means splatters sometimes!


So here is a photo of the kitchen with the mural all finished. I enjoy it every day and hope that you enjoyed this post about how it all came together.


Thursday, October 23, 2014

Winter Squash Season Side Dish


Time just seems to be flying these days! Found something I think that you will want to try yourself. About a month ago Sweetie and I were at Costco and they had tastings of some new products, all Afghan recipes. I sometimes think that a raft of people only go to Costco on the weekends for the samples, not to actually buy anything. Is that possible?

Anyhoo, we fell in love with a butternut squash side dish that was savory, with a hint of sweetness and a touch of heat. Sweetie decided that we should try making it ourselves, so I researched online and found about six different ways to make it. One of the constants was onion puree. I usually chop or mince my onions for most dishes, but for this one I put the peeled and quartered yellow onion into the food processor and let it run until it was a puree. I found that the cooked puree not only flavored the squash, but it seemed to thicken the sauce a bit, or at least provide body to the sauce.

I ended up combining a few of the recipes. Most had a goodly amount of peppers for heat, but since I was going for the very mild heat that I prefer, I used a small amount of cayenne pepper. If you like your food hotter, you can add jalapenos or increase the cayenne. They often had more turmeric, too. I know that turmeric is good for you , but it is not my favorite flavor, so I used only a teaspoon, while some recipes used as much as a tablespoon. Try it with a smaller amount unless you know that you love turmeric. You can always add more.

One of the most time consuming parts of this kind of recipe is preparing the butternut squash. Sweetie got past that by buying already peeled and cubes fresh squash. Beyond that the part that requires some time is that during the cooking you need to turn the squash over in the sauce every 10 minutes and to keep an eye on it so that the sauce cooks down, but doesn't burn.

This makes a lovely side dish. Traditionally it is served with naan flatbread and yogurt, usually garlic yogurt, but I served it with grilled chicken and the yogurt topping was plain yogurt. The chunks of butternut squash were tender, but not falling apart. They had an aroma of turmeric and onion and tomato. Now that it is winter squash season, give this a try, either as part of a traditional meal, with some eggplant, too, or as a side dish. It would go well with pork or heaped over a serving of couscous with pine nuts. You can substitute another kind of squash, like kabocha, or pumpkin, too.


Afghan Squash

1 large yellow onion
1/4 olive oil
1 clove minced garlic
1 tablespoon tomato paste
1 teaspoon turmeric
1 tablespoon minced fresh ginger
1/4 cup sugar
1/2 salt
1 1/2 - 2 cups chicken broth
4 cups peeled, de-seeded, and cubed butternut squash or pumpkin

Peel the onion and remove the stem end and the tip. Cut onion into four pieces. Place in the work bowl of a food processor fitted with the steel blade. Process until pureed, scraping down the sides as needed so that all the onion is a puree. In a large skillet cook the onion puree in the olive oil for 10 minutes, stirring often. All of the squash will need to go into the skillet, preferably in a single layer, so make sure the skillet is large enough.

To the cooked onion add the garlic, tomato paste, turmeric (you can add more if you like...I've seen as much as a tablespoon used), minced fresh ginger, sugar and salt. Stir to combine, then add the chicken broth and stir to completely combine all the ingredients in the mixture. Bring mixture to a boil, then reduce heat so mixture simmers. Add the prepared squash and stir to coat the squash with the mixture. As mush as possible, keep the squash in a single layer. Simmer for 10 minutes. Turn squash over so that top surface goes toward the bottom and is immersed in the sauce. Simmer another 10 minutes. Check squash for tenderness. You want the squash completely tender, but still holding together. Simmer another 5 or 10 minutes (or longer) if needed until squash is tender. Sauce will have thickens a bit. If squash is very tender, but sauce is too thin, remove squash with a slotted spoon, cover to keep warm, then simmer sauce some more until it is desired thickness. Put squash back into sauce and stir to coat with sauce. Serve at once, garnished with yogurt, or cover and refrigerate, then reheat the next day.


Speaking of time passing, we are just about a month away from Thanksgiving. Our neighbors have invited us for dinner and I think this year we will be enjoying a heritage turkey. It might be one of these blue faced toms. I snapped these shots as they tried to intimidate the dog. She is a sheep dog, but was having fun herding the chickens and turkeys, too.

Thursday, October 16, 2014

Bread Baking Babes Get Stuffed for October


It's the 16th again...time for the Bread Baking Babes to reveal the October bread. This month we were treated by Katie of Thyme for Cooking, our Kitchen of the Month, to a savory stuffed bread.This was a sticky dough at first, but fine by the time I was rolling it out.Of course that may have been because I stored it overnight after the dough had it's first rise. I let it come to room temperature and rise a little more, then turned it out on a floured board and shaped it. It smells heavenly with the herbs, but the herbs were barely tasted in the final bread. 

I admit that part of the situation may be because I used a different onion filling. Thinly sliced onions are mixed with honey, white wine, and bacon drippings, then caramelized. When you make the bread, you put ricotta cheese in the center third, then the onions, then crumbled bacon. It is a wonderful filling, but it may have overpowered the other flavors in the bread. I still want to thank Katie for choosing this savory stuffed bread. It sure did get eaten fast and it made a very pretty braid. It was also filling, so cut small pieces. The original recipe can be found on Katie's site. The filling recipe I used is here.


If you'd like to bake this bread and be a Buddy, bake it by the 29th and let Katie know by e-mail about your experience with this bread and be sure to send a photo for the roundup. Further instructions should be on her blog.


Be sure to visit the other Babes because you can be sure that many of them will make a wonderful savory braid and there may be a few surprises along the way.

Bake My Day - Karen, Blog From OUR Kitchen - Elizabeth, Bread Experience - Cathy, Girlichef - Heather, Life's a Feast - Jaime, Living in the Kitchen with Puppies - Natashya, Lucullian Delights - Ilva, My Diverse Kitchen - Aparna, My Kitchen in Half Cups - Tanna, Notitie van Lien - Lien

Friday, October 10, 2014

Apples and Raisins Liven Bread Pudding


I love a good bread pudding. There is something comforting about the combination of sweet custard and old bread, cooked so the custard infuses and surrounds the bread with creamy delight while the top browns to a nice crisp crunchy crustiness. My traditional recipe marries the custard with lemon and adds a bit of fruit to the mix with raisins. The recipe was given to me in ancient days (1971) by a friend who used dark cherries as the fruit of choice. She said her bread pudding was always the first thing to go at church suppers.

Since it is wonderful autumn and since apples are seasonal right now, I decided to use up some stale French bread by making Apple Raisin Cinnamon Bread Pudding, based on that old recipe. I kept the lemon zest in the custard mixture and I think that made it even better. A good dose of Penzey's cinnamon and a grating of fresh nutmeg kept the fall theme going. I used Golden Delicious apples, which keep their shape and are mellow in flavor. I didn't peel them, but you could if you prefer. For milk I used whole milk because I had enough, but I often use nonfat evaporated milk and it is delicious and a bit healthier.

Sweetie served us extra large portions for dessert and then I had a much smaller portion for lunch today.  I think it may have been even better than last night. Of course that may have been because I had just finished painting the new laundry room wall with the drywall primer, so I was eating over an hour later than usual.

If you try this without the lemon could you let me know how you like it that way? Do try this. It is easy, delicious, and a great way to pretend that you are a thrifty French housewife, using up the stale bread. Bon apetit!


Bread Pudding with Apples and Raisins and Cinnamon      
A recipe from 1971, from a Fredricksburg, Maryland friend, Gale 

4 cups dry bread cubes          1/4 teaspoon salt           
3 cups milk, scalded               1/4 teaspoon freshly grated nutmeg
1 tablespoon butter                1/2 teaspoon cinnamon
4 slightly beaten eggs            1 teaspoon vanilla
3/4 cup sugar                         1 cup fresh apple, cut into small chunks (peel or not - I didn't)
½ teaspoon lemon zest          1/4 cup raisins                        
                       
1) Preheat oven to 350 degrees.

2) Melt the butter in the milk. Add a little of the milk to the beaten eggs, then add eggs to rest of milk. Stir in the sugar, lemon zest, salt, nutmeg, cinnamon and vanilla.

3) Put the bread cubes in a large bowl. Pour the egg/milk mixture over, stir gently, and let sit 15 minutes.

4) Butter a large baking pan. A deep one will give a softer center, a shallower one will give more crispy crust. Gently stir apples and raisins into bread mixture and pour into baking pan.


5) Bake in a pan of hot water until firm, about 1 hour. Serve warm.

Wednesday, October 08, 2014

Plenty of Peppers - Stuffed


It must be October in Northern California. We have had a string of days where the temperature was well above 90 degrees. So much for fall baking! A week or so ago when it was cooler I made stuffed peppers for dinner and just realized that I never posted the recipe or photos.

The red peppers were beautiful...large, meaty and very fresh. I bought them at the farm stand that was also selling the last of the strawberries, plus lots of melon, tomatoes, beans and squash. The yellow pepper came from a friend's CSA box. It was thinner skinned but delicious, too. The lamb is so local that its from sheep who kept our grass down early this spring, another gift from our great-hearted neighbors.

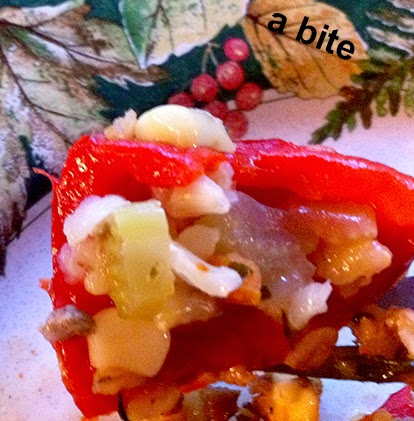
The filling started with sauteed onion, carrot and celery. To that I added both cooked brown rice and fresh corn, cut from the cob, plus some salty feta cheese. A robust flavor was added by using browned ground lamb, fresh rosemary, minced garlic, and dried thyme. I moistened the mixture with a little chicken broth I had in the fridge. It made a wonderful filling for the peppers, bringing out the peppers sweetness and warm flavors. I put the filling that wouldn't fit in the peppers into a greased baking dish and cooked it along with the peppers. It made an outstanding lunch for Sweetie the next day.

He could really use a satisfying lunch because this was just about the time that we had discovered the results of a small, long-term leak in one of our pipes. It has taken almost two weeks to do the repair, but on Friday I should be able to paint the new drywall. After that we can install the last of the new flooring and take a break from construction for a while.

Maybe we'll get cool weather to turn the leaves autumn colors. That's a wonderful time to take a ride in the country and check out all the gold and red and burgundy leaves. Of course what we really want is rain. Wishing for a very rainy winter, but I do hope you get to enjoy fall color if you live where there is some.


Lamb Stuffed Peppers
Serves 4

4 medium to large bell peppers (I like red and yellow and orange, but green is OK, too)
1 tablespoon olive or grapeseed oil
1 medium onion, peeled and chopped
1-2 stalks celery, chopped
1 small carrot, sliced into thin coins
1 pound ground lamb, browned and drained
1 1/2 cups cooked and cooled brown rice
1 ear corn, steamed 5 minutes, then cooled; corn cut from cob
1/4 cup feta cheese, in small crumble
2 teaspoons fresh rosemary, chopped
2 cloves fresh garlic, finely minced
1 teaspoon dried thyme
S & P
1/4 - 1/2 cup chicken broth
about 1/8 teaspoon cayenne pepper, or to taste

Wash the peppers and remove the stem end and the core, plus all the seeds. Cut in half. (I like to cut from the stem to the bottom, but some people like to cut through the middle and set the stem end as a bottom. Make sure that the halves are not tippy. Cut off a bit of the outside of the pepper if needed. Set peppers aside.

In a skillet, saute the onion, celery and carrot in the grapeseed oil. Cook, over medium-high heat, stirring often, until onion is transluscent, about 5 minutes. Turn mixture into a large bowl and add the cooked lamb, cooked rice, corn, feta, chopped rosemary, chopped garlic, and dried thyme. If desired, add salt and pepper to taste. Add enough chicken broth to moisten the mixture.

Line a baking sheet with foil or parchment, or a silicon baking mat. Arrange the pepper halves on the pan. Stuff each half with the lamb mixture, mounding in the center. Sprinkle with a touch of cayenne pepper. If there is left over stuffing mixture, place in a greased small baking dish to bake along with the peppers.

Bake in a preheated 350 degree F oven for about 20 minutes. Peppers will be softened and stuffing mixture will be hot and a little browned.

Serve at once. Refrigerate any leftovers, or baked leftover stuffing mixture.