Showing posts with label rosemary. Show all posts

Saturday, December 16, 2023

A Bread To Love


This is going to be my last Bread Baking Babes bread for a while, because I find that I don't make bread much anymore and Sweetie has no willpower to not eat fresh bread and is happy I'm baking less. Better for our waistlines, too. I'll still be blogging and checking on the 16th of each month to see what the others have been up to...and you should too.

The good news is that I'm Kitchen of the Month for December 2023 and I chose a wonderful bread - Fougasse. This one is often called Leaf Bread, too, because the bread is shaped like a large leaf (or Christmas tree!) and you cut the leaf veins so that this sort of flat bread looks like a leaf and tears or breaks apart for sharing very easily.

I made two versions of fougasse for this challenge. The first, which ended up being shaped similar to a Christmas Tree, was with chopped rosemary and topped with more rosemary and with sea salt. It makes your house smell delicious as it bakes and is quite tasty.

The second fougasse was shaped like a verrrry wide square-ish leaf and was flavored with both chopped walnuts and crumbles of blue cheese. That made a nice combination and went well with our bean soup. That's the photo at the top. You can see that it's an unusual shape for a leaf...and that the blue cheese melted and ran, which made it taste even better, I assure you.

The recipe given makes enough dough for 4 fougasse of about 450 grams each. Before you decide to cut the recipe in half or quarters, remember that if your fridge has room, this dough can sit in your fridge for many days, getting a better flavor each day, so you can bake the four loaves over a week or so and have lots of fresh, delicious, fragrant bread.

Fougasse is pretty flat but it should be fairly fluffy inside but it does have a lot of thin crustiness because of the cuts that create the veins. 


If you bake along with us and want to be a Buddy, be sure and email me your URL and a photo and a short description of your bake and I'll send you a Buddy badge. You have until Dec. 29th to get that to me at plachman -at-sonic-dot-net.

Be sure to check out the bakes that the other Babes have done, too. We have a very creative and supportive group and I will miss the monthly bakes and especially the bakers!

I forgot to mention that this bread makes a great gift, too...which is handy as it is gift giving season.

Let's think about baking this...You can use sourdough starter or dry yeast, you can flavor it with rosemary and sea salt...my favorite...but you could use other seasonings like oregano, basil, lemongrass...or use seeds like poppy seeds or sesame seeds to enhance the bread. Consider adding cheese, like a good strong blue cheese, and maybe some walnut pieces. Maybe you would like citrus zest added, or perhaps olives.

Let's see what you come up with. The basics of the challenge are to make a leaf shaped, slashed bread, preferably with the recipe(s) below, but you decide the shape, flavorings, and if you will use sourdough starter or not.


Fougasse with Rosemary and Sea Salt

Preferment:
1/4 teaspoon active dry yeast
2 cups lukewarm water (not hot), divided
2 cups bread flour, divided


Mix together 1/4 teaspoon active dry yeast, 1 cup lukewarm water and 1 cup bread flour in a bowl. Cover lightly and let sit for 1 hour. Add an additional 1 cup lukewarm water and add additional cup bread flour and mix until all new ingredients are incorporated. Let sit for at least an hour for flavor (or refrigerate overnight, then bring to room temperature).

Dough
all of Preferment
4 tablespoons olive oil, divided
1 cup water, divided
1/4 teaspoon active dry yeast
4 - 5.5 cups unbleached bread flour
2 teaspoons salt
2-3 tablespoons olive oil from brushing
1-2 tablespoons chopped fresh rosemary
1/2 - 1 tablespoon fresh rosemary for top of dough
1-2 tablespoons sea salt for sprinkling

In the bowl of a stand mixer place the Preferment.  Add 3 tablespoons of the olive oil and mix briefly just until the oil is mixed in.

Make sure the water for the dough is lukewarm, not hot. Take 1/4 cup of it and add the dry yeast in a small bowl. Let sit 5 minutes until foamy.

Add the rehydrated yeast, the rest of the warm water, and about half the flour (2 cups) to the mixture in the stand mixer bowl. Mix with the paddle.

Switch to the dough hook. On slow speed add the remaining flour, a half cup or so at a time, adding only a few tablespoons at a time toward the end. The dough will be soft. Add the salt and then knead with the dough hook on low to medium low speed for about 6 minutes, until the dough cleans the sides of the bowl and is smooth. If necessary, add up to an additional cup flour so that dough is soft but firm. Turn kneaded dough out on a lightly floured board or counter and knead a few turns to make sure all flour is incorporated.

Form the dough into a ball. With the remaining tablespoon olive oil, oil a large bowl and turn the dough ball in the oil to coat. Cover with oiled plastic wrap or a clean shower cap and place in a warm place and let rise until doubled in bulk. This usually takes a couple of hours but check often. Dough is ready when a finger poked into the dough leave an indent that stays.

Shaping: About an hour before baking the fougasse, punch dough down, and turn the dough out onto a lightly floured board. Knead a few times to get rid of the extra trapped gas. Divide it into four pieces weighing about the same. Take one of the pieces and knead in the chopped fresh rosemary, then press it out into a leaf shape. Use your clean hands to press it to about 10-11-inches on a side and about 1/2 - 1-inch high. Wet hands if necessary, so that dough doesn't stick. (I shaped it into a tall triangle.)

Place the shaped dough onto a piece of baking parchment which has been placed on a baking sheet. Using a bench scraper or stiff plastic scraper or something similar, cut into the dough to make leaf 'veins' - see photo at top of post. Use your fingers to gently spread out the dough to open up the cuts. Keep the leaf shape. Repeat if desired with the other pieces of dough, making four leaves, which can be flavored differently if desired, or store rest of dough, covered, in fridge, until ready to use.

Cover with lightly oiled plastic wrap, oiled side down, and let rise for about 30 minutes. Leaf will get puffy. If holes close up, gently open them again with your fingers after removing the plastic wrap.

While leaf is rising, preheat the oven to 425 degrees F. If you have a pizza stone, put it in to preheat too.

Use a pastry brush to lightly brush the surface of the leaf with olive oil, then sprinkle with some fresh rosemary and sea salt.

Bake in the preheated oven for 15-20 minutes until dark golden brown. Remove from oven, cool a bit on a wire rack after having removed it from pan and parchment. Serve while still warm, breaking off pieces of the leaf, or cutting into portions.

Don't care for rosemary and sea salt? Just replace those with your favorite enhancements.

or, for Sourdough:


Sourdough Fougasse
2 cups 100% hydration sourdough starter
4 tablespoons olive oil, divided
1 cup water, divided
1/4 teaspoon active dry yeast
4 - 5.5 cups unbleached bread flour
2 teaspoons salt
additions like cheese, nuts, herbs, citrus peels, olives, etc.

In the bowl of a stand mixer place the sourdough starter. Add 3 tablespoons of the olive oil and mix briefly with the paddle attachment just until the oil is mixed in.

Make sure the water is lukewarm. Take 1/4 cup of it and add the dry yeast. Let sit 5 minutes until foamy.

Add the yeast, the rest of the warm water, and about half the flour. Mix with the paddle.

Switch to the dough hook. On slow speed add the flour, a half cup or so at a time, adding only a few tablespoons at a time toward the end. The dough will be soft. Add the salt and then knead with the dough hook on low to medium low speed for about 6 minutes, until the dough cleans the sides of the bowl and is smooth. Turn out on a lightly floured board or counter and knead in most of the rosemary, leaving about a teaspoon for the top.

Form the dough into a ball. Oil a large bowl (not metal) and turn the dough ball in the oil to coat. Cover with plastic wrap and place in a warm place and let rise until doubled in bulk. It took mine four hours, but even my 'warm' place wasn't as warm as it should have been.

Punch dough down, turn out of the bowl onto a lightly floured surface, knead a few times to get rid of the extra trapped gas.

Use the Instructions for Shaping and Baking in the recipe above.

Elizabeth gave us the recipe to include weights. I'm a complete fool when it comes to conversions, but I think Elizabeth knows what she is doing. Thank you Elizabeth!

FOUGASSE WITH ROSEMARY AND SEA SALT
(for 4 fougasses)

PREFERMENT
1/4 teaspoon active dry yeast [0.75 grams]
2 cups lukewarm water (not hot), divided [480 grams?]
2 cups bread flour, divided [240 grams]

DOUGH
all of Preferment [720 grams?]
4 tablespoons olive oil, divided [50 grams]
1 cup water, divided [240 grams]
1/4 teaspoon active dry yeast [0.75 grams]
4 - 5.5 cups unbleached bread flour [480-660 grams]
2 teaspoons salt [12 grams]

TOPPING
2-3 tablespoons olive oil from brushing
1-2 tablespoons chopped rosemary
1-2 tablespoons sea salt for sprinkling

SOURDOUGH VERSION:
2 cups 100% hydration sourdough starter [720??? grams]
4 tablespoons olive oil, divided [50 grams]
1 cup water, divided [240 grams]
[strike]1/4 teaspoon active dry yeast[/strike]
4 - 5.5 cups unbleached bread flour [480-660 grams]
2 teaspoons salt [12 grams]
additions like cheese, nuts, herbs, citrus peels, olives, etc.
~~~~~~~~~~~~~~~~~~

If I were going to make a wild version, I think I might be a bad BBBabe and try following this previous wild yeast one I made, but leave out the poppy seeds:
https://etherwork.net/blog/wild-fougasse-with-poppy-seeds/.

Karen converted the starter, flour and salt for half the original recipe to grams. Thank you Karen!
1 cup starter = 227 to 241 grams
2 to 2 3/4 cups flour = 240 to 330 grams (I used 260 grams)
1 teaspoon table salt = 6 gram

Cathy of Bread Experience has a great post which includes instructions and photos for shaping, as well as a delicious spelt and asiago cheese version!

Wednesday, May 27, 2020

Lots of Bread Flour So Fougasse


My favorite neighbor ordered a super sized bag of Sir Lancelot flour from King Arthur Flours. Since the smaller sizes of flour were out of stock, he figured that we could share and we did. He is most generous. This particular bread flour has wheat flour, unbleached, but also barley flour. It's a great bread flour, so I wanted to make bread as soon as he brought the bag over and left it on the porch.

He made bagels. I made fougasse, a leaf shaped bread that is a bit like focaccia. My original plan had been to knead in some chopped walnuts in half the bread dough, and knead in chopped mixed herbs into the other half of the dough, but I ended up just using a pastry brush to brush the top of each lightly with olive oil and then sprinkling on chopped fresh rosemary and then a sprinkle of coarse sea salt. Sweetie loved it that way!


This recipe makes four leaves, each about 10 inches on a side. Since the shape is a rough triangle, that gives you some idea of the size. I baked mine on parchment which was set on 12-inch pizza pans and that worked very well. You can also shape on parchment on a larger pan. You can shape it on parchment on a pizza peel, or, by adding some cornmeal under the dough to allow the dough to roll onto a pizza stone, shape it right on the peel. If not using a pan, bake on a preheated pizza stone.

I gave one loaf to a favorite relative for his birthday, and one loaf to the neighbor who gave me the lovely bread flour. Sweetie and I ate most of the first one on the day it was made, as part of our dinner. Our second one was baked four or five days later and enjoyed with a meal, too. Although this bread is delicious all by itself, it is also great dipped into a mixture of olive oil and good balsamic vinegar. Sort of gilding the lily, but so good.

You can bake the four loaves over time, or bake them all at once. I was using my toaster oven, so each baked by itself and two during each baking session seems right, but if you are using a full oven you may be able to bake all four at once. Just be sure to switch the pans out halfway through baking time...putting those on the top rack down and moving those on the lower rack up.

It's been pretty hot here for the last few days, so no baking going on at the moment, but I did enjoy local strawberries for the first time for breakfast. Stay safe and healthy dear reader.


 Fougasse with Rosemary and Sea Salt
Preferment:
1/4 teaspoon active dry yeast
2 cups lukewarm water (not hot), divided
2 cups bread flour, divided

Mix together 1/4 teaspoon active dry yeast, 1 cup lukewarm water and 1 cup bread flour in a bowl. Cover lightly and let sit for 1 hour. Add an additional 1 cup lukewarm water and and additional cup bread flour and mix until all new ingredients are incorporated. Let sit for at least an hour for flavor (or refrigerate overnight, then bring to room temperature).

Dough
all of Preferment
4 tablespoons olive oil, divided
1 cup water, divided
1/4 teaspoon active dry yeast
4 - 5.5 cups unbleached bread flour
2 teaspoons salt
2-3 tablespoons olive oil from brushing
1-2 tablespoons chopped rosemary
1-2 tablespoons sea salt for sprinkling

In the bowl of a stand mixer place the Preferment.  Add 3 tablespoons of the olive oil and mix briefly just until the oil is mixed in.

Make sure the water for the dough is lukewarm, not hot. Take 1/4 cup of it and add the dry yeast in a small bowl. Let sit 5 minutes until foamy.

Add the rehydrated yeast, the rest of the warm water, and about half the flour (2 cups) to the mixture in the stand mixer bowl. Mix with the paddle.

Switch to the dough hook. On slow speed add the remaining flour, a half cup or so at a time, adding only a few tablespoons at a time toward the end. The dough will be soft. Add the salt and then knead with the dough hook on low to medium low speed for about 6 minutes, until the dough cleans the sides of the bowl and is smooth. If necessary, add up to an additional cup flour so that dough is soft but firm. Turn kneaded dough out on a lightly floured board or counter and knead a few turn to make sure all flour is incorporated.

Form the dough into a ball. With the remaining tablespoon olive oil, oil a large bowl  and turn the dough ball in the oil to coat. Cover with oiled plastic wrap or a clean shower cap and place in a warm place and let rise until doubled in bulk. This usually takes a couple of hours, but check often. Dough is ready when a finger poked into the dough leave an indent that stays.

Shaping: About an hour before baking the fougasse, punch dough down, and turn the dough out onto a lightly floured board. Knead a few time to get rid of the extra trapped gas, and divide it into four pieces weighing about the same. Take one of the pieces and press it out into a leaf shape. Use your clean hands to press it to about 10-11-inches on a side and about 1/2 - 1-inch high. Wet hands if necessary so that dough doesn't stick. (I shaped it into a tall triangle.)

Place the shaped dough onto a piece of baking parchment which has been placed on a baking sheet. Using a bench scraper or stiff plastic scraper or something similar, cut into the dough to make leaf 'veins' - see photo at top of post. Use your fingers to gently spread out the dough to open up the cuts. Keep the leaf shape. Repeat if desired with the other pieces of dough, making four leaves, or store rest of dough, covered, in fridge, until ready to use.

Cover with lightly oiled plastic wrap, oiled side down, and let rise for about 30 minutes. Leaf will get puffy. If holes close up, gently open them again with your fingers after removing the plastic wrap.

While leaf is rising, preheat the oven to 425 degrees F. If you have a pizza stone, put it in to preheat too.

Use a pastry brush to lightly brush the surface of the leaf with olive oil, then sprinkle with rosemary and sea salt.

Bake in the preheated oven for 15-20 minutes until dark golden brown. Remove from oven, cool a bit on a wire rack after having removed it from pan and parchment. Serve while still warm, breaking off pieces of the leaf, or cutting into portions.

 To make focaccia instead of fougasse, follow this link

Tuesday, July 16, 2019

Rosemary For Remembrance - Again


Five years ago I baked a lovely rosemary bread, Panmarino, for the July Bread Baking Babes challenge and this month I made it again (photo above), but made only 1/4 of the recipe and shaped it as a baguette. Our challenge this month (with no Kitchen of the Month to choose something new) is to choose one of the July breads from years past and bake it. Since both Sweetie and I are eating less bread these days for our health, a fraction of the recipe seemed like a good idea. As is often the case, my timing was flawed, so we had our first bites at a little after 10 p.m. I decided that I like this bread best with a small amount of olive oil on top of the slice and a few grains of sea salt added.

July is always a month for remembrance for me and Sweetie, and rosemary is the traditional herb for remembrance...at least according to Shakespeare. Tomorrow is the 20th anniversary of our son's fatal accident. In 20 years we have learned how to live without him and how to live with each other and with what the days bring, but a day doesn't go by without our remembering him in some way...no rosemary needed.

Still, with a huge rosemary shrub on the property, it's easy to enjoy recipes using fresh rosemary and this bread is a winner. I used some sourdough starter in addition to the pinch of yeast in the biga. I let it sit longer than the recipe called for (overnight and then some), so I used 40 grams of the flour and the water, mixed together, to add to the biga for an additional hour and then I followed the recipe to make the dough and then the bread. I think that the added time, plus the sourdough starter, gave the finished bread a wonderful depth of flavor.

Use good quality olive oil for the dough and be generous with the fresh rosemary. Your kitchen is going to smell wonderful while this bread bakes!


Be sure to visit the other Babes to see which July bread they've made. If you want to be a Buddy, I guess you send an email to the Babe whose bread you make. If it's mine, send me an email at elle dot lachman at gmail dot com and include a photo of your bread and a short description of your baking experience. You have until the 29th of July and I'll try and send you a Buddy Badge, if there is one.

We have quite a few Babes who are sitting out the bread baking right now, for various reasons. We do have a Kitchen of the Month for next month and I know that the Babes who are baking right now are enthusiastic about it, so join in if you like. You might discover a recipe that becomes a standard for you!

Panmarino (Note: I made 1/4 of this recipe for one loaf)
Makes: 4 Loaves  Original Panmarino created in Ferrara near Venice

Biga (which I made exactly as described):
Bread flour 143 grams/  5 ounces
Water 122 grams/  4 1/4 ounces
Pinch of instant yeast

Final Dough:
Bread flour 884 grams/  1 pound 15 ounces
Water 487 grams/  2 cups
Milk 2 ounces/ 1/4 cup
Biga 265 grams/  9 1/3 ounces
Salt 1/2 ounce/ 2 teaspoons
1 teaspoon instant yeast
Olive oil 88 grams/  3 ounces
Chopped fresh rosemary 9 grams/  1/3 ounce


Preparing the Biga:
Combine the bread flour, water and yeast in a large mixing bowl. Stir with a wooden spoon until well blended.  Scrape down the edge of the bowl, cover with plastic wrap, and let it rest at 75 degrees F. for 14 to 16 hours.

Making the Final Dough:
In the bowl of a stand mixer, combine the water, milk, and biga. Using the dough hook, mix on low speed until blended.

Add the salt and yeast to the bread flour in a bowl and whisk to combine. Add bread flour mixture a cup at a time and mix on low speed until incorporated, then add more. When about half the flour is added, add the olive oil, mix with the dough hook to combine, then continue to add the flour mixture. You may need to add by tablespoonfuls at the end. Mix with dough hook on low for 5 minutes.  Increase the speed to medium and mix for about 7 more minutes, or until the dough is smooth.

Lightly oil a large bowl. Scrape the dough into the bowl and cover with plastic wrap. Let the dough ferment for 45 minutes.

Remove the dough to a lightly-floured work surface and knead in the fresh rosemary. Divide the dough into four 450-gram /16-ounce pieces (or divide into three pieces to shape as desired, as I did). Shape the dough pieces into rounds. Cover with plastic wrap and let them bench rest for 15 minutes.

Place two couches on a separate work surface or bread board and dust them with flour.

Uncover the dough and, if necessary, lightly flour the work surface. Gently press on the dough to degas and carefully shape each piece into a tight and neat rounds (or into rolls or loaves, as I did. I also shaped my round loaf in a heavily floured brotform).  Place one loaf on one side of the couche, fold the couche up to make a double layer of cloth to serve as a divider between the loaves, and place a second loaf next to the fold.  Repeat the process with the remaining two loaves and the second couche.  Cover with plastic wrap and proof for 1 hour.

About an hour before you plan to bake the loaves, place a baking stone (or tiles) into the oven along with a steam pan (underneath) or iron skillet (on the top rack) and preheat the oven to 450 degrees F.

Uncover the dough and score the top of each loaf in a star pattern using a lame or sharp knife. This particular formula doesn't say to do this, but you can sprinkle sea salt into the crevices as the original baker did to make it "sparkle with diamonds."

Carefully transfer the loaves to the preheated baking stone using a peel or the back of a baking sheet. To make the steam, add 1 cup of ice to the iron skillet or steam pan.

Bake for 40 minutes, or until the crust is light brown and crisp and the loaves make a hollow sound when tapped on the bottom.

Remove the loaves from the oven and transfer to a wire rack to cool.

Thursday, November 22, 2018

Happy Thanksgiving


I wish each of you and your families a most Happy Thanksgiving. I'm very grateful for your loyal reading of this blog over the years and for the feedback and comments, too. May God bless you, each and every one.

Rosemary is for remembrance. Let's remember those who have played a role in our lives but who have gone, either through distance or death, and be grateful for those who were a blessing to us.


This photo shows my Mom,two younger sisters, me, my older sister & brother & my paternal grandmother. We are gathered around the Thanksgiving table. Earlier the three oldest children had walked around to Mrs, Goff's home where grandmother had her residence. We had escorted her to our house. Along the way we sang The Grandfather clock song, stopping when the song said that the clock stopped when the old man died. Sort of a grim song for a day of thanksgiving,  but we liked that song. It was a good 'marching' song.

After dinner we would walk her back or Dad would drive her home, depending on how late it was.

Today we are making our own memories. The pecan pie was out of the oven & the turkey was in by 8 am! Pi dog is really loving being here with us in SoCal instead of being left at home. I brought a bottle of Iron Horse Gratitude champagne to drink at dinner with the appetizers. There is more Sonoma Co wine for dinner itself. I suspect by the time we get to coffee & pie we will be very grateful, stuffed, and merry!

Friday, March 09, 2018

Lamb Shanks Savory Delight


I've had lamb shanks at restaurants, the last time being in Avignon in France, but have never made them myself...at least not that I can remember. Turns out that they are an easy braise and a savory delight. The key things are to brown the shanks very well before braising, and to start the dish early enough that you can allow it a nice, slow braise in the oven for tender meat.

So, what is braising, you may ask? It is slow cooking of something with additional liquid added. Pot roast is a well known example.

Sweetie and I provide pasture for lambs for our neighbors each year. As a thank you they usually give us some lamb. I was going through the freezer a week or so ago and noticed that they had given us a beautiful lamb shank, almost two pounds in size. This is the perfect size for a dinner for two. Although you can probably get lamb shanks that are boned by the butcher, for this braise a shank with the bone is best.

A quick review of online recipes revealed that you brown the shank, brown aromatics like onion, garlic, carrot and celery, then cook all of those with a liquid, often wine, and with aromatic herbs like rosemary and thyme. I also added a pinch of dried orange peel, a trick from Julia Child.

This was a most delicious meal. I served the shanks in low, wide soup bowls with cooked yukon gold potatoes, smashed, and with cooked peas. I sprinkled gremolata on top to add a bring note and spooned on some of the delicious broth and vegetables. It was the perfect dish for a chilly winter evening. Try it yourself and see!

For those who are keeping track of what I am up to beyond food, a couple of days ago I was rear ended shortly before noon. The good news is that, other than some muscle soreness on my right side, I am fine. I was pretty shaken up and very sore yesterday, but rest and fluids, some movement and stretching, and chiropractic and ice and some ibuprofen have helped. The poor car will take some time to repair but in the meantime I scored a nice rental SUV. Thanks to everyone who expressed their concern. Although sometimes injury doesn't show up right away, as far as I can tell I'll be fine.
Sweetie was, as always, a rock and I'm sure I would have fallen to pieces without him. I'm a blessed and lucky woman!


Lamb Shanks with Red Wine and Herbs
Serves 2

2 one pound lamb shanks or one two pound shank
salt and pepper to taste
2 tablespoons olive oil
1 large carrot, diced
2 stalks celery, diced
1 medium onion, diced
2 cloves garlic, peeled and minced
2 cups red wine
1 3/4 cups chicken broth
1 15oz. can diced tomatoes and juice
2 teaspoons fresh rosemary, chopped
1 teaspoon dried thyme
1/8 teaspoon dried, crushed orange peel

Preheat oven to 325 degrees F.

Rinse lamb shank(s) and dry thoroughly. Season with salt and pepper. Set aside.

Heat olive oil in heavy oven-proof covered dutch oven or similar large pot. Brown lamb on all sides. Remove to plate. Saute carrot, celery, onion and garlic in same pot, stirring often, until onion is translucent, about 5 minutes.

Add wine to the pot and stir to deglaze pan. Return the lamb to the pot, add the chicken broth, tomatoes and juice, herbs and orange peel. Cover pot and place in preheated oven. Cook for one and a half (1 1/2) hours, then turn pot 180 degrees and cook in oven at same temperature another one to one and a half hours, until meat is tender and falling off the bone.

Serve at once, with generous portions of the juices and vegetables in the broth. If desired, top with gremolata.

Gremolata
1 clove garlic, minced fine
lemon zest from one lemon
1 tablespoon finely chopped flat leaf parsley

Combine all ingredients. Sprinkle over cooked meats, poultry or veggies that need a flavor lift.

Tuesday, January 16, 2018

A Tartine Polenta Bread for the Babes


Seems like a long time since I've posted, but until the day before yesterday I've not been cooking or baking anything that warrants posting...boring! That has changed!!

Fortunately, Elizabeth of 'blog from OUR  Kitchen', the Bread Baking Babes Kitchen of the Month, chose a Tartine bread for our enjoyment. Tartine is an artisan bakery in San Francisco. They make slow-rise natural yeast breads with attention being paid to the crust and to a soft, moist, somewhat holey interior (think Swiss cheese). The extra holes are created by both using a high-hydration dough (lots of water) and careful handling so that air from the expanding yeasts is retained in the dough during shaping.


I was fortunate to find a copy of the Tartine Bread book at the library. It has many, many photos to help with understanding the methods described so well by Chad Robertson. The polenta version, which is what we made, adds toasted pumpkin seeds, soaked polenta, oil, and fresh rosemary to the basic recipe. It is a wonderful bread and smells delicious, but the taste is what takes it over the top. I highly recommend that you get a copy of the book and make this bread.


The thing to know is that this is a bread that takes time. Time to create the leaven, time to let the dough sit after water and flour and salt are mixed, time to combine the additions of the seeds, polenta, oil and herb, time to do the bulk fermentation, time to let the slightly shaped dough sit, time to let the shaped dough sit in the basket or brotform, and, finally, time to bake it, both with and without the cover. The good news is that most of the steps don't take much time on their own. You go to the dough, wet your hand, do the turns in a minute or less, and you are good to go on with other things for a half hour...this is during bulk fermentation.


I started with my own sourdough starter to make the leavener. I also used the recipe directly from the Tartine Bread book, not the one below, although they are almost identical. It makes two large loaves. Due to unforeseen circumstances, the leavener sat in the fridge for a few days until I had a day free to take the time needed to finish the dough. Even so, I only baked one bread loaf and finished that at 10 pm. Mostly that was poor planning. If I had done everything up to the brotform stage and then put it all in the fridge overnight, I could have baked two loaves the next day. Of course part of the reason I did it the way I did was because even in the rising stage, the rosemary called my name and I wanted to bake it right away. The good news is that because I baked it late at night, by the morning it was very slicable and I made an outstanding avocado toast with smoked salmon tartine for breakfast. (A tartine is an open faced sandwich on toasted artisan bread.)


I didn't read the instructions at first and made the basic dough with only 600 gm water instead of 750 gm, so it was a tight, dry dough (remember, this is the full two-loaf recipe). While Sweetie and I took the dog for a walk, that dough sat in the fridge and the polenta sat in it's boiling water and soaked. Since I shorted the water at the beginning, I kept all of the water used to soak the polenta (200 gm) and added 1/4 cup additional whole wheat flour when I added the polenta, seeds, oil and rosemary to the original dough. Once it was all squeezed together, it made a dough that felt right and, indeed, it turned out right, too.

For the first loaf I used a basket with a tea towel liberally spread with a mixture of flour and rice flour. That ended up on the top of the bread, which gives it the craters of the moon appearance. The top of the dough also had some whopper air bubbles, which expanded and those are the blackened bits. I baked the first loaf in a cast iron skillet with a large round and tall cake pan over it in my very large toaster oven. It gets hotter than my regular oven and browns nicely.


The second loaf is slightly smaller. I let it rise on a sheet of parchment and then slide all of it into the preheated oval Dutch Oven that was in the regular oven. Less flour and different environment gave it a different look. It has a thinner top crust, too, than loaf number one.


Be sure to check out the other Bread Baking Babes to see their versions and to become a Buddy, by baking it yourself and then posting about it. Send Elizabeth the posting URL and a photo by January 29th and she will send you a Buddy Badge. Her email is on her website.


Thanks for continuing to join me on my cooking and baking journey. I'm hoping to put a little more of my thoughts about non-cooking/baking things in posts this year, but this one is long enough!

BBB TARTINE POLENTA BREAD
Elizabeth's recipe, based on the recipe for 'Polenta Bread' in "Tartine Bread" by Chad Robertson

makes one round loaf:

Leavener

  • dessert spoonful of bubbling wheat starter from the fridge
  • 75gm (~2/3 c) 100% whole wheat flour
  • 75gm (75ml) water at body temperature
Polenta mixture

  • 70gm (.5 c) raw pepitas (shelled dried pumpkin seeds)
  • 61gm (.5 c) grains for polenta (coarse grind) - I used medium-grind  cornmeal  millet
  • 240gm (1 c) boiling water
  • pinch salt
  • 21gm (1.5 Tbsp) sunflower oil (Robertson calls for unfiltered corn oil)
  • 1 Tbsp fresh rosemary, chopped
Dough

  • 100gm floating leavener (stir the rest into the jar in the fridge)
  • 500gm flour:
       » 375gm (~3 c) unbleached all purpose (no additives) flour
       » 125gm (~1 c) 100% whole wheat (no additives) flour, sifted (reserve the bran - should be approximately 4gm)
       » 4gm (~1.5 tsp) wheat germ
  • 350gm (350ml) water, at body temperature
Adding the Salt

  • all of the Dough mixture
  • 10gm salt (approx 1.5 tsp table salt - but please see Salt is salt, right?)
  • 25gm (25 ml) water at body temperature
Pre-Baking

  • rice flour
  • brot-form (or bowl)
  • reserved bran from sifting whole wheat flour
Baking

  • parchment paper
  • cast iron frying pan
  • large stainless steel mixing bowl
Procedure

  1. Leavener and refreshing the starter: On the evening before baking the bread, put the leavener ingredients into a medium-sized bowl. Using your dough whisk (use a wooden spoon if you don't have a whisk), mix the leavener ingredients until all the flour is incorporated. Leave 100gm in the bowl. Mix the extra into the jar in the fridge. Cover the bowl containing the 100gm with a plate and leave in the oven with only the light turned on overnight - until it becomes bubbly and frothy like mousse.
  2. polenta mixture:Spread pumpkin seeds evenly in one layer into a dry cast-iron frying pan over medium-high heat. Cook, stirring from time to time with a wooden spoon, until the seeds begin to pop, changing from light green to brown (Robertson says this takes about 10 minutes but for me, it took about 5 minutes). Set aside and allow to cool for at least 20 minutes.
      1. Pour boiling water into a bowl and stir in cornmeal (or whatever grain you are using). Set aside for about 10 minutes. Put the raw grains into a pot over medium heat and cook, stirring occasionally until they are turning gold and smell toasty (not more than 5 minutes). Add the water and a pinch of salt. Turn up the heat, stir and bring the mixture to a rapid boil. Turn the heat down to very low, cover the pot and allow the grains to simmer for about 15 minutes. Avoid the temptation to lift the lid. When the water has absorbed, remove from the heat and allow to cool.
      2. Add oil, rosemary and pumpkin seeds.
    dough: When a small spoonful of the leavener floats in a small bowl of room temperature water, you can go ahead and mix the dough. (If the leavener does not float, stir in a little more whole wheat flour and water - even amounts by weight - cover with a plate and leave for about 30 minutes more. Chances are that it will now float.) Put all the dough ingredients into a large mixing bowl along with the now bubbling leavener. Mix as well as you can with a wooden spoon. Cover the bowl with a plate and leave on the counter to rest for about 40 minutes. Chad Robertson says Do not skip the resting period. Working with the nature of the dough, the resting perod allows the protein and starch in the flour to absorb the water, swell, and then relax into a cohesive mass.adding the salt: Pour the 25gm water over-top of the mass of dough. Sprinkle on the salt, making sure that it goes onto the water. (Alternatively Chad Robertson recommends adding the salt to the Dough Mixture for Polenta Bread, rather than waiting until this step)
  3. kneading:Use one of your hands to squoosh the salt and water into the dough; use the other hand to steady the bowl - this way you always have a clean hand. At first the dough might be a bit messy. But persevere. Suddenly, it will seem more like dough than a horrible separated glop. Keep folding it over onto itself until it is relatively smooth. Cover with a plate and leave to rest for about 30 minutes.
    stretching and folding (part 1): About 30 minutes after adding the salt, run your dough-working hand under water. Reach down along the side of the bowl and lift and stretch the dough straight up and almost out of the bowl. Fold it over itself to the other side of the bowl. Turn the bowl and repeat until it's a little difficult to stretch the dough up any more. You'll notice that the dough feels significantly smoother. Cover with a plate and leave on the counter (or if the kitchen is cool like ours in winter, in the oven with only the light turned on) for about 30 minutes.
    Repeat the above step
    adding the polenta mixture: Add the polenta mixture to the dough. Run your dough-working hand under water and use it to squoosh the polenta, pepitas and rosemary into the dough. Allow to rest for 30 minutes
  4. stretching and folding (part 2): Repeat the stretching and folding step 1 or 2 more times (Robertson says it should be done 4 times in all). Robertson writes [N]otice how the dough starts to get billowy, soft, and aerated with gas. At this later stage, you should turn the dough more gently to avoid pressing gas out of the dough. [...] A well-developed dough is more cohesive and releases from the sides of the bowl when you do the turns. The ridges left by the turn will hold their shape for a few minutes. You will see a 20 to 30 percent increase in volume. More air bubbles will form along the sides of the container. These are all signs that the dough is ready to be [...] shaped
  5. prepare the brot-form: Put rice flour into a brotform and distribute it as evenly as possible. (If you don't have a brot-form, you can line a bowl, basket or sieve with parchment paper. You can also use a liberally rice floured tea towel (but then you have to deal with a floured tea towel once the bread is baked). If you do not have rice flour, you can use wheat flour. However, it makes it significantly more difficult for the bread to be released from the basket....
  6. shaping: Scatter a dusting of wheat flour on the board and gently place the dough on the flour. Using wet hands, stretch the dough into a longish rectangle, then fold it like a letter, gently patting off any extra flour that might be there. Continue folding until the dough is shaped in a ball. Place it seam side UP in the well floured (rice) brot-form. Evenly spread the reserved bran on and around the seam. Loosely wrap the basket and bread with a clean tea towel and enclose the whole thing inside a plastic bag and leave it in the oven with only the light turned on for 2 or 3 hours (until it has about doubled). You can also refrigerate the shaped bread overnight. Just be sure that it is in a large enough container.
  7. baking: To know when it's time to bake, run your index finger under water and gently but firmly press it on the side of the bread. If the dough springs back immediately, recover the bread with the plastic bag and leave it in the oven with only the light turned on. If the dough gradually returns back after being pressed, put the cast-iron frying pan and stainless steel bowl into the oven and preheat all to 425F.
  8. About fifteen minutes later, put a square of parchment paper on the counter (the paper should be large enough to cover the bottom and sides of the frying pan). Overturn the shaped bread onto the parchment paper. Using a lame (or scissors, or serrated knife), score the bread. Take the pan and bowl out of the oven (wear oven mitts!!) and place the frying pan on the stove (to prevent burning your countertop...). Transfer the bread to the middle of the frying pan and immediately put the stainless steel bowl overtop like a hat. Put everything into the oven and immediately turn it down to 400F. Bake for 30 minutes. Remove the hat and bake for a further 30 minutes or so, until the crust is a nice dark brown and the bread sounds hollow when tapped on the bottom.
  9. cooling: When the bread is done, remove it from the pan and allow it to cool on a footed rack before slicing and eating; the bread is still baking internally when first removed from the oven! If you wish to serve warm bread (of course you do), reheat it after it has cooled completely: To reheat any uncut bread, turn the oven to 400F for 5 minutes or so. Turn the oven OFF. Put the bread into the hot oven for about ten minutes. This will rejuvenate the crust and warm the crumb perfectly.
      
  10. Notes::: salt I urge you to weigh the salt. For more raving about this, please see Salt is salt, right?

    Leavener- The leavener is a 100% hydration and takes about 5 days to make. (Please see our take on Jane Mason's Natural Starter made with Wheat Flour.)

    If you're too afraid (or don't have time) to take five days to make a natural starter and still want to bake this by using commercial yeast, I think what I'd do is create a poolish - say 50gm water, 50gm flour and a few grains (not more than 1/8 tsp) yeast stirred together, covered, and left overnight. And then proceed as written. I confess I haven't tried it but don't see why it won't work. If you're really worried, you could probably add few more grains of yeast into the dough itself as well.

Sunday, February 05, 2017

Meatballs For Pork Lovers


Meatballs can be such versatile little bites. You can serve them with a dipping sauce for appetizers, put them into a soup or use them to adorn a salad. A favorite way to serve them is with a sauce on pasta or rice. You can serve them on their own, perhaps with a sauce or dip on the side. And of course you can use them in a sandwich, too.

Recently our favorite neighbors thawed out too much ground pork from their home grown pig. What a problem to have, right? Anyway we were suddenly blessed with a good sized quantity of ground pork, so I immediately thought 'meatballs'! These are baked and are very simple and delicious. The recipe calls for cooking the onions and then mixing the cooked onions with the meat and other ingredients. I managed to overlook those instructions and added raw onions, but they cooked in the oven and I liked that they still kept their character and weren't wimpy caramelized onions, even though I do love onions that way. They also have chopped fresh rosemary, but you could also use another herb, dried or fresh. Imagine them with green onions, ginger and cilantro for an Asian take on meatballs. You can also use any mixture of meat. I mixed some ground turkey with the ground pork, but ground chicken or beef would also be good. Just keep the proportions the same.

By the way, I was just looking at the blog history and last October 22 I finished ten years of blogging...and I'm already 52 posts past that. Lately about 500 people a day are looking at my posts. I know that lots of people who read this blog don't leave comments, so it was really nice last week when we called to wish Sweetie's East Coast sister a hearty Happy Birthday that I found out she had made the Bean Ham and Cabbage Soup and liked it. It's very gratifying to know that someone makes these recipes and that they like them. If you missed that post you may want to check it out. The soup is one of my all time favorites and great for cold weather.

Are you ready for meatballs? Once these were baked, I cooked up a simple 'cream' sauce with non-dairy margarine, mushrooms, minced garlic, flour, thyme, salt and pepper and some soy creamer. I boiled some noodles al dente, stirred them into the sauce and put the meatballs on top. Steamed fresh spinach on the side filled out the plate. These meatballs would go well with a nice tomato sauce and pasta, too, or on top of rice with some steamed sugar snap peas and a little soy sauce and ginger...you get the idea. If you are worried about fat, you can put the balls on top of a rack which has been placed in the baking sheet instead of baking directly on the sheet as I did.


Easy Oven-Baked Meatballs
from Stupid Easy Paleo.com

2 pounds ground lean pork (or other ground meat)
(I used a combination of pork and turkey)
1 medium onion, chopped finely
3 tablesppons fresh rosemary, chopped (or 3 teaspoons dried rosemary)
1 tablespoons dried sage
1 teaspoon sea salt
1 teaspoon ground black pepper
1 tablespoon fat of choice (I used olive oil)

Preheat the oven to 400 Degrees F (204 C). Line a sheet pan with foil or parchment paper (or silpat mat as I did).

In a large skillet, over medium heat, saute the onion in a spoonful of your fat of choice until softened, about 5 minutes. Let cool. (this is the part that I skipped over!)

In a large bowl, combine the ground meat(s), onions and all the spices.

Form into 2-inch balls and arrange on the prepared sheet pan. (If you have a sturdy disher or scoop it helps to keep the size even. Otherwise use a heaping  tablespoon measure.)

Bake for 15 - 20 minutes until cooked through.  Serve at once or store in fridge or freezer for quick protein in your favorite recipe.


Ideas: Chop and use in and egg and veggie scramble or omelet or frittata.
Chop and toss over a salad and toss with your favorite dressing.
Use in your favorite soup.
Mix with a tomato sauce flavored with Italian spices and put over steamed spaghetti or spaghetti squash.

Wednesday, October 08, 2014

Plenty of Peppers - Stuffed


It must be October in Northern California. We have had a string of days where the temperature was well above 90 degrees. So much for fall baking! A week or so ago when it was cooler I made stuffed peppers for dinner and just realized that I never posted the recipe or photos.

The red peppers were beautiful...large, meaty and very fresh. I bought them at the farm stand that was also selling the last of the strawberries, plus lots of melon, tomatoes, beans and squash. The yellow pepper came from a friend's CSA box. It was thinner skinned but delicious, too. The lamb is so local that its from sheep who kept our grass down early this spring, another gift from our great-hearted neighbors.

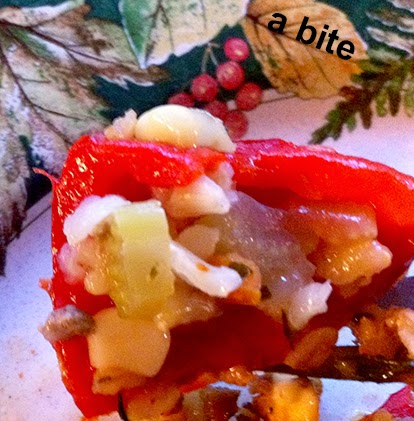
The filling started with sauteed onion, carrot and celery. To that I added both cooked brown rice and fresh corn, cut from the cob, plus some salty feta cheese. A robust flavor was added by using browned ground lamb, fresh rosemary, minced garlic, and dried thyme. I moistened the mixture with a little chicken broth I had in the fridge. It made a wonderful filling for the peppers, bringing out the peppers sweetness and warm flavors. I put the filling that wouldn't fit in the peppers into a greased baking dish and cooked it along with the peppers. It made an outstanding lunch for Sweetie the next day.

He could really use a satisfying lunch because this was just about the time that we had discovered the results of a small, long-term leak in one of our pipes. It has taken almost two weeks to do the repair, but on Friday I should be able to paint the new drywall. After that we can install the last of the new flooring and take a break from construction for a while.

Maybe we'll get cool weather to turn the leaves autumn colors. That's a wonderful time to take a ride in the country and check out all the gold and red and burgundy leaves. Of course what we really want is rain. Wishing for a very rainy winter, but I do hope you get to enjoy fall color if you live where there is some.


Lamb Stuffed Peppers
Serves 4

4 medium to large bell peppers (I like red and yellow and orange, but green is OK, too)
1 tablespoon olive or grapeseed oil
1 medium onion, peeled and chopped
1-2 stalks celery, chopped
1 small carrot, sliced into thin coins
1 pound ground lamb, browned and drained
1 1/2 cups cooked and cooled brown rice
1 ear corn, steamed 5 minutes, then cooled; corn cut from cob
1/4 cup feta cheese, in small crumble
2 teaspoons fresh rosemary, chopped
2 cloves fresh garlic, finely minced
1 teaspoon dried thyme
S & P
1/4 - 1/2 cup chicken broth
about 1/8 teaspoon cayenne pepper, or to taste

Wash the peppers and remove the stem end and the core, plus all the seeds. Cut in half. (I like to cut from the stem to the bottom, but some people like to cut through the middle and set the stem end as a bottom. Make sure that the halves are not tippy. Cut off a bit of the outside of the pepper if needed. Set peppers aside.

In a skillet, saute the onion, celery and carrot in the grapeseed oil. Cook, over medium-high heat, stirring often, until onion is transluscent, about 5 minutes. Turn mixture into a large bowl and add the cooked lamb, cooked rice, corn, feta, chopped rosemary, chopped garlic, and dried thyme. If desired, add salt and pepper to taste. Add enough chicken broth to moisten the mixture.

Line a baking sheet with foil or parchment, or a silicon baking mat. Arrange the pepper halves on the pan. Stuff each half with the lamb mixture, mounding in the center. Sprinkle with a touch of cayenne pepper. If there is left over stuffing mixture, place in a greased small baking dish to bake along with the peppers.

Bake in a preheated 350 degree F oven for about 20 minutes. Peppers will be softened and stuffing mixture will be hot and a little browned.

Serve at once. Refrigerate any leftovers, or baked leftover stuffing mixture.

Wednesday, July 16, 2014

Rosemary - That's For Remembrance

Flowers and herbs used to have secret, hidden meanings, sort of like a secret handshake or something. Rosemary is for remembrance, but I almost forgot to post today...things have been hopping around our house as the first part of the kitchen remodel is underway and almost complete...and we are starting work on the second part. Fortunately, I baked this bread the first time in June and the second time a few weeks ago when all my baking supplies were still in their usual place.

The Bread Baking Babes Kitchen of the Month, Cathy of Bread Experience, chose Panmarino, an Italian bread created in Ferrara near Venice for our baking and eating pleasure. Perhaps the ultimate gift of this bread is that the scent of rosemary permeates the kitchen while it bakes and also rises up when you take a bite. 

Of course that requires fresh rosemary, not dried, with all its delicious and scented essential oils. I'm fortunate that the people who owned our property before we did planted a small rosemary shrub in the perfect spot. I know it's the perfect spot because it has grown and grown over the years and now covers an area about the size of a VW bus. Plenty of fresh rosemary to go into my favorite lamb marinade, plenty of long skinny branches of rosemary to use as skewers for food for the BBQ, plenty more for baking with olive oil coated potatoes, and lots to go into bread, too. If you don't own a rosemary plant, you might consider planting one. If you put it in a good sized pot, but one not too heavy to move, you can find a sunny spot for it and be able to move it indoors if it gets too cold outside. Keep the soil on the dry side and don't give it too much fertilizer and you, too, can have lots of fresh rosemary.

The first time around I was in a hurry and didn't allow enough time for rising, nor for baking. The result had great flavor, but was dense and under-cooked.That'll teach me to try to rush bread making. Tsk, tsk.

The second time I made some changes, partly because I seem to be compelled to change recipes and partly because I wanted a bread that was less dense.

The second time I increased the water and the milk a little, added more yeast, reduced the salt in the dough a bit and kneaded the rosemary into the dough after its first rise. That way I could have nine dinner rolls with rosemary, a round loaf with rosemary, and a sandwich loaf without rosemary. I skipped the slashing and salt crystals this time, so it wasn't authentic, but it was lighter in crumb (Sweetie said the crumb was perfect!) but still sturdy, had a nice crust (yes, I did put ice cubes in a preheated pan for extra steam), and delicious. It makes great toast!

You are going to want to try this bread, then take a photo, write up your experience and e-mail them to  Cathy so that you can be a Buddy. Deadline is July 29. Do visit all the other Babes to see what their bread looks like, too. I think you will find variations on a theme. We are baking fools and love to have you visit and see what fun we have been having.

I also want to make a moment of remembrance of my son Maxwell. He was only a few weeks short of being 17 when we lost him 15 years ago tomorrow in an auto accident. I remember his smile, his generous and loving ways, and his curiosity and empathy. He was blessed with so many talents and many friends. Perhaps the rosemary plant has grown so large because we have so much good to remember. I miss him very much.


Panmarino
Makes: 4 Loaves  Original Panmarino created in Ferrara near Venice

Biga (which I made exactly as described):

Bread flour 143 grams/  5 ounces
Water 122 grams/  4 1/4 ounces
Pinch of instant yeast

Final Dough:

Bread flour 884 grams/  1 pound 15 ounces
Water 487 grams/  2 cups
Milk 2 ounces/ 1/4 cup
Biga 265 grams/  9 1/3 ounces
Salt 1/2 ounce/ 2 teaspoons
1 teaspoon instant yeast
Olive oil 88 grams/  3 ounces
Chopped fresh rosemary 9 grams/  1/3 ounce


Preparing the Biga:
Combine the bread flour, water and yeast in a large mixing bowl. Stir with a wooden spoon until well blended.  Scrape down the edge of the bowl, cover with plastic wrap, and let it rest at 75 degrees F. for 14 to 16 hours.

Making the Final Dough:
In the bowl of a stand mixer, combine the water, milk, and biga. Using the dough hook, mix on low speed until blended.

Add the salt and yeast to the bread flour in a bowl and whisk to combine. Add bread flour mixture a cup at a time and mix on low speed until incorporated, then add more. When about half the flour is added, add the olive oil, mix with the dough hook to combine, then continue to add the flour mixture. You may need to add by tablespoonfuls at the end. Mix with dough hook on low for 5 minutes.  Increase the speed to medium and mix for about 7 more minutes, or until the dough is smooth.

Lightly oil a large bowl. Scrape the dough into the bowl and cover with plastic wrap. Let the dough ferment for 45 minutes.

Remove the dough to a lightly-floured work surface and knead in the fresh rosemary. Divide the dough into four 450-gram /16-ounce pieces (or divide into three pieces to shape as desired, as I did). Shape the dough pieces into rounds. Cover with plastic wrap and let them bench rest for 15 minutes.

Place two couches on a separate work surface or bread board and dust them with flour.

Uncover the dough and, if necessary, lightly flour the work surface. Gently press on the dough to degas and carefully shape each piece into a tight and neat rounds (or into rolls or loaves, as I did. I also shaped my round loaf in a heavily floured brotform).  Place one loaf on one side of the couche, fold the couche up to make a double layer of cloth to serve as a divider between the loaves, and place a second loaf next to the fold.  Repeat the process with the remaining two loaves and the second couche.  Cover with plastic wrap and proof for 1 hour.

About an hour before you plan to bake the loaves, place a baking stone (or tiles) into the oven along with a steam pan (underneath) or iron skillet (on the top rack) and preheat the oven to 450 degrees F.

Uncover the dough and score the top of each loaf in a star pattern using a lame or sharp knife. This particular formula doesn't say to do this, but you can sprinkle sea salt into the crevices as the original baker did to make it "sparkle with diamonds."

(I did this with my first try, but didn't with my second. Didn't think it contributed much to the bread.)

Carefully transfer the loaves to the preheated baking stone using a peel or the back of a baking sheet. To make the steam, add 1 cup of ice to the iron skillet or steam pan.

Bake for 40 minutes, or until the crust is light brown and crisp and the loaves make a hollow sound when tapped on the bottom.

Remove the loaves from the oven and transfer to a wire rack to cool.