Showing posts with label onion. Show all posts

Thursday, May 09, 2024

Quick Dinner


Sometimes you need or want to fix dinner quickly. I was lucky this evening to have some leftover rotisserie chicken, some ricotta tortellini, some pesto sauce, some pine nuts from the freezer, and a few veggies on hand. Put together they made a delicious meal in a very short time. Sweetie was a very happy guy and said I can make this any time.

The first thing to do is to put a big pot of water on to boil to cook the tortellini. While that's coming to a boil, toast the pine nuts in a large skillet. It only takes a minute or two. Set those aside and chop some onion - I used green onion, but yellow or white works, too. Spray the same skillet you used to cook the pine nuts with a little olive oil, then add the onions and sauté, stirring often. While those are cooking, chop some tomato...I used about a half dozen grape tomatoes. Add those to the onions, stir, and let them begin to sauté, too. Cube into bite size pieces the cooked chicken. (You could also use cooked turkey, cooked Italian sausages.) 

By now the water should be really boiling. Add some salt, if desired, and then the tortellini. Stir them every few minutes to cook the pasta part evenly, but be gentle so the fillings stays inside.

Add the cubed chicken to the onion-tomato mixture and stir to combine. Turn the heat to the lowest setting, cover and let it all heat up.

Get ready to drain the pasta when it is cooked al dente and cook about a cup of frozen peas in the microwave. Check the pasta and when it is ready, drain and put into a large bowl. Add a big scoop of pesto sauce and stir to combine with the pasta. Add the chicken-onion-tomato mixture and the pine nuts and stir gently to combine.

Serve at once with the hot peas on the side.

I know that there are no actual measurements for this recipe. If you feel you need them, make a comment asking for that and I'll try to figure out the amounts I used, O.K?

Saturday, March 16, 2024

Sweetie's Pi Day Pie


Sweetie really enjoys pies and this year on Pi Day we were also remembering our beloved black lab Pi who left us in the fall. We still miss him, a lot, as you might expect since he was the best dog we've ever had...and that's difficult because we've been blessed with a number of great dogs. Here is a photo of our Pi dog when he was young:


Usually I would bake a sweet pie, but this year I went for a quiche...basically a savory cheese, veg and custard pie. We had it for dinner on March 14th and Sweetie had more today for lunch.

If you use pre-made pie crust dough for this, it all comes together fairly quickly. You can go with the filling ingredients I chose, or use your own mixture. This one had sweet breakfast sausage as the meat, and not a lot of that, so mostly the vegetables were the stars. Onions, mushrooms, potato and asparagus were also my fillings but I think if I made this again I would skip the potato. It made the pie so dense that it took longer to bake and there was less of the delicate creamy egg custard, too. There was too much custard because of all the filling, so some dripped off and cooked on the baking sheet I had under the pie and some drips got between the pie dough and the pie tin, so the crust stuck a bit. Note to self: use less solid filling to allow room for more custard filling.

If you are planning this for dinner, do remember to start a little early since you need to blind bake the crust and let it cool a bit before putting in the fillings.

Spring Quiche with Asparagus and Swiss Cheese  and Mushrooms and Onion
Serves 4 - 6

1 9-inch pie shell, blind baked at 425 degrees F for 10-12 minutes (see notes)
1/3 cup finely chopped yellow onion
1 tablespoon olive oil
1 cup Swiss cheese, cut into ¼ inch dice
1/2 baked potato, peeled, thinly sliced
2 small, cooked Breakfast Sausage patties, each cut into 6-8 pieces 
3 eggs (or equivalent egg substitute)
1 ½ cups evaporated milk or light cream or 1 1/4 cup whole milk
¼ teaspoon salt
1/4 teaspoon dried thyme
dash pepper
Dash nutmeg
3-4 spears asparagus, tough bottoms trimmed off and sliced in half through the length of the spear
4 oz. crimini mushrooms, sliced thinly

Preheat oven to 350 degrees F.

In a small skillet, sauté the onion  in the olive oil until translucent, about 5 minutes, stirring often. Add the sliced mushrooms, stir and cover. Turn heat to low and cook another 5 minutes, stirring occasionally.

Sprinkle the bottom of the pie shell with the sautéed onion-mushroom mixture and Swiss cheese, distributing evenly. Top with the sliced potato. Sprinkle sausage pieces evenly over that. Set aside.

In a bowl, beat the eggs lightly, then add the milk and beat with a fork to combine, add the salt, thyme, pepper and nutmeg and beat with a fork or whisk to combine.

Arrange the half asparagus spears in a nice pattern on top of the onions, mushrooms, potatoes, sausage and cheese in the pie shell. 

Pour the egg/milk mixture over the ingredients in the pie shell. Place in the preheated oven and bake 30-45 minutes, or until set and lightly browned. I find that setting on a parchment-lined small baking sheet is a good idea in case some of the filling spills over. Cool for 10 minutes before cutting to serve.

Note: Use your favorite one crust pie dough, rolled for a 9-inch pie pan, or a package of pre-made dough like Pillsbury ReadyCrust (you'll have one pack of dough ready for another pie) at room temperature. Fit the dough into a 9-inch pie pan, crimp the edge, put in baking parchment and weigh with pie weights or beans, then bake for 10-12 minutes in a preheated 425 degree oven. Remove from oven, cool 5 minutes, remove the pie weights/beans and let pie shell, now blind baked, cool for another 10 minutes before adding the filling ingredients.

Monday, March 27, 2023

Fan Favorite Oldie But Goodie


The photos don't do this dish justice...at all. Trust me when I say that this recipe will become one of your favorites, just like it's a favorite of others stopping by this blog.

I first posted about this casserole in the spring of 2009. A lot of life has happened since then, but the recipe has been a continually searched one over the years. I first made it even longer ago than 2009, maybe even before my kids were born. It's from a delightful and unusual cookbook called the Moosewood Cookbook by Mollie Katzen. Unusual because the recipes were written by hand and the illustrations were done by hand...no photographs, no type to speak of, just warm and welcoming recipes with lots of them vegetarian, many of them celebrating cultures other than U.S.A. cultures, and ones that became favorites, like this one. Delightful because you will likely keep finding another recipe you want to try as you make your way through the book. It was first published in 1977. If you don't find it at Powell's Books (a Portland, Oregon bookstore that has a lot of used books of all kinds), then check Amazon or your local library, used book store, etc. It's a great cookbook to have on your shelf.

This recipe, Spinach-Rice Casserole, has brown rice with it's nutty flavor, spinach, cheddar cheese, eggs and milk, and some seasonings. Don't skip the sunflower seeds on top...they not only taste great and add texture, but their fragrance mingles with the other ingredients to make your kitchen smell cozy and welcoming. Perhaps the best part is that you will likely have leftovers...and they are even better than the first night. I just returned from four days in Phoenix, visiting family, and Sweetie ate leftover Spinach-Rice Casserole the first two nights I was gone. I think he would have eaten it the next two nights, but it was all gone.

Cook the brown rice first because brown rice takes a little longer than white rice. While it's cooking you chop the onion and mince the garlic and grate the cheese. I use frozen spinach that is already chopped...it just needs thawing and then squeezing the thawed spinach to get out the excess liquid. Eggs get whisked, milk added, and parsley chopped. Then you sauté the onion and garlic, add almost all of the rest of the ingredients and stir them together, add the rice and combine everything so that it can be turned out into a buttered casserole dish. After a sprinkle of both sunflower seeds and paprika, the casserole gets covered, baked, uncovered, baked some more, than cooled just enough that it doesn't burn your mouth. Feast on a soft and gloriously flavored casserole with a bit of crunch from the sunflowers. You'll be glad you took the time to bake this dish. So will friends and/or family because this make a good sized casserole (about 9 x 13-inches) that can feed quite a few lucky folks.


Spinach-Rice Casserole, based on a recipe from Moosewood Cookbook by Mollie Katzen, 1977


2 cloves minced garlic
1 medium yellow onion, peeled and chopped
1/2 teaspoon salt (More, to taste)
3 tablespoons butter (I used 2 tablespoons olive oil)
2 lbs. raw, chopped spinach or, as I did, use 1 package frozen, chopped spinach, thawed
4 cups cooked brown rice
4 beaten eggs 
1 cup milk
1 1/2 cups grated cheddar
1/4 cup chopped parsley
2 tablespoons tamari (optional)
a few dashes each - nutmeg, cayenne
1/4 cup sunflower seeds
paprika

Saute' onions and garlic with the salt in butter (or oil). When onions are soft, add spinach. Cook 2 minutes. (Alternately, thaw and drain a 10 oz box frozen chopped spinach. Add to onion mixture, but don't cook any further.)
Combine the onion mixture with the brown rice, eggs, milk, cheese, parsley, tamari, nutmeg, cayenne. Spread into buttered casserole and sprinkle sunflower seeds and then paprika on top.
Bake, covered, 25 minutes at 350 degrees F. Uncover and bake 10 more minutes.

Serves 4 - 6

Monday, January 09, 2023

Italian Sausage Meat Loaf


I grew up eating a meat loaf made with ground beef, enhanced with tomato juice and oatmeal and an egg. It fed the whole family until the next to the last kid was old enough for it but by then the older kids were often gone at dinner time babysitting, so I think that the recipe worked just fine my whole childhood, even though there were ten of us at dinner some of the time. Since it takes about the same amount of time to bake potatoes as to bake the meatloaf, the next oven rack down usually had the potatoes baking to be served with the meat loaf. 

I got the recipe from my Mom when I moved to California and made it myself but these days I can't eat beef, so I have to be creative. 

Tonight's version is made with Italian sausage and ground pork. Because the Italian sausage comes already seasoned, I didn't add salt and did add some extra mixed Italian seasonings to make it even more Italian in flavor. Beyond that I only sprinkled some black pepper over the ketchup to tone down the sweetness. Because I love mushrooms, I added finely chopped mushrooms to the mix, plus the usual onion and oatmeal. I added chopped parsley and tomato and skipped the tomato juice. I  forgot to put in the egg...but I did coat the top with the ketchup and a sprinkle of black pepper right before putting it into the oven to cook. 


Italian Meatloaf 

Serves 8

1 1/2 pounds ground meat - I used 3/4 ground pork and 3/4 Italian sausage
1/2 cup onion, chopped
1 cup finely chopped cremini mushrooms
1 diced tomato
2 teaspoons chopped parsley
1/2 teaspoon Italian seasonings
3/4 cup oatmeal (rolled oats), uncooked
2 tablespoons ketchup
a dash of ground black pepper

Preheat the oven to 350 degrees F. Line a small sheet pan with a silicone liner or foil or parchment paper.

In a large bowl place the ground meat, chopped onion, chopped mushrooms, diced tomatoes, parsley, Italian seasonings and the uncooked rolled oats (oatmeal). Use your hands to gently mix thoroughly. Form into a rough ball in the bowl, pour out onto the prepared pan, then use your hands to shape in an oval loaf. Spread the ketchup thinly over the top of the loaf and sprinkle with the black pepper. 

Bake in the preheated oven for 45 minutes. Check for doneness - thermometer should read at least 175 degrees. If lower, return to oven. Can take up to 1 hr 10 minutes.

Let stand for 5 minutes before slicing. Serve hot. 


Monday, September 13, 2021

Stuffed Cabbage Rolls Like It Was Mid-Century


One of the cooler weather dishes that I really enjoyed growing up was stuffed cabbage rolls which are cooking in a tomato sauce. Not sure if it was the interesting bit of stuffing the cabbage leaves, or the challenge of keeping them together with toothpicks, even while browning them, of the comfort food aspect of eating them, but I remember them fondly. The leaves are stuffed with a mixture of ground beef and rice, plus a few secret ingredients. Since I can no longer eat beef, I substituted ground turkey and they were still tasty. If you can eat beef, use it because it gives an authentic and totally savory experience.

The hardest part was probably separating the leaves from the head of cabbage because I wanted unbroken leaves and the edges of my cabbage had grown together and didn't want to become individual leaves. The next challenging part was securing the cabbage once rolled with toothpicks so that they didn't unroll. One kinda did, but the others stayed together...I even was able to turn a couple of them over to brown on both sides! I know, supposed to do that with all of them, but it was fine and the flavor stays the same.

Because you have protein, starch, and some veg all in one dish, you don't have to have a side dish, but a green salad goes well with this meal. Leftovers are even better than the day they are made...must be the onions.

Do try this when you have a yen for a delicious, savory, flavorful meal where you get to play with your food in the making of it.

Stuffed Cabbage in Tomato Sauce 
Serves 6

1 lb. lean ground beef
1 cup cooked rice
1 small onion, chopped
1 teaspoon caraway seed
1 teaspoon salt
¼ teaspoon black pepper
1 egg
12 whole cabbage leaves
¼ cup vegetable oil
2 cans tomato sauce (8 oz. cans)
¼ cup water
1 can beef consommé or beef broth
2 tablespoons cornstarch

Mix together the ground beef, cooked rice, onion, seasonings and egg in a large bowl. Trim off thickest part of the stem from the cabbage leaves which have been softened with boiling water and drained. Divide meat into 12 portions, wrap each in a leaf, and fasten with wooden toothpicks.

 Brown the cabbage rolls in hot oil. Add tomato sauce and water and stir. Cover; cook slowly over low heat about 40 minutes. Add beef consommé or broth. Remove cabbage rolls; thicken gravy with the cornstarch which you have mixed with at least ¼ cup water. Once gravy thickens, serve with cabbage rolls while both are hot. Serves 6.

Tuesday, September 07, 2021

Spicy Bean Bake

I'm in the process of re-doing my family cookbook. It's fun! One of the things I did early on in the renovation was to change the font size to make it smaller. Originally I had it larger for my Mom, but this time around I'm looking at this as a resource for the next generation...and, perhaps, beyond, so I think they can handle a smaller type face.

As a result there is more room for extra recipes. In a kind of serendipity, I also found some recipe cards that had been missing, including some in my Mom's handwriting. One of the recipes was for a baked bean concoction that became popular with the family after I left home and moved to the West coast, so I had to ask Mom for the recipe and now it's in the cookbook. It's called Spicy Bean Bake, but it's not really that spicy. I suspect that my hot sauce loving siblings may add extra heat via sauces that contain things like habanero chilis after it's served. My Mom didn't really care for extra spicy things. You could also make this vegan by leaving out the ham or other meat and the bacon and adding a cup of cooked corn. 

What this recipe does have is a lot of flavor! It's also easy to make and makes a lot. The leftovers were even better than the original dish. Score!

I only made half the recipe, but Sweetie liked it so much that next time I'll make the full amount.,


Spicy Bean Bake

Serves 8-12 

One can 40-oz., baked beans
One can 1-pound, red kidney beans
2 large apples, chopped
1/2 cup raisins
1 1/2 cups chopped onion
1 cup chopped bell pepper
3 cups chopped cooked leftover ham, pork or beef
4 slices crumbled crisp bacon
1 cup catsup
1/2 cup pickle relish
1/2 cup brown sugar, packed
1 teaspoon dry mustard
1/2 cup molasses

Mix all ingredients in a 3-quart casserole. Cover and bake in a 250 degrees F. oven about 1 1/2 hours.


Tuesday, April 03, 2018

Yam and Pork and Veggie Hash


Sweetie made a slow cooked pork roast on the BBQ a few days ago using a pork shoulder. It was a big one, so there was a lot left. Last night I made a kind of a hash using some of it. I didn't really have a recipe, but I've been looking at this kind of recipe for a while, so figured it couldn't be too difficult.

First I cooked some chopped onions over slow heat in a little olive oil. Later I added some diced celery, diced yellow pepper, and a sliced zucchini, cut into quarters and sliced. Once all the veggie were nicely cooked, I removed them from the pan and used the same frying pan to brown some diced pork roast. While all these were cooking, a nice fat yam was steaming to doneness. That, once cooked, was peeled and cut into a small dice. I put the dice on top of the pork and added seasonings: pepper, thyme, sage and garlic. Those cooked together a minute, then I flipped the mixture so the yam was on the bottom, then put the cooked veggie mixture over the top. With the pan covered, that cooked for a couple of minutes, then I flipped it all again and cooked it another minute. That was it...Pork and Yam Hash. Had it with a salad for a nice meal, then the leftovers (heated up) as the bed for a fried egg this morning for breakfast.


This one take some time with all the chopping and slow cooking, but it is worth it. The pork gets some crispy bits, the veggies are soft and delicious and, if you add the egg, it is almost comfort food.

I'm not going to give an actual recipe, but I used about 1 1/2 - 2 cups diced pork, 1/2 a yellow onion, 1 small zucchini, 1 stalk celery, about the same amount diced yellow pepper, 1 large yam...and an egg.

Monday, June 26, 2017

Spanish Chicken and Rice for Dinner


Want an easy casserole of chicken, rice, tomatoes, onions and garlic, herbs and spices and a little marsala wine? Check out this one that was a family favorite for many, many years. I made it tonight but had to change a few things. It was supposed to be sherry instead of marsala, and the dish should have saffron, but those were both missing. It still tasted wonderful! The good news was that it went together so quickly. We've spent quite a bit of time today on our next project and suddenly it was almost dinner time. From start to finish was less than an hour. Don't leave out the whole cloves...it is an essential flavor in this dish.

Sweetie and I are in the planning stages for replacing the tub in Grandma's farmhouse with a nice alcove shower with glass doors. We still haven't decided on the size but have narrowed it down to a 5 foot one that is basically the same size as a tub in length, or a 4 foot one that will allow us to move the vanity over to the same wall...a blessing in a bathroom as narrow as this one. I'm going with white shower, vanity and toilet, brushed nickel fixtures and door frame, and cream colored walls with bright white trim. The floor is currently cork colored but it will need replacing, so we may go with something darker for contrast with all that white. It should be fresh feeling once we are done. We are hiring a plumber to do all the plumbing and the electrical that's in there should be OK, so it's really mostly constructing some walls to attach the shower walls to, some tile or sheetrock, and paint. Probably doing demo will be the most complicated because it involves, among other things,  moving a very heavy cast iron clawfoot tub out and across to the outbuilding where it will live until we find a place for it or sell it.

I'll try to remember to post photos of the before and after once the project is finished. The one at the top is courtesy of WayFair. Probably not the vanity we will use, but I like the sleek look.

Speaking of photos, I completely forgot to take any of this delicious dish. Think browned chicken pieces peeking out of a sea of tomato-studded rice with a nice sprinkle of peas on top. Colorful and savory. Don't take my word for it...try it yourself.

Arroz con Pollo (Spanish Chicken and Rice)
From Family Food by Patricia Lachman
Serves 6-8

2 1/2 lbs. chicken...I used boneless, skinless chicken thighs, but a cut up frying chicken is traditional
salt (optional)
3 tablespoons olive oil
1 large onion, chopped
1 clove garlic, minced
1 medium pepper, chopped (traditionally green, but I used red)
1 can peeled, chopped tomatoes in their own juice
1/4 teaspoon pepper
1/2 teaspoon paprika
1 bay leaf
a pinch saffron
2 whole cloves
1 cup water
1/3 cup sherry (or marsala)
1 cup long grain uncooked rice
1 cup cooked green peas
1 pimento, cut up (optional)

Use a large skillet or Dutch oven with a tight-fitting lid. Season chicken with salt, if desired (I always skip the salt...it's not needed). Brown the chicken in 2 tablespoons of the olive oil. Remove the chicken and cover with foil. Add remaining olive oil, heat, then add the onion, garlic and pepper. Brown 5 minutes. Add remaining ingredients, except for rice, peas and pimento. Return the chicken to the pot. Cover and simmer 15 minutes. Add the rice. Bring to a boil, stir, being sure that the rice is submerged in the liquid in the pot, cover and simmer for 30 minutes.
Garnish with the hot peas and with the pimento, if using.

This dish makes great leftovers since the rice tastes even better the next day.

Tuesday, February 28, 2017

Cranberry Chicken For A Chilly Evening


We finally have gotten a few days of sun, but it's still pretty chilly, so I decided to make a baked chicken dish last night. I found it in a Rachel Ray magazine and it is a keeper! The skinless chicken stays moist under a shingling of bacon, plus the presence of a mixture of chicken broth and red wine. In general I can't drink wine, but I have found that I can eat things where the wine has been cooked. Yay! All the alcohol gets cooked off, but something else must get mellowed, too.

The components, besides the chicken and bacon, are sweet from the dried cranberries, savory from the broth and wine and balsamic vinegar, mellow from the translucent cooked onion wedges, and hearty from the red potato chunks. Add in the flavors of garlic, thyme, pepper and bay leaf and you have a dish that smells wonderful and tastes even better. All you need with it is a small salad or steamed veggies and, perhaps, some bread to sop up the delicious juices.

Because I never make anything quite how it is written up, I did change the chicken to boneless thighs, I added a 1/4 teaspoon fresh orange zest (cranberries  and orange are a match made in heaven), and I reduced the dried cranberries by 1/4 cup...and will reduce them by another 1/4 cup next time. I also didn't have fresh thyme, so I used dried thyme...2 teaspoons in the broth mixture and none for garnish.

There are a number of good reasons to make this dish besides the fact that it is yummy. First of all, it is relatively inexpensive. Then there is the bonus of a short prep time and about 30 minutes cooking time. Add to that the easy clean-up, especially if you line the casserole with heavy duty foil like I did. Last, but not least in my world, there is no dairy in this dish...and you don't miss it either. With no added oil, butter, cheese, or cream, it is fairly healthy, too...well, except for the bacon, but that adds so much flavor and fragrance that it would be a shame to leave it out. Sweetie helped me out by eating half my bacon. Isn't he the best?


Roasted Cranberry Coq au Vin
Serves 4
from Rachael Ray Every Day, March, 2017

1 1/4 cups dried cranberries (I used 1 cup but 3/4 cup would be better)
1 cup red wine, such as Pinot Noir or Beaujolais (I used Zinfandel)
1/2 cup chicken stock
6 large cloves garlic, chopped (don't worry, the garlic gets mellow in the oven)
4 bay leaves
1 tablespoon balsamic vinegar
2 teaspoons onion salt
Optional: 1/4 teaspoon orange zest
3 tablespoons fresh thyme, divided (I used 2 teaspoons dried thyme)
4 bone-in chicken thighs (about 8 oz. each), skin removed (I used boneless skinless chicken thighs)
1 pound red potatoes, cut into 3/4-inch pieces
1 large yellow onion, cut through core into 3/4-inch wedges
4 slices thick-cut hickory-smoked bacon, each cut into 4 pieces
8  1-inch thick slices French bread (didn't have any...didn't miss it)

Position oven rack to upper third of the oven and preheat to 450 degrees F.

In a bowl, mix the first 7 ingredients and 2 tablespoons thyme (or all the dry thyme if using). Optional, but good: add 1/4 teaspoon freshly grated orange zest to the mixture.

In a large baking dish, arrange the chicken, potatoes and onion in a single layer. Shingle the bacon on the chicken. Add the cranberry mixture, pressing cranberries to submerge. Season with salt and pepper.


Roast in preheated 460 degree oven until an instant-read thermometer inserted into a chicken thigh registers 165 degrees F., about 30 minutes. If using fresh thyme, garnish with remaining 1 tablespoon.

Serve at once. If desired serve with bread to mop up the juices.


Wednesday, January 11, 2017

What Smells SO Good?


That's what Sweetie asked after he came in from cutting up the Christmas tree to put it into the green recycle bin. We finally took down the tree today and put all the decorations and ornaments and lights up in the attic until next year. Usually I would have done it on January 7th (the day after Epiphany), but we have been having terrible wind and rain since the weekend and it was nice having the lights and soft glow of the round ornaments during the rain. Of course we also had some blackouts with no power - 3 hours and then about 6 hours, plus a few brief ones, (less than a minute), so no comfort from the tree lights then. Still, we are on high ground, so no flooding here. We didn't lose too many tree limbs, although our old apple tree did fall over, which is very sad.

Our friend and neighbor Phil also asked, "What smells so good?" when he came by this afternoon to borrow a few gallon jugs of well water. Our neighbors are on a different power line and had been out of power for about 14 hours by then and needed a little extra. Fortunately, I usually fill up about a dozen during December for times like these. We have our well water treated with a salt, so for tea and coffee I use bottled spring water because it has more acid than the treated water, so it's better tasting, for tea especially. I just fill those as they empty and label them with the date and "Well".

So what did smell so good? The Country Bean, Ham and Cabbage Soup that took most of the day to make. This is one of those recipes that are good to do when you're going to be hanging out at home much of the day. We did get a walk in with Pi between storms,


and saw how flooded the Laguna de Santa Rosa was on High School Rd. in Sebastopol. Many roads in the Santa Rosa area have flooded and there have been mudslides and evacuations from low lying areas. We have had over 11 inches of rain since Sunday. A good time for soup since there is more rain today and will be a little more tomorrow. Taking care of the Christmas tree was also a 'between the storms' thing since we finally had a day where there was a break between storms.

You actually start this soup recipe the night before. You rinse dry white beans and put them to soak with water covering them. (Actually put at least an inch of water over them. They soak it all up during the night). The next day there are draining, rinsing and simmering sessions. The longest is for an hour and a half. Most of the rest are for 15 minutes or a half hour. It does take a little time to chop the veggies and to make the herb bouquet. Towards the end of the process you have to take a few minutes to fish out the herb bouquet to discard and to cut the ham into bite sized chunks, as well as to slice up the cabbage. The recipe calls for a roux of cooked flour and butter to thicken the soup, but mine simmered so long that it didn't need any thickening.

Give this a try. The recipe is from my Mom, but I don't know where she got it from...I just make it and enjoy it. It is hearty, tasty, stick-to-your-ribs good, and pretty healthy, too. It makes lots, so there are leftovers which are even more delicious than the original meal. Just be prepared for that question: What Smells SO Good?

Country Bean Ham and Cabbage Soup

2 1/3 cup dry pea beans (Great Northern, white beans)
1 3-lb cooked picnic ham, bone in
1 celery stalk, sliced
2 carrots, quartered and sliced
5 sprigs parsley + 2 bay leaves tied together
2 medium onion, sliced, plus 1 onion stuck with
3 whole cloves
4 garlic cloves, mashed
½ teaspoon EACH dried thyme & ground pepper
1 teaspoon salt
1 can tomatoes
1 small head green cabbage, sliced in 1/4” slices


Cover beans with cold water by at least an inch and let stand overnight. 

Drain, rinse, return to pot and cover with fresh water and bring to a boil. Turn off heat and soak for 1 hour. 

Drain & rinse & return beans to the pot. Add ham. Add enough water to cover the beans. Bring to a low simmer and simmer 15 minutes. 

Add the vegetables, herbs, onions and seasonings to pot. Cover and simmer 1 ½  hours. 

Add the tomatoes and simmer ½  hour. If tomatoes stay whole, chop them up with a spoon. 

Remove herb bouquet and whole onion. 


Add the cabbage, stir, and simmer ½ hour. 


Remove any ham bones and discard. Cut up any ham chunks into bite sized pieces and return to the pot.

Make a roux of 2 tablespoons butter and 2 tablespoons flour, cooked in a small pan until light brown. Add it to soup. Simmer 15 minutes. 

Taste and season with more salt and/or pepper as needed. Serve hot.

Monday, January 25, 2016

Duck!


Recently there was a great buy on duck legs at the market. I rarely cook duck, so I took the opportunity to do some online searching for a good recipe. I ended up using a recipe from the New York Times, but also changed it a bit to include red wine because I think duck and red wine go so well together.

The results were awesome, like dining at a fancy restaurant, probably a French one. The dish was rich in flavor, full of roasted veggies, had a wonderful sauce in the bottom of the pot and went really well with some boiled red potatoes. It took a little more time than usual, but was well worth it.


Braised Duck Legs with Veggies
based on recipe at Diners Journal/NY Times

Ingredients
  • 2 duck legs, trimmed of excess fat
  • Salt and pepper to taste
  • 1/2 cup red wine (I used a nice Pinot)
  • 2 large onion
  • 3-4 cloves garlic, peeled and sliced
  • 1 pound carrots
  • 6 celery stalks
  • 1 teaspoon dried thyme
  • 4 oz. sliced, cleaned mushrooms
  • 2 cups chicken stock, preferably homemade.
Method

  • 1. Put duck legs, skin side down, in a skillet large enough to accommodate all ingredients comfortably; turn heat to medium. Heat oven to 400 degrees. Brown duck legs carefully and evenly, sprinkling them with salt and pepper as they cook. Meanwhile, peel and dice vegetables.
  • 2. When legs are nicely browned, turn them over and sear for just a minute or two. Remove to a plate; remove fat to a small bowl. Add red wine to deglaze the pan, then simmer wine for 1o minutes to reduce. Pour red wine over chicken and wipe out skillet. Add just enough of the reserved fat to cook the vegetables. Discard rest of fat or use for another purpose.  Add vegetables and thyme to skillet along with some salt and pepper. Cook over medium-high heat, stirring occasionally, until they begin to brown, 10 to 15 minutes. Return duck legs to pan, skin side up and juices/wine, and add stock; it should come about halfway up duck legs but should not cover them. Turn heat to high, bring to a boil, and transfer to oven.
  • 3. Cook uncovered for 30 minutes, then lower heat to 350 degrees. Continue to cook, uncovered & undisturbed, until duck is tender and liquid reduced, at least another half hour. The duck is done when a thin-bladed knife pierces the meat with little resistance. When done, duck will hold nicely in a warm oven for another hour. Serve hot.

Wednesday, January 13, 2016

Mushrooms and Rice and Bacon, Oh My


Not sure why, but yesterday I wanted mushrooms with my dinner. We had about 6 oz. of whole crimini mushrooms in the fridge so I just needed to decide what to make. Sweetie didn't have any preferences when I asked him, so I went with a rice dish. There wasn't a recipe for this and I didn't measure some of the ingredients, so I'll write up a recipe as best I can to keep it for the next time and to share it with you.This is a wonderful side dish with nutty flavors and delightful savory notes. If you like mushrooms, you'll love this dish!

The first thing I did was to chop some yellow onion and saute it in olive oil. Then I added the sliced mushrooms and cooked those together with some dried thyme and a little water. It smelled wonderful!

After that I decided that I wanted both bacon and pecans with the rice mixture, but first I started some brown rice mixed with chicken broth in the rice cooker and some wild rice and water in a pot on the stove.

While the rice cooked, I rendered the bacon enough so that it would crumble when it was cooled, poured off almost all of the bacon grease, then toasted the pecans in the pan I cooked the bacon in.

For timing, the wild rice was the key since it takes a little longer to cook than the brown rice. Once the wild rice was done I drained it and added it and the cooked brown rice to the mushroom mixture, along with the crumbled bacon and toasted, chopped pecans. After a quick stir and a minute on low heat to make sure everything was warm, I served it up. It was really delicious. The rice had a little chew, the nuts added crunch, the bacon and caramelized onions perked up the flavor and it all went really, really well with the mushrooms. This is a dish worth making again, and soon.

Mushroom Rice with Bacon and Pecans
Serves 4-6

1 tablespoon olive oil
1/2 medium onion, chopped
6 oz. small crimini mushrooms, cleaned, dried and sliced
1/4 teaspoon dried thyme
2 tablespoons water
1/2 cup brown rice, rinsed
2 cups chicken broth
1/2 cup wild rice, rinsed
2 cups water
1-2 strips bacon
1/2 cup pecans

In a large pot, heat the olive oil over medium-hot heat. Saute' the onions in the hot oil for 1/2 minute, then reduce heat to low and cook, stirring often, until onions become dark golden brown, about 5 minutes. Add the mushrooms and the thyme and the water, stir, cover and let cook over low heat for 5 minutes, stirring occasionally. When time is up, turn off the heat and set aside.

While mushrooms are cooking, put the brown rice into a medium heavy bottomed pot or rice cooker and add the broth. Cover and cook over medium to low heat (mixture should simmer) until rice is cooked and tender. Set aside.

While mushrooms and brown rice are cooking, put the wild rice into a medium heavy bottomed pot or rice cooker and add the water. Cover and cook over medium to low heat (mixture should simmer) until rice is cooked and tender. Drain. Set aside.

The brown rice will take 20 - 30 minutes and the wild rice closer to 45 minutes.

While rice is cooking, in a small frying pan, cook the bacon until it is crisp enough to crumble when cool. Let cool on a paper towel, then crumble. Discard the extra bacon grease in the pan, but don't wipe it. OK to have a little bit of grease left in the pan.

In the pan the bacon was cooked in toast the pecans for 5 minutes over medium-high heat, stirring and turning them over as needed to keep them from burning. Set aside to cool, then chop the nuts.

Once all the rice is cooked, reheat the mushroom mixture over medium heat for about a minute, then add the two kinds of rice, the crumbled bacon and the chopped pecans. Stir well to combine, heat another minute over medium-low heat, covered, then serve while hot.

Sunday, November 30, 2014

Parsley Sage Rosemary and Thyme and Bacon!


"It is never too late to be what you might have been."    - George Eliot

A few years ago I read about a challenge that sounded a bit overwhelming. Bloggers were going to do a post to their blog each day for the whole month of November. The idea was to encourage more writing and maybe even to spark an interest in writing as a way of life. At the time I knew it was impossible for me to do a post every day, especially in November. This year I decided that I just might be able to do it, so I began on November 1.

As you may have noticed if you have read my posts, I think of this primarily as a food blog, so it is only right that most of the posts should be about food. Even better if they contain a recipe. A photo or two is part of the look and feel of this blog, so I rarely do a post without at least one photo. Looking back over the month I feel like I've done pretty well, A third of the posts didn't have a recipe, but some of those were about food and all had a photo or illustration.

It's been a good month, although a few friends have had major health problems. I'm glad that the month finishes off with Thanksgiving and post-Thanksgiving thoughts since turkey is one of my favorite foods. Today I cooked a turkey for our family since last Thursday we were treated to our neighbor's heirloom variety home grown turkey for the holiday meal. Mine is a frozen bird from a chain grocery store, so it should be interesting to see the difference.

Soon fall will turn into winter and my favorite season will hibernate until next year. Of course the run-up to Christmas will keep me busy and it means lots of baking, so I have a smile on my face as I type this and think of what great posts there will be in December.

I spoke with my Mom yesterday and she has already gotten an early Christmas gift from me. I created a book of our kitchen remodel project for her and had it published by Blurb, so it has a nice hard cover and lovely paper to really show off the photos I took as we went along and the finished kitchen, too. So glad that she and the family enjoyed learning about how the project went as they read through the book over the weekend while they were visiting her.

I hope dear reader that you have enjoyed the November posts and are getting in touch with your inner elf as we jump into the winter holiday season!

But before we leave November I want to share with you the stuffing I made today. I'm glad I made the stuffing because the frozen bird was not as fully flavored as the turkey raised right across the street that we enjoyed on Thursday. This time I took my Mom's classic recipe and added corn bread, mushrooms, bourbon and bacon. It makes a wonderful stuffing with a hint of Southern style. If I hadn't used up almost all of my pecans for the pies I would have put some pecans in, too. When you make this, and your really should, you can add pecans and think of me.


Parsley Sage Rosemary and Thyme and Bacon! Stuffing 

4 slices bacon, cut into 2-inch pieces
1 medium onion, minced
4 oz. mushrooms, chopped
1 cup celery, chopped
1-2 cloves garlic, finely chopped
1 tablespoons poultry seasoning
1/4 teaspoon dried thyme
1/4 teaspoon dried rosemary, crushed
½ teaspoons salt
1 teaspoon pepper
2 quarts soft stale bread cubes and cornbread
1 cup chicken broth
3 tablespoons bourbon
½ cup parsley, chopped


In a heavy pot or skillet cook the bacon over high heat until almost crisp. Remove and drain on paper towels. Saute’ the onions, mushrooms, and celery in the bacon drippings (grease) on medium heat for 5 minutes, stirring often. Add the garlic and stir well. Continue cooking over medium heat another two minutes. Add the poultry seasoning, dried thyme, dried rosemary, salt and pepper and stir well to combine.


Pile the parsley on top of the bread cubes and cornbread in a very large bowl or pot. Pour sauteed mixture over the parsley. Combine sauteed mixture and the reserved bacon with the bread cubes (I always substitute some cornbread for some of the bread cubes).

In a large bowl or measuring cup combine the chicken broth and bourbon. Moisten the bread crumb mixture with chicken broth mixture. You may also add chopped apples, dried fruit, chopped toasted pecans, or oysters.

Use stuffing to stuff bird. Place inside bird lightly...don't pack tight.Stuffing expands a bit during cooking.  Extra may be baked in 425 degree F. oven ‘til brown (after turkey is out of oven).

Enough for a 10-14 lb. turkey.

Thursday, October 23, 2014

Winter Squash Season Side Dish


Time just seems to be flying these days! Found something I think that you will want to try yourself. About a month ago Sweetie and I were at Costco and they had tastings of some new products, all Afghan recipes. I sometimes think that a raft of people only go to Costco on the weekends for the samples, not to actually buy anything. Is that possible?

Anyhoo, we fell in love with a butternut squash side dish that was savory, with a hint of sweetness and a touch of heat. Sweetie decided that we should try making it ourselves, so I researched online and found about six different ways to make it. One of the constants was onion puree. I usually chop or mince my onions for most dishes, but for this one I put the peeled and quartered yellow onion into the food processor and let it run until it was a puree. I found that the cooked puree not only flavored the squash, but it seemed to thicken the sauce a bit, or at least provide body to the sauce.

I ended up combining a few of the recipes. Most had a goodly amount of peppers for heat, but since I was going for the very mild heat that I prefer, I used a small amount of cayenne pepper. If you like your food hotter, you can add jalapenos or increase the cayenne. They often had more turmeric, too. I know that turmeric is good for you , but it is not my favorite flavor, so I used only a teaspoon, while some recipes used as much as a tablespoon. Try it with a smaller amount unless you know that you love turmeric. You can always add more.

One of the most time consuming parts of this kind of recipe is preparing the butternut squash. Sweetie got past that by buying already peeled and cubes fresh squash. Beyond that the part that requires some time is that during the cooking you need to turn the squash over in the sauce every 10 minutes and to keep an eye on it so that the sauce cooks down, but doesn't burn.

This makes a lovely side dish. Traditionally it is served with naan flatbread and yogurt, usually garlic yogurt, but I served it with grilled chicken and the yogurt topping was plain yogurt. The chunks of butternut squash were tender, but not falling apart. They had an aroma of turmeric and onion and tomato. Now that it is winter squash season, give this a try, either as part of a traditional meal, with some eggplant, too, or as a side dish. It would go well with pork or heaped over a serving of couscous with pine nuts. You can substitute another kind of squash, like kabocha, or pumpkin, too.


Afghan Squash

1 large yellow onion
1/4 olive oil
1 clove minced garlic
1 tablespoon tomato paste
1 teaspoon turmeric
1 tablespoon minced fresh ginger
1/4 cup sugar
1/2 salt
1 1/2 - 2 cups chicken broth
4 cups peeled, de-seeded, and cubed butternut squash or pumpkin

Peel the onion and remove the stem end and the tip. Cut onion into four pieces. Place in the work bowl of a food processor fitted with the steel blade. Process until pureed, scraping down the sides as needed so that all the onion is a puree. In a large skillet cook the onion puree in the olive oil for 10 minutes, stirring often. All of the squash will need to go into the skillet, preferably in a single layer, so make sure the skillet is large enough.

To the cooked onion add the garlic, tomato paste, turmeric (you can add more if you like...I've seen as much as a tablespoon used), minced fresh ginger, sugar and salt. Stir to combine, then add the chicken broth and stir to completely combine all the ingredients in the mixture. Bring mixture to a boil, then reduce heat so mixture simmers. Add the prepared squash and stir to coat the squash with the mixture. As mush as possible, keep the squash in a single layer. Simmer for 10 minutes. Turn squash over so that top surface goes toward the bottom and is immersed in the sauce. Simmer another 10 minutes. Check squash for tenderness. You want the squash completely tender, but still holding together. Simmer another 5 or 10 minutes (or longer) if needed until squash is tender. Sauce will have thickens a bit. If squash is very tender, but sauce is too thin, remove squash with a slotted spoon, cover to keep warm, then simmer sauce some more until it is desired thickness. Put squash back into sauce and stir to coat with sauce. Serve at once, garnished with yogurt, or cover and refrigerate, then reheat the next day.


Speaking of time passing, we are just about a month away from Thanksgiving. Our neighbors have invited us for dinner and I think this year we will be enjoying a heritage turkey. It might be one of these blue faced toms. I snapped these shots as they tried to intimidate the dog. She is a sheep dog, but was having fun herding the chickens and turkeys, too.

Wednesday, October 08, 2014

Plenty of Peppers - Stuffed


It must be October in Northern California. We have had a string of days where the temperature was well above 90 degrees. So much for fall baking! A week or so ago when it was cooler I made stuffed peppers for dinner and just realized that I never posted the recipe or photos.

The red peppers were beautiful...large, meaty and very fresh. I bought them at the farm stand that was also selling the last of the strawberries, plus lots of melon, tomatoes, beans and squash. The yellow pepper came from a friend's CSA box. It was thinner skinned but delicious, too. The lamb is so local that its from sheep who kept our grass down early this spring, another gift from our great-hearted neighbors.

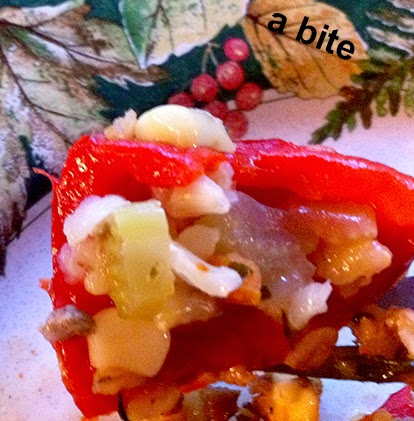
The filling started with sauteed onion, carrot and celery. To that I added both cooked brown rice and fresh corn, cut from the cob, plus some salty feta cheese. A robust flavor was added by using browned ground lamb, fresh rosemary, minced garlic, and dried thyme. I moistened the mixture with a little chicken broth I had in the fridge. It made a wonderful filling for the peppers, bringing out the peppers sweetness and warm flavors. I put the filling that wouldn't fit in the peppers into a greased baking dish and cooked it along with the peppers. It made an outstanding lunch for Sweetie the next day.

He could really use a satisfying lunch because this was just about the time that we had discovered the results of a small, long-term leak in one of our pipes. It has taken almost two weeks to do the repair, but on Friday I should be able to paint the new drywall. After that we can install the last of the new flooring and take a break from construction for a while.

Maybe we'll get cool weather to turn the leaves autumn colors. That's a wonderful time to take a ride in the country and check out all the gold and red and burgundy leaves. Of course what we really want is rain. Wishing for a very rainy winter, but I do hope you get to enjoy fall color if you live where there is some.


Lamb Stuffed Peppers
Serves 4

4 medium to large bell peppers (I like red and yellow and orange, but green is OK, too)
1 tablespoon olive or grapeseed oil
1 medium onion, peeled and chopped
1-2 stalks celery, chopped
1 small carrot, sliced into thin coins
1 pound ground lamb, browned and drained
1 1/2 cups cooked and cooled brown rice
1 ear corn, steamed 5 minutes, then cooled; corn cut from cob
1/4 cup feta cheese, in small crumble
2 teaspoons fresh rosemary, chopped
2 cloves fresh garlic, finely minced
1 teaspoon dried thyme
S & P
1/4 - 1/2 cup chicken broth
about 1/8 teaspoon cayenne pepper, or to taste

Wash the peppers and remove the stem end and the core, plus all the seeds. Cut in half. (I like to cut from the stem to the bottom, but some people like to cut through the middle and set the stem end as a bottom. Make sure that the halves are not tippy. Cut off a bit of the outside of the pepper if needed. Set peppers aside.

In a skillet, saute the onion, celery and carrot in the grapeseed oil. Cook, over medium-high heat, stirring often, until onion is transluscent, about 5 minutes. Turn mixture into a large bowl and add the cooked lamb, cooked rice, corn, feta, chopped rosemary, chopped garlic, and dried thyme. If desired, add salt and pepper to taste. Add enough chicken broth to moisten the mixture.

Line a baking sheet with foil or parchment, or a silicon baking mat. Arrange the pepper halves on the pan. Stuff each half with the lamb mixture, mounding in the center. Sprinkle with a touch of cayenne pepper. If there is left over stuffing mixture, place in a greased small baking dish to bake along with the peppers.

Bake in a preheated 350 degree F oven for about 20 minutes. Peppers will be softened and stuffing mixture will be hot and a little browned.

Serve at once. Refrigerate any leftovers, or baked leftover stuffing mixture.