Showing posts with label molasses. Show all posts

Thursday, December 30, 2021

Bourbon Glazed Ham


The holidays really rush by, don't they? One of our holiday meals had a centerpiece of Bourbon Glazed Ham, using a recipe from Martha Stewart. You begin with a fully-cooked half ham, so it's pretty easy, and towards the end of heating it fully, you brush on this aromatic bourbon-brown sugar-mustard glaze that you make while the ham does it's initial heating up. As the ham gets to the end of it's time in the oven, the glaze becomes shiny, browned and a bit sticky - altogether delicious. You don't even need to save this for a holiday...it works to dress up a weeknight dinner just as well.


Bourbon Glazed Ham

Adapted from a recipe by Martha Steward, 2009

1 1/2 cups dark brown sugar, packed
1 tablespoon molasses
2 tablespoons grainy mustard
1/4 cup bourbon (could also use brandy if preferred)
1 bone-in, fully cooked half ham, about 6 pounds

Preheat oven to 275 degrees F. Place ham in a roasting pan, cover tightly with foil (or put into a baking bag, like Reynolds Brown-In Bag, as I did, following directions for adding 1 tablespoon flour and cutting vent holes). Cook in preheated oven until thermometer registers 145 degrees F, about 1 1/2 hours.

While ham is in the oven, make the glaze. In a small saucepan combine the brown sugar, molasses, mustard and bourbon. Bring to a boil over medium heat and boil for 3 minutes or until thickened and syrupy. Set aside until the ham has reached XX degrees F.

Remove the cover from the ham, increase oven temperature to 350 degrees F, and brush the glaze generously on the ham, covering all exposed parts. Bake, uncovered, another 30-35 minutes until glaze is shiny and darkened. Serve warm, sliced, or at room temperature.

Tuesday, September 07, 2021

Spicy Bean Bake

I'm in the process of re-doing my family cookbook. It's fun! One of the things I did early on in the renovation was to change the font size to make it smaller. Originally I had it larger for my Mom, but this time around I'm looking at this as a resource for the next generation...and, perhaps, beyond, so I think they can handle a smaller type face.

As a result there is more room for extra recipes. In a kind of serendipity, I also found some recipe cards that had been missing, including some in my Mom's handwriting. One of the recipes was for a baked bean concoction that became popular with the family after I left home and moved to the West coast, so I had to ask Mom for the recipe and now it's in the cookbook. It's called Spicy Bean Bake, but it's not really that spicy. I suspect that my hot sauce loving siblings may add extra heat via sauces that contain things like habanero chilis after it's served. My Mom didn't really care for extra spicy things. You could also make this vegan by leaving out the ham or other meat and the bacon and adding a cup of cooked corn. 

What this recipe does have is a lot of flavor! It's also easy to make and makes a lot. The leftovers were even better than the original dish. Score!

I only made half the recipe, but Sweetie liked it so much that next time I'll make the full amount.,


Spicy Bean Bake

Serves 8-12 

One can 40-oz., baked beans
One can 1-pound, red kidney beans
2 large apples, chopped
1/2 cup raisins
1 1/2 cups chopped onion
1 cup chopped bell pepper
3 cups chopped cooked leftover ham, pork or beef
4 slices crumbled crisp bacon
1 cup catsup
1/2 cup pickle relish
1/2 cup brown sugar, packed
1 teaspoon dry mustard
1/2 cup molasses

Mix all ingredients in a 3-quart casserole. Cover and bake in a 250 degrees F. oven about 1 1/2 hours.


Saturday, October 19, 2019

Warm Spices in a Crinkle Cookie


Now that the weather has finally taken a turn towards cooler temperatures, I find myself thinking about using the warm spices of fall and winter - cinnamon, ginger, cloves, nutmeg, cardamom, pepper, allspice - and so I was thrilled to find a recipe in a magazine I took out of the library recently that uses a lot of those. The magazine is the Martha Stewart Living magazine from December 2018 and the cookies are Gingerbread-Espresso Crinkle Cookies. I think that it was the addition of the espresso that caught my attention. I'd never thought of adding it, but it seems right and did, indeed, add a rich deep note to these gingery cookies. The second reason I decided to make them was that Sweetie loves anything with molasses and these cookies have both brown sugar and liquid molasses in them.


These are crinkle cookies, meaning that you roll the dough in balls and roll the balls in sugar, as shown above. When baked the cookies have grown a bit, so the sugar gets sort of cracked and there are lovely fissures of cookies and areas covered with sugar between. For this recipe you roll the dough in both granulated sugar and confectioners' sugar. Just remember that confectioners' sugar is the glitter of the culinary world...it seems to go everywhere while you are working with it! The cookies aren't too sweet, even with all that sugar coating and the texture is crisp on the outside and slightly chewy in the center. I gave some to my neighbor and she enjoyed them in the morning with coffee.

You do need to start theses cookies at least four hours before you plan to bake them, but the dough can also sit in the fridge for three days, or you can freeze it for up to a month, making them a nice thing to have on hand for when a yen for cookies hits. They're not refrigerator cookies exactly, but the time in the fridge lets the flavors meld. You can shape and sugar a tray of cookie in about the time it takes to preheat your oven and then shape the next cookie sheet worth while the first one cooks, or you can bake two sheets at once, but be sure to turn the sheets around and switch the rack they are on about half way through baking.

These are pretty enough for a tea party, but simple enough for everyday eating...ready to bake?


Gingerbread-Espresso Crinkle Cookies
Martha Stewart Living Magazine, Dec 2018
Makes about 30 cookies

1 3/4 cups unbleached all-purpose flour
1 tablespoon instant espresso powder
1 1/4 teaspoon ground ginger
1 teaspoon ground cinnamon
1/4 teaspoon ground cloves
1/4 teaspoon freshly grated nutmeg
1 1/2 teaspoons baking powder
1/2 teaspoon kosher salt
1 stick unsalted butter, room temperature
1 tablespoon finely grated fresh ginger (from a 1-inch piece)
2/3 cup packed dark-brown sugar
1/4 cup unsulfured molasses (not blackstrap)
1 large egg
granulated sugar (about 1/2 cup) and confectioner's sugar (about 1 cup) for rolling

In a bowl, whisk together the flour, espresso powder, ground ginger, cinnamon, cloves, nutmeg, baking powder and salt.

In a mixer bowl beat the butter with the grated ginger and brown sugar on medium-high speed until pale and fluffy, about 2 minutes. Add the molasses; beat until combined. Add egg and beat until combined. Scrape bowl and beaters and beat to combine. Reduce speed to low and gradually add the flour mixture, beating only until combined with no dry flour remaining.

Transfer the dough to plastic wrap, pat into a disk, wrap and refrigerate until firm, at least 4 hours and up to 3 days (or freeze up to 1 month; thaw in the refrigerator before using).

Line 2 baking sheets with parchment. Preheat oven to 350 degrees F, with racks in upper and lower thirds if baking two sheets at a time.

Place granulated sugar in one shallow bowl and confectioners' sugar in another.

Using a 1-oz scoop or a tablespoon measure, scoop rounded spoons of dough, roll into balls and put into the bowl of granulated sugar. Roll around to coat, then transfer to the bowl of confectioners' sugar. Turn dough balls to fully coat. Balls should be heavily coated; don't shake off excess. If dough becomes sticky as it warms, dust your hands with confectioners' sugar and continue to make balls of dough. Once each dough ball is heavily coated with confectioners' sugar, place it on the prepared sheet, leaving 2 inches between balls.

Bake, rotating sheets and rack positions once halfway through, until cookies spread and surfaces appear cracked, 15 - 17 minutes (I found that closer to 12 minutes was sufficient). Let cool on sheets 5 minutes, then transfer to a wire rack; let cool completely. Store in an airtight container at room temperature, between sheets of parchment, up to 5 days.

Monday, October 16, 2017

Seasonal and Sensational Bread Baking Babes World Bread Day Bread


This has been a long, strange week here in Northern California. A week ago, very early in the morning, a neighbor phoned and woke me up and said she smelled smoke. Her husband is a Napa Sheriff and he had deployed to the Atlas fire in Napa, so smelling smoke here, so far away from that fire really made her nervous. We checked and there was no fire nearby, but Sweetie heard that there was one in the northern reaches of Napa, plus the wind was blowing in our direction, from the east, rather than the usual direction, from the west and the ocean.


By morning there was a lot of smoke and we could see the flames in Santa Rosa and further south from our upstairs, east-facing deck. The wildfire had spread rapidly with the high winds and already destroyed a large area in northern Santa Rosa. The fire even jumped over a six-lane freeway! Evacuations had begun just about the time my neighbor called. Thus began a week with over 40 dead, over 6 thousand structures destroyed, many, many acres burned and many thousands of people displaced. It took until today for the major evacuations to be rescinded, although there are still evacuations happening elsewhere as the fire continues to spread. Fortunately it is finally beginning to be contained by all of the brave and exhausted first responders and public safety folks from far beyond the borders of California.


We are blessed in that we have never been at risk (although I was packed and ready if the wind shifted the wrong way) and could offer our home to evacuees. The photo above is from this morning where the sun was again red due to the smoke in the air.  The smoke has been bad most days, but that has been the worst of it for us. Thank you to all who sent good wishes and prayers.


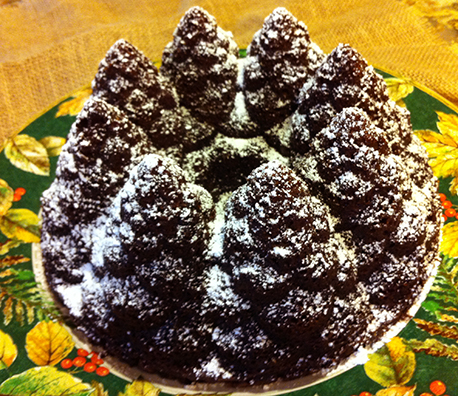
This afternoon I was able to finally find some time to make the delicious seasonal bread brought to us by our Kitchen of the Month, Judy of Judy's Gross Eats. Pumpkin Cornmeal Bread sounds sort of mundane, but this bead is not. It is moist and a little fluffy.


Mine had a good rye flavor, some pumpkin flavor, but I reduced the molasses a bit so that it didn't overwhelm the other flavors. I also used some walnut oil for the oil part which gave it a subtle nuttiness. The cornmeal provided some chew and more flavor. This is a really flavorful bread. Thank you Judy for picking it!

I decided to make 12 dinner rolls in a spiral shape and a good size braided loaf. We had some of the rolls with dinner and I really enjoyed them.

You'll love making this bread. Because it has a lot of dry yeast, it is sure to rise for you (as long as you keep your ingredients barely warm or even cooler) and it is easy to work with and shape. To be a Buddy, just bake it, take a photo, and send it by Oct. 29th to Judy. She'll send you a badge for your blog.


Be sure to check out the lovely bread made by the other Babes...and Happy World Bread Day!


Pumpkin Cornmeal Bread
Yield:  2 or 3 loaves or 24 dinner rolls

1 ½  tablespoons active dry yeast (1 ½ packets)
Pinch of sugar
1 cup warm water (105˚ to 115˚)
1 cup warm buttermilk (105˚ to 115˚)
5 tablespoons melted butter or oil
1/3 cup light molasses
½ cup pumpkin purée (either canned or homemade)
1 tablespoon salt
1 cup fine- or medium-grind yellow cornmeal
1 cup medium rye flour
4 ½ to 4 ¾ cups unbleached all-purpose or bread flour

In a large bowl, combine yeast, sugar, salt, cornmeal, and rye flour.   Whisk to mix well.

Add warm water, buttermilk, melted butter/oil, molasses, and pumpkin purée.  Beat until smooth (1 to 2 minutes) using either a whisk or the paddle attachment on a mixer.

Add the unbleached all-purpose flour or bread flour, ½ cup at a time, until it becomes a soft dough. Knead until smooth and slightly tacky, either by hand or with a dough hook.

Place in a greased bowl, turning once to coat the top; cover with plastic wrap.  Let rise at room temperature until double, about 1 ½ to 2 hours, depending on how warm it is.

Turn onto work surface and divide the dough into 2 or 3 equal round portions.  Place on parchment-lined baking pan, cover loosely with plastic wrap, and let rise at room temperature until doubled, about 45 minutes.

To make dinner rolls, divide the dough into 24 equal portions and shape as desired.

Place on parchment-lined baking pan, cover loosely with plastic wrap, and let rise at room temperature until doubled, about 20 minutes, or place in refrigerator for 2 hours to overnight.

Twenty minutes before baking, heat the oven to 375˚, using a baking stone, if you wish.  While the oven is heating, brush the tops with melted butter.

Bake in the center of the preheated oven until golden brown:  40-45 minutes for loaves or 15 to 18 minutes for rolls.  Remove from oven, let cool on rack until completely cool.


(adapted from Bread for All Seasons by Beth Hensperger)

Thursday, October 20, 2016

Sugar And Swirls of Spice for the Cake Slice Bakers


It's often sad to finish up with a cookbook, but each October the Cake Slice Bakers do just that. We have been baking since last November from Maida Heatter's Cake book and I've enjoyed all of the cakes I chose to make during that time. This month we get to choose our own recipe. With it finally feeling like Fall, I decided to go with a cake that has a spicy component and a vanilla/almond component. This marble cake is delicious, the crumb is moist and light and tight and it looks pretty, too.

If you make this cake be prepared to use a lot of bowls. You make the spice batter and, unless you have multiple stand mixer bowls, you scrape it out into another bowl, clean up the mixer bowl and use it to make the vanilla/almond batter. For that batter you need to whip egg whites...so another bowl. A three bowl cake, but it is well worth it (but just wanted you to know).


In the past I've made marble cakes where you put in the batter in sections and then swirled the two batters together with a knife. The recipe didn't indicate that we should do that, but I wish I had. This way the batters are more like ribbons than marbling. Still yummy, but next time I'd do a swirl or two. I also changed the directions a bit because, unless you have many stand mixer bowls, it is easier to beat the egg whites first and then mix up the light batter so that the whites are ready to fold in as soon as the white batter is mixed. You might even want to beat the whites before you do the dark batter...

Do try this one if you want a pretty, spicy, wonderful tube or Bundt cake. You'll be glad you did.


Marbelized Spice Cake
adapted from Maida Heatter's Cakes
12-16 portions

Note: This is a three bowl recipe - 1 bowl for the dark batter, 1 for the light batter, and 1 to whip the egg whites in. If you have three stand mixer bowls, great. If not, be prepared to transfer batters and wash and dry bowls as you go along. You'll need to wash and dry the beaters either way.

Dark Batter

2 cups cake flour
1 teaspoon EACH: baking soda and cinnamon
1/2 teaspoon EACH: nutmeg and ginger
1/4 teaspoon salt
1 tablespoon unsweetened cocoa powder (preferably Dutch-process)
1 teaspoon espresso powder
4 oz. (1 stick) margarine, at room temperature
1 cup packed dark brown sugar
4 egg yolks
1/2 cup dark molasses
1 cup unflavored plain yogurt

Adjust a rack one-third up from the bottom of the oven and, once you have everything ready to go, preheat the oven to 350 degrees F. Butter a large tube pan with a 14 cup capacity, then dust it all over with fine, dry bread crumbs to coat. Use your fingers to sprinkle crumbs on the inner tube. Invert the pan over paper and tap to shake out excess. Set the pan aside. (I used two small decorative Bundt pans and a 6 cup capacity standard Bundt pan and there was just a little too much batter. Allow some room for the cake(s) to rise.)

Sift the cake flour, then sift it again with the baking soda, cinnamon, nutmeg, ginger, salt, cocoa powder and espresso powder; set aside.

In the large bowl of a stand mixer, beat the margarine until soft, add the sugar, and beat to mix; then add the yolks all at once along with the molasses. Beat  until smooth and slightly lighter in color; a couple of minutes.

On low speed add the sifted dry ingredients in three additions alternating dry ingredients with the yogurt in two additions. Beat batter as you go. Scrape the bowl and beaters as you go to keep everything incorporated well.

Set aside or transfer batter to another bowl if you only have one bowl as I do. In that case, clean and dry the bowl and beaters.

Light Batter

4 egg whites at room temperature
1/4 cup sugar

In the clean, dry bowl, with clean beaters, preferably the whisk beaters, beat the egg whites until they hold a soft shape. Reduce the speed to moderate and gradually add the sugar. Increase the speed again and beat briefly only until the whites hold a definite shape. Transfer beaten whites to a clean bowl, then re-clean the stand mixer bowl and beaters and dry them.


2 1/2 cups cake flour
2 teaspoons baking powder
1/4 teaspoon salt
4 oz. (1 stick) margarine at room temperature
1 teaspoon vanilla extract
1/4 teaspoon almond extract
3/4 cup granulated sugar
3/4 cup soy milk

Sift the flour, then sift it again with the baking powder and salt. Set aside.

In the clean stand mixer bowl, beat the margarine until soft. Add both extracts and the 3/4 cup sugar and beat until thoroughly mixed. On low speed add the dry ingredients in three additional alternately with the soy milk in two additions. Beat, scraping the bowl and beaters as necessary, until the ingredients are smooth.

With a flexible rubber or silicon spatula, fold in the beaten egg whites, a third at a time...don't fold thoroughly until the last addition.

Take the prepared pan and two large serving spoons. Scoop dark batter into the prepared pan(s), leaving space between the scoops. Fill the space, using the other spoon, with light batter. Scoop dark batter on top of the light batter and, using the light batter spoons, scoop light batter on top of the first layer's dark batter. Keep going, alternating dark and light, until pan is almost full, but leave room at the top for the cake to rise.

Rotate the pan briskly and tap it on the counter to release air bubbles and even the top.
Bake in the preheated oven for about 1 hour. When don a cake tester inserted gently to the bottom will come out clean.

Cool cake in the pan for 10 minutes. Then cover with a rack, turn the pan and the rack over, remove the pan and let your gorgeous cake cool on the rack.

Serve as is or with whipped cream or ice cream on the side.

Sunday, January 10, 2016

Buddies Bake Anadama Bread

Not sure what happened, but I completely forgot to do a round-up post for the Anadama Bread. So sorry dear Buddies! Perhaps this being my first post for 2016 will make it more acceptable.

We had at least two lovely breads baked by our Buddies Kelly of A Messy Kitchen and Carola of Sweet and That's It.   I thought there was a third one, but can't find any e-mails. Many thanks to each of your for baking with the Bread Baking Babes!


Kelly of A Messy Kitchen  found this month's bread a stroll down memory lane since she had made the bread in high school. She says, "For my loaf, I used a blend of flours, all purpose, spelt, and einkorn.  Because spelt and einkorn don't absorb liquid like regular flour, I ended up having to add a lot more, between ¾ and 1 cup of regular flour (to boost the gluten).  I still left the dough on the sticky side though because too much einkorn can give you a dry or dense loaf.  I must have hit it right because I got neither of those.  The loaf was hearty, for certain, but not heavy and still nicely moist.  I only figured out today that I used double the sugar as the original post, because I looked at another babe's post first which did the same.  Maybe that was why my loaf took so long to rise, the sugar inhibits the yeast.  I might use less next time but it was really good as it turned out!  And I still got fantastic oven spring."


Carola of Sweet and That's It posted on our Facebook page and not on her blog, but her Anadama bread was gorgeous, with a lovely pattern made using the seeds on top. She found that not all cornmeal is created equal but I hope she will try again to make this bread, even using the fascinating pan she tried.

I think a lot of the Babes had a good time with the Anadama bread and the variety of seeds was stunning. The Bread Baking Babes will be posting the January recipe on Jan. 16th. It's a different one, so do check back then.

Saturday, December 19, 2015

Three Kinds of Ginger


Although I've always loved gingerbread, I was an adult before I discovered the joys of fresh ginger and candied ginger. Of late I've been increasing the amount of ginger in my diet since it is not only an effective anti-inflammatory, but it tastes wonderful. Fresh ginger does have some natural heat to it, but I find that I enjoy that much more than the heat from, say, hot peppers.

One way to enjoy three kinds of ginger; fresh, candied and ground dried ginger; is by making gingerbread cake. I recently tried a new recipe that uses all three and it works really well in a Bundt cake pan. It's called the Gramercy Tavern Gingerbread and it's a recipe from Epicurious. I think I decided to try it because the first ingredient is one cup of stout (like Guinness). It also has lots of spices, not just ginger. Cinnamon, nutmeg, cloves and cardamom are also used. The strong flavor of molasses comes from molasses itself, but also from dark brown sugar. The only think it was lacking was the candied ginger, so I chopped up a tablespoon of that and added it anyway. It tended to go to the bottom of the pan, which became the top of the cake. I found that out because it got in the way of slicing the beginning of some slices, but I still think it adds a necessary element to the cake.

This makes a full Bundt cake, so make sure that your pan is a full sized one, which I think is a ten-cup capacity or larger one. I baked mine in a pan that looked like a circle of Christmas trees. For decoration I sifted on just a little powdered sugar, so they looked like snowy trees. Very pretty and perfect for a party, or your own holiday table.

This gingerbread is moist, spicy, mouthwatering (perhaps due to the wonderful fragrance of the stout and all those spices), with a fine crumb and sturdy form. Everyone who tried it was delighted, especially those who added a dollop of whipped cream to their serving.

Be sure to check back tomorrow to see what I made for the Cake Slice Bakers!


Adapted from
Gramercy Tavern Gingerbread
from Epicurious

1 C stout (like Guinness which is what I used)
1 C dark molasses
1/2 t baking soda
2 C all-purpose flour
1 1/2 t baking powder
1 1/2 T ground ginger
1 t ground cinnamon
1/4 t ground cloves
1/4 t freshly grated nutmeg
pinch ground cardamom
1 T freshly grated fresh, peeled ginger root
1 T finely diced moist candied ginger
3 large eggs
1 C packed dark brown sugar
1 C granulated sugar
3/4 C vegetable oil

Preheat oven to 350 degrees F. Generously butter a 10-inch (10-12 cups) Bundt pan and dust with flour, knocking out excess.

Bring stout and molasses to a boil in a large saucepan and remove from heat. Whisk in baking soda, then cool to room temperature.

Sift together flour, baking powder, and spices in a large bowl. Whisk together eggs and sugars and fresh ginger. Whisk in oil, then molasses mixture. Add to flour mixture and whisk until just combined.

Pour batter into Bundt pan and rap pan sharply on counter to eliminate air bubbles. Bake in the middle of the oven until a tester comes out with just a few moist crumbs adhering, about 50 minutes. Cool cake in pan on a rack 5 minutes. Turn out onto rack and cool completely.

Serve cake, dusted with confectioners' sugar, or serve with whipped cream.

As a reward for reading to the end, here is a recent shot of the sunset in our wintery sky. We have been having rain on and off, which is such a blessing!, so there are often clouds in the sky at sunset. Winter sunsets seem to have a wonderful fragile quality to them that I love.


Wednesday, December 16, 2015

The Babes And An Old New England Bread


This month I have the honor of being the Kitchen of the Month and have asked my fellow Bread Baking Babes to gather around the kitchen table and to have fun with Anadama Bread, an old New England favorite. Sweetie enjoys this bread because of the molasses and I enjoy the seeds and the fact that it makes great toast. It has corn meal in it for body and mine was a fairly compact bread which rose well enough as it was proofing, but didn't have much oven spring either time I made it. You can have fun with this bread by changing out the seeds. The first time I made it I didn't have many seeds on hand, so I used mostly flax and poppy seeds. 


The second time I used those, but also used sesame seeds and sunflower seeds, plus I used regular flour and just a bit of millet flour. I'm pretty sure that traditional Anadama Bread doesn't have much in the way of seeds, so this is a good recipe to have fun with, knowing that you are giving and old New England bread a new way of being.

Anadama bread is an old time bread, baked at least since 1850. This recipe is from the March 2015 Bon Appetit magazine.
 
 I tried it out in a semi-gluten free version, replacing 1/2 cup of the wheat flour with buckwheat flour and the King Arthur Flours gluten free flour mix so I could actually try a slice and not suffer for it. I also used a non-dairy butter substitute instead of the butter. For seeds I used 3 tablespoons whole brown flax seeds and 4 teaspoons poppy seeds.  I baked it in a long, thin bread pan, which is usually good for gluten free baking, so it made a long, narrow loaf. I think a regular sized loaf pan would make nicer bread for sandwiches. 

This dough made a pretty dense loaf with wonderful flavor and fragrance. I would recommend using regular flour (unbleached or whole wheat), real butter and whichever seed mixture you like, staying pretty close to the same seed proportions. Do allow time for the three risings.
 
No one really knows how this bread got its name. Wikipedia says, "An apocryphal story told about the origin of the bread goes like this: Every day a local worker would find cornmeal mush in his tin lunch pail, despite asking his wife for an occasional piece of bread. One day, because of weather or other circumstances, he came home just prior to lunch time. His wife, Anna, was out. He sat down and opened his lunch box to find the usual cornmeal mush. He sighed and said, "Anna, damn her," as he resolutely reached for the flour, molasses and yeast which he added to the cornmeal mush. His resulting bread became a local favourite."
 
 King Arthur Flour has this explanation: "There are many versions of how this bread came into being. They're all similar, but each varies slightly. The general consensus is that a New England woman named Anna provoked her husband — some say through laziness, others say from baking the same bread daily, or for not finishing her bread-baking. The husband either threw a bag of cornmeal at her and missed, but spilled it into the dough; or he grabbed cornmeal instead of flour and tried to finish her bread. He muttered, "Anna, damn her!"
 
So you can freely swear while making this bread (it's tradition, right?), have some wine while it rises and rises again...and again, and enjoy it as the weather grows ever colder.

Be sure to visit the other Babes sites to see what their version is and since this is a wonderful bread to go with a pot of hot soup, there is likely to be a good day to make it between now and December 29th. Make the bread, send me an e-mail with a photo and a note about your experience with it, and I'll send you a Buddy badge created by our talented Babe Lien. My e-mail is elle dot lachman at gmail dot com. Looking forward to seeing your beautiful, seedy Anadama Bread.


Anadama Bread - Makes one loaf

2 tablespoons unsalted butter, room temperature, plus more for the pan
1 - 1/4 oz. envelope active dry yeast (about 2 1/4 tsp.)
1 cup stone ground medium cornmeal
1/4 cup mild-flavored molasses
2 tablespoons help seeds or white sesame seeds
1 tablespoon nigella seeds or black sesame seeds
2 tsp. golden flaxseed
2 tsp. brown flaxseed
2 tsp. poppy seeds
1 1/4 tsp. kosher salt
2 cups all-purpose flour, plus more for kneading, etc.
1 large egg, beaten to blend
Salted butter, for serving

Preheat oven to 375 degrees F. Lightly butter an 8" x 4" loaf pan and line with parchment paper, leaving a generous overhang. (I skipped the parchment and baked the bread in a narrower and longer pan.)

Place yeast in a medium bowl or the bowl of a stand mixer. Add 1 cup warm water; stir to dissolve the yeast. Add the cornmeal, molasses, help seeds, nigella seeds, golden and brown flax seeds, poppy seeds and salt. Stir to combine using a wooden spoon. Continue stirring with the wooden spoon or use the dough hook if using the stand mixer. Add 2 cups of flour and 2 tablespoons of butter and mix until no dry spots remain.

Turn the dough out onto a lightly floured surface and knead until the dough is smooth and elastic, 10-15 minutes OR mix in stand mixer on medium speed 8-10 minutes.

Lightly butter a medium bowl. Transfer dough to bowl and turn to coat. (Elizabeth might skip the butter part.) Cover with plastic wrap or shower cap and let rise in warm, draft-free spot until almost doubled in size, about 1 hour.

Punch down dough to deflate; cover. Let rise again until about doubled in size, about 1 hour.

Turn dough out onto a lightly floured surface and pat into and 8' x 4' rectangle. Starting at the short side furthest from you, roll up dough, pinching the seam as you go to create a tight roll. Pinch seam to close and tuck ends under, pinching to seal. Place seam side down in the prepared loaf pan. Cover with plastic and let dough rise. Uncover before it crests the top of the pan and wait for it to spring back slightly when pressed, about 1 hour.

Brush top of dough with egg. Bake, rotating halfway through, until bread is baked through and the top is a deep golden brown, 45-50 minutes. Let cool slightly in the pan on a wire rack before turning out. Let cool on the rack before slicing (if you can wait that long). Serve with salted butter.

Bread can be made 5 days ahead. Store tightly wrapped at room temperature.

Monday, April 07, 2014

One For Sweetie

The tulips are blooming, the apple trees are in bloom, and Sweetie did a lot of grass mowing today. It had gotten remarkably long. He deserved something good to eat! As you may have guessed if you've read this blog for a while, I'm blessed with a wonderful partner, Sweetie, and he enjoys eating what I cook and bake. One of his favorite breads to bring home from Berkeley when he visits Acme Bread there is the Cranberry Walnut loaf.


I decided to try my hand at that kind of bread. My version is not as dense or dark, so I probably should have added more rye flour, but he loves it and I enjoyed making it.

I looked at quite a few recipes before throwing this one together. The cocoa and molasses add color and flavor and go well with the rye and whole wheat flours. I added the cooked mixed grains because I love the texture that they add, as well as nutrition. The walnut oil is a luxury and can be replaced with regular veggie oil or olive oil, but it goes so well with the walnuts.

I made this in a heavy duty stand mixer, using the dough hook, but ended up kneading it for about 5 additional minutes on a board to make sure there was plenty of gluten development. I kneaded in the walnuts and cranberries after the first rise. I shaped the nut and cranberry laden dough into two football shaped loaves, but they would bake up nice in loaf pans, too.


Cranberry Walnut Bread Elle's Way
makes 2 smallish loaves

1 packet (2.xx oz.) dry yeast
1/4 cup lukewarm water
1/2 cup mixed whole grains (rye berries, barley, wheat berries, rolled oats, etc.), cooked in 1 cup water, drained and cooled
2 tablespoons cocoa powder (unsweetened)
1 cup rye flour
1 cup whole wheat flour
1 cup bread flour
1 1/2 cups all-purpose flour, plus another 1/2 cup for kneading
1 teaspoon salt
1 1/2 cups lukewarm water
2 tablespoons molasses
1/4 cup walnut oil
1/3 - 1/2 cup chopped walnuts per loaf (2/3 - 1 cup total)
1/3 - 1/2 cup dried cranberries per loaf (2/3 - 1 cup total)

In a small bowl re-hydrate the yeast in the 1/4 cup lukewarm water. Let sit at least 5 minutes until yeast is foamy.

After yeast is ready, add to the cooled cooked grains in a stand mixer bowl and stir. Let sit 5 minutes.
While yeast mixture is sitting, in a large bowl whisk together the cocoa powder, rye flour, whole wheat flour, bread flour and 1 cup of the all-purpose flour and the salt. Set aside.

To the yeast mixture, add the 1 1/2 cups lukewarm water, molasses and walnut oil. Stir to combine. Set the stand mixer bowl with the yeast mixture on the stand mixer. Using the dough hook, on low speed, add the flour mixture, one cup at a time, to create a shaggy dough. With the mixer running still, add the remaining 1/2 cup all purpose flour a tablespoon at a time. Continue kneading with the machine about 5 minutes, then transfer to a floured board. Using the final 1/2 cup flour, if needed, knead an additional 5 minutes until dough is relatively smooth and silky.

Turn dough in an oiled bowl to coat with oil, then cover and let rise until doubled in bulk, about an hour.

Turn out onto lightly floured board, knock down, and divide in half. Return half the dough to the bowl.

Knead the walnuts and cranberries into the dough and form into a loaf. Repeat with the other half the dough.
Cover with oiled plastic wrap and let rise until doubled, about an hour.

Slash top and bake in preheated 375 degree F oven until loaf is dark golden brown and sounds hollow when tapped on bottom, about 45 minutes.

Let loaf cool before slicing. Will keep on counter, wrapped in a tea towel, a couple of days.

Saturday, November 23, 2013

Bread Again


It's been almost a year since my life changed due to kidney stones. Too much bread, especially the kind that I like with lots of whole grains, seemed to be one of the foods that led to the problem. For a while I stopped baking bread all together, but I've missed bread baking. It is an activity that brings me joy. So lately I've decided that since I can have small amounts of grains that I can have the occasional slice of multi grain bread. Why not have that slice be from a loaf I baked?

One of my favorite techniques for using whole grains in bread is to make a porridge from rolled grains. Oatmeal is still my favorite, but Quaker has a mixture of a number of grains...oats, rye, wheat to name a few...that are whole grains, but rolled to make them thinner. I cooked up a half cup of the mixed grains with 1 cup of water and then let it cool. That provided the base for my bread.

The best part was that I added some dark molasses. Sweetie loves molasses and it added a depth of flavor that goes well with these grains. I think the little yeasties like it too.

The second best part was what I did when the dough had risen and been punched down and shaped into a loaf. Using a technique that I read about in Daniel Steven's book The River Cottage Bread Handbook, I dipped the shaped loaf in milk, then rolled it in the uncooked multi grains, then put it into the bread pan. It makes for a lovely crust with toasted grains attached, lending flavor and texture, too. This is fabulous sandwich bread and makes great toast, too.


Multi Grain Sandwich Bread
makes one loaf

1/2 cup rolled grain, preferably a mix of grains like wheat, oats and rye
1 cup water
1 tablespoon molasses, dark preferred
2 cups all-purpose flour
2 cups whole wheat flour
1 teaspoon salt
1 packet dry yeast
1 1/2 cups water
1/2 cup milk
about 1 cup rolled grain, preferably a mix of grains like wheat, oats and rye

In a medium bowl that is microwave safe, cook the grain mixed with the 1 cup of water on high until it is cooked through, about 2 minutes. Remove to the counter and add the molasses. Set aside. Let cool.

In a large bowl whisk together the all-purpose flour, whole wheat flour, salt and yeast. Leave the flour out since you may need to add more, depending on the wetness of your dough.

Once the cooked grain mixture has cooled so that it is barely warm to the touch, put it into the bowl of a stand mixer. Add the 1 1/2 cups water and whisk to combine thoroughly. With the dough hook in place, on low speed, gradually add the flour/yeast mixture until a soft dough forms. Knead with the mixer (or by hand) 8 - 10 minutes, or until dough is satiny, if a bit lumpy from the grain, adding additional flour as needed. Shape dough into a ball and place it in an oiled bowl. Turn the dough to coat all sides with oil. Cover and let rise until doubled in bulk in a warm place.

Turn risen dough out onto a lightly floured work surface and punch down to remove excess gas. Knead a few times, then shape dough into a loaf shape. Place milk in a shallow pan which is large enough to hold the shaped dough. Gently turn the loaf shaped dough in the milk to coat. Place the rolled grain mix in another shallow pan and roll the milk coated loaf shape in the grains to coat. Place into a greased bread pan, cover, and let rise until just below the edge of the pan.

Bake loaf in a preheated 350 degree F. oven until golden brown and loaf sounds hollow when the back of the loaf is tapped, about 45 minutes.

Cool on a rack before slicing if you can wait that long.

Thursday, August 29, 2013

Going Bananas in the Land of St. Honore'


She woke with a start. It had been a horrible dream. The twins, her granddaughters who live on the other side of the country, were grown up in the dream. One was a dental tech and the other was a personal trainer at a gym...and neither one of them knew what to do with the ingredients on the kitchen counter in her dream; the softened butter, the sugar, flour, molasses, eggs, nuts, chocolate chips. They had a birth right, as anyone in our land has, to bake, yet they had no idea how to measure flour, soften butter, or even how to crack an egg. This was terrible! No child in the Land of St. Honore' should be flummoxed about baking something.

Eva decided she would do something so that this dream never became a reality. Well, maybe they would become a personal trainer and a dental tech, but she would make sure that they knew how to bake. Not only would they not be mystified at the sight of an egg, they would know how to separate eggs and whisk whites and bake a lovely, light, luscious, delectable cake.


First she waited until a decent hour, then called her daughter, their mom. She had to time the call just right because Grace would be leaving home soon to go to work. She was a CPA high up in her firm. Although she had been taught, she never baked. 'No time' was her excuse.

"Grace, I would love to have the girls visit me at Christmas, or even Thanksgiving, if that's possible. I know that they are always busy with volleyball and chess club and the debate team, but could you find a few days when they could spend a little time with me?" Eva was tempted to add "before its too late" but didn't think her daughter would be so easily led.

Grace had a particularly difficult client at the moment, so she agreed. Better that her girls have some fun instead of being saddled with a babysitter when she had to work extra. At eleven years old they were getting a bit beyond babysitters anyway.


Eva was thrilled. They were coming the day before Thanksgiving. They could bake pies for Thanksgiving, perhaps make dinner rolls, and surely they could make a cake, too. She could hardly wait!

Plans changed and they arrived the day after Thanksgiving. No one wanted pies or dinner rolls and a cake seemed too rich after all the holiday food. Still, there were some ripe bananas to use up. Time to bake a classic banana bread...with a twist. She wanted to use molasses and to add chocolate chips, just for fun.


The girls were a bit hesitant at first, but soon got into the swing of things, measuring flour and sugar, mashing bananas, and, yes, cracking some eggs and finding out that bits of shells could be removed from the eggs in the bowl, with care.

They giggled at the slow movement of the molasses and had fun getting their fingers greasy while using the butter wrapper to grease the bread pan.


Their faces beamed with big smiles when they brought the first piece of baked banana bread to their Granddad. They were even happier when he exclaimed over the texture, flavor and deliciousness. They were hooked! Eva knew that on their next visit that they would bake that cake with her. Their heritage was intact.

You, too, can keep the arts of baking alive. This banana bread is easy, uses up very ripe bananas, and can be packed in a lunchbox or used as an afternoon pickup or quick bite in the morning. If you make it with half regular flour and half whole wheat flour it is almost healthy...after all, it has fruit.

Banana Bread with Walnuts and Chocolate
makes one loaf

1/2 cup butter, softened
1/4 cup molasses, dark is best
1/2 cup granulated sugar
2 eggs, beaten
3 ripe bananas (or 2 large), mashed
1 cup whole wheat flour
1 cup all purpose flour
1 teaspoon baking soda
1/2 teaspoon baking powder
1/2 teaspoon salt
1 teaspoon vanilla extract
1/4 cup buttermilk
1/2 cup chopped walnuts
1 cup chocolate chips

Preheat oven to 350 degrees F. Grease and flour a 9 x 5 x 3 inch loaf pan (you can use the butter wrapper if you've already put the soft butter into the mixing bowl. That is what the twins did).

Beat butter, molasses and sugar together until fluffy. It's OK if it looks curdled.

Add eggs and banana pulp and beat well.

Add sifted dry ingredient's, vanilla, and buttermilk. Mix just until dry ingredients are incorporated. Stir in nuts, and chocolate chips.

Pour into prepared loaf pan. Bake about 1 hour. Test for doneness with a toothpick in center. When done, toothpick comes out clean or with a few crumbs on it. Cool well.

Store overnight before cutting...if you can wait that long. A serrated knife makes cutting easier.

Wednesday, September 26, 2012

Late Rye Bread Worth the Wait

This lovely Rye Bread that has nostalgic meaning for Kitchen of the Month Elizabeth requires kneading and this month when the Bread Baking Babes...and many Buddies...posted their versions, I was still letting the old arm heal, so no kneading allowed.

Now we are into the 6th week post-injury and I'm supposed to start using it more, so I HAD to make the Fennel Molasses Rye Bread as part of my rehab :)

I'm not a huge fan of fennel or even caraway, so I added some pulverized dried orange peel instead. The molasses gives the bread a fantastic flavor. I used mild, not blackstrap, but it worked just fine. For the raisins I used golden raisins because thats what I had on hand. The dough is lovely and easy to work with. I decided to make rolls and they are extremely delicious!

This recipe is a keeper for sure. Thank you Elizabeth! I know I'm late to the BBB party, but it was worth the wait.

Molasses Fennel Rye Bread

based on Jack Francis' recipe for Molasses-Fennel Bread served at "Clark's by the Bay" restaurant in Collins Bay, Ontario (near Kingston) - now sadly closed
makes two round loaves (or 8 large rolls)

¼ c (63gm) lukewarm water
1½ tsp ( 6 5gm) active dry yeast
4 tsp (17gm) sugar
4 Tbsp (85gm) blackstrap molasses
1¾ c (438gm) water, room temperature
1 Tbsp (6gm) fennel seeds
½ tsp (1gm) ground dried ginger
1 c (103gm) rye flour
1 c (122 gm) whole wheat flour
½ c (59gm) wheat germ
2 c (254gm) unbleached all purpose flour
1 Tbsp (18gm) salt
¼ c (36gm) Thompson raisins
up to ½ c (64gm) unbleached all purpose flour for kneading

Mixing In a smallish bowl, whisk yeast with the lukewarm water (do the baby's bottle test on your wrist) until it resembles cream. Set aside.

Meanwhile, in a bowl large enough for the dough to double, pour the rest of the water. Stir in sugar and molasses. (If the molasses is stiff because of a chilly kitchen, use warm water instead of room temperature.) Add fennel seeds and ground ginger. Dump in flours, wheat germ and salt and stir with a wooden spoon until the flour is mostly absorbed.

Add the yeast mixture (it should be quite foamy - if it is not after a period of 20 minutes have passed, either the yeast is dead or the water was too hot or far too cold. Check the due date on your yeast container. If the date hasn't passed, try again.) stir to form a rough dough. Cover the bowl with a plate and let sit on the counter for about 20 minutes.

Kneading Scatter a little of the flour for kneading onto a wooden board. Turn the dough out onto the board.

Wash and dry the mixing bowl. (Please do not be tempted to skip this step.)

Hand knead the dough 10 to 15 minutes, adding the smallest amounts of additional flour if dough is sticky. You don't have to use up all the flour. When the dough is springy and silky to the touch, knead in raisins.

Proofing Form the dough into a ball and put it in the clean bowl; cover it with a plate (there is no need to oil the bowl!) Let the dough rise in a no-draught place at room temperature (or in the oven with only the light turned on if you want) for about an hour or until it has doubled in size. Gently deflate dough. Recover with the plate and allow to rise until doubled again.

Gently turn the dough out onto a lightly floured board; cut it in half with a dough scraper if you have one, with a knife if you don't.

Shape into two round balls and place them (not touching) on a parchment papered pan or a cornmeal dusted peel. Dust the tops with flour. Cover with a clean tea towel followed by a large plastic bag overtop let rise until double in size. (about an hour if the temperature is around 20C)

Baking Place a breadstone, if you have one, on the middle to second from the top rack and preheat the oven to 400F.

If you want, slash the top of the rounds with a very sharp knife. Liberally spray the tops with water. Put bread in oven and immediately turn the oven down to 350F. Bake the bread on the middle to second from the top rack for 35-40 (I bake it for 45 50- 30-35) minutes until the bread reaches an internal temperature of 205-210F or until it is hollow sounding on the bottom. It's a good idea to turn the bread after about 20 minutes of half way through baking to allow for uneven heat in the oven (remove parchment paper at the same time).

Remove to cool on racks. Please wait until the bread is cool before cutting it. It's still baking inside! If you like to eat warm bread, reheat the bread after it has cooled.

 
We enjoyed these rolls with some butter, barely cooled from baking, then again this morning for breakfast. Awesome!

Wednesday, September 19, 2012

Awesome Baked Beans

Last May my older sister came to visit and at one of the stores in town we visited they were selling one pound sacks of unusual, heirloom dry beans from Rancho Gordo. I chose to try Vallarta They are described in the book from Rancho Gordo, Heirloom Beans, as a, "dense, soft yellow bean" and as being very rich and often paired with other ingredients, including greens like spinach, kale and chard.

I wish I could say that I tried them immediately and have since become someone who eats heirloom beans once a week or something, but the truth is that it took me until this week to cook them up and try them. Since they sounded like a bean that would taste good baked, I used two cups of the cooked beans to make some baked beans to go with fresh, roasted beets,

capresi salad with heirloom tomatoes, basil and fresh mozarella, plus some leftover meatballs from Costco and a plate of sliced cucumbers. everything except the cheese, meatballs and beans came from the garden and it was a satisfying meal. The beans were so rich that I ended up only eating one meatball and one slice of the cheese in the salad. Next time I'll serve the beans as a main course and forget about any meat. They really don't need it.

This is a pretty simple baked bean dish. If you don't have any freshly cooked beans on hand, you could substitute white beans or pinto beans from a can and still have a nice dish. Adjust the amount of molasses to suit your own taste. Some kinds are more potent than others and some people are fonder of molasses, too. Sweetie loves molasses and really like these beans. I didn't look at any recipes, just threw together things that seemed like they would make a nice pot of baked beans.

Baked Beans

2 cups cooked beans (I used Vallarta beans from Rancho Gordo). Recipe for cooking beans below.
2 teaspoons Dijon mustard
1/2 medium onion, finely chopped
1-2 tablespoons molasses
2 tablespoons ketchup
salt and pepper to taste

Combine beans and next four ingredients in an oven proof bowl or casserole. Taste for seasonings and add salt, pepper, and more molasses to taste.

Bake in a preheated 350 degree oven, uncovered, for 20-30 minutes. Beans will be cooked through and crusty on top like the phot at the beginning of this post. Serve at once. Serves 2-4.

Cooking Dry Beans
I used a pound bag of beans and have enough left over after using 2 cups, cooked, for the baked beans that I can make another recipe. The instructions work for larger or smaller quantities of beans, but as long as you are taking the time to cook the dry beans, why not do at least a pound?

Pour the dry beans into a collander and rinse, making sure to check for any debris, small pebbles, etc. I didn't find any in my packet of beans, but have found some before when cooking lentils, so I always look. Place the rinsed beans in a large bowl and cover with cold or room temperature water. Let beans soak at least 3 hour, up to overnight. When ready to cook the beans, I poured out the soaking water and rinsed them again and set them aside. Some folks just put the beans, soaking water and all into the pot after they have cooked the mirepoix.

In the pot you will be cooking the beans, saute' a mixture of finely chopped onion, carrots and celery in a bit of bacon grease or olive oil or grapeseed oil. For the pound of beans I used 1/2 and onion, about 1/2 cup carrots and 2 stalks celery. This is the mirepoix.

To the mirepoix, once it is cooked long enough to color the carrots and so the onion is translucent, add the beans and stir to combine. Cover with water and enough extra water to be one inch over the beans. Bring to a boil, uncovered, and boil 5 minutes. Reduce the heat to a simmer, stirring often, let beans simmer until tender, somewhere between 1 and 4 hours, depending on the age of the bean and how it has been stored. When the beans are almost ready they really have a nice, beany smell which you will notice more than the onion-celery-carrot smell. Keep an eye on the liquid and add more room temperature water as needed. When the beans were almost tender I let some of the liquid cook down, so by the time they were done there was about 1/4 inch of beans above the bean cooking liquid. I also stirred the beans a lot to make sure that they cooked evenly.

Your beans are now ready to use in any recipe calling for cooked beans. Think of all the stews, chilies, soups, salads and so on that you can make. The Vallarta beans have even been used as ravioli stuffing, according to Steve Sando, one of the authors of Heirloom Beans. You can find Rancho Gordo beans and the book on the web, too.

Monday, May 10, 2010

Too many Bananas

These started out as Raisin Bran Muffins, but I had no bran, nor old-fashioned oats and I did have ripe bananas and walnuts and coconut…and raisins. Being playful, I changed quite a few things around and made some lovely muffins that have full banana fragrance and flavor and are joined sweetly by playmates walnuts, coconut and raisins.

Since I played around so much with the recipe, it ended up making more than 12 muffins. You could probably get 18 muffins from this recipe, but I chose to put the additional batter in a mini-loaf pan instead.

Playful Banana Muffins
Based loosely on Raisin Bran muffins in The King Arthur Flour Bakers Companion

3 ripe bananas
1 cup buttermilk at room temperature
1 stick of butter, melted (1/2 cup) and cooled a bit
2 large eggs, at room temperature
½ cup brown sugar, packed
2 tablespoons molasses
1 ½ cups all-purpose flour
1 cup whole wheat flour
½ teaspoons salt
1 tablespoon baking powder
1 teaspoon baking soda
½ cup rolled oats (oats for oatmeal)
¼ cup dried coconut
½ cup golden raisins
½ cup roughly chopped walnuts

Preheat the oven to 425 degrees F. Prepare a 12 cup muffin tin and a mini-loaf pan by spraying with baking spray or by greasing and flouring them. Set aside.

Peel and mash the bananas in a bowl. Set aside.

In a large mixing bowl, mix together the buttermilk, butter, eggs, brown sugar and molasses. Add the bananas and mix to combine.

In another bowl mix together the flours, salt, baking powder and baking soda, oats, coconut, raisins and nuts.

Quickly, with as few strokes as possible, mix the dry ingredients into the wet ingredients, just until combined.

Fill prepared muffin cups with the mixture, filling each cup almost to the top. Pour the rest of the batter into the prepared mini loaf pan.

Bake in preheated oven for 14 to 18 minutes for the muffins, or until they spring back when pressed lightly in the middle and about 25 minutes for the mini loaf pan banana bread, until a cake tester inserted in the center comes out clean.

Removed when ready from the oven and cool on a wire rack 5 minutes, then turn out of the pans and let cool until ready to serve.

Sunday, August 17, 2008

Pear Season

Not only are the apples ripe early, but the pears are too. They are usually ready to be harvested (hard and green) in early September. If you let them turn golden on the tree you cut in to them and find that the inner part is browning and pasty in texture. Found that out the hard way our first year here. They do much better if you pick them green and let them ripen in a brown paper bag. Did that a week ago, so we now have a lot of ripe pears...the Bartlett variety.

Recently I found the site of the Pie Lady, Brittany. It's a great blog if you like to bake and she has some great recipes. Go check it out!! You'll be glad you did. Then come back and see what I did with her recipe.
One that caught my eye was for Buttermilk scones with fruit. This morning I decided that I'd make some Buttermilk Scones with Pears for dinner. I used her recipe to jump from, but made a lot of changes.

I like oatmeal a lot. Have it most mornings, cooked in the microwave. For the scones I decided to grind up some oatmeal to replace part of the flour. It adds a nutty taste and some good nutrients. Healthy eating and scones are not really partners, but there's nothing wrong with having some of the ingredients be nutritious. I replaced some of the white flour with whole wheat flour, too. The finished scones are darker that way, and sort of homey.

Sweetie loves molasses, so I decided to replace the sugar with molasses, except for a sprinkle on the tops for decoration. Having eaten the finished product, I think adding about 1/2 cup of sugar, plus the molasses, would have been better, so that's how I wrote up the recipe.

Pears go really well with almonds, so I included some almond extract. Buttermilk provides tang, butter and eggs do their thing well. Salt, baking powder and baking soda provide flavor and leavening. Pears and golden almonds provide the fruit.

The result is a light scone with great flavor, juicy bits of pear, chewy little raisins. If I were to do it again, I'd throw in some orange zest and/or finely chopped candied ginger for a little more pizazz. I might also put in a little more butter. These were more muffin like than scone like in texture. More fat might improve them and you can't beat the taste of real butter. i could have added it when I ate the scones, but I didn't. I did try some orange marmalade with them. It was a good combo.


Buttermilk Oat and Wheat Scones with Pears and Golden Raisins
Based loosely on Buttermilk Scones recipe by the Pie Lady, Brittany

1 egg (or ¼ cup egg substitute)
¼ cup molasses
½ teaspoon real vanilla extract
½ teaspoon almond extract
1 ½ cups buttermilk

½ cup rolled oats (not instant)
2 ½ cups bread flour
2 cups whole wheat bread flour
1/3 cup granulated sugar
½ teaspoon salt
1 teaspoon baking soda
4 teaspoons baking powder
6 oz. unsalted butter, cold and cut into ½ inch cubes
1 cup fresh diced pears, peeled and cored first
1/3 cup golden raisins

Preheat oven to 375 degrees F. In a measuring pitcher, whisk together the egg, molasses, vanilla, almond extract, and buttermilk. Put in the fridge while making the dry mix.

In the bowl of a food processor, whirl the rolled oats until a fairly fine flour is formed. Add the two flours, the sugar, the salt, the baking soda and the baking powder. Pulse to blend. Add the cold butter and pulse briefly until the mixture is crumbly. (Elle’s note: the butter almost disappears…that’s OK).

Put the dry mixture into a large mixing bowl. Make a well in the center, pour in the liquid mixture and with your hands or a spoon, stir until about half way incorporated. Add the diced pears and the raisins and continue to mix, just until the dry mix is incorporated. Don’t over mix.

Turn the batter out onto a lightly floured surface. Gently pat into a long rectangle. Cut the rectangle into 8 squares. Then, cut each square diagonally so you have 16 scones. Place on a parchment or Silpat lined baking sheet and sprinkle with some sugar if desired. I used crystal sugar. Bake in the preheated oven for 15 – 20 minutes, or until the scones are brown and firm to the touch. Remove to a rack to cool.
Serve warm or cold, split and spread with butter or lemon curd. Some orange marmalade goes well, too.

Jazz It Up: These scones would also be good with a few tablespoons finely diced crystallized ginger, and/or a tablespoons of orange zest.