Showing posts with label rye. Show all posts

Monday, October 16, 2017

Seasonal and Sensational Bread Baking Babes World Bread Day Bread


This has been a long, strange week here in Northern California. A week ago, very early in the morning, a neighbor phoned and woke me up and said she smelled smoke. Her husband is a Napa Sheriff and he had deployed to the Atlas fire in Napa, so smelling smoke here, so far away from that fire really made her nervous. We checked and there was no fire nearby, but Sweetie heard that there was one in the northern reaches of Napa, plus the wind was blowing in our direction, from the east, rather than the usual direction, from the west and the ocean.


By morning there was a lot of smoke and we could see the flames in Santa Rosa and further south from our upstairs, east-facing deck. The wildfire had spread rapidly with the high winds and already destroyed a large area in northern Santa Rosa. The fire even jumped over a six-lane freeway! Evacuations had begun just about the time my neighbor called. Thus began a week with over 40 dead, over 6 thousand structures destroyed, many, many acres burned and many thousands of people displaced. It took until today for the major evacuations to be rescinded, although there are still evacuations happening elsewhere as the fire continues to spread. Fortunately it is finally beginning to be contained by all of the brave and exhausted first responders and public safety folks from far beyond the borders of California.


We are blessed in that we have never been at risk (although I was packed and ready if the wind shifted the wrong way) and could offer our home to evacuees. The photo above is from this morning where the sun was again red due to the smoke in the air.  The smoke has been bad most days, but that has been the worst of it for us. Thank you to all who sent good wishes and prayers.


This afternoon I was able to finally find some time to make the delicious seasonal bread brought to us by our Kitchen of the Month, Judy of Judy's Gross Eats. Pumpkin Cornmeal Bread sounds sort of mundane, but this bead is not. It is moist and a little fluffy.


Mine had a good rye flavor, some pumpkin flavor, but I reduced the molasses a bit so that it didn't overwhelm the other flavors. I also used some walnut oil for the oil part which gave it a subtle nuttiness. The cornmeal provided some chew and more flavor. This is a really flavorful bread. Thank you Judy for picking it!

I decided to make 12 dinner rolls in a spiral shape and a good size braided loaf. We had some of the rolls with dinner and I really enjoyed them.

You'll love making this bread. Because it has a lot of dry yeast, it is sure to rise for you (as long as you keep your ingredients barely warm or even cooler) and it is easy to work with and shape. To be a Buddy, just bake it, take a photo, and send it by Oct. 29th to Judy. She'll send you a badge for your blog.


Be sure to check out the lovely bread made by the other Babes...and Happy World Bread Day!


Pumpkin Cornmeal Bread
Yield:  2 or 3 loaves or 24 dinner rolls

1 ½  tablespoons active dry yeast (1 ½ packets)
Pinch of sugar
1 cup warm water (105˚ to 115˚)
1 cup warm buttermilk (105˚ to 115˚)
5 tablespoons melted butter or oil
1/3 cup light molasses
½ cup pumpkin purée (either canned or homemade)
1 tablespoon salt
1 cup fine- or medium-grind yellow cornmeal
1 cup medium rye flour
4 ½ to 4 ¾ cups unbleached all-purpose or bread flour

In a large bowl, combine yeast, sugar, salt, cornmeal, and rye flour.   Whisk to mix well.

Add warm water, buttermilk, melted butter/oil, molasses, and pumpkin purée.  Beat until smooth (1 to 2 minutes) using either a whisk or the paddle attachment on a mixer.

Add the unbleached all-purpose flour or bread flour, ½ cup at a time, until it becomes a soft dough. Knead until smooth and slightly tacky, either by hand or with a dough hook.

Place in a greased bowl, turning once to coat the top; cover with plastic wrap.  Let rise at room temperature until double, about 1 ½ to 2 hours, depending on how warm it is.

Turn onto work surface and divide the dough into 2 or 3 equal round portions.  Place on parchment-lined baking pan, cover loosely with plastic wrap, and let rise at room temperature until doubled, about 45 minutes.

To make dinner rolls, divide the dough into 24 equal portions and shape as desired.

Place on parchment-lined baking pan, cover loosely with plastic wrap, and let rise at room temperature until doubled, about 20 minutes, or place in refrigerator for 2 hours to overnight.

Twenty minutes before baking, heat the oven to 375˚, using a baking stone, if you wish.  While the oven is heating, brush the tops with melted butter.

Bake in the center of the preheated oven until golden brown:  40-45 minutes for loaves or 15 to 18 minutes for rolls.  Remove from oven, let cool on rack until completely cool.


(adapted from Bread for All Seasons by Beth Hensperger)
Saturday, September 16, 2017

Swiss Rye Ring with the Bread Baking Babes


This month our lovely Babe Cathy from Bread Experience invites us all to gather around the kitchen table and bake a complex and delicious rye bread that is formed into a wreath shape. This one takes a bit of planning because you need to make a sourdough sponge with rye and a firmer poolish with wheat. It also requires an agile mind and attention to detail as you add flour, to know when the dough is stiff enough, but not too stiff.

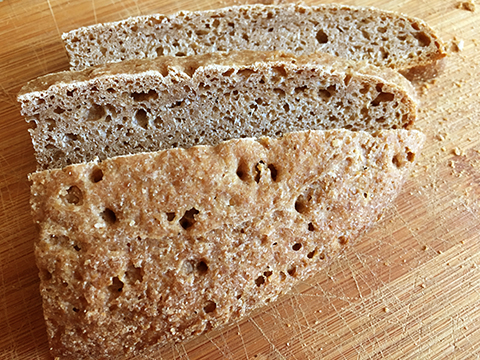
Mine seemed very stiff when I made the dough, but when I shaped it and let it rise, it slumped down and spread out, so I had a wide, thin ring of delicious rye bread with a nice, tight crumb and a delightful crust and chewy texture. It's possible that I let it over proof, too. My days have been packed and I might have let it sit just a little too long before baking it. The docking didn't help, knocking some of the air that was left right out of it. Perhaps the docking should happen before rising??


Do try this bread. Your's will probably be higher and nicer than mine and even if it droops like mine, the taste and chew make it an adorable bread to eat. So far I've just cut a slice or two and buttered them to go with soup or salad, but I think I'll be trying slices with salami and with sardines, too.

To become a Buddy, bake the bread, take a photo, and email Cathy with a short description of your baking experience (couldn't resist) and the photo. She will send you a badge and include you in the round-up. Deadline to get it to her is Sept. 29th.

Be sure to check out the other Babes this month to see how their ring turned out!

Swiss Rye Ring/Brasciadela/Kantonsbrot Graubünden


Rye %:
69%
Stages:
Rye sponge, Wheat poolish, Final dough
Leaven:
Rye sour culture, Instant yeast
Start to Finish:
13-15 hours
Hands-on Time:
30-35 minutes
Yield:
Two 1¼ lb. (575 g.) loaves

Graubünden is Switzerland’s largest canton, extending eastward between Austria to the north and Italy to the south. It’s also Switzerland’s most mountainous canton, home to several glaciers, as well as the 11,853-foot Tödi and 13,284 foot Piz Bernina. Not surprising, then, that its bread culture is based on rye. Like the circular breads of Scandinavia, Brasciadela’s ring shape made it easy to store the breads on poles hung from the ceiling during the long Alpine winter.
I adapted this bread from a recipe I found in the wonderful blog Bernd’s Bakery, which is written by a Bavarian baker who lives in northern Switzerland and who generously has shared his collection of traditional Swiss breads. The original recipe calls for Type 1150 rye, a medium-light grade that’s unavailable in the US; instead, I used a blend of white and medium rye that produces a virtually identical composition.
Like many Alpine breads, this one is built on two sponges – a low-hydration sour rye sponge that favors acetic acid formation and a high-extraction wheat flour poolish that’s refrigerated overnight to bring out the wheat’s nutty sweetness. The preparation and baking are straightforward and the result is a smooth, tight crumbed loaf that combines the tang of its sour, the spiciness of rye, and the mellowness of a well-matured wheat sponge. This is a tasty and basic all-around rye-wheat mischbrot, as good with butter and fruit preserves as with strong-flavored cured meats and fish.
Rye Sponge:
Ingredient
Grams
Ounces
Baker’s
Percentage
300
10.60
100%
Warm (105°F/41°C) water
200
7.05
67%
Rye sour culture
20
0.70
7%

Combine the sponge ingredients by hand into a stiff dough, cover and ferment at room temperature (70°F/21°C) until doubled in volume 10-12 hours or overnight.


Wheat Poolish:
Ingredient
Grams
Ounces
Baker’s
Percentage
200
7.05
100%
Cold water
200
7.05
100%
8
0.30
4%

Mix the poolish ingredients by hand, cover and refrigerate 10-12 hours or overnight.
Final Dough:
Ingredient
Grams
Ounces
Rye sponge
520
18.35
Wheat poolish
408
14.40
110
3.88
210
7.41
82
2.89
Warm (105°F/41°C) water
170
6.00
Salt
20
0.71

In the mixer, combine the final dough ingredients and use the dough hook at low (KA2) speed to mix into a stiff, slightly sticky dough that leaves the sides of the bowl and gathers around the hook, 6-8 minutes. Cover the dough and bulk ferment at room temperature until doubled in volume, 60-75 minutes.
Turn the dough onto a lightly floured work surface and divide it into two pieces weighing about 26 oz./750 g each. Form each piece into an oblong about 18 inches/45 cm long and 2 inches/5 cm in diameter. Shape each into a ring, wetting the ends to seal, and place on a well-floured peel, if using a baking stone, or parchment-lined sheet pan.
Cover and proof at room temperature until the breads have visibly expanded and surface shows cracks or broken bubbles.
Preheat the oven to 480°F/250°C with the baking surface in the middle and a steam pan on a lower shelf. Dock the surface of each loaf thoroughly and evenly to a depth of at least ¼”/0.6 cm. with a fork, chopstick or docking wheel.
Bake with steam 15 minutes, then remove the steam pan, reduce the temperature to 410°F/210°C and bake until the loaves thump when tapped with a finger and the internal temperature is at least 198°F/92°C, about 30 minutes. Transfer to a rack and cool thoroughly before slicing.


 Baker’s Percentages:
Ingredient
g
%
TOTAL FLOUR
902
100.00%
   Medium rye flour
410
45.45%
   First clear flour
282
31.26%
   White rye flour
210
23.28%
Water
570
63.19%
Salt
20
2.22%
Instant yeast
8
0.89%
Rye sour culture
20
2.22%
TOTAL FORMULA
1,520
168.51%
% total flour prefermented
500
55.43%
% rye flour prefermented
300
33.26%
% wheat flour prefermented
200
22.17%

Thursday, November 17, 2016

Porridge Into Bread With The Babes


A day late with the November bread, but it was worth the wait. Our Kitchen of the Month this time is Kelly of A Messy Kitchen. She chose a wonderful, hearty rye bread that starts the old fashioned way, with boiling water poured over the rye flour and grain flakes, for a pain bouillie.

I didn't have rye flakes, but I did have Bob's Red Mill Mixed Hot Cereal grain flakes so I used those. I also substituted some King Arthur Flour Irish Wholemeal Flour for some of the all-purpose flour. Could have sworn I had caraway seeds, but they were hiding from me, so the raisins were all on their lonesome in the paste. Never have had a use for a mortal and pestle, so don't own one. Instead I forced the raisins through the smallest holes of a grater, which seemed to work well.

This is an interesting bread because you shape it into two loaves that touch in the bread pan, because the rising after shaping is in a cold oven, and because the baking is done starting with a cold oven, too, although I didn't do that last part.


I love the crust which is chewy and delicious.

I'm not going to include the recipe because you can find it (and some great photos) on Kelly's post and I actually followed the recipe, with the exceptions noted above and, because I read comments from fellow Babes, I preheated the oven to about 325 before putting the loaf in to bake, hoping to bake it through before it burned. The oven-spring didn't happen but we love this bread!

I gave some to friends, one of whom had lived in France for many years. She said it was her favorite of all the breads I have shared. She loved how flavorful it is. The crumb is pretty nice, too.


Now I know you want to bake this, even if it does seem a bit different. Think of the toast and sandwiches! Would be a great bread for stuffing, too. To be a Bread Baking Babes Buddy, bake the bread, share via email with Kelly your experience, include a photo for the round-up and she will send you a Buddy badge. Get the email to her by November 29th for the round-up. No blog? No problem. Post a picture of your bread on Flickr or another photo sharing site (if you use Snapchat, don't us a filter, OK?) and tell about your bread baking experience. Be sure to email Kelly and give her a location/link for your post.

Also, be sure to visit the other Bread Baking Babes to see what beautiful breads they have baking.


Friday, March 16, 2012

A Northern Rye Bread from the Babes


The fragrance was irresistible! I know that you are supposed to let bread rest and cool before slicing it but this time we could barely wait for the bread to finish baking.

The braw Bread Baking Babes of March baked a lovely Swedish Rye bread as we gathered around the kitchen table of our hostess of the month, the lovely Astrid of Paulchen's Food Blog. Sweetie can attest that she chose a wonderful recipe for Swedish Rye Bread adapted from the Tassajara Bread Book by Edward Espe Brown. Tassajara Bread Book. It is described in the Tassajara Bread Book as "sweet-smelling and scented, a light bread suitable for sandwiches." This one is a keeper.

The bread that came out of the oven was moist and light and thrilled the taste buds with the flavors of orange, rye and caraway. (I left out the anise seed since it is not a flavor I enjoy.) There was a wonderful crust and just the right amount of chewiness. At Astrid's recommendation I baked it in a bread pan. I've never been a huge fan of rye bread but this may be the rye bread that changes that. It's wonderful!

I used a dark rye flour and expected a strong rye flavor, but it was just right, a sort of medium rye flavor. We had those first slices topped with some butter. I look forward to enjoying the rest of the loaf with some cheese, as toast, and maybe with pastrami because it goes so well with rye.

I know you are going to want to be a Buddy this month and bake this great and easy rye bread. Instead of using a mixer we get to play with wooden spoons and our hands. To be a Bread Baking Buddy just go over to Astrid's post for the recipe (including great step by step photos), bake it, take at least one photo to share with her via e-mail and tell her about your experience baking this great rye bread. She even has a fill-in form on her blog to make it super easy.

Do check out the beautiful loaves baked by many of the Babes this month. The links are to the right.

Other than not adding the anise seed and only making half the recipe, I followed the recipe as written. That may be why it turned out so well! Since the recipe is over at Astrid's I won't post it here.

Last but not least in any way, I'm sending this to Susan at Wild Yeast for the weekly Yeastspotting event. A treasure trove of great bread recipes awaits you when you visit and there just might be some variations on the Swedish Rye Bread...next Friday probably.

XO Elle

Swedish Rye Bread

adapted from Tassajara Bread Book by Edward Espe Brown

1.
3 cups lukewarm water
1 1/2 tablespoons dry yeast (2 packets)
1/3 cups honey
1 cup dry milk
grated peel of 2 oranges
2 teaspoons anise seeds
2 teaspoons caraway seeds
4 cups unbleached white flour

2.
4 teaspoons salt
1/4 cup oil
4 cups rye flour
1 cup whole wheat flour (for kneading)

Method:

1. Dissolve the yeast in water. Add the honey and dry milk plus the oranges and seeds

2. Add the flour to get a thick batter.

Add one cup of flour at a time, stirring good after each addition. The more flour you add the more you knead to go into a beating mode with your spoon. Best way is to stir up and down in a circular mode from the bottom of the bowl to the surface of the dough. Don't forget to scrape the sides of the bowl from time to time. After the 4 cups of flour you should have a thick mud-like dough.

3. Beat well with a spoon (100 strokes).

Continue to beat until you have a smooth dough. Again pull your spoon under the dough and bring it up to the surface again in a circular mode. The batter will be more elastic while you are doing this as more and more air gets incorporated.

4. Let rise for 45 minutes.

Cover the bowl with a damp towel and let rise in a warm place.

5. Folding in the remaining ingredients. Do not stir! Do not cut through the dough, this will improve the elasticity and strength of the dough.

6. Sprinkle on the salt and pour on the oil. Stir around the side of the bowl working carefully your way towards the center. Rotate your bowl a little with every stroke you do. Repeat until all of the salt and oil is incorporated.

7. Sprinkle the flour 1/2 a cup at a time onto the dough. Again fold it in while rotating your bowl.

8. Continue until the dough comes away from the sides of your bowl. Now the dough is ready to give it a good knead!

9. Plop your dough on your kneading board and scrap all remainings from the bowl onto the dough. Keep in mind that your surface should be floured enough to prevent the dough from sticking to much on the board.

10. Flour your hands and the top of the dough. From the middle of your down stretch it away from you and then fold it back onto the remaining part of the dough. Continue to push down and forward.

11. Turn the dough a quarter turn. Again continue with the pushing and folding.

12. Turn, fold, push. Rock forward. Twist and fold as you rock back. Be careful not to stretch the dough too much and tear it. Add flour to the boards as needed.

13. While you continue with the kneading the dough will become more and more elastic, smooth and shiny.

14. When you are finished, place the dough in your lightly oiled bowl smooth side down, then turn it over so the dough ball is covered lightly with oil. This will prevent the dough from forming a crust on the top while rising.

15. Cover the bowl with a damp towel again and set aside to rise in a warm place. (50.60 minutes until doubled in size)

16. Punch down your dough with your fists steadily and firmly about 15-20 times.

17. Let rise again 40-50 minutes until doubled in size again.

18. Preheat your oven at 350°F.

19. Turn your dough onto the board again.

20. Form the dough into a ball. Cut the dough into two even pieces and form smaller balls again. Let rest for 5 minutes.

21. Knead the dough and fold it about 5 times, this gives the dough added spring. After the final push turn the dough a quarter turn.

22. Roll up the dough into a log shape. Seam at the bottom, flatten the top of the dough. Square the sides and ends. Turn the dough over and pinch the seams all the way.

23. Put the dough seam side down into your pan. Press it down into the pan with your fingers.

24. Cover and let rise again. This will take 20-25 minutes.

25. Cut the top with 1/2 inch deep slits to allow the steam to escape.

26. You and brush with eggwash and sprinkle with poppy seeds or sesame if you want!

27. Bake for about 50-60 minutes.

28. Remove from pan to cool down completely.

Wednesday, June 23, 2010

Buddy Gets Korni

Those rollicking, creative and determined Bread Baking Babes have two new things going this month.


First off they have decided on a posting schedule. As a sometime Buddy I really appreciate that. Now I know when to check for the latest bread challenge (the 16th of each month) and when I have to have baked that bread challenge by...and post about it...to be a BBB Buddy (the 29th of the month). It's great to have so many days to bake, too. Some months the turnaround was a week and sometimes that is too short a span for me. Thank you Tanna!


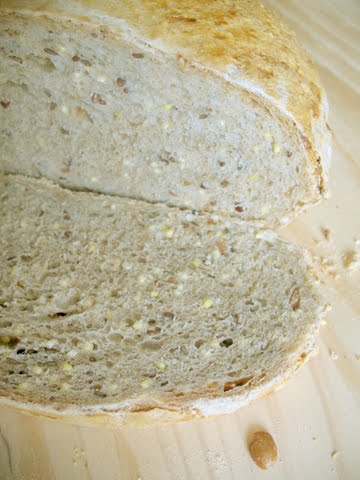
The second new thing is a delightful bread suggested by Lien of Notitie van Lien called Korni Bread. It has lots of interesting ingredients including a new one for me...soy nuts. The recipe called for cooking and then baking coarsely chopped soy beans but some of the Babes substituted soy nuts, so that's what I did and it worked very well. They added great texture and flavor to the bread. Grains include rye, whole wheat and unbleached white flours and the crunch of millet. Flax seed and caraway seed complete the list and both added flavor and color.

I enjoyed making this bread. You start a sponge the night before and then the next day add more flour, the seeds and soy nuts and millet plus a little more yeast so this doesn't become a heavy bread, although it is still dense and chewy. I weighted the dry ingredients and found that I needed about another 2 tablespoons of water to bring the dough together. It was fun to knead because of the tiny lumps of millet and flax seed and larger chunks of soy nuts.

I made a round loaf and a torpedo shaped one and both look great! We had some with dinner and the flavors were an excellent blend of grains and seeds. I'll bet it will make great toast, too! Will try that tomorrow.

You, too, can bake this wonderful bread (and become a Buddy). The recipe can be found at Lien's blog (thank you Lien for a great choice!) and you still have a few days before the deadline. Let's bake!

Monday, February 09, 2009

Goes Well with Soup

Yesterday I posted a recipe for some great Potato and Spinach Soup. This bread, full of the brawny flavors of ale, cheddar and rye, goes really well with soup. The crust has some crunch, the interior is soft and with pockets of holes, some left by melting cheddar. As you can see by the photo of the shaped boule, it is loaded with cheddar shreds.


It probably makes good toast, too, but Sweetie and I just ate it warm and as is...no butter needed.

A huge thank you goes to Jackie for this recipe which comes from Jackie's blog: Toxo Bread. She modified it from Tomi's recipe Brown Interior's Ale Bread recipe, which was in turn adapted from Richard Bertinet's Crust. Since the measurement were given in grams and I'm not fluent in metrics, I may have changed the recipe more than I know when I converted it to cups. The addition of rye was my own idea, too. Some thing about cheddar, rye and ale seemed right and it did turn out a great pair of loaves of bread.


I made two round loaves, better known as boules. That gave maximum crust territory and I love a good crust! Going to send this over to Susan at Wild Yeast for the Yeastspotting roundup this week. If you love bread, it is a great place to go for new ideas.


Ale and Cheddar Bread
adapted from Jackie's recipe at Toxo Bread

Poolish
1 cup ale (or any beer you’d just as well drink)
1 cup bread flour
1/4 tsp instant yeast (or 1 cup sourdough starter)

Final dough
all of the poolish
2 cups bread flour
½ cup dark rye flour
1 cup whole wheat flour
1 cup Vermont sharp cheddar, shredded
1/4 tsp instant yeast
½ cup water, lukewarm
1 teaspoon salt

Directions
Mixing the poolish

Combine all of the poolish ingredients, cover and let ferment for 3 to 5 hours, until risen and bubbly.

Mixing the dough
Mix all of the final dough ingredients except for the salt. Knead for 10 minutes by hand until supple. Add salt and cheese, and knead until they’re fully incorporated, another 3 to 5 minutes.

Bulk ferment
In an oiled bowl for two hours, with one stretch and fold at the one hour point.

Shaping and proofing
Shape according to your heart’s desire - I divided the dough into two portions, and made two boules. Proof for one hour. I proofed them on a baking sheet on top of a silicone mat, covered with a linen dish towel.

Baking
After proofing, I slashed each boule in a cross shape, and placed the baking sheet into a preheated 450 degree F. oven and baked it about ½ hour, until deep golden brown. If you turn the boule over and tap on the bottom, it should make a hollow sound. Cool before serving.