Showing posts with label mustard. Show all posts

Thursday, December 30, 2021

Bourbon Glazed Ham


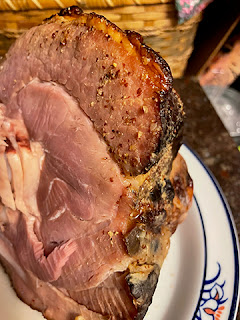
The holidays really rush by, don't they? One of our holiday meals had a centerpiece of Bourbon Glazed Ham, using a recipe from Martha Stewart. You begin with a fully-cooked half ham, so it's pretty easy, and towards the end of heating it fully, you brush on this aromatic bourbon-brown sugar-mustard glaze that you make while the ham does it's initial heating up. As the ham gets to the end of it's time in the oven, the glaze becomes shiny, browned and a bit sticky - altogether delicious. You don't even need to save this for a holiday...it works to dress up a weeknight dinner just as well.


Bourbon Glazed Ham

Adapted from a recipe by Martha Steward, 2009

1 1/2 cups dark brown sugar, packed
1 tablespoon molasses
2 tablespoons grainy mustard
1/4 cup bourbon (could also use brandy if preferred)
1 bone-in, fully cooked half ham, about 6 pounds

Preheat oven to 275 degrees F. Place ham in a roasting pan, cover tightly with foil (or put into a baking bag, like Reynolds Brown-In Bag, as I did, following directions for adding 1 tablespoon flour and cutting vent holes). Cook in preheated oven until thermometer registers 145 degrees F, about 1 1/2 hours.

While ham is in the oven, make the glaze. In a small saucepan combine the brown sugar, molasses, mustard and bourbon. Bring to a boil over medium heat and boil for 3 minutes or until thickened and syrupy. Set aside until the ham has reached XX degrees F.

Remove the cover from the ham, increase oven temperature to 350 degrees F, and brush the glaze generously on the ham, covering all exposed parts. Bake, uncovered, another 30-35 minutes until glaze is shiny and darkened. Serve warm, sliced, or at room temperature.

Tuesday, August 02, 2016

Pickled Beans


I'm not a big fan of dill, with one exception. I really love dill pickles. Recently I bought a book on pickling foods and decided to try the Dilly Beans since I have enough string beans to do some canning. I hope that I enjoy them as much as regular dill pickles.I planted regular green, yellow and purple beans this year and planted two plantings about 10 days apart. They have done well, especially the purple ones, and we have enjoyed them steamed and in salads. The pickles will be my way of taking care of the full flush of production. They are starting to reduce the number of beans produced, so this is the optimal time.

I also planted cucumbers but so far the production is one here and then another one a few days later, etc. so it is unlikely that there will be enough to pickle them. If that changes, I'll let you know.

The pickled beans are fairly easy to make, but canning is one of those activities where keeping everything clean is essential. I washed the jars and lids in hot soapy water, rinsed them, then put them into boiling water, too, before filling the jars with the trimmed beans, dill, garlic cloves, whole peppercorns and whole mustard seeds. The vinegar solution was boiling so I used a metal cup measure to fill the jars with that mixture, then dipped the lids in the boiling water before putting them on top of the jars. Then they went into a boiling water bath for 10 minutes. Here I'm using a canning tongs tool to take them out of the hot water so that they can cool. As the jars cool, the lids become concave...that lets you know that they have sealed properly.


 I wasn't really surprised that the vivid green and purple and light yellow of the beans (photo at top of post) turned to a muted green when the jars had finished processing in the water bath. That usually happens when I cook them, too. There is still a difference of light and dark, but not the great colors.


Here's hoping that they will be yummy when I finally crack open a jar to sample these dilly beans!

For those of you who keep up with what Sweetie is doing, here is a photo taken today at the Registrar of Voters office. He is filing for another term (his 5th!) on the fire board. Here his is swearing to uphold the Constitution. Very proud of him and his service to the community.


Dilly Beans
from Tart and Sweet by Kelly Geary and Jessie Knadler

4 cups white vinegar
3 tablespoons sherry vinegar
2 cups water
3 tablespoons kosher salt
4 pounds green beans, trimmed to fit into jars

Per Jar: 
3 dill sprigs or 1 dill head
2 cloves garlic
1 teaspoon yellow mustard seed
1/4 teaspoon black peppercorns
(recipe also called for 1/4 teaspoon brown mustard seeds, but I left them out)

Bring the vinegars, water and salt to a boil in a medium nonreactive pot. Stir to dissolve the salt.

Place dill, garlic, mustard seeds, and peppercorns in each hot jar. (I dipped each clean jar into the boiling water & then drained it right before filling it.) Pack the beans in tightly. Make sure there is a half inch headroom and trim the beans so that they will be covered with the brining solution.

Pour boiling brine over the beans. Check for air bubbles, wipe the rims, and seal with the screw bands.

Lower carefully into the super large pot of boiling water which covers the jars completely. There should be enough room around the jars to easily lift them in and out of the water. Process for 10 minutes. Water should be at a full boil when you start timing.

After the 10 minutes are up, turn off the heat and let the water stop bubbling before removing the jars. Place the jars on a cooling rack or a heat-absorbent surface, such as a towel or cutting board, allowing space around them. Leave them undisturbed until they;re cool to the touch.

After the jars have cooled completely (up to 8 hours or so), eyeball the lids. If the lid is concave (curved downward) the jar has sealed. TO check, press your finger into the center of the lid. If there's no give ( lid doesn't pop up upon release of your finger) it's airtight and ready to be labeled and stored. Stash in a cool, dark place.

Yield: 4 pints

Sunday, April 03, 2016

Mushrooms and Meatballs and Silver Cars


Seems like a lot and hardly anything has been going on lately. Let me explain. The hardly anything refers to cooking and baking, at least the creative sort. Dinners have been simple things like roast chicken, stir fry deliciousness, and salads for the most part and baking has been non-existent. Sweetie has been successfully losing weight and asked me to curtail baking plus I have been trying to once again get a handle on my gut health so have had little energy to bake, either.

The lot going on mostly refers to buying and selling cars and all the stuff that surrounds those activities. I have enjoyed driving a silver PT Cruiser for many years. PTs are cute cars and we've had ours since 2001. Sweetie has been ready to switch out to another car for a couple of years, so I have had the dubious pleasure of learning about all the other likely replacement choices for the same amount of time. Any time we were out and about together he was likely at least once during the trip to point out a potential auto and to let me know why it should be considered. This often happened in parking lots, particularly when we were at the hardware store or grocery store. We would wander the lot and discuss the pros and cons of different makes and models. I'm sure we looked pretty strange.

Finally I told Sweetie that I would make a choice, since we agreed that I should choose, and that it would be between March and June 2016. In late February I began my research on the Internet and narrowed my list to four cars to test drive. I could always go back to the drawing board if those turned out to be duds. Then one morning about a week and a half ago I just woke up knowing that it was the day to car shop. We test drove two cars and I fell in love with the second one, a silver, low-miles, 2015 Suburu Outback. I love the way it handles, the comfortable ride, the back-up camera and touch screen controls and more. Sold the silver PT Cruiser on Friday, so into the new silver car era we go.

So what about mushrooms and meatballs? Turns out that the box of large size Reynolds Oven Bags had a great sounding recipe included with the instructions. Meatball Stroganoff uses frozen meatballs, fresh mushrooms and onions, mustard, Worcestershire sauce and broth to make an oven baked dish that is finished with sour cream (or yogurt in my case) and dill (or parsley in my case) and served over cooked noodles. Since the part of beef stroganoff that I never enjoyed was cooking the cubed beef, I decided this was a recipe to try.

Because the latter part of the recipe uses a large bowl for the final mixing, I decided to mix together part of the flour, the sauce, mustard and broth in the bowl instead of the bag. It takes a few extra minutes to wash out the bowl once the broth mixture is added to the meatballs, but it allows for whisking the mixture together and eliminates the odd flour glob. I also increased the flour in my write up because the gravy was way too thin.

This is a great, easy dish and there is very little clean-up needed. I suspect you could skip the Oven Bag and bake it in a casserole...but then you would need to scrub out the casserole pan when you were done. If you do go that route, cover the pan with foil for the first half of the baking, then uncover to let the meatballs brown. You could also use chicken broth instead of beef broth if you prefer.


Meatball Stroganoff with Mushrooms
A variation of a Reynolds recipe

 1 Reynolds Oven Bag, large
4 tablespoons all-purpose flour – divided
1 can (14.5 oz.) beef broth
2 tablespoons Worcestershire sauce

1 tablespoon Dijon style mustard
1 lb. frozen meatballs, 1-inch in diameter
1 small onion, chopped
2 cups sliced mushrooms, preferably Baby Bella
¾ cup sour cream (I used plain yogurt)
2 tablespoons chopped fresh dill (I used fresh parsley)
½ teaspoons salt
½ teaspoon pepper
1 package (8 oz.) egg noodles, cooked according to package directions


 Preheat the oven to 400 degrees F. Place 1 tablespoon flour in the Oven Bag and shake. Place bag in a 9 x 13 x 2-inch baking pan.

 In a large bowl whisk together the remaining three tablespoons flour, the Worcestershire sauce, Dijon mustard and broth. Set aside.

 Place the meatballs, onion and mushrooms in the bag, close with your hand, and shake to combine. Carefully pour in the broth mixture and shake closed bag to coat contents. Replace bag in the baking pan, put the nylon tie that comes with the Oven Bag around the end of the bag to close, then tuck ends under. Pat contents of bag into an even layer. Cut six ½-inch slits in top of bag.

 Wash out the bowl that held the broth mixture and set aside.

 Bake in preheated oven 25 – 30 minutes. Meatballs will be browned on top. Carefully cut end and pour contents of bag into clean large bowl. Contents will be HOT! Slowly stir sour cream or yogurt into bowl, then salt and pepper. Taste and adjust seasonings if necessary. Add dill or parsley and stir. Serve over hot, cooked, drained noodles.

Saturday, January 30, 2016

Mustard With Your Meat


When I was a kid one of the cool things was when my Dad would come home from packaging shows with new products like shrink wrapped items and Velcro fasteners and lunch boxes that folded flat. He also brought home silly things like a records. One of the most memorable was a Christmas record from a company called Line Materials. One of the songs on that record, which became a family favorite in my silly family, was called "People Should Listen To Me" or something similar to that. It was a song sung by a baritone guy who said he knew what the right way of doing things was...for everything! One of the lines called for 'mustard with your meat, galoshes on your feet' to give us two examples of what was right.

A few days ago I decided to see if that mustard with meat part was correct. I know I like mustard on hamburgers, but I had never used it for meat loaf and I was making a meat loaf using ground beef, which is rare for me...usually I use ground turkey. HERE is one I made using turkey and pork.

The other change was that I added cooked mushrooms seasoned with dried thyme. I wanted to add mushrooms but was worried that the moisture they give off when cooked would mess up the firmness of the meat loaf, so I cooked them first. Since I love the combination of mushrooms and thyme, that's what I used.

For the recipe I started with my Mom's Oatmeal Meat Loaf from the Classic Comfort Food cookbook (see link at top right corner of this blog, in web view). By cooking the mushrooms first and adding the mustard to the tomato juice, it didn't change the recipe too much and the results were not only delicious, but, according to Sweetie, the best meat loaf I ever made. I guess that officious guy on the record was right about mustard anyway.


Oatmeal Meat Loaf With Mushrooms and Mustard

1/2 teaspoon dried thyme
4 oz. fresh mushrooms, finely chopped
1 1/2 pounds ground beef or turkey, or a combination
1/4 teaspoon salt
1/4 teaspoon pepper
1 cup tomato juice
1 teaspoon Dijon mustard
1/2 onion, peeled & chopped
1 egg, beaten
3/4 cup rolled oats, uncooked

Spray a large skillet lightly with cooking spray (I used olive oil spray) and heat over medium-high heat. Add the mushrooms and the thyme and cook, stirring often, for 3-5 minutes, until mushrooms are browned and have given off most of their juice. The juices should evaporate as you brown the mushrooms. The idea is to have cooked mushrooms that will add little moisture to the meat loaf.

In a large bowl mix the ground meat or poultry, cooked mushrooms, salt and pepper.
Mix the mustard with the tomato juice and add to the mixture. Add the onions and egg and mix again. Add the oatmeal and mix thoroughly until everything is incorporated. Pack firmly into an ungreased loaf pan.


Bake for 1 hour and 15 minutes in a preheated 350 degree F. oven. Let stand for 5 minutes before slicing. Serves 8.

Friday, September 12, 2014

Gluten Free Baked Lamb Meatballs


It's been great being back in the kitchen cooking. I had no idea that finding new homes for all my cooking and baking equipment and supplies would be so challenging. It isn't that there isn't room, nor that I hadn't planned where to put most of it, the problem is that I find that where I thought things should go is not truly where they fit best when actually using the kitchen. That means rethinking a lot of my original plan.

I look pretty crazy sometimes as I open and close drawer after drawer and door after door of the cabinets, looking for a whisk or grater, a citrus juicer or colander. Some things have been moved four or five times since the project started and my memory just isn't what it used to be.


Still, I wouldn't go back to the old kitchen and I love all of the work space. I even used the little table this week while I was preparing pounds of home grown, just picked cherry tomatoes for roasting. Sitting instead of standing to remove all of those little tomato tops before I prepared them for roasting was a treat. After the tomatoes were roasted I decided that as long as the oven was hot, I could make meatballs for dinner.

I had thawed some frozen ground lamb from the freezer and somewhere recently I read a recipe where they used almond meal instead of bread crumbs for making meatballs, so I decided to see what I could come up with using items already in the pantry and fridge. I'm not eating gluten free myself, in general, but it's always nice to have a dish to make that is when I might have guests who need to eat gluten free. This dish is not vegan or vegetarian however, but it is dairy free. Because Sweetie is not a big fan of mint, it is a mint free dish, too. Mostly I would make these again because they were awesomely yummy.

There was just over a pound of ground lamb. The fridge had a wonderful caramelized red onion and fig conserve, some Dijon mustard, an egg yolk left over from another recipe, eggs, fresh basil, and the almond meal. The pantry had salt and pepper. That was all I needed. Because the onion and fig conserve was ready to go and very full flavored, the meatballs went together very quickly.


I scooped them on to a foil lined baking sheet and baked them in a 400 degree F oven for about 18 minutes. I was going for 20 minutes, but they seemed to be done at 18 and I hate overcooked lamb.


A key thing to remember if you decide to make these is to handle the mixture lightly. That keeps 'em tender and juicy. The other thing to know is that they may flatten just a bit, so don't expect tight, round meatballs. Instead look forward to light, juicy, delicious meatballs with some crispy bits where they sat on the pan. The lamb flavor shines and is enhanced by the slightly sweet onions and figs. The mustard and basil are background flavors and I didn't really taste the egg or almond meal at all. You can serve them with some more of the conserve or a bit of tomato sauce, or some yogurt...all three would be good. I served them with a neighbor's gift of fresh from the garden broccoli, which I roasted with garlic, and corn on the cob, and that was wonderful, too.


Elle's Gluten Free Baked No Mint Lamb Meatballs

1 pound ground lamb
1 egg yolk
1 medium or large egg
1/4 cup caramelized red onion and fig conserve (any kind of onion-fig jam or conserve will work)
1 tablespoon Dijon mustard
1/2 cup almond meal (ground blanched almonds)
2 - 3 tablespoons minced fresh basil
salt and pepper to taste (I used 1/2 teaspoon salt and 1/4 teaspoon freshly ground pepper)

In a mixing bowl, using a fork, lightly stir together the above ingredients. Scoop balls about the size of a walnut on to a foil lined baking sheet, leaving about an inch to two inches between balls. (You can make the meatballs any size you like, but the smaller size bakes more quickly than larger ones.)

Bake in a preheated 400 degree F oven for 12-20 minutes. Check after 12 minutes to see how done they are - they should be browned around the edges and spring back a bit when prodded - turn the pan 180 degrees and continue baking until done.

Serve at once and enjoy! Serves 3-4.

Wednesday, June 06, 2012

Lovely Spring Lamb Marinade

We have been enjoying some great dinners but most of the food is the same as dishes that have been posted here before. The marinated lamb today was excellent and was served with fresh steamed corn on the cob and a big vegetable salad with field greens. On checking my recipe list I found that I haven't given you my lamb marinade (or if I have I can't find the post...so excuse me for being a forgetful biddy if it turns out this is a repeat). Sweetie loves this marinade! I've been making it pretty much like this for years and years and the flavor combination of the red wine, garlic, rosemary and mustard is a winner.


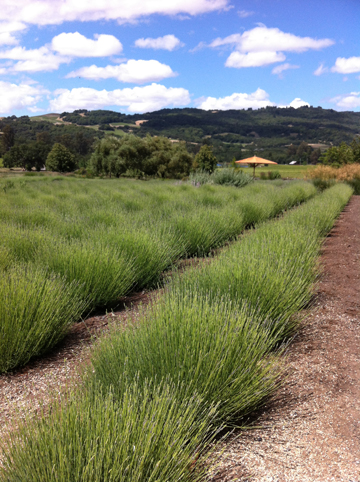
Yesterday we went to Matanzas Creek Winery, hoping to see their lavender fields in bloom. Looks like we are about two weeks too soon...lots of buds but few were blooming. They have acres and acres of blooms later this month and a big-deal Lavender and Wine weekend at the very end of June. Guess I could have put some lavender from my shrub into the marinade but didn't think of it...maybe next time.


Lamb in Red Wine Marinade


6 oz. dry red wine
2 cloves garlic, minced
1 tablespoon Dijon-type mustard
1 tablespoon balsamic vinegar
1 teaspoon freshly ground black pepper
2 tablespoons olive oil
about 2 tablespoons fresh rosemary (OK if still on the stem)
1 lamb roast (we like a leg of lamb with the bone removed but this will work for lamb steaks and lamb rib roast, too)

Place all the marinade ingredients except for the rosemary in a large bowl and whisk to combine. Lay a gallon size zipper lock plastic bag in a large baking pan, carefully un-zip and place the rosemary and them lamb in the bag. Add the marinade. Close plastic bag. Let marinate at room temperature for an hour, then turn the bag over and let the other side marinate for an hour. If there is time, continue to marinate in the refrigerator, turning occasionally. Have never marinated the lamb for longer than 8 hours, but more might be OK.

Remove lamb from the marinade and discard the marinade. Grill the lamb on a prepared grill to the degree of pinkness you desire. Serve at once.

Thursday, February 03, 2011

Gremolata and Blood Oranges


My mind usually turns to baking and making sweets. Guess it's both because I have a sweet tooth and because I'm endlessly fascinated with the process of baking...turning butter and sugar and flour and more into delicious treats.

But sometimes I get a notion of something I'd like to cook that isn't sweet. That happened the other day as I was driving home from work. I'd recently read a recipe that used gremolata as a finisher to the dish and I thought that it would be interesting to take the chicken thighs that I knew were in the fridge at home and cook them in the manner of osso bucco, but with red wine instead of white, and then finish them off when I served them with a nice sprinkle of gremolata.

O.K. first off, gremolata is a combination of minced parsley (I use Italian parsley for the good strong flavor of it) and minced fresh garlic and freshly grated lemon zest. When combined the flavor is zesty and refreshing and a nice counterpoint to a slow cooked entree which usually has mellow flavors. This whole post is dedicated to Natasha because she has been waiting patiently for the recipes.

Now that I'd daydreamed an entree, I turned to what should go with it. A roasted beet salad on field greens with some small chunks of a good blue cheese seemed like it would go well with the chicken dish. Here is a dish of roasted, peeled beets and some blood orange halves.


A citrus dressing would be seasonal and add some fruitiness, too. Around here it's the season for both blood oranges and Meyer lemons so I picked up some of each at the farm stand I pass on my way home. The next day I bought the organic beets and the blue cheese, plus some tricolor potato gnocchi that looked good. Everything else was already in the fridge or pantry. I started the chicken about 1 pm and once it was simmering I joined Sweetie down the hill where he was putting new boards on the farmhouse deck. By the time we had all the boards attached...and I did learn how to use the impact driver by the time I'd done all the fasteners in the middle of the deck!...the chicken was done and the beets I'd roasted earlier were cool enough to peel.

Blood orange juice is a lovely light fuchsia color so the dressing is pink even without any beet juices.

Both the chicken recipe and the vinaigrette recipe are ones where I've pulled bits and pieces from a number of recipes I found online. The vinaigrette in particular was a work in progress as I made it...less olive oil than I had originally planned, blood orange zest added...something none of the recipes I looked at had included which is odd when you consider how much flavor the zest has...less honey, too.

That evening we truly had a feast. The chicken was so tender it fell off the bone. The sauce created by the wine, chicken, herbs, and vegetables was great over the gnocchi, and the gremolata did the job of brightening up the dish. The salad was an excellent combination of flavors. I later wished that I'd added some toasted nuts...maybe hazelnuts or walnuts...but there was none left once we enjoyed it.

I cut the beets in wedges and marinated them for about 15 minutes in the blood orange dressing but if you are short of time you could slice them quickly and pour a little of the vinaigrette over them after you lay them over the dressed greens.

Slow-cooked Chicken Thighs with Gremolata

4 chicken thighs...I used bone-in thighs but boneless work well, too.
2 tablespoons olive oil
1 medium onion, chopped
2 ribs celery, chopped
1/3 cup chopped carrots
2 bay leaves
2 teaspoons dried rosemary or 1 stalk fresh rosemary
1/2 teaspoon dried thyme or 3 sprigs fresh thyme
1 can diced tomatoes in juice
about 1 cup red wine
salt and pepper

Gremolata

1 clove garlic, finely chopped,
Zest of one lemon (I used a regular lemon, not a Meyer lemon)
1 tablespoon parsley, finely chopped
Mix the three ingredients together until well combined.

Rinse and dry the chicken thighs. Heat a skillet or Dutch oven over high heat and add the olive oil. Brown the chicken thighs, turning once after about 5 minutes. Once browned remove to a plate and set aside.

If you have used chicken with skin you may have to pour off some of the fat from the pan. 1-2 tablespoons is all that is needed to sauté the vegetables.

Sauté the onions, celery and carrots for about 5 minutes, until onions are translucent. Spread the vegetables out on the bottom of the pan. Top with the browned chicken thighs.

Add the herbs to the pan, putting some on top of each piece of chicken. Pour the tomatoes and juice over everything in the pan. Add the red wine until the thighs are at least 2/3 covered. Season with salt and pepper to taste.

Cover the pan, reduce the heat to low and simmer for 1 1/2 to 2 hours. Chicken will be very tender.

Serve over gnocchi, rice, noodles or mashed potatoes, spooning some of the juices over. Sprinkle the chicken pieces with Gremolata and serve hot.

For the Roasted Beet Salad with Blue Cheese and Blood Orange Vinaigrette I tossed field greens with some of the blood orange vinaigrette, put them on a salad plate, topped with the marinated roasted beets, sprinkled on about 1 teaspoon of crumbled blue cheese and served the salads. Toasted nuts would make a nice addition.

Roasted Beets

4-5 small to medium beets, well scrubbed to remove dirt

Cut the root end off the beets and the leaves if your beets come that way. No need to peel the beets now. Lay the beets on a sheet of aluminum foil. Bring two sided together and fold over a couple of times to seal. Bring the ends up and over the packet. Roast in a preheated 400 degree oven for about 1/2 hour, or until beets are tender when pierced with a sharp knife tip.

Let the beets cool. Slip the peels off and cut into wedges or slices. Any leftovers should be kept refrigerated.

Blood Orange Vinaigrette

2 tablespoons balsamic vinegar (I used raspberry infused)
1/3 cup blood orange juice
zest from 1 blood orange
1/2 clove garlic, finely chopped
1 tablespoon Dijon style mustard
1/2 cup olive oil
1 teaspoon finely chopped parsley
salt and pepper to taste

Put all ingredients into a jar with a screw top lid, put the top on tightly and shake until ingredients are fully mixed and mixture thickens slightly. Taste and adjust salt and pepper as needed. Serve at once. Can be stored in the refrigerator for a week.

Wednesday, March 04, 2009

Pork Chops with a Mustard Marinade

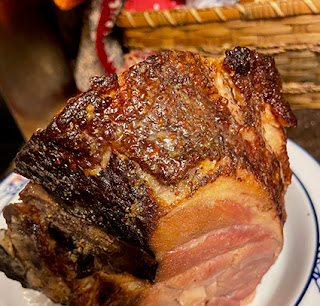
No, I don't spend my whole life baking bread...although that does sound like fun. Sometimes I even cook dinner. The photo is not the best, but it was late and the light was poor. Sorry.

One of the great things about visiting other blogs and reading what other bloggers have to say is that it can inspire you, or at least help you figure out what to cook for dinner.

Deborah at Taste and Tell might be a time-strapped new mother, but she always comes up with delicious dishes. Often she gives multiple recipes from one cookbook. Recently she wrote about a marinated pork chop dish from Weight Watchers New Complete Cookbook that had lots of strong flavors from mustard and cider vinegar, plus a little sweetness from some honey.

I added some lime juice for a citrus kick and this was one great entrée. Sweetie put them under the broiler and we enjoyed them with some baked potatoes and a green salad with tomatoes, cucumber and avocados. Not a terribly adventuresome meal, but a delicious one. Thanks Deborah!

Mustard Honey and Lime Pork Chops
adapted from Weight Watchers New Complete Cookbook
Serves 4

4 teaspoons honey
1/4 cup Dijon mustard
juice from one small lime
1 teaspoon cider vinegar
1/4 teaspoon salt
freshly ground pepper, to taste
4 (5-ounce) bone-in loin pork chops, 1-inch thick

To prepare the marinade, in a small saucepan over low heat, heat the honey until it liquefies. Stir in the mustard, lime juice, vinegar, salt and pepper; cool to room temperature.

Place the pork chops in a gallon-size ziploc plastic bag; add the marinade. Seal the bag, squeezing out the air; turn to coat the chops. Refrigerate, turning the bag occasionally, at least 8 hours or overnight. Remove the chops from the refrigerator 30 minutes before broiling.

Preheat the broiler. Discard the marinade. Place the chops on the broiler rack and broil 3-4" from the heat until cooked through, 6-7 minutes on each side.

Sunday, April 06, 2008

The Best Chicken with Lemon

Each month when the clinic session is over where I work, we have a celebratory dinner with the participants and their partners or spouses and the clinic personnel...about 20-30 people. Our chef, a talented young man who makes the best salad dressings, among other things, has a lemon chicken recipe that he makes for the entree'. The chicken is moist, tender, with a very flavorful sauce and crumb topping. It makes a sauce as it cooks whose dominant flavors are lemon and garlic.

For months I tried to figure out the recipe, but he always made the marinade, which is key, while I was in the office and away from the kitchen. He kept saying he would tell me the recipe, but never got around to it. Maybe that is because it is just the best lemon chicken? This month he went on vacation, so I was in charge of the dinner. I was expecting the recipe to be complicated and was a little anxious about making it. What if I blew it? Imaging my surprise when I found out that the recipe is very simple, but bold. Everyone seemed pleased with my effort, but the genius is G and his recipe.

Do try this recipe yourself...see if you agree that it is some of the absolutely most mouthwatering lemon chicken ever. Be sure to eat those garlic cloves. After such a nice time in the oven, they are often the consistency of butter. Mmmm. For smaller groups, divide by 1/3. Baking time will remain the same.

G's Lemon Chicken for a Crowd
Serves about 25-30

30 boneless skinless chicken pieces
3 tablespoons olive oil for coating pans
1-2 heads garlic
6 lemons
1 16 oz. jar Dijon mustard
10-12 branches fresh rosemary, each about 5 inches long, divided
1/3 cup olive oil
1/2 cup Parmesan cheese (use the real thing for best flavor)
1 1/2 cups Italian seasoned bread crumbs
3 tablespoons finely chopped parsley

Arrange the boneless skinless chicken thighs (or substitute some boneless skinless chicken breasts if you wish) in three 11 x 13 baking pans where the bottom of the pan have been lightly oiled with the olive oil, evenly divided. Keep the chicken pieces touching each other. Place whole, unpeeled garlic cloves between some of the pieces, about 5-6 cloves of garlic per pan.

In a mixing bowl, whisk together the Dijon mustard, the juice of 6 lemons, and 3-4 tablespoons minced fresh rosemary. Whisk in 1/3 cup olive oil. Pour 1/3 of the mixture over each pan of chicken. Tuck a few sprigs of remaining fresh rosemary between some of the chicken pieces in each pan. Cover tightly with plastic wrap and chill 3-4 hours or overnight.

Preheat the oven to 350 degrees F. Uncover the chicken and place the pans in the oven, spacing evenly about the interior if possible. Bake for 40 minutes or until the juice runs clear when a piece of chicken is pierced.

If desired, about 10 minutes before the chicken is done, mix together the Parmesan cheese, bread crumbs and parsley; sprinkle this mixture evenly over the chicken, using about 1/3 for each pan. Return to oven to bake last 10 minutes.

Serve over rice, mashed potatoes, or boiled potatoes, which bread to sop up the sauce. The sauce is mighty good. The chicken is amazing.

You can divide this recipe by 1/3 to make chicken for a family :) Leftovers are delicious, too. You can also freeze this, well wrapped, for a month. Thaw in the refrigerator, then bake in a 350 degree oven until heated through, or in the microwave, reheating at no more than 50% power.