Showing posts with label celery. Show all posts

Sunday, September 09, 2018

Lentils and Eggs


When I was visiting Los Angeles in the summer (yes, it's still summer but it's beginning to feel like fall and school has started again, so summer seems like it's in the past) we went for brunch to a place called Playa Provisions in Playa Vista (I think). They had an eclectic menu but not a lot of items that were non-dairy. One dish that sounded good was lentils with tomatoes and egg and kale. It was outstanding! A touch of vinegar when served added just the right note against the beany flavor of the lentils and the richness of the soft boiled egg. I came home and decided to see if I could replicate the dish, or at least come close.

After searching the Internet I found a recipe by Bon Appetit that was close so I made a few tweaks and served it for dinner a few nights ago. It was delicious and filling and Sweetie enjoyed it, too. One of the key elements is a soffritto of onion, carrot, celery and garlic (the Bon Appetit recipe had fennel and not celery but I don't like fennel flavor) which is cooked almost into a paste. This plus the tomato sauce really flavor the lentils in a great way!

This is a vegetarian dish but could be vegan if you skip the egg. The Bon Appetit recipe called for serving it with bread that had been fried in olive oil, but I just toasted some seeded sourdough and put on some non-dairy margarine for me and butter for Sweetie. I also sprinkled on a bit of Parmesan cheese on his serving and he said that made it even better.


You could probably serve this the day it is cooked, but I like to 'age' dishes with onions, so I put it in the fridge in the pot it was cooked in for a couple of days. That made reheating it easy. The already cooked spinach was reheated in the microwave and spooned on top of the lentil mixture before I added the egg. I actually forgot to add the red wine vinegar, but plan to do it next time (there were leftovers) since the sharpness is a great foil for the relatively bland legumes. The bread is nice for sopping up any juices. I served it in a shallow, wide soup bowl and that works really well because there are some juices.


Lentils and Tomato Stew with Egg and Spinach
serves 4

1 large onion, chopped
2 stalks celery, chopped
2 medium carrots, chopped
5 cloves garlic, finely chopped
1/4 cup olive oil
sea salt to taste (I used about 1/2 teaspoon)
1/2 cup tomato sauce
2 cups lentils (preferably French green), picked over and rinsed
water
1 cup baby spinach, rinsed
4 large eggs
4 sliced crusty bread
red wine vinegar and grated Parmesan cheese (for serving)

Pulse onion, celery, carrots and garlic in a food processor until soffritto is finely chopped.

In a heavy bottomed pot over medium heat, heat the olive oil and add the soffritto, stirring to coat the vegetables with the oil. Season with salt and cook, stirring occasionally for 10-12 minutes, until soft.

Stir in the tomato sauce and cook, stirring occasionally until golden brown and very soft, about 10-12 minutes. Add a splash of water if it is browning too quickly. You want to caramelize the vegetables.

Add the lentils and 6 cups of water. Bring to a boil, reduce heat, cover and simmer until lentils are almost tender, 30-35 minutes. Uncover and simmer for another 10 minutes to reduce the liquid.

Skim about a cup of the liquid at the top of the pot and place it in a microwave safe dish. Add the spinach and cover with foil. Let sit to wilt the spinach. Refrigerate this spinach mixture.

Taste the lentil mixture and adjust for salt, if needed.

Refrigerate the pot of lentils at least 24 hours and no more than 48 hours. You can also just make the rest of the recipe from this point without refrigerating the stew, but the flavor is better with a rest.

On serving day, reheat the lentil stew over low heat, stirring as needed to keep it from sticking to the bottom of the pot.

Bring a small pot of water to a boil. Add the eggs and cook at a simmer for 9 minutes. Removed from the pot and run under cold water until just cool enough to handle. Carefully remove shell while keeping egg whole. Place on a cutting board.

Reheat the spinach mixture while the eggs are boiling. Toast and butter the crusty bread.

Put about a quarter of the lentils in a bowl. Top with a quarter of the spinach mixture. Slice the hot eggs in half lengthwise and place, yolk side up on top of the veggies in the bowl. Add a splash of vinegar and sprinkle with Parmesan, as desired. Serve with the toasted bread. Serve at once.


Tuesday, April 03, 2018

Yam and Pork and Veggie Hash


Sweetie made a slow cooked pork roast on the BBQ a few days ago using a pork shoulder. It was a big one, so there was a lot left. Last night I made a kind of a hash using some of it. I didn't really have a recipe, but I've been looking at this kind of recipe for a while, so figured it couldn't be too difficult.

First I cooked some chopped onions over slow heat in a little olive oil. Later I added some diced celery, diced yellow pepper, and a sliced zucchini, cut into quarters and sliced. Once all the veggie were nicely cooked, I removed them from the pan and used the same frying pan to brown some diced pork roast. While all these were cooking, a nice fat yam was steaming to doneness. That, once cooked, was peeled and cut into a small dice. I put the dice on top of the pork and added seasonings: pepper, thyme, sage and garlic. Those cooked together a minute, then I flipped the mixture so the yam was on the bottom, then put the cooked veggie mixture over the top. With the pan covered, that cooked for a couple of minutes, then I flipped it all again and cooked it another minute. That was it...Pork and Yam Hash. Had it with a salad for a nice meal, then the leftovers (heated up) as the bed for a fried egg this morning for breakfast.


This one take some time with all the chopping and slow cooking, but it is worth it. The pork gets some crispy bits, the veggies are soft and delicious and, if you add the egg, it is almost comfort food.

I'm not going to give an actual recipe, but I used about 1 1/2 - 2 cups diced pork, 1/2 a yellow onion, 1 small zucchini, 1 stalk celery, about the same amount diced yellow pepper, 1 large yam...and an egg.

Wednesday, January 11, 2017

What Smells SO Good?


That's what Sweetie asked after he came in from cutting up the Christmas tree to put it into the green recycle bin. We finally took down the tree today and put all the decorations and ornaments and lights up in the attic until next year. Usually I would have done it on January 7th (the day after Epiphany), but we have been having terrible wind and rain since the weekend and it was nice having the lights and soft glow of the round ornaments during the rain. Of course we also had some blackouts with no power - 3 hours and then about 6 hours, plus a few brief ones, (less than a minute), so no comfort from the tree lights then. Still, we are on high ground, so no flooding here. We didn't lose too many tree limbs, although our old apple tree did fall over, which is very sad.

Our friend and neighbor Phil also asked, "What smells so good?" when he came by this afternoon to borrow a few gallon jugs of well water. Our neighbors are on a different power line and had been out of power for about 14 hours by then and needed a little extra. Fortunately, I usually fill up about a dozen during December for times like these. We have our well water treated with a salt, so for tea and coffee I use bottled spring water because it has more acid than the treated water, so it's better tasting, for tea especially. I just fill those as they empty and label them with the date and "Well".

So what did smell so good? The Country Bean, Ham and Cabbage Soup that took most of the day to make. This is one of those recipes that are good to do when you're going to be hanging out at home much of the day. We did get a walk in with Pi between storms,


and saw how flooded the Laguna de Santa Rosa was on High School Rd. in Sebastopol. Many roads in the Santa Rosa area have flooded and there have been mudslides and evacuations from low lying areas. We have had over 11 inches of rain since Sunday. A good time for soup since there is more rain today and will be a little more tomorrow. Taking care of the Christmas tree was also a 'between the storms' thing since we finally had a day where there was a break between storms.

You actually start this soup recipe the night before. You rinse dry white beans and put them to soak with water covering them. (Actually put at least an inch of water over them. They soak it all up during the night). The next day there are draining, rinsing and simmering sessions. The longest is for an hour and a half. Most of the rest are for 15 minutes or a half hour. It does take a little time to chop the veggies and to make the herb bouquet. Towards the end of the process you have to take a few minutes to fish out the herb bouquet to discard and to cut the ham into bite sized chunks, as well as to slice up the cabbage. The recipe calls for a roux of cooked flour and butter to thicken the soup, but mine simmered so long that it didn't need any thickening.

Give this a try. The recipe is from my Mom, but I don't know where she got it from...I just make it and enjoy it. It is hearty, tasty, stick-to-your-ribs good, and pretty healthy, too. It makes lots, so there are leftovers which are even more delicious than the original meal. Just be prepared for that question: What Smells SO Good?

Country Bean Ham and Cabbage Soup

2 1/3 cup dry pea beans (Great Northern, white beans)
1 3-lb cooked picnic ham, bone in
1 celery stalk, sliced
2 carrots, quartered and sliced
5 sprigs parsley + 2 bay leaves tied together
2 medium onion, sliced, plus 1 onion stuck with
3 whole cloves
4 garlic cloves, mashed
½ teaspoon EACH dried thyme & ground pepper
1 teaspoon salt
1 can tomatoes
1 small head green cabbage, sliced in 1/4” slices


Cover beans with cold water by at least an inch and let stand overnight. 

Drain, rinse, return to pot and cover with fresh water and bring to a boil. Turn off heat and soak for 1 hour. 

Drain & rinse & return beans to the pot. Add ham. Add enough water to cover the beans. Bring to a low simmer and simmer 15 minutes. 

Add the vegetables, herbs, onions and seasonings to pot. Cover and simmer 1 ½  hours. 

Add the tomatoes and simmer ½  hour. If tomatoes stay whole, chop them up with a spoon. 

Remove herb bouquet and whole onion. 


Add the cabbage, stir, and simmer ½ hour. 


Remove any ham bones and discard. Cut up any ham chunks into bite sized pieces and return to the pot.

Make a roux of 2 tablespoons butter and 2 tablespoons flour, cooked in a small pan until light brown. Add it to soup. Simmer 15 minutes. 

Taste and season with more salt and/or pepper as needed. Serve hot.

Saturday, May 07, 2016

Using Up Roasted Turkey


This should probably be a post for November, but the truth is that I love turkey and eat it year 'round. With the easy availability now of turkey parts at my local market, it's easy to pick up a pack of turkey thighs and cook them in the toaster oven until roasted. Since my toaster oven is located in my studio, away from the house, this works well when the temperature is in the upper 80s as it was earlier in the week.

Once the initial dinner of roast, sliced turkey, mashed potatoes and peas passed, I still had plenty of turkey to use and it was more easily cut into chunks than sliced. Perfect for putting into a pasta sauce. In the past I've made a cream based pasta sauce with herbs and mushrooms, so I decided to try that but to use rice milk and soy creamer instead of milk, creating my own recipe as I went along.

It worked really well and since I included fresh rosemary along with dried thyme and sage, plus a large amount of green garlic (a gift from a neighbor), it was pungent in fragrance as well as delightful in flavor. Because this kind of sauce can be a bit staid, even with all of those ingredients, I used two strips of local bacon for added depth of flavor. I cooked the bacon first and used the drippings (after removing the bacon itself) to saute the mushrooms, celery and green garlic.

This made a wonderful pasta sauce and went well with a fresh green salad embellished with orange segments, avocado and a balsamic dressing. Although I did use gluten free pasta, I used regular flour for the sauce. I've figured out that I need to keep my gluten down to a low level but don't have to eliminate it altogether. If you do, just substitute a GF flour mix in the sauce and cut back the milk by a couple of tablespoons. Then, once the liquid has thickened, add more if needed to make the sauce the consistency you like.


Turkey Mushroom Pasta Sauce with Green Garlic

2 strips of bacon, cut into roughly 1-inch pieces
1 cup celery, diced
1 cup sliced mushrooms (I used baby bellas)
1/2 cup finely chopped tender green garlic bulb (no roots or skin or tough parts)
(if green garlic not available, used 1/2 cup finely chopped onion, plus 2-3 minced garlic cloves)
2 cups diced (bite sized) cooked turkey
1/2 teaspoon dried thyme
1/4 tespoon dried sage
1 tablespoon fresh, chopped rosemary or 1/2 teaspoon dried rosemary
1/4 cup all-purpose flour
1 cup rice milk or other non-dairy milk
2 tablespoons soy creamer, unsweetened and unflavored
salt and pepper to taste

In a large, heavy bottomed pot cook the bacon over medium-low heat until browned and fat rendered. Remove bacon from pot with a slotted spoon to a piece of paper towel to drain.

Increase heat to medium-high and add the celery. Stir to coat with oil. Cook, uncovered 1 minute, stirring as needed. Add the mushrooms, stir to combine with the celery, cover, and cook 3 minutes. Remove cover, stir well, cover and cook 1 more minute. Uncover, stir in the green garlic, cover, lower heat to medium-low and cook 2 minutes. Uncover and stir in the turkey, thyme, sage and rosemary. Cover and cook 5 minutes, stirring occasionally to keep from burning or sticking.

In a large measuring cup, whisk the milk into the flour slowly to avoid clumping. Uncover the pot, raise heat to medium, and pour the milk mixture in all at once. Immediately stir vigorously to combine all the ingredients in the pot with the milk mixture and continue stirring until the liquid thickens. Taste and add salt and pepper to taste. Cover, reduce heat to lowest setting and cook 1 minute to combine flavors. Uncover, add the soy creamer if needed to make the sauce the consistency you like.

Serve over cooked pasta or rice. Sprinkle each serving with chopped Italian parsley if desired.

Serves 4.

Monday, January 25, 2016

Duck!


Recently there was a great buy on duck legs at the market. I rarely cook duck, so I took the opportunity to do some online searching for a good recipe. I ended up using a recipe from the New York Times, but also changed it a bit to include red wine because I think duck and red wine go so well together.

The results were awesome, like dining at a fancy restaurant, probably a French one. The dish was rich in flavor, full of roasted veggies, had a wonderful sauce in the bottom of the pot and went really well with some boiled red potatoes. It took a little more time than usual, but was well worth it.


Braised Duck Legs with Veggies
based on recipe at Diners Journal/NY Times

Ingredients
  • 2 duck legs, trimmed of excess fat
  • Salt and pepper to taste
  • 1/2 cup red wine (I used a nice Pinot)
  • 2 large onion
  • 3-4 cloves garlic, peeled and sliced
  • 1 pound carrots
  • 6 celery stalks
  • 1 teaspoon dried thyme
  • 4 oz. sliced, cleaned mushrooms
  • 2 cups chicken stock, preferably homemade.
Method

  • 1. Put duck legs, skin side down, in a skillet large enough to accommodate all ingredients comfortably; turn heat to medium. Heat oven to 400 degrees. Brown duck legs carefully and evenly, sprinkling them with salt and pepper as they cook. Meanwhile, peel and dice vegetables.
  • 2. When legs are nicely browned, turn them over and sear for just a minute or two. Remove to a plate; remove fat to a small bowl. Add red wine to deglaze the pan, then simmer wine for 1o minutes to reduce. Pour red wine over chicken and wipe out skillet. Add just enough of the reserved fat to cook the vegetables. Discard rest of fat or use for another purpose.  Add vegetables and thyme to skillet along with some salt and pepper. Cook over medium-high heat, stirring occasionally, until they begin to brown, 10 to 15 minutes. Return duck legs to pan, skin side up and juices/wine, and add stock; it should come about halfway up duck legs but should not cover them. Turn heat to high, bring to a boil, and transfer to oven.
  • 3. Cook uncovered for 30 minutes, then lower heat to 350 degrees. Continue to cook, uncovered & undisturbed, until duck is tender and liquid reduced, at least another half hour. The duck is done when a thin-bladed knife pierces the meat with little resistance. When done, duck will hold nicely in a warm oven for another hour. Serve hot.

Sunday, November 30, 2014

Parsley Sage Rosemary and Thyme and Bacon!


"It is never too late to be what you might have been."    - George Eliot

A few years ago I read about a challenge that sounded a bit overwhelming. Bloggers were going to do a post to their blog each day for the whole month of November. The idea was to encourage more writing and maybe even to spark an interest in writing as a way of life. At the time I knew it was impossible for me to do a post every day, especially in November. This year I decided that I just might be able to do it, so I began on November 1.

As you may have noticed if you have read my posts, I think of this primarily as a food blog, so it is only right that most of the posts should be about food. Even better if they contain a recipe. A photo or two is part of the look and feel of this blog, so I rarely do a post without at least one photo. Looking back over the month I feel like I've done pretty well, A third of the posts didn't have a recipe, but some of those were about food and all had a photo or illustration.

It's been a good month, although a few friends have had major health problems. I'm glad that the month finishes off with Thanksgiving and post-Thanksgiving thoughts since turkey is one of my favorite foods. Today I cooked a turkey for our family since last Thursday we were treated to our neighbor's heirloom variety home grown turkey for the holiday meal. Mine is a frozen bird from a chain grocery store, so it should be interesting to see the difference.

Soon fall will turn into winter and my favorite season will hibernate until next year. Of course the run-up to Christmas will keep me busy and it means lots of baking, so I have a smile on my face as I type this and think of what great posts there will be in December.

I spoke with my Mom yesterday and she has already gotten an early Christmas gift from me. I created a book of our kitchen remodel project for her and had it published by Blurb, so it has a nice hard cover and lovely paper to really show off the photos I took as we went along and the finished kitchen, too. So glad that she and the family enjoyed learning about how the project went as they read through the book over the weekend while they were visiting her.

I hope dear reader that you have enjoyed the November posts and are getting in touch with your inner elf as we jump into the winter holiday season!

But before we leave November I want to share with you the stuffing I made today. I'm glad I made the stuffing because the frozen bird was not as fully flavored as the turkey raised right across the street that we enjoyed on Thursday. This time I took my Mom's classic recipe and added corn bread, mushrooms, bourbon and bacon. It makes a wonderful stuffing with a hint of Southern style. If I hadn't used up almost all of my pecans for the pies I would have put some pecans in, too. When you make this, and your really should, you can add pecans and think of me.


Parsley Sage Rosemary and Thyme and Bacon! Stuffing 

4 slices bacon, cut into 2-inch pieces
1 medium onion, minced
4 oz. mushrooms, chopped
1 cup celery, chopped
1-2 cloves garlic, finely chopped
1 tablespoons poultry seasoning
1/4 teaspoon dried thyme
1/4 teaspoon dried rosemary, crushed
½ teaspoons salt
1 teaspoon pepper
2 quarts soft stale bread cubes and cornbread
1 cup chicken broth
3 tablespoons bourbon
½ cup parsley, chopped


In a heavy pot or skillet cook the bacon over high heat until almost crisp. Remove and drain on paper towels. Saute’ the onions, mushrooms, and celery in the bacon drippings (grease) on medium heat for 5 minutes, stirring often. Add the garlic and stir well. Continue cooking over medium heat another two minutes. Add the poultry seasoning, dried thyme, dried rosemary, salt and pepper and stir well to combine.


Pile the parsley on top of the bread cubes and cornbread in a very large bowl or pot. Pour sauteed mixture over the parsley. Combine sauteed mixture and the reserved bacon with the bread cubes (I always substitute some cornbread for some of the bread cubes).

In a large bowl or measuring cup combine the chicken broth and bourbon. Moisten the bread crumb mixture with chicken broth mixture. You may also add chopped apples, dried fruit, chopped toasted pecans, or oysters.

Use stuffing to stuff bird. Place inside bird lightly...don't pack tight.Stuffing expands a bit during cooking.  Extra may be baked in 425 degree F. oven ‘til brown (after turkey is out of oven).

Enough for a 10-14 lb. turkey.

Wednesday, October 08, 2014

Plenty of Peppers - Stuffed


It must be October in Northern California. We have had a string of days where the temperature was well above 90 degrees. So much for fall baking! A week or so ago when it was cooler I made stuffed peppers for dinner and just realized that I never posted the recipe or photos.

The red peppers were beautiful...large, meaty and very fresh. I bought them at the farm stand that was also selling the last of the strawberries, plus lots of melon, tomatoes, beans and squash. The yellow pepper came from a friend's CSA box. It was thinner skinned but delicious, too. The lamb is so local that its from sheep who kept our grass down early this spring, another gift from our great-hearted neighbors.

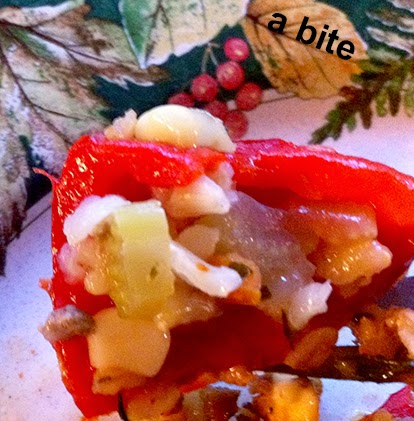
The filling started with sauteed onion, carrot and celery. To that I added both cooked brown rice and fresh corn, cut from the cob, plus some salty feta cheese. A robust flavor was added by using browned ground lamb, fresh rosemary, minced garlic, and dried thyme. I moistened the mixture with a little chicken broth I had in the fridge. It made a wonderful filling for the peppers, bringing out the peppers sweetness and warm flavors. I put the filling that wouldn't fit in the peppers into a greased baking dish and cooked it along with the peppers. It made an outstanding lunch for Sweetie the next day.

He could really use a satisfying lunch because this was just about the time that we had discovered the results of a small, long-term leak in one of our pipes. It has taken almost two weeks to do the repair, but on Friday I should be able to paint the new drywall. After that we can install the last of the new flooring and take a break from construction for a while.

Maybe we'll get cool weather to turn the leaves autumn colors. That's a wonderful time to take a ride in the country and check out all the gold and red and burgundy leaves. Of course what we really want is rain. Wishing for a very rainy winter, but I do hope you get to enjoy fall color if you live where there is some.


Lamb Stuffed Peppers
Serves 4

4 medium to large bell peppers (I like red and yellow and orange, but green is OK, too)
1 tablespoon olive or grapeseed oil
1 medium onion, peeled and chopped
1-2 stalks celery, chopped
1 small carrot, sliced into thin coins
1 pound ground lamb, browned and drained
1 1/2 cups cooked and cooled brown rice
1 ear corn, steamed 5 minutes, then cooled; corn cut from cob
1/4 cup feta cheese, in small crumble
2 teaspoons fresh rosemary, chopped
2 cloves fresh garlic, finely minced
1 teaspoon dried thyme
S & P
1/4 - 1/2 cup chicken broth
about 1/8 teaspoon cayenne pepper, or to taste

Wash the peppers and remove the stem end and the core, plus all the seeds. Cut in half. (I like to cut from the stem to the bottom, but some people like to cut through the middle and set the stem end as a bottom. Make sure that the halves are not tippy. Cut off a bit of the outside of the pepper if needed. Set peppers aside.

In a skillet, saute the onion, celery and carrot in the grapeseed oil. Cook, over medium-high heat, stirring often, until onion is transluscent, about 5 minutes. Turn mixture into a large bowl and add the cooked lamb, cooked rice, corn, feta, chopped rosemary, chopped garlic, and dried thyme. If desired, add salt and pepper to taste. Add enough chicken broth to moisten the mixture.

Line a baking sheet with foil or parchment, or a silicon baking mat. Arrange the pepper halves on the pan. Stuff each half with the lamb mixture, mounding in the center. Sprinkle with a touch of cayenne pepper. If there is left over stuffing mixture, place in a greased small baking dish to bake along with the peppers.

Bake in a preheated 350 degree F oven for about 20 minutes. Peppers will be softened and stuffing mixture will be hot and a little browned.

Serve at once. Refrigerate any leftovers, or baked leftover stuffing mixture.

Saturday, July 05, 2014

Cool Dinner Salad


Well, here we are in the middle of the year, the beginning of July. Hot evenings are part of that mid year time, at least above the equator. Some evenings the fog rolls in, like last night, and we can enjoy eating indoors and scarfing down a warm lamb braise over rice. (Yes, I know it was national hot dog and hamburger day, the 4th of July, but we had lamb. I'm still a patriot, but it was pretty chilly out around here.)

It was much warmer earlier in the week when we enjoyed this delicious chicken salad with pecans and grapes. I had some a couple of days later for lunch, surrounded by wedges of local tomatoes. Great combo! I had been inspired by a chicken and grape salad I saw at a local deli, but I basically threw together what I thought should go into this kind of salad, without a recipe. Hope you like it.

Chicken Salad with Grapes and Pecans

3-4 cups diced cooked chicken (I poached chicken breasts in chicken broth, with some celery tops and peppercorns added, then cooled them, drained them and diced them up into bite sized pieces)
1 cup red or green seedless grapes, halved
1/2 cup pecans, roughly chopped
3 stalks celery, diced
1/2 cup mayonnaise
1/4 cup plain yogurt
2 teaspoons Dijon mustard
1/4 teaspoon dried thyme
juice of 1/2 a lemon
milk as needed
1 teaspoon Italian parsley, finely chopped

In a large bowl gently mix together the chicken, grapes, pecans and celery.
In a small bowl mix together the mayonnaise, yogurt, mustard, thyme, and lemon juice. Add enough milk to make the dressing as thick as Ranch dressing (a little thicker than heavy cream). Pour over the chicken mixture and gently stir to combine thoroughly. Chill for at least 1 hour.

When read to serve, garnish with the parsley. Serve as is, over a bed of lettuce, in cups made from hollowed out tomatoes, garnished with more grapes or with wedges of tomato.

Serves 4 - 6

Tuesday, September 10, 2013

R in the Month Stew


When I was growing up we were told that the only months that were OK for eating oysters are those with an R in them. Well, it's September, so the season for oysters has begun. Truthfully, I sometimes eat oysters in other months as long as they are local ones. We have companies in our area which grow oysters year-round in Tomales Bay, so there are always some oysters in the right stage of development to be eaten. Still, old tapes are hard to dislodge. September means I can eat oysters and so I do.

Oysters are an acquired taste. If you eat them raw, it is like a slurp of sea brine with a little bit of muscle thrown in. It's hard to imagine why anyone ate them in the first place, but once you get to like them they get a hold on you. I could eat them all the time. Unfortunately they, like most seafood these day, are somewhat expensive, so I save them for a treat.

Tonight's treat was Oyster Stew. Our market had jars of small ones on sale and I had green onions, celery, carrots, parsley, small red potatoes, corn and milk handy, plus some bacon. That, plus some salt, pepper and thyme is all you need to make a warm, hardy bowlful of deliciousness.

There are lots of ways to make Oyster Stew. I started by cooking the red potatoes. Mostly that was because I wanted to keep this a one pot dish. After they were cooked and draining, I used the same pot to cook some bacon, then, after fishing out the cooked bacon, I used the bacon grease to cook the onions, celery and carrots. After that it was a simple matter to drain the oysters, mix a bit of flour with the reserved liquid the oyster had been packed in, and then used that to thicken the milk/veggie combo a bit. Throw in some thyme, salt and pepper, the potatoes, the corn and heat 'em up. Right before you are ready to serve, add the rinsed oysters and stir. Set the timer for 1 minutes, stir again, and let sit one more minute. You'll see the edges of the oysters curl like ruffles on a dress. That's it! Time to ladle the stew into bowls and top with a bit of chopped Italian parsley, then dig in. Mmmm.

Elle's Oyster Stew

3-4 small red potatoes, cut into small bite-sized pieces
3 slices bacon, cut into 1 inch pieces
2 green onions, sliced fine, including part of the greens
1 medium carrot, diced fine
1 stalk celery, diced fine
1 jar small oysters
2-3 tablespoons all-purpose flour
2 cups milk
1/4 teaspoon dried thyme
salt and pepper to taste
1 -2 cups frozen or fresh corn - if frozen, thaw in the microwave
1 tablespoon fresh Italian parsley, chopped


In a large pot, cook the red potatoes in simmering water until tender. Drain and set aside.
In the same pot, cook the bacon until crisp, turning once or twice for even cooking. Remove the bacon and set aside.

In the same pot, sauté the green onions, carrot and celery in the bacon grease until the onions are translucent, about 5 minutes, stirring often.
While the veggies cook, drain the oysters in a fine mesh strainer, reserving the liquid they were packed in. Rinse the oysters under cold running water. If the oysters are large, cut them in half. Set aside.

In a bowl, whisk together the flour and the reserved oyster liquid.  Set aside.
Add the milk, thyme, salt and pepper to the pot of veggies, stirring to release any browned bits on the bottom and sides of the pot. Stir in the flour mixture and cook over medium heat, stirring often, until liquid thickens a bit. Add the reserved potatoes, bacon, and corn. Heat thoroughly but don't boil.

2 minutes before it is time to serve the stew, make sure that the stew is hot, then add the prepared oysters. Set a timer for 1 minutes. When one minute has passed, stir the stew, then let sit a few more seconds. The oyster edges will have ruffled, so you know they are cooked. Ladle stew into bowls and top with a sprinkle of chopped parsley. Serve at once.

Friday, September 06, 2013

Tomato Love Summer Soup


Given my absurdly successful experiences with starting tomato plants from seed, I am never able to complain of too many tomatoes, but, wow!, there are a lot of them coming ripe at once.

With three pounds of blanched and peeled tomatoes on hand, a take on the classic gazpacho cold tomato soup was easy to accomplish. I still had another two pounds for making pasta sauce, and that's not even counting the endless cherry tomatoes.

This is a refreshing soup with a little crunch. If you prefer really smooth, just keep the blender running longer. If you make a lot of this, you can keep it in a pitcher in the fridge and just pour out some when you need a quick, cool hit of yummy tomato bliss. The addition of red pepper, classic cucumber, and tangy celery gives it a more complex flavor, as does the onion and garlic. Since I'm not a big fan of raw onion or garlic, I sautéed and cooled mine before I adding them to the soup (absolutely not classic!), but you can go with uncooked if you prefer...and it will be faster.


Almost Classic Gazpacho
Serves 4-6

1/2 yellow or white onion, chopped
2-3 cloves garlic, sliced
1 tablespoon olive oil (if cooking the onion and garlic)
3 pounds fresh tomatoes, peeled
1 cup diced cucumber, peeled if skin is thick
1 cup diced celery
1/2 cup diced red pepper
1/4 cup red wine vinegar
1/4 cup olive oil
salt and pepper to taste

Sauté onion and garlic in olive oil, if cooking, until onion is translucent and garlic light brown. Set aside to cool. If not cooking onion and garlic mix them and set aside.


In a blender, combine cooked or uncooked onion mixture, tomatoes, cucumber, celery, red pepper, red wine vinegar and olive oil. Pulse until mixture is of the desired consistency. I like mine a bit chunky, but it can be smooth. If necessary, process in one or two batches. Taste and add salt and pepper to taste.

Turn into a non-reactive bowl or pitcher and chill thoroughly, at least one hour.

To serve, put portions in either glasses or bowls. If desired, garnish with red pepper and/or cucumber cut into a fine dice. Crisp croutons are also a nice garnish. Serve at once while fully chilled.

Wednesday, June 12, 2013

Stormy Weather


Glad we buttoned up the new construction on Sunday because in the wee hours of Monday morning we had a huge thunder and lightning storm, followed by rain. Pi was frantic. I guess the noise is really awful for dogs. Xam used to have the same reaction. First there is the barking, as if warning off whoever is making those 'bowling' noises. Then comes the whimpering and shaking, probably from fear as the flashes continue and the noise gets louder. It went on from about 12:30 am to a little after 6 am. I think I was awake for about four hours of that. At one point we were all bundled up on the bed, trying to comfort the dog. I heard on the news that there were 400 lightning strikes in our area during the storm! According to the old timers, we rarely get a thunder storm that lasts longer than about an hour, so 6 hours is some kind of record.

The weather today was much different...low 80s and sunny. Today I joined a friend for some 'broken plate' mosaic fun. We worked in her garage, with a nice breeze blowing through. It was a welcome break from working on the entry construction and kitchen planning. I almost finished a table top in shades of blue and green, with a little butter yellow here and there and a few pops of terra cotta for contrast. I'm hoping to use it on the deck off our bedroom as a place to hold a mug of coffee or two in the morning and maybe a glass of wine or two in the evening. Sweetie already bought two chairs to go with it. It should be ready to using in a few days, so I'll post a photo then.

I brought the salad for our lunch today. Romaine lettuce is OK for me, even though I would prefer mesclun, so I threw together a bunch of bite size romaine leaves, some sliced celery, chunks of cooked chicken, chopped toasted pecans, sliced fresh local strawberries and a sprinkle of blue cheese. It was refreshing and just substantial enough. My friend provided iced tea and some nice toast spread with her own lemon curd. It actually went well with the salad, probably because of the strawberries in the salad. For dressing my friend's hubby and I had blue cheese dressing and my friend had honey mustard. This is a great salad for strawberry season, but you could substitute peaches or plum later in the year and I know that pears rock in this salad...but use walnuts instead of the pecans.

Strawberry Pecan Chicken Salad
Serves 4

6-8 cups romaine lettuce, washed, dried, and cut or torn into bite sized pieces, chilled
2-3 stalks celery, washed and sliced
1-2 cups cooked chicken, cut into bite sized chunks
1/2 pint strawberries, washed, dried, hulled and sliced
1/2 cup toasted chopped pecans
1/2 cup blue cheese crumbles or small pieces
dressing of your choice, but blue cheese and honey Dijon work well

In a large bowl combine the lettuce, celery, chicken, strawberries and pecans. Toss to combine. Serve on large plates or salad bowls. (Photo at top is up to this point, with no blue cheese on top yet, or dressing.) Top with the blue cheese to taste. Dress lightly with preferred dressing and serve.

You can make a few hours ahead and keep chilled. If you know those eating the salad love blue cheese, you can toss it in with the rest of the ingredients, otherwise pass the cheese with a spoon so each can add as much or little as desired.

Thursday, May 02, 2013

A Potluck Dish I Love


In just a little over a week I'll be off to my Mom's on the East Coast to help celebrate a significant birthday of hers. It's very exciting because all of my siblings will be there as well as some of the spouses and kids and grandkids. I'm really looking forward to seeing them all, and to seeing Mom's sisters and their extended families. I think the last time we had so many of us together was ten years ago for another birthday. Since we are scattered all over the country, it might be years before we gather again.

One of the things planned is a potluck picnic by the Potomac river on Sunday. I'll be making a wild rice/brown rice and baby carrots casserole with herbs to bring. I made it many years ago for one of the Derby Day pot lucks and tried it out for dinner last week. It went really quickly at the Derby Day potluck and Charlie gave it his stamp of approval, too, last week. It’s easy to fix, delicious, and vegan if made with vegetable broth, but mostly I’m making it because I like to eat it.

I'm starting with a rice mixture sold in a box because it is designed to have the different rices cooked together. I'll skip the seasoning packet (with usually has way too much sodium) and instead add some onion and celery, Italian parsley and thyme, a touch of orange juice, plus a bit of salt and lots of pepper. I looked at some recipes online, but didn't find anything where the rice and carrots cook at the same time. I know when I made it years ago I cooked the wild rice separately and then mixed it in once the other rice was cooked, but the packaged mixture didn't need that. It's pretty simple actually: Onions sautéed in a little olive oil, rice mixture stirred in, carrots cut into chunks stirred in, herbs and orange juice stirred in, S&P over all, then the broth. I brought it all to a boil, reduced the heat to simmer, then covered it and let it cook until the rice was cooked. By that time the carrots were perfectly cooked, too with just a bit of bite still to them. I like it warm, but it would probably taste fine cold. It was even delicious a day later, maybe even better. Dishes with cooked onions often taste better then next day.

May is usually filled with lots of occasions for gathering together of family and friends, so you may want to bookmark this for a quick dish to bring or serve at your party.

Wild and Brown Rice with Carrots and Herbs

1/2 medium to large onion, chopped
1 stalk celery, chopped
1 tablespoon olive oil or grapeseed oil
1 package wild and brown rice mix (discard the seasoning packet)
1 1/2 cups baby carrots or larger carrots cut into approximately 1 1/2-inch chunks
2 tablespoons finely chopped Italian (flat leaf) parsley
1/2 teaspoon dried thyme
the juice of 1/2 a medium orange
salt and pepper to taste
1 can broth, either chicken or vegetable

In a wide, flat skillet or pan with a lid, sauté the onion and celery in the olive oil until onion is translucent, about 5 minutes.

Stir in the wild and brown rice, the carrots, the parsley, the thyme and the orange juice. Add salt and pepper to taste. Pour over the mixture the broth.

Bring the mixture to a boil, reduce heat to a simmer, then cover and let cook until rice is cooked and most of liquid is evaporated, about 25 - 30 minutes. If desired you can remove the lid, increase the heat, and let more of the liquid evaporate for another 5 minutes, stirring occasionally to keep the rice mixture from scorching.

Serve warm or at room temperature. If made with chicken broth, keep chilled once mixture has cooled.

Serves 6-8 as a side dish.

Wednesday, April 10, 2013

Farm Box Fun


At the home show about a month ago I signed up for delivery every other week of a box of fruits and veggies. The company is called Farm Fresh to You and they deliver from the Sacramento area. I will probably cancel once my own veggies start coming in, but for now it is encouraging me to eat more whole foods. The produce is wonderfully fresh, organic, abundant and delicious. Over the weekend I made both a veggie quiche and some chicken soup chock full of vegetables. Yesterday's lunch included a handful of small Nantes carrots. They were crisp and sweet and so good. Yesterday we enjoyed the broccoli from the box and tonight we are having stir-fry which will include some red peppers, onions, and asparagus, the latter two from the box. I've also been eating some very juicy tangerines from the box as well as navel oranges. We still are shopping at the market for our melons and garlic and potatoes, but it really is nice to have really fresh produce right on hand to inspire me.


Sweetie continues to heal and he and I have become very expert at doing the dressing changes. He still has about another 4 weeks before he can play tennis but we are grateful that he did no long-term damage.

Still playing with kitchen designs and researching appliances. Do any of you dear readers have experience with Samsung gas ranges or with their refrigerators or dishwashers? How about Bertazonni?

For now I'm having fun with my current kitchen and appliances. This baking spree over the weekend was the first time since mid-January that I really wanted to cook and bake. There will be a new bread showing up here on the 16th. I'm looking forward to playing with yeast dough again!

Here is the quiche recipe. It is just a variation of my usual one. If you use evaporated milk as I do, be sure to shake it well before opening. I forgot to do that this time and it took some doing to get it all mixed up in the bowl (which also had the eggs in it). I think this is the perfect quiche for the spring...savory, flaky, full of asparagus and onions and cheese. Now I want another slice...and it's all gone. It went so fast that I didn't really get great photos...but if you make one yourself you can see how beautiful it looks with the green asparagus spears on top.


Spring Quiche with Asparagus and Swiss Cheese and OnionServes 4 - 6

1 9-inch pie shell, blind baked at 425 degrees F for 10-12 minutes (recipe follows)
1/3 cup finely chopped yellow onion
1/4 cup celery, chopped
1 tablespoon olive oil
1 cup Swiss cheese, cut into ¼ inch dice
3 eggs (or equivalent egg substitute)
1 ½ cups evaporated milk (I used non-fat) or light cream
¼ teaspoon salt
1/4 teaspoon dried thyme
dash pepper
Dash nutmeg
2-3 spears asparagus, tough bottoms trimmed off and sliced in half through the length of the spear
1 - 2 large mushrooms, sliced thinly

Preheat oven to 350 degrees F.

In a small skillet, saute the onion and celery in the olive oil until translucent, about 5 minutes, stirring often.

Sprinkle the bottom of the pie shell with the sauteed onion/celery mixture and Swiss cheese, distributing evenly. Set aside.

In a bowl, beat the eggs lightly, then add the milk and beat with a fork to combine, add the salt, thyme, pepper and nutmeg and beat with a fork or whisk to combine.

Arrange the half asparagus spears in a nice pattern on top of the onions and cheese in the pie shell. Place the mushroom slices near them where space permits between the spears.

Pour the egg/milk mixture over the ingredients in the pie shell. Place in the preheated oven and bake 30-45 minutes, or until set and lightly browned. I find that setting on a parchment-lined small baking sheet is a good idea in case some of the filling spills over. Cool for 10 minutes before cutting to serve.


Pastry Pie Shell

1 cup all-purpose flour
¼ teaspoon salt
1/3 cup chilled butter
1 egg, lightly beaten
2 tablespoons ice water
1 teaspoon lemon juice (optional)

Mix the flour and salt in a bowl. Cut in the butter with a pastry blender, or two knives, until particles the size of dried peas are formed.

In a small bowl mix together the egg, ice water and lemon juice (if using). Sprinkle over the flour mixture and toss with a fork lightly. Do not over mix. Gather the particles together in a ball. Wrap airtight and chill in the freezer for 10 minutes. Roll out with a rolling pin on a floured surface until large enough to fill a 9 inch pie pan with some overlap.

Fit into a 9 inch pie pan, smooth to fit, trip excess , tuck edges under and crimp as for any pie crust. Prick lightly all over the surface with a fork. Freeze 10 minutes. Remove from freezer and cover with a circle of parchment paper or foil. Fill the paper with beans or pie weights (blind baking the crust).

Bake at 425 degrees F for 10 – 12 minutes. Cool slightly. Remove and save the beans or pie weights. Fill with filling as called for in recipes needing a pie shell.

Tip: If you use a pound of dried beans as pie weights as I do, save them once they have cooled off and you can use them again and again as pie weights...just don't plan on cooking them to eat. At about a dollar and a half for a bag of dried beans, it sure beats the almost $9 you would pay for Pie Weights from King Arthur or a similar amount at Sur la Table.


Saturday, August 04, 2012

What to Do with the Rest of the Beans

Only one cup of cooked cranberry beans were left after making the awesome Cranberry Bean Salad. I cleaned out the fridge today and there they were...poor, unloved beans. I also found that the crisper had ample amounts of fresh spinach, half a yellow onion, some red bell pepper that needed using up, lots of celery and some carrots that were starting to dry out. There was no doubt in my mind that the answer was...SOUP. With the fog scheduled to roll in by dinnertime I knew it would be cool enough to enjoy some soup. The fridge clean out also inspired me to make some salmon egg rolls, but that's for another post.


I often don't post soups that I make because it seems so simple to me to make soup. This time it turned out so well that I want the recipe just as I made it for future reference. It is still pretty simple, but these days I forget what I had for dinner last night, so it is likely I won't remember the exact proportions and that might just be the secret for why this soup was so savory and delicious.

I started, as I usually do, with chopped onion, sauteed in a little olive oil. Garlic goes in after the onion has had some time to soften. Chopped celery and red pepper went in next, followed closely by chopped carrot. That all cooked for about 3 minutes before I added some yellow zucchini, covered the pot, turned the heat way down, and sweated the mixture for a while...about 10 minutes.

Then I gave it a good stir and turned the heat up to high...that allowed the excess liquid to steam off and also some of the veggies had some nice browned spots on them. Before brown could turn to black I added chopped tomato including juice. That deglazed the pan nicely! Fresh spinach was stirred in until it wilted. The beans were added, along with thyme, sage, dried orange peel, paprika, and pepper. Again the the pot was covered and the heat turned low. Another 10 minutes allowed all those wonderful flavors to combine. After uncovering again I added some broth and gave it all a stir. Covered again the mixture simmered another 20 minutes.

The soup smelled sooo good and tasted even better. Often I try a new recipe and make notes right away on what to do differently next time. This time I wouldn't change a thing. Quite unusual, but now you know why I want to save this recipe...and why I want to share it with you.


Cranberry Bean and Veggie Soup
serves 2-4

2 tablespoons olive oil
1/2 yellow onion, chopped
2 cloves garlic, chopped fine
1-2 stalks celery, chopped
1/2 red bell pepper, seeded and chopped
1/2 cup chopped carrot
1/2 medium zucchini (any color) sliced lengthwise in quarters and then sliced in 1/4 inch slices
1-2 medium tomatoes, cored and chopped...keep the juice for the pot
3-4 cups fresh spinach, rinsed
1 cup cooked cranberry beans (see THIS recipe for cooking the beans)
1/4 teaspoon dried thyme
1/8 teaspoon dried orange peel
1/4 teaspoon paprika
1/2 teaspoon dried sage
pepper to taste
1 can (1 3/4 cups) vegetable or chicken broth

In a soup pot heat the olive oil over medium-high heat. Add the onions, stir and cook, stirring often, for 2 minutes. Add the garlic, stir and cook another minute. Add the celery, bell pepper, and carrot and stir. Cook for 3 minutes. Stir in the zucchini and stir. Cover and cook over low heat for 10 minutes. Uncover and turn heat to high. Cook another 3 minutes, stirring about every 30 seconds. Vegetables will brown a little bit.

Add the chopped tomatoes to the pot and stir. Lower the heat to medium. Use a wooden or nylon spoon to scrap any dark brown or black bits from the bottom and sides of the pan. Add the fresh spinach and stir. Let cook another minute to wilt the spinach. Add the cooked beans, dried thyme, dried orange peel, paprika, sage and pepper to taste. Cover and cook 10 minutes over low heat.

Uncover, add the broth, recover the pot and simmer for 20 minutes. Serve. If desired, sprinkle a little grated Parmesan cheese over the soup in the bowl before serving.

Sunday, July 01, 2012

July and Meatballs

July is one of those months that hold beginnings and endings for me. It was the month I met my first husband and the month, years later, when I left him. I was the month of my first sleep-over camping experience as a girl, the month I started my last job, and the month we lost our son in an auto accident over a decade ago.


It was also the month, in 2008, when a wonderful blogger, Sherry Cermak of the What Did You Eat blog died of a heart attack. She was very young and touched a lot of hearts with her blog. A number of bloggers honored her by making something from her blog. I made Turkey Meatballs with Plum Sauce, inspired by a post of hers. Today, starting off the month of July, I made the recipe for dinner, making a few changes as I usually do. I always think of Sherry now when the plums come in. They are just ripening, so I used a few from my tree for the sauce. If you choose to make this dish, think for a moment of Sherry if you visited her blog or knew her, or of someone you know who died too young and was a sweet person. It never hurts to remember the good ones.

Turkey Meatballs with Citrus Plum Sauce

Ingredients:

2 Tbs. unsalted butter, divided
1 yellow onion, finely chopped, divided
1 small celery stalk, finely chopped
1 lb. ground turkey
1 cup rolled oats, whirled in a blender or food processor until lightly ground
1 egg
2 Tbs. chopped fresh oregano
1/2 tsp. salt
1/2 tsp. freshly ground pepper
2/3 cup fresh citrus juice (I used a combination of orange and lime)
1 cup fresh diced plums, peels left on


Directions:
Make the meatballs

Preheat an oven to 425°F. Lightly oil a rimmed baking sheet.

In a large fry pan over medium-high heat, melt 1 tablespoon of the butter. Add the onion and sauté two minutes. Set aside 1-2 tablespoons of the onions. Add the celery to the pan and continue to sauté’ until softened, 2 to 3 minutes. Spoon into a bowl and let cool. Set the pan aside.

Add the turkey, oats (I actually used Quaker Multi Grain Hot Cereal, mix of rye, barley, oat and wheat whole grains), egg, oregano, salt and pepper to the cooled onion mixture, and mix gently but thoroughly with your hands. Shape the mixture into 12 meatballs and arrange on the prepared baking sheet.

Cook the meatballs and make the sauce.

Bake the meatballs until opaque throughout, about 10 minutes.

Meanwhile, melt the remaining 1 tablespoon butter in the fry pan and combine the citrus juices, and plums in the fry pan and place over medium-high heat. Cook, stirring often, until the juice comes to a boil and the fruit is warmed through, 2 to 3 minutes. Add the reserved onions to the sauce, taste for seasonings, add salt and/or pepper as needed.

Divide the meatballs among dinner plates, spoon the plum sauce over them and serve immediately. Serves 3- 4.

Monday, June 25, 2012

Asian Soup with Zucchini and Pi

Life is changing here on the farm. The garden plants, especially the veggies and herbs, are getting bigger all the time and we are getting enough zucchini squash to give some away and still have plenty for grilling and for other recipes.

A week ago I made my favorite spaghetti sauce which uses a couple of the squash. It's one of the first recipes I put on this blog and I've been making it for over 35 years...it's a winner! It is vegan if you omit the ground meat (which I did this time) and tastes even better the next day (I just love leftovers!). We had it over whole wheat penne pasta, along with a green salad.

I also gave some away on Thursday to a friend who loves to make zucchini bread and we gave some to Grandma L for her famous zucchini bake. It's possible I planted too many squash plants, but I don't think so. There are so many ways to use this versitile squash. Check out the soup recipe below.

Another big change is that we have adopted a rescue dog named Pi. It has been just about a year since Xam died. We had him for 16 or 17 years, so it took a while to want another dog. Then we had to fix the electronic fence and fix up a new animal door. Last Wednesday, after days and days of e-mails, we picked Pi up in Oakland.

He is a beautiful black lab male, about 2 years old and a real sweet boy. He is mellow and well trained and affectionate. We have taken him to the gym, on a picnic, to our favorite park twice and have been working on training him for the electronic fence. In the meantime we have to take him out on a leash. I had forgotten how enjoyable but exhausting it is to have a new dog! Sort of like having a toddler in the house. We feel very lucky to have Pi...he is a great dog! If you are in the neighborhood, come by and say 'Hi'...he is very friendly and not excitable as our previous dogs have been at this age.
Isn't he handsome?

Back to the zucchini... On Saturday I used some freshly picked zucchini to make this soup with Asian flavors. It made just enough for a nice lunch for Sweetie and I. If you want it for a larger number, just double the amounts. It has a lovely, savory flavor and a faint hint of garlic and ginger fragrances.

Asian Zucchini Soup

1 tablespoon olive or grapeseed oil
1 medium onion, chopped
2 stalks celery, chopped
2 green onions, thinly sliced, including the green part
2 cloves garlic, minced
1/2 teaspoon minced fresh ginger
1 portobello mushroom, gills removed, sliced and cut into bite sized pieces
1-2 medium zucchini squashed, cut lengthwise into quarters, then sliced
1 can vegetable or chicken broth
1/2 cup water
1 package (4 oz) soba noodles
1/4 teaspoon toasted sesame oil
1 teaspoon soy sauce or to taste
1/2 teaspoon finely chopped fresh cilantro
salt and pepper to taste

In a large saucepan heat the oil over medium-high heat. Add the onion, stir to coat with the oil. Saute' for 1 minute, stirring occasionally to keep from browning. Add the celery and green onions, stir and continue cooking 1 minute. Add the garlic, ginger and mushrooms, stir and cook 2 minutes. Add the zucchini, stir and cook 1 minute. Add the broth, noodles (breaking them up if necessary), water, sesame oil, soy sauce, cilantro, and salt and pepper. Stir and heat through for at least 4 minutes, then serve. Serves two.

Wednesday, June 13, 2012

Forbidden

There is a sense of mystery about something forbidden...and a challenge, too. I felt that way upon discovering black forbidden rice, a gorgeous black rice with a nutty flavor similar to wild rice. The mystery is how to use this lovely grain to best advantage...and that was the challenge, too.

A salad or room temperature dish seemed like a good idea so I trolled the Internet and found something close to what I wanted with a Black Forbidden Rice with Sugar Snap Peas and Nectarine dish by Giada De Laurentiis. It can be served warm or at room temperature, it has a slightly Asian feeling with fresh ginger and soy sauce and the combination of fruits and vegetables is interesting, too. As usual I had some ideas on how to change the recipe to make it my own.

My version keeps the ginger and the soy sauce, but I add a strong orange note with both orange zest and juice in the dressing. I find that citrus adds a sparkle to both rice and bean dishes. I was out of nectarines, but had just purchased fresh red cherries so I used them.
Cherries and oranges are also a great combination. For a bit of crunch I added celery and some green onions for their fresh green taste.

I had thought that such a good dose of fresh ginger would leave a strong ginger taste in the rice but during the cooking process the ginger is muted and the flavor of the rice shines with just a hint of ginger in the background. I didn't use any hot sauce or other additional heat but after tasting this rice dish I think that you could add a little fresh minced ginger to the dressing or a dash of cayenne if you like your food a bit spicier than I do and it would be a great addition.

By the time I served this dish, the rice was lukewarm. The warm cherry mixture was perfect with the slightly cooler rice and the dressing added just the right mixture of salty and sweet. Sweetie took two helping, so I suspect that this will be a hit with your family, too. If you wish to dress this beautiful rice dish up, you could sprinkle some toasted sliced almonds over it when you are ready to serve it.
Black Forbidden Rice with Cherries

based on a recipe of Giada De Laurentiis'

Serves 4-6

Rice:
3 1/2 cups water
2 cups black forbidden rice
1 (1 1/2-inch) piece fresh ginger, peeled and finely chopped
2 teaspoons kosher salt
1 tablespoon olive or grapeseed oil
2 stalks celery, sliced
1 green onion, sliced, white part only
6 oz fresh cherries, pitted and halved

Dressing:
1/4 cup unseasoned rice vinegar
1/4 cup grapeseed oil
3 tablespoons honey
2 tablespoons fresh orange juice
1 tablespoon soy sauce
1 teaspoon grated orange zest

Directions:
For the rice: In a medium saucepan, bring the water, rice, ginger, and salt to a boil over medium heat. Reduce the heat to a simmer, cover the pan, and cook until the rice is tender, about 30 minutes. Remove the pan from the heat and set aside for 5 minutes. Fluff with a fork and place in a large serving bowl.

Heat the oil in a large skillet. Add the celery and green onion and sauté for 3-5 minutes, or until onion is translucent. Add the cherry halves and sauté for 2 minutes. Transfer the mixture to the serving bowl with the cooked rice.

For the dressing: In a medium bowl, whisk together the rice vinegar, oil, honey, orange juice, soy sauce and orange zest until smooth.

Pour the dressing over the rice and cherry mixture and toss gently to combine. Serve warm or at room temperature.

Monday, March 05, 2012

A Simple Stir Fry on Beautiful Bamboo

Some days a little forethought means that dinner will be easy. On Saturday I had time in the late afternoon to cut up the veggies for a nice stir fry and we actually had the right kind of ingredients in the fridge. Mushroom slices and chopped yellow onion make a great base. Slender slices of red pepper and carrot go well with chopped celery and florets of broccoli. Sweetie likes to steam them for a couple of minutes in the microwave before adding them to the stir-fry itself.

I like brown rice so I started some about an hour before dinner time. Sweetie likes small pieces of pork chop with this mixture of veggies. I found some Soy Vay sesame seed laced teriyaki sauce to add at the end for seasoning. It really was easy and tasty, too.

Before my bouts with cold, flu and hay fever I received a lovely box from Sarah Bentley at Restaurantware.com which contained earth friendly serving pieces to try. My creativity seems to have deserted me along with my health so I've not found too many things to serve in the cute server ware. There is a darling tiny fry pan and a variety of small skewers which are much nicer than toothpicks. One small bowl is made from bamboo and so is a small plate and the other two are recycled plastic and there are two cups as well and a couple of silver toned spoons. I know that I'll be posting dishes soon that make use of some of these and I appreciate the opportunity to try them.

I served the stir fry on the largest piece, a molded bamboo leaf squared off plate. It is really beautiful with natural bamboo marking and golden color and a nice touch of dark brown on the reverse. It is very lightweight and sturdy and feels nice in the hand. I think it is supposed to be single use but I washed it gently so that I can use it again for another dish...and post. If this sounds like something you might like, do check out their web site at plastic plates or http://www.restaurantware.com/. If you are going to have a party, or love appetizers presented beautifully on biodegradable tableware, you will love the variety and elegance of their selections.


Pork Stir Fry

1 recipe steamed rice
4 oz. sliced mushrooms
1 yellow onion, peeled and chopped
1 tablespoon olive or canola oil
4 oz boneless pork chops, cut into bit sized pieces
garlic salt and freshly ground black pepper
1/2 -1 red bell pepper, cored, seeds discarded and cut in thin slices
2 medium carrots, cleaned and cut into matchsticks
1 small head broccoli, divided into florets
1 stalk celery, chopped or sliced
2-3 tablespoons teriyaki sauce or soy sauce

In a large non-stick skillet or wok sauté the mushrooms and onion until onion is translucent, about 5 minutes. Remove from skillet or wok and set aside.

Wipe out the skillet or wok with a paper towel. Add the rest of the oil and heat it. Season the pork pieces with garlic salt and pepper if desired. Stir-fry the pork until edges are golden brown.

While pork is cooking, steam the bell pepper, carrots, broccoli, and celery in the microwave for 2 minutes at 70% power. Drain.

Add the steamed veggies to the pork when it is cooked. Add 2 -3 tablespoons teriyaki sauce (optional) or soy sauce. Toss with pork and vegetables and cook 1 minute.

Serve the stir-fry over a bed of the steamed rice. Serve at once.

Serves 4

Monday, January 30, 2012

Pork Yumminess for a Cold Night

Sometimes things just come together. The plants go in the ground just before a gentle rain falls, followed by warmth and sunshine, so they grow well from the start. A job opens up after months of not much interest when resumes were sent, then housing nearby is easy to find and the move happens just before a big snowfall. Requests for a speaker for an important meeting fall through and then, at the last minute, you get a 'yes' from the speaker you wanted the most. Things like that brighten you day, week or month.

Today things came together on the dinner front. I knew we had some boneless pork that needed to be cooked, I had a yen for polenta, inspection of the produce bin showed that we had both fresh mushrooms and baby spinach. After that it was just a matter of remembering other dishes that were good and borrowing from them. Sautéed onion, mushrooms, celery and garlic can be the base for any number of delicious savory meals. Sage and thyme go so well with pork and with mushrooms.

Julia Child often threw some orange peel into this kind of braised meat dish, so why not this one? Ditto with the red wine and touch of tomato sauce. My mom's stew recipe uses Worcestershire so I added some of that, too, plus a bit of leftover chicken broth to keep the meat submerged in liquid as it braised.

I've always loved polenta with a little Parmesan cheese added and I know that this sort of hearty braised meat goes well with polenta. The spinach? It was the thing that pulled it all together, plus the bright green color is so appealing.

Have fun with this. The wine could be replaced with beer, ale or stout, or even white wine. The fresh mushrooms could be replaced with dried and reconstituted ones. Add more garlic, skip the orange peel, replace the celery with fennel. I'm sure you will still have a wonderful dish that will warm you up on a cold night as it did Sweetie and Elle.


Pork Ragout with Spinach over Polenta

2-3 tablespoons olive oil
1 large onion, peeled and chopped
4 oz. fresh mushrooms, sliced
1 stalk of celery, chopped
1 clove garlic, minced
1 1/4 lbs boneless pork (I used country rib meat), cut into 1 inch cubes
1/4 teaspoon minced fresh sage
1/4 teaspoon dried thyme
1/4 teaspoon dried orange peel or a 1-inch by 2-inch piece of fresh orange peel minced
salt and pepper to taste
1/2 cup red wine
1/4 cup tomato sauce
1/4 teaspoon Worcestershire sauce
1/2 cup chicken broth
Polenta for 2 - 4 people
1/4 cup grated Parmesan cheese
2 cups baby spinach leaves, rinsed and drained

In a large, heavy bottomed ovenproof pot heat 1-2 tablespoons of the olive oil and saute' the onions, mushrooms, celery and garlic until softened, about 5 minutes, stirring often.

While vegetables are cooking, heat the remaining olive oil in a large skillet over medium-high heat. Blot the meat cubes if necessary. Dry meat browns better than cubes with moisture one them. Brown the pork cubes on all sides, working with about 1/4 of the meat at a time. As the pork finishes browning, transfer to the vegetable pot.

To the vegetables and pork add the sage, thyme, orange peel, salt and pepper, red wine, tomato sauce, Worcestershire sauce and chicken broth. Cover the pot and place over medium heat on the stove top while you preheat the oven.

Preheat the oven to 325 degrees F. When oven is hot remove the pot of pork and vegetables from the heat and put it into the oven, still covered. Cook for 1 hour, checking in the last 15 minutes to make sure there is still enough liquid so that the contents don't burn.

When the pork has about 15 minutes left, prepare polenta according to the package directions. When cooked stir in the Parmesan cheese.

When the polenta is almost done, remove the pot from the oven, stir in the spinach, and set aside, covered for 2-3 minutes to wilt the spinach. Serve the pork and vegetable mixture over the polenta in wide bowls. Garnish with more grated Parmesan if desired. Serves 2- 4