Showing posts with label fresh tomatoes. Show all posts

Saturday, September 28, 2024

Tomato and Zucchini Tart


Because we had a late spring and the soil didn't warm up until weeks after I usually plant, we are also having a late harvest. Finally I'm getting ripe tomatoes! To celebrate I made a fresh tomato and zucchini tart. Although I was inspired by a recipe I found in the newspaper, I made so many changes that it really is a new recipe.

First I started with a pre-made pie crust found in the refrigerator case in many grocery stores...Pillsbury ReadyCrust. It comes two to the box, but I only used one. That single round of pie dough was placed in a 9-inch tart pan with a removable bottom. The dough came up higher than the sides, so I folded that down to make a double thickness side for the tart. I pricked the bottom with a fork, all over, and then pre-baked at 425 degrees F for 10 minutes.

While the tart crust was cooling, I sliced the tomatoes into 1/4-inch thick slices, cutting off a bit of the top and bottom, then slicing through horizontally, not stem end to bottom.  The zucchini was sliced at the same thickness on the diagonal. The slices were spread on a double layer of paper towels and sprinkled with salt. Another layer of towels went on top and I let them sit for at least an hour to get rid of the excess moisture in the veggies.

For the filling I used Boursin cheese and some egg white. The cheese comes with herbs and garlic already blended in and the egg white makes the consistency just right.

If you have large tomatoes, you may only need one slice from the middle of the tomato, and then smaller zucchini slices or half slices can go around nearer to the tart edge. Just see how your veggies are. My tomatoes were pretty small, although very flavorful, so I put multiple slices all around the outside edge, then filled in the middle with the zucchini. A sprinkle of black pepper is optional.

The final piece is the topping, which is a combination of olive oil and dry bread crumbs and pine nuts.

The finished tart doesn't get baked very long...just long enough to cook the egg white and soften the zucchini a bit. It's a thin, savory tart, but with very intense flavor and quite delicious. Do try it!


Summer Harvest Veggie Tart
Servings: 6-8 

Ingredients
2-3 small tomatoes. If using large heirloom tomatoes, you only need one

      1 small zucchini (about 6-inches)

·      Fine salt

·      about 2.5 oz. (half the package, 75 grams) Boursin cheese herbs and garlic flavor

·      1 egg white from a medium or large egg (reserve yolk for another use)

·      One circle pie dough - I used half a package of Pillsbury ReadyCrust, at room temperature

·      2 tablespoons extra-virgin olive oil, divided           

3     3 tablespoons dry breadcrumbs

       3 tablespoons pine nuts

Directions

 Using  a very sharp knife, cut the tomatoes, and zucchini into thin slices, about 1/4-inch thick. (Cut the tomatoes parallel to the equator and the zucchini slightly on the diagonal.)

 Line a large sheet pans with double thickness paper towels;  Place the sliced tomato slices and zucchini slices on top, and lightly sprinkle with salt on both sides to draw out moisture. Cover with more paper towels to absorb the released juices.  Let the vegetables sit for about 30 minutes to draw out the maximum moisture.

 Prepare the cheese filling by mixing the Boursin cheese with the egg white in a small bowl. Set aside.

 While the vegetables rest, position a rack in the middle of the oven and preheat to 425 degrees F. Line a 9-inch tart pan with a removable bottom with the circle of pie dough. Double the thickness of the sides by folding the excess pastry down on the inside and press the pastry against the sides of the tart pan. Prick the bottom with a fork, then put the pan in the freezer for 30 minutes to chill and firm up.

7.    Remove the pastry-lined tart pan from the freezer and bake in the preheated oven for 10 minutes. Cool on a rack for 15 minutes. Reduce oven temperature to 350 degrees F.

       Spread the prepared cheese mixture over the bottom of the pastry. Use a small offset spatula or the back of a spoon to level the cheese mixture.
    

       Arrange the tomato and zucchini slices in a pattern on top of the cheese filling. If you have a large heirloom tomato slice, that might go in the middle, surrounded by zucchini slices. I did a circle of small tomato slices, with zucchini slices in the middle. Sprinkle with ground black pepper, optional.

       Bake the tart at 350 degrees F. for 10 minutes. While the tart is baking, stir together 1 tablespoon of the olive oil, the breadcrumbs, and the pine nuts.

       Remove the tart from the oven after 10 minutes. Use a pastry brush to brush remaining 1 tablespoon olive oil over the pastry, the vegetables and filling. Use the breadcrumb mixture to fill in any spaces not covered by vegetables, plus scatter any leftover over the vegetables. Return tart to the oven and bake another 10 minutes or until the crumbs are a bit crispy and the pine nuts are golden browned.

1     Let tart cool ten minutes on a rack, then unmold by pushing the bottom up. Slide the tart off the pan bottom onto a serving plate and serve, either still warm, or at room temperature, in wedges.


Wednesday, July 20, 2022

Early Tomatoes


The baby tomatoes on the tomato plant in my garden are still pretty small; about golf ball size. It's going to be weeks before we enjoy any of them.


Fortunately the farm stand near town had some lovely, large, ripe tomatoes this week. They had good flavor, even if they were a bit pale towards the center, and so we could enjoy them the way we like tomatoes best. Slices of tomatoes are arranged on a plate, sprinkled with garlic salt and pepper, drizzled with olive oil and balsamic vinegar, and showered with thin slices of fresh basil. 

I served them with fresh corn from the same farm stand, and with some grilled zucchini which were from our garden. Nice and summery and so delicious!

Thursday, September 30, 2021

Fresh Tomato Soup

Here we are at the end of September. The tomatoes are ripening in multiples a day. I only planted two plants this year. The Black Krim has produced at least a half dozen super sized tomatoes and there are a few more ripening now, but the Early Girl plant has produced dozens and dozens of tomatoes. They are smaller and their flavor is milder, but they are perfect for putting in a green salad. I also love to slice them, spread the slices on a nice plate, douse them with good olive oil and balsamic vinegar, then sprinkle with pepper, a bit of salt, and some chiffonade of fresh basil. So good.

Since I have such a bounty of tomatoes, I decided to make fresh tomato soup for lunch. My Dad had a recipe from 1977 in which you simmer the peeled, seeded, and diced tomatoes in butter, then puree them in a blender before adding seasonings and flour for thickening, water and white wine or chicken broth. 

I used that recipe as a jumping off place. Before I simmered the tomatoes, I gently cooked a whole onion, diced, in olive oil, adding a minced garlic clove toward the end of cooking. I added the tomatoes to that with some non-dairy butter, but, although I peeled them, I didn't seed them and only cut each into six wedges. I used a hand blender to smooth out the cooked vegetables but it didn't make the soup smooth, just smoother. The seasonings were the same, but I put in a can of chicken broth instead of water and chicken broth. I also stirred in a few leaves of basil that I had minced. I let it all simmer then made a slurry of flour and water which I stirred in and let it all simmer a bit more until it thickened just a little. Eating it was like tasting the essence of summer. It's also healthy...only 85 calories a serving.

I'm going to give you Dad's recipe, but you can always change things up as I did to make it your own.


Fresh Tomato Soup

2 pounds ripe tomatoes, peeled, seeded, and diced (See note)
3 tablespoons butter or margarine or olive oil
2 tablespoons flour
1 teaspoon salt
1/2 teaspoon sugar
1/8 teaspoon fresh-ground pepper
1 cup water
1/2 cup dry white wine or or vegetable broth or chicken broth - canned or home made

In large saucepan, simmer tomatoes in butter about 5 minutes. Remove from heat and rub through a wire strainer or whip smooth in a blender.
Return to saucepan. Sprinkle in the flour, salt, sugar and pepper, mixing well. Add water, and wine or chicken broth. Heat to simmering. Garnish with pat of butter or crisp crackers or thinly sliced fresh basil.
Makes 6 servings - about 85 calories per serving.


Note:
To peel tomatoes, bring a pot of water to boiling, only filling pot half way. With a sharp knife, cut and x on the 'bottom' of the tomato (the end opposite of the stem end). Place the tomatoes into the boiling water and cook a minute or two until the skin near the x starts to separate. Remove tomatoes from boiling water and peel from the x. Peel will come off easily - if it doesn't, return the tomato to the boiling water. To seed, cut in half horizontally and squeeze out the seed and gel. Remove stem end at center and dice.

Saturday, September 09, 2017

Finally Tomatoes


We had a cool, rainy spring. Night temperatures stayed low on into June, so the tomatoes went in late. As a consequence they are ripening late, too. Finally had our first plate of sliced Marvel Stripe tomatoes. These were also on the small side, but juicy, sweet, and delicious.


I prepared them as a composed salad. The plate included thick slices of our Kirby cucumbers, pepper, sea salt, and a splash of balsamic vinegar and drizzle of olive oil. Sweetie also had some cute little mozzarella balls with his salad.

Not an actual recipe, but I'll bet you can improve upon my fairly simple salad.

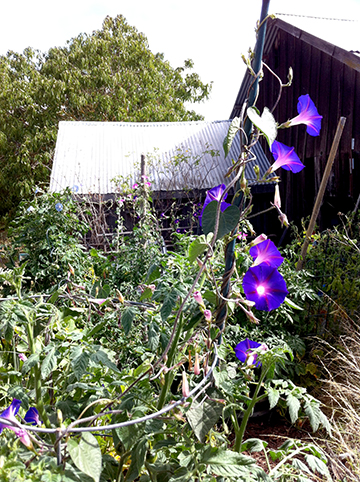
Bonus: Yellow roses and sunflowers dancing with purple and magenta morning glories. High summer!


Wednesday, October 21, 2015

Don't Cook? Try This Salad


Sometimes you need a salad recipe that will be easy to assemble somewhere other than your kitchen, one that is a main dish salad, one that is fairly healthy with vibrant flavors, too. Then to have a salad that is also pretty good for non-cooks as long as they are comfortable with grilling chicken and you have a winner. Did I mention that it's delicious? It is. I served it with rolls just like THESE.

This recipe is based on a couple of recipes I saw online, but, as usual, I changed it so much that I'm not going to attribute it to anyone in particular.

For starters you can use a number of things for the salad greens. You can use pre-washed bagged salad mix. You can wash and dry and chop or tear your own greens. You can use almost any mixture of greens, so this is great for greens from your garden. I went with heads of romaine lettuce from Costco, which I washed, spun dry and chopped.

The next piece is balsamic dressing. You can use bottled dressing and most stores have a number of choices for you. You can also have a little fun in the kitchen and mix up a simple dressing with garlic, mustard, honey, olive oil, salt and pepper and balsamic vinegar. The dressing is used to marinate chicken breasts and also to dress the salad when it is serving time.

The chicken breasts should be boneless, but they can also be skinless. You could also use boneless chicken thighs as long as you spread them out to cook so they cook evenly. You use 1/3 cup of the balsamic dressing as a marinade and put the chicken and marinade in a seal-able plastic bag in the fridge for about 3 hours, turning the bag over every hour. Not too difficult, right?

While the chicken is marinating you get to do some chopping. You need 2 cups prepared tomatoes. The recipes usually recommend getting rid of the seeds, but it is actually OK to just chop the tomatoes or dice them. If you are using cherry tomatoes, cut each of them in four pieces.

You will also need to slice or chop some fresh basil (1/4 cup) and stir that and some dried oregano into the chopped tomatoes.

A can of sliced olives, drained and some feta cheese finishes what is needed.

Once the chicken has finished it's time in the fridge, drain off the marinade and grill it until just cooked. Let it cool slightly, then cut into bite sized chunks. If you are lucky, someone who loves to grill things will do this for you as Sweetie did for me. I'm a lucky girl! I haven't tried it, but I suspect that if you bought a pre-cooked whole chicken and removed the meat and cut it in chunks and marinated it for a short time in the dressing that you could even skip the grilling part, although you will lose the great flavor one gets from grilling.

Now for the fun part, assembling the salads. If you are serving this somewhere other than you own kitchen, you will have a container of salad greens, a container of cooked chicken, a container of sliced olives, a container of the prepared tomatoes, some feta cheese and some balsamic dressing.

Put the greens in a large bowl. Drizzle with some of the dressing and toss to coat. This is a great time to use short tongs if you have them. Divide the greens among the plates. Top with a serving of chicken chunks (about 1/2 cup), then top that with 1/4 cup of the tomato mixture, add some of the sliced olives, sprinkle with some feta cheese chunks/crumbles and drizzle a tiny bit more dressing over it all. If you have extra basil, it makes a pretty garnish. That's it. Serve with pride and enjoy the flavors of the Mediterranean. I served some mini-carrots on the side, but a nice bunch of grapes would go well, too.

The recipe serves 8, but you can cut it in half or double it depending on how many you are serving.


Chicken and Tomato Over Greens Salad - 8 luncheon sized servings

  • 6 boneless chicken breast halves (can be skinless, too, if desired)
  • 12-14 cups salad greens of choice (about one and a half large heads, chopped, or two large bags)
  • 1/3 cup balsamic salad dressing per pound of chicken, plus more for tossing with greens (recipe follows; may substitute your favorite store-bought option)
  • 2 cups seeded and chopped tomatoes
  • 4 tablespoons fresh basil leaves, thinly sliced
  • 1/4 teaspoon dried oregano
  • Freshly ground black pepper to taste
  • 1 can sliced black olives
  • 1/2 cup crumbled feta cheese

For the balsamic salad  dressing:
  • 1 small garlic clove, smashed and minced
  • 1 teaspoon kosher salt and 1/4 teaspoon freshly ground pepper
  • 1 tablespoon Dijon mustard
  • 1 tablespoon plus 1 teaspoon honey
  • 1/4 cup plus 2 tablespoons balsamic vinegar
  • 1/2 cup olive oil

  1. For the balsamic salad dressing: In a bowl whisk together the garlic, salt and pepper, Dijon, honey and balsamic vinegar. Drizzle the olive oil in a slow, steady stream, whisking as you go, until the dressing is emulsified.  You may also add everything to a jar with a tight-fitting lid and shake well.

  2. Cover and refrigerate for a couple of hours to allow flavors to blend. The vinaigrette will keep for several weeks in the refrigerator. Shake well prior to using.  If the olive oil has solidified due to the cold, simply allow the jar to sit at room temperature for a few minutes before using.

  3. For the grilled chicken: Place the chicken in a large, resealable plastic bag. Pour the vinaigrette over top (1/3 cup per pound of chicken), seal, and marinate in the refrigerator for at least 3 hours or overnight if possible. I like to flip the bag a few times (every hour or so during the day) to distribute the marinade.

  4. Prepare the grill or heat a large cast iron skillet or grill pan. Remove the chicken from the marinade, discarding the remaining marinade, and cook the chicken over medium heat for 7-8 minutes per side, depending on thickness, or until the chicken is just cooked through. Cut into center...if still pink, keep cooking, if not you are done...don't overcook.  If cooking in a skillet or on a grill pan, you may need to do this in two batches.  Remove from the heat and allow the chicken to rest for 5 minutes. Cube into bite sized cubes. Set aside for 5 minutes and then package into ziploc type plastic bag. Refrigerate if not made right before serving.

  5. For the tomato mixture: Gently mix the tomato, basil, dried oregano and a few grinds of fresh pepper in a ziploc type plastic bag. Close and shake bag to mix the ingredients. Refrigerate if not made right before serving.

  6. Gather salad components: Washed, dried, and  chopped chilled salad greens or pre-washed chilled greens in the bag, chicken pieces in ziploc type bag, tomato mixture in ziploc type bag, drained olives, feta cheese in chunks and crumbles, extra vinaigrette.

  7. Assembling the salad: Reheat the chicken in the oven if one is available or serve at room temperature. (Chill any unused chicken right away). Place the salad greens in a bowl and toss with enough vinaigrette to lightly coat.  Distribute the dressed greens among eight plates. Top with chicken breast pieces (chunks) followed by one eighth of the tomato-basil mixture (about 1/4 cup). Sprinkle with some of the sliced black olives, drained. Sprinkle on one eighth of the feta cheese.  Drizzle a little extra balsamic vinaigrette over top  and garnish with extra basil if desired. Serve and enjoy!

Wednesday, October 14, 2015

Pretty Good Pizza


One of the foods I miss is pizza. Crisp yeasty crust, intense tomato flavor in the sauce, gooey melty cheese on top are all favorites. A few days ago I decided to try Pamela's brand pizza dough mix and see how it worked out. I bought Daiya shredded non-dairy mozzarella for the topping and made up some fresh tomato sauce using grape tomatoes from my waning tomato plants. I also cooked up some onion, fresh garlic, ground turkey and herbs for topping.

Following the directions on the packet, I mixed up the dough and let it sit for a couple of hours to let the yeast grow. Spreading the dough on parchment with my fingers wasn't too difficult and baking the crusts for 8-10 minutes until lightly golden was also OK, although the crust on the pizza stone at the top of the oven (recommended by Pamela's) didn't crisp up at all and the one on a sheet pan at the bottom of the oven did, so that's the one I ended up eating.

Over the baked crust I spread some of the cooked down tomatoes, then added some of the remaining cooked down tomatoes to the topping mixture, then sort of sprinkled that topping over the crust. A light distribution of the cheese seemed a good idea since I had no idea if it would taste OK.

The finished pizza tasted pretty good, although the texture of the crust was not chewy but sort of dry and the cheese was just OK, not really good. It did taste like pizza and I ate the leftover piece the next morning for breakfast so you know that I had been wanting pizza for quite a while. If only somebody could create fake cheese that was as delicious as real cheese. In the meantime I'll probably only have pizza when the craving really gets intense.

No recipe for this, but there are some photos.
First shows pizza with smeared cooked down tomatoes, plus topping and cheese over partially baked crust.


Then we have the baked pizza, with the crust still pretty light colored, but the dark corn meal shows that something cooked. I used cornmeal under the crust when I formed it, which was suggested as a good method on the pizza crust package.


Finally we have the slices. You can see that the cheese didn't really melt. Some of the shreds sort of shrank a little when they got hot. Still they tasted kinda like cheese.


Sunday, July 26, 2015

Ripe Tomatoes


As happens almost every year, this winter I started seeds for most of the garden I planted. Some years I do a vast number of tomato varieties, but this year I only planted three kinds. One is a grape tomato, sort of an elongated cherry tomato. Although I expected them to ripen first the one that actually is giving me enough tomatoes for salads is called Stupice. The tomatoes are about golf ball size and have a nice strong tomato flavor. Some of them have green shoulders at the stem end even when the rest of the tomato is fully ripe, but I just cut that part off and put it in the compost pile. A few of the grape tomatoes are ripe, too, but not many. The third tomato is my favorite Black Krim. They are lobed and get larger and are a brownish red and super delicious. I also planted the seed for them later than the others, so I probably won't harvest any until next month at the earliest.

Tonight we'll be having three kinds of grilled squash: white scallop, yellow scallop and zucchini. There will be sliced Stupice tomatoes with basil from the garden and Sweetie and Straight Shooter will enjoy grilled rib eye steaks from a local farm while I enjoy chicken thighs from a local market. A summery meal for a summers evening.


The morning glories are running rampant in the garden, climbing anything they can climb, including the tomato plants.


The lilies have just started to bloom, too.


I didn't really plant too many other flowers this year, devoting my water mostly to veggies. I'd like a few more cucumbers, too, but they have slowed down production. Only got one this week.

We finished our deck repair on the front of the house and even moved some wicker furniture and a rocker to the most recently repaired part near the door to the baking center. I just finished having a cup of tea while enjoying the rocker, a nice breeze and the company of Sweetie and Pi doggie. Bliss.

Hope you are having your own kinds of summer good times.

Tuesday, August 26, 2014

Height of Summer Chicken and Corn


The garden is so beautiful right now! The cherry tomato plants have taken over most of a 4 foot by 6 foot planter box, but there is a sky blue morning glory with flowers as big as saucers that has climbed up and through those tomatoes and up some more.


There is a smaller Early Girl plant that is starting to produce red, ripe tennis ball size tomatoes, too. I used both the cherry and Early Girl tomatoes in today's dish. The squash plants yield about one a week, which is fine since there has been no baking to speak of until today for about 5 weeks, and not much real cooking either. Sweetie grills the squash, just like using a campfire. Come to think of it, having no working kitchen is a bit like camping out, without the bugs. Fun for a while, but it was so nice to finally bake today!

A good friend has corn that has all ripened at once, so she gave us some a few days ago. The first eating was lightly steamed and right off the cob. Today I cut the kernels off the cobs and added them at the last minute to a chicken casserole which also has fresh tomatoes, white wine, onions and fresh basil. It's based on a recipe I've loved for years, Chicken Cacciatore. This is a fresher combination and really delicious.


It is also one to bookmark because you can make it up the night before, or even a few days before you eat it and then reheat it when you have had a busy, busy day. Sitting overnight or longer melds the flavors and it is even better than freshly made. Just be sure to add the corn 5 minutes before you serve the dish. It really only needs to warm up!

I served this with fresh from the garden steamed green beans, but it would be lovely with a salad and some nice bread, too. Bread baking coming soon, I promise.


Chicken with Corn, Onion, Tomato and Basil

1 chicken, cut up (I used 4 chicken breasts, each cut in half)
1 large onion, sliced thin
1 pound fresh tomatoes, washed, stem end removed, and cut up (I used about 14 oz. Early Girl and the rest cherry tomato...with the cherry tomatoes cut in quarters)
3 tablespoons fresh basil, sliced in thin slices or chopped
2 ears fresh corn, cut from the cob
salt & pepper to taste & olive oil for the bottom of the pan

Sprinkle chicken with salt. In a large, heavy ovenproof skillet, over medium heat, brown chicken in hot oil. (I use just enough oil to coat the pan bottom to keep the chicken from sticking. If you have a large, heavy ovenproof non-stick skillet, you don’t even need the oil.)
Add the onion; cook about 3 minutes, stirring, until the onion is crispy-tender. (If using chicken breasts, remove them to a bowl...which retains the juices...while you stir the onions, then place them over the mixture once the tomatoes have been added. Otherwise they may cook too long and become tough)
Remove pan from the heat. Stir in the tomatoes and pepper. Sprinkle with the basil.
Bake in a pre-heated 350 degree F. oven for about 30-40 minutes, or until tender. 5 minutes before dish is cooked, add the corn, cover, and return to oven for 5 minutes. Serve at once.
 If you will be reheating the dish, don't add the corn until you have reheated the dish. Keep the corn refrigerated until ready to use.
If you are reheating the dish, place it in a preheated oven, without the corn, and heat it until internal temperature registers 165 degrees F. Uncover, add the corn, cover and keep heating for 5 minutes. Serve at once.
It is OK to let the casserole stand in turned off oven up to 1 hour, but the corn will not be as sweet.
Serves 4-6.

Thursday, August 14, 2014

Eat From the Garden


Farm to table is really big right now in the restaurant world. That is probably a good thing because getting people to really taste fresh veggies and fruit soon after they are harvested might help generate demand for that taste hit in regular and fast food restaurants, to say nothing of in grocery stores.

Even better than farm to table is garden to table. To have planted the little seeds, nurtured them, set them out in the garden when the time was ripe, kept them going with regular water (and plant food as needed), tying up the tomatoes and re-routing the wayward pole bean vines, watching the first fruits form and grow and ripen...then to pick and eat that ripe food shortly after picking. Bliss.


I usually try to do as little as possible with the harvest if I only harvest enough to enjoy that day. Today I harvested enough lovely green bush beans for Sweetie and I to enjoy with our dinner. All they needed was a quick rinse and a rapid steam to turn them brilliant green and heat them enough to enjoy. Nothing else was needed! We had them last night, too. The thing to remember if you decide to grow bush beans is that they come in almost all at once...within a week or so. Great if you are canning them, but otherwise you need to pick them almost every day and figure out what to do with them. My pole beans seem to take a bit longer, so I harvest them less frequently.


The small tomatoes (Early Girls, I think) also got a quick rinse and then were sliced. The slices were laid on a platter and I sprinkled on a tiny bit of garlic salt and freshly ground pepper.


These tomatoes never saw the inside of a refrigerator, so they were room temperature. They taste like summer...juicy, tart, the essence of tomato. Last night's cherry tomatoes were even simpler. Wash, put on plate. Remove green top, eat, repeat.


If you don't have a garden or a neighbor who wants to share, try a good farmer's market. It will be almost as fresh and very, very delicious.

For those who are keeping track, we now have a counter and sink and faucet in the baking center, so washing up is easier. The photo of the tomatoes and cutting board shows a sliver of the new quartz counter top. Still no regular stove or oven, but Sweetie is patching some dry wall tomorrow and I'll be working on the mural this weekend, so it won't be too much longer before I can bake again.

Friday, September 06, 2013

Tomato Love Summer Soup


Given my absurdly successful experiences with starting tomato plants from seed, I am never able to complain of too many tomatoes, but, wow!, there are a lot of them coming ripe at once.

With three pounds of blanched and peeled tomatoes on hand, a take on the classic gazpacho cold tomato soup was easy to accomplish. I still had another two pounds for making pasta sauce, and that's not even counting the endless cherry tomatoes.

This is a refreshing soup with a little crunch. If you prefer really smooth, just keep the blender running longer. If you make a lot of this, you can keep it in a pitcher in the fridge and just pour out some when you need a quick, cool hit of yummy tomato bliss. The addition of red pepper, classic cucumber, and tangy celery gives it a more complex flavor, as does the onion and garlic. Since I'm not a big fan of raw onion or garlic, I sautéed and cooled mine before I adding them to the soup (absolutely not classic!), but you can go with uncooked if you prefer...and it will be faster.


Almost Classic Gazpacho
Serves 4-6

1/2 yellow or white onion, chopped
2-3 cloves garlic, sliced
1 tablespoon olive oil (if cooking the onion and garlic)
3 pounds fresh tomatoes, peeled
1 cup diced cucumber, peeled if skin is thick
1 cup diced celery
1/2 cup diced red pepper
1/4 cup red wine vinegar
1/4 cup olive oil
salt and pepper to taste

Sauté onion and garlic in olive oil, if cooking, until onion is translucent and garlic light brown. Set aside to cool. If not cooking onion and garlic mix them and set aside.


In a blender, combine cooked or uncooked onion mixture, tomatoes, cucumber, celery, red pepper, red wine vinegar and olive oil. Pulse until mixture is of the desired consistency. I like mine a bit chunky, but it can be smooth. If necessary, process in one or two batches. Taste and add salt and pepper to taste.

Turn into a non-reactive bowl or pitcher and chill thoroughly, at least one hour.

To serve, put portions in either glasses or bowls. If desired, garnish with red pepper and/or cucumber cut into a fine dice. Crisp croutons are also a nice garnish. Serve at once while fully chilled.

Sunday, August 18, 2013

Tomato Love


I get a bit emotional about tomatoes. First because I spend a lot of time and thought on them: I start them from seeds in the late days of winter, tend the little plants with care, give a boatload of older, re-potted plants away to friends since there are almost always way more seedlings than I can handle, harden them off and then plant them in the spring. It is hard to see the seedlings that are left...unloved and unplanted...so I usually plant more than I should.

It doesn't stop there. Daily watering allows me to follow the growth of each plant, the formation of tiny tomatoes (often after a long, frustrating period when I get lots of blossoms and no fruit setting up) and the growth of those tomatoes to see what kind they might become. That last was especially true this year because when the plants were re-potted into larger peat pots I was deranged due to morphine residual from the hospitalization with a kidney stone, so I didn't really keep track of the varieties very well. It was actually kinda fun to see what I ended up with.


Then there is the looooooong wait until the tomatoes actually ripen. This year the cherry tomatoes came first and were a delight, but that first plate of sliced tomatoes, lightly seasoned with pepper, olive oil, balsamic vinegar sprinkles and a little garlic salt or sea salt is the ultimate pleasure. Until I have the first of the season BLT.

Now we are to the point where there are enough large tomatoes (and way too many cherry tomatoes) that I can share them. I also begin making different recipes that showcase the tomato.

Yesterday I threw together a seasonal veggie stew you might like. Chunks of juicy ripe Mortgage Lifter tomatoes added their summery flavor and color, but it also had sautéed onions and garlic, lots of fresh basil for fragrance, flavor and bite, slices of zucchini because I love zucchini, plus some yellow wax beans for color and texture and just a bit of beany flavor. Of course there was some pepper added, but no salt this time. Instead I added a splash of balsamic vinegar. All that was missing was eggplant, but I don't actually like eggplant, so I was fine with that.

This mixture went perfectly with a couple of small rectangles of this cheese and polenta grill that I posted about HERE. I suspect that it would also work well over almost any grain, as a filling for rolled up tortillas, maybe with some cheese, or even over pasta. For pasta you might want to cut up the veggies smaller when you start.

Do you have a favorite tomato recipe?


Tomato, Basil and Beans Together

1/2 medium onion, chopped
2 cloves garlic, minced
1 tablespoon olive oil
1 1/2 cups fresh tomato chunks
1 cup sliced zucchini
1 cup fresh beans (I used yellow wax beans, but green string beans are great, too)
2-3 tablespoons chopped fresh basil
salt and pepper to taste

In a large pot, sautee' the onions and garlic in the oil until tender and translucent, about 5 minutes.

Reduce the heat to medium and add the tomato chunks, zucchini, beans, basil, and salt and pepper.

Stir to combine and heat until the zucchini is tender, about 8 minutes. Taste for seasoning and serve.

Monday, August 05, 2013

Fast and Fun Burrito


Now that I live in California I'm surrounded with some of the best Mexican food outside of Mexico, but when I was growing up on the East coast, I knew absolutely nothing about tacos and enchiladas and burritos much less empanadas or tamales or any other south-of-the-border foods.

When I lived in Berkeley I went to a dinner party where the highlight of the dinner was make-it-yourself burritos. I liked it so much that it soon became a staple of our busy lives. When you make a big pot of chili, there are leftovers and those become the centerpiece of the burrito. Add a tray with a pile of chopped fresh tomato, a pile of chopped cilantro, a pile of diced avocados or a bowl of guacamole, some sliced olives, a bowl of shredded cheese, shredded lettuce, a bowl of re-heated rice, a bowl of sour cream or plain yogurt and you are almost there. We used to add plain tortillas, heated briefly in the cast iron skillet and doled out as they were warmed. Now there are so many types of tortillas that we can have some flavored with tomato or spinach or herbs, but I often go with the plain tortillas I remember from my first encounter with this dish.

Once the children were grown and no longer around the dinner table, I lost track of this dish for some reason. I think we've had it half a dozen times at the most in the last dozen years. Today I needed a quick meal and remembered the left over chili in the fridge. Once I discovered a package of tortillas on the bottom shelf the rest was easy. Unfortunately we were out of avocados but it was OK. Even with a limited number of add-ons, it was just as much fun as I remembered. On a warm tortilla I laid out a rectangle of hot chili, sprinkled on some shredded cheddar cheese, a big pinch of cilantro, a dribble of plain yogurt, then folded it up into the classic burrito shape. Brought back great memories I can tell you!

You can make your own memories. This is a great meal to do with kids because they can make it their way. If you don't have chili you can use refried beans or kidney bean, black beans or pintos. If you do that, add some salsa and/or hot sauce for zest.

Sweetie ate up all the tomatoes we didn't put into the burritos and then we ate some wonderful Bing cherries for dessert. Fast, easy and fun.


Make Your Own Burritos

leftover chili OR
refried beans or kidney bean, black beans or pintos and some salsa or hot sauce
reheated cooked rice
shredded cheese
chopped cilantro
chopped tomatoes
1-2 avocados, peeled, pit removed and diced
plain yogurt or sour cream
sliced black olives, drained
shredded iceberg lettuce
more salsa and/or hot sauce
flour tortillas

Heat the chili, or beans and put into a serving dish.
On a tray arrange a bowl of warm rice, a pile of the cheese, a pile of cilantro, a pile of tomatoes, a pile of avocado, a dish of yogurt or sour cream, a bowl of olives, a pile of shredded lettuce. If you don't have any of the ingredients on the tray, don't worry...just serve what you have.
Put the salsa and/or hot sauce on the table, along with the dish of chili or beans, and the tray of fixins.
Heat the tortillas in a skillet or the oven to warm them. Serve wrapped in a towel to keep warm.


For each serving, put a warm tortilla on the plate. In the middle put a rectangle of chili, leaving enough room to wrap the tortilla around the fillings. Add your favorite fillings, salsa or sauces. Wrap by folding in one side, folding up the bottom, then the other side. Eat, being sure to have a napkin handy to catch any drips.

Sunday, February 24, 2013

Salmon for Lunch

Our local market had wild salmon at a very good price this week. I do love salmon and enjoyed some for dinner, but the piece was too large for one meal, so I found a way to use up the leftovers at lunchtime yesterday.

This is one of those recipes that don't really have precise amounts, especially since I was using up leftover rice, too. Amounts given are close to what I used. I decided to reheat the rice and add the parsley, tomato, and lemon juice so that all were not only warm, but mixed, when added to the wrap. I re-heated the salmon first, then the rice mixture, then added them to the warm tortilla that had the cheese already melted on it. I probably should have left out the smidgen of sour cream but it really added to the finished wrap's rich flavor.


Tortilla Wrap with Salmon, Rice, Tomato, and Jack Cheese
Serves 1

1 large flour tortilla
about 2-3 tablespoons shredded Monterey Jack cheese
leftover grilled salmon...about 1/2 cup flaked
1/2 cup brown rice, already cooked
1/4 cup diced fresh tomato
1 tablespoon finely chopped flat leaf parsley
1 tablespoon fresh lemon juice
1 tablespoon sour cream (optional)

In a large skillet, over medium-high heat, warm the tortilla for 1 minute. Add the shredded cheese in a thick ribbon down the middle of the tortilla. Cover with a lid and turn off the heat.

In a small bowl, re-heat the salmon in the microwave. I usually use half power to reheat things and this is important with the salmon since you don't want to overcook it. Depending on your microwave, try about 1 minute at half power.


Remove the heated fish to a small plate and use the same bowl to heat the rice, tomato, parsley and lemon juice. Once warmed through, stir the mixture.

Remove the lid from over the cheesy tortilla, turn the heat to medium, and add the salmon, placing it over the cheese and a bit to each side, leaving sections on both sides of the tortilla uncovered. Repeat with the rice mixture. Add little dollops of the sour cream over the center of the rice strip if using. Replace the lid and let the whole concoction heat for 1/2 minute. Turn off the heat, remove the lid and fold in the uncovered sections of the tortilla. Remove to a plate and serve, garnished with a wedge of lemon, if desired.

Tuesday, November 20, 2012

Making Progress


I used to think that I would love to have the time to just loaf around and do nothing. When you are working full time and have a couple of kids to look after, a great guy to build a life with, and the usual errands and cleaning and shopping that building a life, or just having a life, entails, it's easy to daydream about a carefree time in the future without all those time eaters.

Turns out I'd rather have projects to do and even the occasional deadline than too much time doing nothing. I like having enough things to do that I need a list to keep track of them. It usually means that I'm interacting in some way with other people (which I usually love) and that I'm making progress on something that is meaningful to me. Somewhat surprising, but not a lot. I've always enjoyed the process more than the product and you have to have things to do in order to have processes, right?

So the carpet was installed, lots of stuff found new homes and some of the old stuff returned to it's place (like this computer), although there is more to do.

The book I'm doing for my InDesign class was uploaded to the publisher today *Yay!* and will be a real book at my doorstep in early December. There is still lots more to do for the class but it feels good to have the book part of it to print.

Thanksgiving will be at our house this year so I have lists and more lists and couldn't be happier! I made the Pocketbook Rolls again, this time with my sourdough starter, so we will have puffy, slightly sour, tender rolls to go with the turkey dinner. Since I have been fairly successful with my weight loss program so far I think I'll even allow myself a good size piece of pumpkin pie!

In no time Christmas will be here, too, so there will be more fun stuff to do to get ready. That will likely mean an increase in posts as I find new recipes to try for entertaining and for gift giving. I'm stoked!

Today I have a new and simple pasta recipe that I threw together one evening. It had to be simple because my eyes were still crossed from too much time proofing the book. It starts with a bed of fresh tri-color pasta (from a package in the refrigerator section of the grocery store...any good brand will do), topped with a melange of sauted onion and garlic, wilted fresh spinach, fresh chopped tomatoes, leftover grilled chicken, and some herbs and spices. Over it all I sprinkled a generous amount of toasted pine nuts. It was wonderful! If you don't have any leftover chicken, you could substitute some rotisserie chicken, cut into bite sized pieces and dinner can be on the table before you know it!

Chicken and Spinach Pasta with Pine Nuts
my own recipe
1/2 onion, chopped
1 clove garlic, finely chopped (or more, to taste)
1 tablespoon olive or grapeseed oil
4 oz. sliced mushrooms
1/2 cup chicken broth
2 cups diced tomatoes and their juice...fresh tomatoes if possible
1 - 2 cups cooked chicken, cut into bite sized pieces
4 cups fresh baby spinach, rinsed well
2 tablespoons finely chopped flat leaf parsley
1/4 teaspoon dried thyme
salt and pepper to taste
1/3 cup pine nuts
Hot, freshly cooked, drained, fresh pasta ribbons - I used tri-color, but any fresh pasta will work

In a large saute pot, saute the onion and garlic in the grapeseed oil, stirring often, until onion is translucent, about 5 minutes. Add the mushrooms, cover the pot, and cook over low heat for 5 minutes. Uncover the pot. Add the chicken broth and deglaze the pan, stirring to release any bits stuck to the side of the pot. Add the tomatoes and cook over medium-high heat uncovered, stirring often, until sauce has thickened, about 5 minutes. Add the chicken and stir to combine. Heat 2 minutes. Add the baby spinach, stirring until it wilts. Stir in the parsley and thyme, salt and pepper.

On a dinner plate pile a serving of fresh pasta. Top with some of the sauce. Sprinkle with the pine nuts. Serve at once. Serves 4.