Showing posts with label oranges. Show all posts

Wednesday, November 27, 2024

Black Bean and Pork Stew is Perfect for Cold Weather


My dear sister-in-law Anne once brought a pot of this stew to our Christmas gathering and it was a hit. She gave me the recipe and I made it once, but then lost track of it. Because it calls for cooking black beans from scratch, it becomes the kind of recipe that I'm not going to put on rotation...takes too much time. But it is still a fabulous recipe.

A few days ago I decided to see if I could make it using canned black beans. Having already-cooked beans shortened the time needed for making it...but would it still be delicious?

Sweetie thinks it's even better! I used four cans of organic black beans, rinsing the beans in each can in turn to get rid of the excess bean liquid. That liquid can contribute to gastric discomfort and we didn't have any Beano on hand.

Because the original recipe calls for cooking the beans with aromatics like onion, garlic and red pepper, I decided to heat up the three of the cans of the beans with those after I had sautéed the onion, garlic and red pepper in some olive oil. Then that mixture went into a Dutch oven and I added a cup of water. After stirring that around, I strained out the liquid and used it later to puree the last can of beans. 

Because the beans and aromatics left too much residue for my liking,  I rinsed out the cast iron skillet before I used the cast iron skillet to cook the meat. The cooked meat went into the Dutch oven, too. Then I deglazed the pan with the orange juice and wine and cooked it down a bit, then put that into the Dutch oven. Last, I pureed the final can of beans with the liquid from the beans and aromatics, then put the puree into the Dutch oven, and then stirred it all together. It smelled wonderful! After adjusting the seasonings, the covered Dutch oven went into the preheated oven to bake for 30 minutes. Once the stew was out of the oven I checked for flavor and texture and decided that another 1/2 cup red wine helped both. You can also check for salt and pepper, need for a bit more orange juice for the acid boost, etc.

At this point you can serve the stew with the orange segments, perhaps over saffron rice, or you can do what I did and let it cool in the pot a bit then refrigerate for a day or two. This allows the mixture to blend flavors and mellow - a normal thing when onions are involved, in my experience.

When I reheated the stew the evening I served it, I just put the pot of stew over low heat and stirred it frequently until it was hot. I forgot about the rice and just served it with the fresh orange segments. Sooo good! Depending on appetites and if you serve it with rice, this makes 4, 6, or 8 servings. It's hearty, full flavored, and delicious. I still had a lot of pots and pans to wash up, but the time cooking was reduced quite a bit. You can start it by about 4 in the afternoon and have it on the table by 5:30 or 6 if you serve it the same day. Enjoy!


Pork and Black Beans over Rice
Based on a recipe in Paula Peck's Art of Good Cooking
Serves 6

4 cans cooked black beans, 15 oz. each, rinsed in cold water
1/3 cup olive oil
3 cloves garlic, minced
1 large onion, minced
1 large bell pepper (green, red, yellow or orange), seeded and diced
2 teaspoons salt
½ teaspoon coarse black pepper
1 1 /2 pounds unsmoked pork tenderloin, cut into 1 inch cubes
¾ pound fresh pork sausage - Sweetie bought Italian style, which ended up OK
2/3 cup orange juice
½ cup dry red wine
2 -3 fresh oranges

Open the cans of beans and rinse under cold water (I used a fine-mesh strainer and rinsed a can at a time. Reserve the contents of one can to be pureed later, but do wash the beans in that can before pureeing.

Heat olive oil in a skillet. Add garlic, onion and bell pepper and sauté’ until tender. Season with salt and pepper. Add the onion mixture, three cans of rinsed beans and 1 cup water to a Dutch oven or large, heavy-bottomed pot that can go in the oven. Cover the pot, and simmer about 5 minutes, then strain out the liquid and reserve.


Return the drained beans to the pot and cover to keep warm. Puree’ the remaining 1 can of beans with as much reserved bean liquid as necessary in a blender. Stir bean puree’ into cooked beans and keep warm.

Brown pork cubes and sausage in their own fat in the skillet. (Rinse the skillet if desired after cooking the onion mixture and before cooking the meat.) If very lean, use a little olive oil. Pour off fat when meats are golden all over, and, if in casing, cut sausage into 1 inch pieces. If not in casing, break up sausage into chunks. Add both meats to beans; season with additional salt and pepper if needed.

Pour orange juice and wine into the skillet that the meats were browned in, and cook over high heat until liquid is reduced to less than half, scraping any brown bits in the pan into the sauce. Pour into the bean mixture and stir to combine all flavors. Place in a preheated 350 degree F oven for 30 minutes. Taste and adjust seasonings. If desired, add more wine and/or orange juice if taste or texture would be improved by the addition.

While pork and beans are cooking, peel the oranges, slice an inch thick and separate into segments…you’ll have about 1 ½ cups of triangles of orange.

Serve over saffron or steamed rice, if desired. Garnish with orange segments. The uncooked, juicy, sharpness of the fresh orange is essential to this dish...the rice is great, but optional.


Wednesday, July 29, 2020

Carrot Salad and New Blogger


First, about the new Blogger...I'm not sure that I can stand learning this new version. I had to revert to the old version to do this post since I couldn't figure out how to do a new post! It may be that when using the old version goes away in late August that new posts will go away, too. The already written posts will stay up, but who knows if I have the bandwidth to learn the new version by then. I'm currently learning the ins and outs of Zoom so that I can be a host for two of my P.E.O. scholarship groups when they need to meet. That may end up being all the learning of tech stuff that I can handle. It's been a great run on Blogger...since fall of 2006! Fourteen years is probably enough.

Still, I have until late August to learn the new version, so maybe I'll keep going...come back in late August and find out.

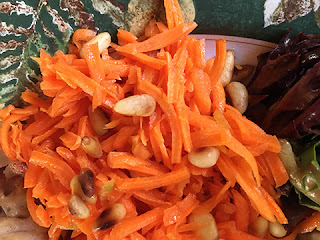
Today the recipe is a lovely Shredded Carrot Salad with Orange and Pine Nuts. It's from the cookbook of Michael Volpatt, co-founder of Big Bottom Market in Sonoma County. I found it one Wednesday in June in the food section of the Press Democrat. That section of the paper has improved so much during the pandemic! Not sure why, but happy that they are concentrating less on wine and more on food.

This refreshing carrot salad makes 6 servings as a side dish and is a great, fresh dish to go with barbequed foods so ubiquitous in summer. If I were to make it for the rest of the year I think I would add some spices.  It keeps for a couple of days, too, so make the full recipe and you'll have leftovers for a nice lunch salad.

I used a bunch of organic carrots from the market that came with tops. I cut off the tops and fed them to the sheep. The carrots themselves were washed and rubbed to remove dirt, and then the top part that was greenish and the tail ends were trimmed before I shredded them all in the food processor.

Before I juiced the lemon, I made zest strips from the peel and added about two teaspoons of them because zest always brightens up dishes. I really enjoyed the citrus zing of the combined juices and the crunch of the carrots and nuttiness of the pine nuts... may have used more than 1/4 cup since I love pine nuts! This salad goes with lots of other foods. Give it a try!


Shredded Carrot Salad with Orange and Pine Nuts

1 1/2 pounds of carrots, cleaned, tops removed, shredded
1/4 cup fresh orange juice
1 tablespoon fresh lemon juice
1 tablespoons olive oil
1/4 cup pine nuts
1 teaspoon salt

Prepare the carrots by cleaning, peeling if desired, removing the tops and tails and shredding. You should have about 4 cups. A food processor works well for shredding this many carrots.

Place the shredded carrots in a bowl with the orange, lemon, (lemon zest, too, if using), and salt. Allow to marinate 10-30 minutes, stirring once.

Dry toast the pine nuts in a heavy frying pan, or heat the olive oil and saute the pine nuts, stirring constantly, until golden. Just before serving, toss the nuts with the carrots.

Saturday, March 12, 2016

The Orange Cake with Almonds First Version


At my nephew's birthday last month in LA, our talented and beautiful and smart hostess served a cake for dessert that was so wonderful I immediately asked for the recipe. Turns out it was a recipe from Molly's blog Orangette, and she calls it a Marmalade Cake. I thought that it would use marmalade, that wonderful tart jam made with citrus fruit. Instead she makes a fresh citrus paste with a boiled and cooled lemon and orange, ground up in a food processor.

Today I tried making the cake and followed it almost to the letter, with only two changes (which is unusual for me...I often change half a dozen things). I used Trader Joe's almond meal instead of toasting and grinding my own almonds. The only other difference was that I folded in the flour mixture at the very end.


It made a delicious, moist cake with an interesting texture that combined a bit of chew from the almond meal and a wonderful, moist quality from the fruit.  The only part that I didn't really enjoy was the bitterness from the citrus pith. I think that next time I may cut back significantly on that part of the fruit, while still keeping the peel and the orange pulp. I plan on making this cake for Sweetie's birthday bash as a vegan version, which is easy because the only thing needing replacement is the egg and I have vegan egg replacer which will work fine. When I do, I'll post it so that you can see what difference, if any, the eggs make.


In the meantime, if you have a lemon and an orange, some almonds, some olive oil, some eggs, and the usual cake staples of flour, sugar, salt and baking powder, you can make this delicious cake for yourself. Just click on the link above to go to Molly's blog (Marmalade Cake) for the recipe. I'll bet you end up bookmarking it. It's that good.

Thursday, February 25, 2016

Marvelous Marmalade Cake


Right at the start I have to say that my photos for this post are not the best. They were taken after dark and I hadn't thought to take any, so not much thought went into them. That said, I hope they convey the convivial nature of the evening and a little bit of how wonderful this marmalade cake was. If the cake weren't so delicious, with the perfect moist crumb and just the right tang of orange, you never would have been subjected to my poor photos.


The star of all this is the baker, a warm and delightful, multi-talented woman who makes amazing food but understands that the food comes in second to the fun. She is a beautiful flower in the garden of eastern LA. I was lucky to not only be included for this birthday party of Mr. Let's Get This Justice Thing Right, but the nephews drove me to and fro on the LA freeways to make it happen. I am most grateful! The drives also gave me a chance to catch up with them.

Included in the fun was Ms. Designer, currently designing the most beautiful baby girl no doubt. Always a delight to visit with her. The youngster in the photo had a sunny smile the whole afternoon and evening. Heard about art from his brother and about favorite books from his cousins; always a great topic. All in all I'm so lucky to have shared the afternoon and evening with them all!


This cake is a plain one but one that goes perfectly with a dollop of whipped cream ... and champagne if you are lucky! It has a moist, crumbly texture, a delightful orange flavor with hints of almond and comes from Orangette's blog, one that I've been reading a long time. There were birthday candles, but I missed taking that photo.

Marmalade Cake just sounds good and she made it in February, 2010, so you know it's seasonal. It has marmalade, almonds and olive oil and is perfect for someone like me who is dairy intolerant. Here is what Orangette said about it, "As birthday cakes go, it was unassuming, even rustic: a single layer, pale gold and coarse-crumbed... But its flavor was something else: big, gutsy, rich with toasted nuts, and saturated, absolutely saturated, with the perfume of citrus." Check out the recipe by clicking on the link and let me know if you make it. I'm sure going to bake it now that I'm home and see if mine is anywhere near as good as the birthday cake from last weekend. Thank you Mimi!

Wednesday, April 10, 2013

Farm Box Fun


At the home show about a month ago I signed up for delivery every other week of a box of fruits and veggies. The company is called Farm Fresh to You and they deliver from the Sacramento area. I will probably cancel once my own veggies start coming in, but for now it is encouraging me to eat more whole foods. The produce is wonderfully fresh, organic, abundant and delicious. Over the weekend I made both a veggie quiche and some chicken soup chock full of vegetables. Yesterday's lunch included a handful of small Nantes carrots. They were crisp and sweet and so good. Yesterday we enjoyed the broccoli from the box and tonight we are having stir-fry which will include some red peppers, onions, and asparagus, the latter two from the box. I've also been eating some very juicy tangerines from the box as well as navel oranges. We still are shopping at the market for our melons and garlic and potatoes, but it really is nice to have really fresh produce right on hand to inspire me.


Sweetie continues to heal and he and I have become very expert at doing the dressing changes. He still has about another 4 weeks before he can play tennis but we are grateful that he did no long-term damage.

Still playing with kitchen designs and researching appliances. Do any of you dear readers have experience with Samsung gas ranges or with their refrigerators or dishwashers? How about Bertazonni?

For now I'm having fun with my current kitchen and appliances. This baking spree over the weekend was the first time since mid-January that I really wanted to cook and bake. There will be a new bread showing up here on the 16th. I'm looking forward to playing with yeast dough again!

Here is the quiche recipe. It is just a variation of my usual one. If you use evaporated milk as I do, be sure to shake it well before opening. I forgot to do that this time and it took some doing to get it all mixed up in the bowl (which also had the eggs in it). I think this is the perfect quiche for the spring...savory, flaky, full of asparagus and onions and cheese. Now I want another slice...and it's all gone. It went so fast that I didn't really get great photos...but if you make one yourself you can see how beautiful it looks with the green asparagus spears on top.


Spring Quiche with Asparagus and Swiss Cheese and OnionServes 4 - 6

1 9-inch pie shell, blind baked at 425 degrees F for 10-12 minutes (recipe follows)
1/3 cup finely chopped yellow onion
1/4 cup celery, chopped
1 tablespoon olive oil
1 cup Swiss cheese, cut into ¼ inch dice
3 eggs (or equivalent egg substitute)
1 ½ cups evaporated milk (I used non-fat) or light cream
¼ teaspoon salt
1/4 teaspoon dried thyme
dash pepper
Dash nutmeg
2-3 spears asparagus, tough bottoms trimmed off and sliced in half through the length of the spear
1 - 2 large mushrooms, sliced thinly

Preheat oven to 350 degrees F.

In a small skillet, saute the onion and celery in the olive oil until translucent, about 5 minutes, stirring often.

Sprinkle the bottom of the pie shell with the sauteed onion/celery mixture and Swiss cheese, distributing evenly. Set aside.

In a bowl, beat the eggs lightly, then add the milk and beat with a fork to combine, add the salt, thyme, pepper and nutmeg and beat with a fork or whisk to combine.

Arrange the half asparagus spears in a nice pattern on top of the onions and cheese in the pie shell. Place the mushroom slices near them where space permits between the spears.

Pour the egg/milk mixture over the ingredients in the pie shell. Place in the preheated oven and bake 30-45 minutes, or until set and lightly browned. I find that setting on a parchment-lined small baking sheet is a good idea in case some of the filling spills over. Cool for 10 minutes before cutting to serve.


Pastry Pie Shell

1 cup all-purpose flour
¼ teaspoon salt
1/3 cup chilled butter
1 egg, lightly beaten
2 tablespoons ice water
1 teaspoon lemon juice (optional)

Mix the flour and salt in a bowl. Cut in the butter with a pastry blender, or two knives, until particles the size of dried peas are formed.

In a small bowl mix together the egg, ice water and lemon juice (if using). Sprinkle over the flour mixture and toss with a fork lightly. Do not over mix. Gather the particles together in a ball. Wrap airtight and chill in the freezer for 10 minutes. Roll out with a rolling pin on a floured surface until large enough to fill a 9 inch pie pan with some overlap.

Fit into a 9 inch pie pan, smooth to fit, trip excess , tuck edges under and crimp as for any pie crust. Prick lightly all over the surface with a fork. Freeze 10 minutes. Remove from freezer and cover with a circle of parchment paper or foil. Fill the paper with beans or pie weights (blind baking the crust).

Bake at 425 degrees F for 10 – 12 minutes. Cool slightly. Remove and save the beans or pie weights. Fill with filling as called for in recipes needing a pie shell.

Tip: If you use a pound of dried beans as pie weights as I do, save them once they have cooled off and you can use them again and again as pie weights...just don't plan on cooking them to eat. At about a dollar and a half for a bag of dried beans, it sure beats the almost $9 you would pay for Pie Weights from King Arthur or a similar amount at Sur la Table.


Saturday, April 14, 2012

Orange-Lemon Yogurt Bread

Our scholarship group met this morning and had some of this bread with our coffee and some red grapes. I think you might enjoy this quick bread, too.

Orange-Lemon Yogurt Bread makes one loaf
2/3 cup butter softened
1 1/4 cups sugar
2 eggs
1/2 cup plain yogurt
1/2 cup freshly squeezed orange juice (I substituted 2 tablespoons Meyer lemon juice for some of the OJ)
1 tablespoon orange zest
1 1/2 cups all purpose flour
1 cup whole wheat flour
1/2 teaspoon baking powder
1/2 teaspoon baking soda
1/2 teaspoon salt

Glaze
1/2 cup confectioners' sugar
2-3 teaspoons orange juice
some grated orange zest

Topping
1/2 cup confectioners' sugar
1 teaspoon lemon juice
1 teaspoon lemon zest

Preheat the oven to 350 degrees F. Grease a 9"x5"x3" loaf pan. Set aside.

Cream the butter and sugar for 3 minutes until light and fluffy. Add the eggs, one at a time, beating to combine after each addition. Add the yogurt, orange juice and zest and combine. Mixture may be curdled looking...that is OK.


Combine the dry ingredients and add to the batter and mix just until combines.

Pour into prepared loaf pan and bake 55-60 minutes. Cover loosely with foil if top browns to quickly.

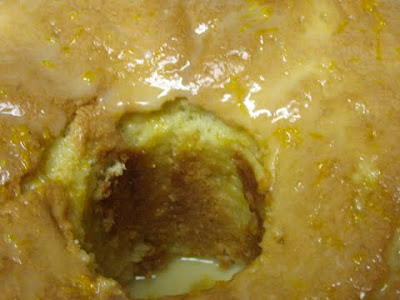
Place warm bread, still in pan or on a platter or board, where you can glaze it. Mix together the glaze. Poke holes in the top of the bread and pour the glaze over the top, letting the glaze settle into the holes. OK if some runs down the side. Let bread cool completely. (I refrigerated it at this point.) Mix together the topping and pour over the top. Because the topping is less runny than the glaze, it should cover the holes. Let topping setup, about 1 hour. Cut and serve in thin slices.


This is a moist, tangy loaf and goes great with your favorite cup or coffee or tea. This photo doesn't show the final topping, so you can see those holes in the top.

Wednesday, April 04, 2012

An Early Spring Salad


Right now is the transition time between winter salads and spring salads. There are certainly asparagus which can be blanched or steamed and added to your salad and avocados are plentiful, too. In general, though if you are going seasonal, there will be a wait for local tomatoes, cucumbers, carrots and beans to liven the salad bowl.

One of the great additions to salads right now are beets. One of our local farms have them from thumb sized to super large. The local market had organic Chiogga beets on sale so I bought some, took them home, cleaned them well with a brush and water, trimmed off some of the roots, oiled them lightly, wrapped them in foil and baked them in the toaster oven at 350 until they were tender when pierced with a knife (about 25 minutes). Since I didn't need them for the salad until the next day, I just kept them in the foil packet and put that right in the fridge. I peeled and sliced them when it was time to make the salad.

The dressing for this salad also uses a seasonal ingredient...fresh orange juice and zest. I'm not sure why but oranges and beets go really well together. The greens are mixed organic baby greens and I tossed them with the dressing, piled them on salad plates, then coated the peeled, sliced beets and some peeled, separated mandarin orange slices in the dressing. Arrange the dressed fruit and beets over the dressed salad greens, then scatter some candied pecans over it all and serve.

The tender Chiogga beets are really pretty with the rings of color, plus they don't 'bleed' while you are preparing them like red beets do. Their flavor is a bit more mellow, too. Do try this easy salad while you are waiting for future bounty from the garden. You may not even miss vine ripened tomatoes (too much).

Here's some spring flowers to get you in the mood.


Citrus Vinaigrette

Juice from one large orange (about 1/2 cup)
2 teaspoons orange zest, colored part only
1/2 teaspoon Dijon type mustard
1 teaspoon balsamic vinegar
3 tablespoons olive oil
salt and pepper to taste

Put all the ingredients into a jar with a tightly fitting lid. Fasten the lid and shake until the dressing emulsifies. Remove the lid, taste for seasonings and adjust as needed. Keep chilled until you use it and chill any left over.


Sunday, May 22, 2011

May Cake Slice Is Orange and Caramel and Almonds

I missed last month's Cake Slice Bakers altogether and am late this month, mostly due to travels. This cake sounded soooo good that I had to make it late or not.

This is a fairly simple cake, single layer, orange flavored and the topping is a yummy delight with toasted almonds, honey and caramel dripping down the sides when I removed it from the pan. We ate our slices while warm and enjoyed the orange fragrance (I tripled the amount of orange zest) and the moist, delicate crumb of the cake.


The topping is a bit heavy for the texture of the cake but it is very fine topping. I added some tiny clumps of orange zest all over the top of the topping once the almonds were on top of the sticky stuff. I think that helped tie the orange flavor in the cake with the orange flavor in the topping. Bet this topping will show up on some yeasted sticky buns one day. Since we vote each month to choose the cake, I want to thank everyone who voted for this delicious cake!

Do use a deep pan so that the batter doesn't overflow. I used a 2 inch deep 9 inch round cake pan and the batter rose a tiny bit above the rim. The batter goes together quickly and it only takes about 35 minutes to bake. You can have the whole thing begun and on the table in about an hour. Sweetie went back for a second piece and he doesn't generally enjoy cake, so you might want to try it yourself.

In case you are one of the readers who want to know what Sweetie and I are up to, we started demolition today on the summer project. Since I usually love to make things I don't know what the appeal is about tearing buildings apart, but I really love to wield the crowbar. Sweetie removed the ledger board we were concerned about and, indeed, there is dry rot aplenty. Looks like our 'small' project will take most of the summer. At least we are working on the north side of the house this time, so it is a bit cooler and shady. Besides we can stop every now and then and enjoy the view. The garden roses are in their spectacular first bloom of the year, the veggies are all growing about as well as normal and this year I have daises which have overwintered, plus two poppy plants that self seeded. It will be fun to see what colors they have.


Back to cake! DO visit the other Cake Slice Bakers if you haven't already. The ones I've seen have been wonderful. Check back on the 20th of June (I plan to be on time despite the project) to see what cake comes next, OK? Also, my camera is still in the mail so these photos were taken with an iPhone (thanks Sweetie!) and I'm not terribly good taking photos with it, but they do show that there were LOTS of almonds in the topping.


Orange Almond Caramel Upside-Down Cake
Recipe from Cake Keeper Cakes by Lauren Chattman)


Makes one 9 inch round cake

Ingredients – Topping
1 cup sliced almonds
6 tbsp (3/4 stick) unsalted butter
2/3 cup packed light brown sugar
¼ cup honey

For the Cake
1½ cups unbleached all purpose flour
1 tsp baking powder
½ tsp baking soda
¼ tsp salt
½ cup sour cream
2 large eggs
¼ cup orange juice
1 tsp vanilla extract
½ cup (1 stick) unsalted butter
¾ cup granulated sugar
1 tbsp grated orange zest (I used the zest of one large orange...1 tablespoon scattered in clumps over the topping once the almond were on, and the rest, about 2 tablespoons, in the batter.)

Method - Topping
Heat the oven to 350F. Grease a 9 inch round non stick cake pan and line the base with parchment paper. Dust with flour.

Spread the nuts on a baking tray and toast until golden, 8 to 10 minutes. Heat the butter in a medium saucepan over medium heat until foaming. Whisk in the brown sugar, turn the heat to low, and cook, whisking constantly, for 2 minutes. Scrape the mixture into the prepared pan and smooth with a spatula. Drizzle over the honey and scatter over the toasted nuts. If using, scatter tiny clumps of orange zest over the almonds.

Method - Cake
Combine the flour, baking powder, baking soda and salt in a medium mixing bowl. Combine the sour cream, eggs, orange juice and vanilla in a glass measuring cup and beat lightly.
Combine the butter and granulated sugar in a large mixing bowl and cream with an electric mixer on medium high speed until fluffy, about 3 minutes, scraping down the sides of the bowl once or twice. Stir in the orange zest.

With the mixer on medium-low speed, pour the egg mixture into the bowl in a slow stream, stopping the mixer once or twice to scrape down the sides.

Turn the mixer to low speed and add the flour mixture, ½ cup at a time, scraping down the sides of the bowl after each addition. Then mix of 30 seconds on medium speed.
Pour the batter over the almonds, gently spreading it into an even layer.

Bake until the cake is golden and a toothpick inserted into the centre comes out clean, 35 to 40 minutes. Transfer the pan to a wire rack and let stand for 5 minutes.

Holding the pan and a plate together firmly with oven mitts, invert the hot cake onto the plate. Peel away the parchment paper. If necessary, replace any almonds stuck to the base of the pan. Let the cake cool for 20 minutes and serve warm or at room temperature.

Store uneaten cake in a cake keeper or wrap and store at room temperature for up to 2 days.

Tuesday, March 30, 2010

Seasonal Sensations - Hot Cross Buns

Seasonal treats of springtime include the wonderful, soft, spicy, fruity hot cross buns. They are fairly quick and easy to make and delicious to eat. I remember eating buns like these when I was a child. Easter was a special time for children when I was growning up. We often had something new to wear to church and the church would have pots of Easter lilies at the altar. After breakfast we were anxious to check out our Easter baskets, all lined up in a row in the living room, filled with jelly beans and marshmallow eggs, yellow and pink marshmallow chicks, and chocolate bunnies. The eggs we had colored the day before became the stars of Easter egg hunts,

and my dad would take home movies of us finding the eggs on automobile bumpers and in clumps of grass, holding up the bright egg to the camera with a smile. It's no wonder that I still enjoy making colored eggs and special treats like these buns.

The recipe called for candied orange peel, but I had some fresh orange marmalade left over from the Orange Tians so I substituted that and added additional flour to offset the extra moisture from the marmalade. I like the strong dose of orange in these buns, but you could substitute lemon zest and candied lemon peel or citron if you prefer. Some recipes also call for mixed fruit like you use for fruitcake. I like the relative simplicity of currants and golden raisins.

Sweetie likes his buns without the icing cross...but I think you need the cross to make 'em hot cross buns.

This is my entry to Tangerine's Kitchen for Bread Baking Day #28 - Bread Buns, plus I'm sending it over to Susan of Wild Yeast's Yeastspotting weekly event. Many thanks go to Susan for this weekly compilation of wonderful yeast based recipes!

Hot Cross Buns
Makes 16 buns

3/4 cup warm (100° to 110°) whole milk
4 1/2 teaspoons (2 packages) active dry yeast
1 large egg
1/4 cup brown sugar
1/4 cup butter, melted and cooled
3/4 teaspoon salt
1/2 teaspoon nutmeg, preferably freshly grated
1/2 teaspoon cinnamon
1/4 teaspoon cloves
Finely shredded zest of 1 large orange or 1 large lemon
About 31/2 cups flour - I used 2 cups bread flour, 1 cup whole wheat flour, and 1/2 cup all-purpose flour
1/2 cup chopped candied orange peel(or candied lemon peel or candied citron) or 1/2 cup orange marmalade*
1/4 cup dried currants
1/4 cup rum
1/4 cup golden raisins
2 teaspoons fresh orange juice
2 teaspoons fresh Meyer lemon juice
1 cup powdered sugar

1. In a bowl of a stand mixer, combine milk and yeast; let stand until yeast softens, 5 to 10 minutes. In another bowl, whisk together the whole egg, brown sugar, cooled melted butter, salt, nutmeg, cinnamon, cloves, and orange or lemon zest. Add to the milk/yeast mixture and beat on medium speed with dough hook until blended.

2. Whisk the flours together in a bowl or large measuring cup if using more than one kind. Blend most of the cup flour into the batter. Beat on medium speed until dough is smooth and stretchy, 10 to 12 minutes, using dough hook. Add just enough additional flour, a tablespoon at a time, (about 1/4 cup) so dough is only slightly tacky.

3. Soak currants in the rum for 10 minutes, then drain off the rum and use for another purpose or discard. Add orange peel and currants to the dough, pick up dough, and mix with your hands to distribute fruit.(I turned the dough out onto a lightly floured board and kneaded the dough in...that way I was sure that I had the dough well kneaded before adding the fruit and that the fruit was well distributed.)
Return dough to bowl, cover, and let rise in a warm place until doubled, about 1 1/4 hours.

4. Punch down dough. With floured hands, shape into 16 smooth rounds. Evenly space rounds in two buttered 8- or 9-in. square pans.

5. Cover loosely and let rise in a warm place until doubled and puffy, about 40 minutes. Meanwhile, preheat oven to 400°. Brush buns with beaten egg. Bake until deep golden, 13 to 15 minutes. Let cool in pans at least 30 minutes.

6. In a small bowl, stir together juices and powdered sugar until smooth. Spoon into a small, heavy-gauge plastic bag, snip a hole in a corner, and squeeze icing onto buns to form large Xs.

* If you use marmalade, you should plan to use about another cup of flour

Saturday, March 27, 2010

Daring Bakers Orange Dessert Delight

Once upon a time in the Land of St. Honore' March came in like a lion, with rain and cold. It was a good time to gather in the living room as a family, basking in the glow of the television set. Maman put a frilly apron on over her sleek black outfit, then put the coffee pot on. As she set the dessert delight she had made onto pretty little plates and added the caramel orange sauce she thought back to the fun she had had creating these light and citrus-rich morsels.

Although she had cooked and baked for years she had never segmented oranges as this recipe required. As the juice dripped off her hands into the bowl, she cradled the peeled orange in one hand and sliced next to each membrane to release the segments. The remaining membranes reminded her of a fan somehow.

Oranges add such a bright look and flavor, so welcome in winter!
She has also never made fresh marmalade, even though she loved it on toast. It was pretty easy to do and the taste so much fresher and lovely than the store bought kind. It was interesting that the whole orange was used and that the blanching removed a lot of the bitterness usually found when the pith is included in recipes. Here's the slices being blanched:


Soon she was layering the caramel covered orange segments,

a lovely whipped cream based band of white, and fresh marmalade on a sweet, crisp cookie.

Once chilled and put on the plate it looked like a dessert you would see at a fine restaurant. The sauce added just the right touch of extra elegance.


As her family gathered to watch the Academy Awards ceremony and to see if they had guessed correctly on Best Picture, she served them the Orange Tians and freshly brewed coffee. The perfect dessert for a festive evening!

The 2010 March Daring Baker’s challenge was hosted by Jennifer of Chocolate Shavings. She chose Orange Tian as the challenge for this month, a dessert based on a recipe from Alain Ducasse’s Cooking School in Paris.

Thanks to Jennifer for choosing such a delightful, delectable dessert! It was fun to make and even more fun to eat!


You can find the recipe here at Jennifer's blog. Do check out other Daring Baker's versions of this treat by using the Blogroll.

Thanks for joining me for the March 2010 Daring Baker's Challenge. Sweetie says orange you glad you did?

Sunday, January 31, 2010

Black Beans and Pork with Oranges

Well, we've had the come-to-mama sugar fix with those waffles. Now the weather seems right to try the delicious recipe that San Francisco Anne brought to the Boxing Day Party. Don't you just love to get a recipe that you know will be great because you've already tasted it? She is a fantastic cook, so I made sure to have some of what she brought and insisted on having the recipe...it was that good!

Not only did she lend me the recipe, but she lent me the book it came from. The book, Paula Peck's Art of Good Cooking has gorgeous hand done illustrations by Mel Klapholz, is a mid-'60 cookbook with wonderful recipes, including one for homemade sour cream that sounds a lot like what is now called creme fraiche. She even gives instructions for rendering chicken fat.

Recipes for mayonnaise, tapenade, and pesto sound very modern, using basic fresh ingredients.

In fact the use of fresh ingredients and the lack of canned soup sets it apart from many cookbooks of the era. There is a recipe for Chicken and Garlic Stew which uses 40 - 60 plump cloves of garlic and it sounds wonderful. I'll try it sometime, leaving out the monosodium glutamate that she seems to add to most things. It has white wine, fresh herbs, unexpected spices like allspice and cinnamon and sounds very light with only a little olive oil used and no butter, eggs, or heavy cream.

The pork recipe is also fairly healthy, depending of the kind of sausage you use. Beans are heart healthy and also delicious prepared this way! Onion, peppers and garlic add flavor, the black beans add substance and a great contrast to the pork. Orange juice and red wine help make a tasty sauce and the thing that is surprising, but ties it all together is the zing of the fresh orange segments.

If you are going vegetarian, I suspect that it would be delicious without any of the pork...just the black beans, onions, peppers, garlic, orange juice, red wine and oranges, plus salt an pepper to taste. A little hot sauce might be needed if the pork is omitted, too.

As with many dishes containing cooked onions, this dish is delightful made ahead, refrigerated for a day or two, and reheated to serve. That's what I did. I served it over saffron rice (white rice cooked the way we like it, but with some real saffron thread added). You get a nice flavor and color that way.

Since the success of this dish depends on fresh oranges and, in the Northern Hemisphere, it is citrus season, do give this hearty meal a try! Thanks again to Anne for sharing this great recipe!


Pork and Black Beans over Rice
From Paula Peck's Art of Good Cooking
Serves 6

2 cups dried black beans (about 1 pound)
1/3 cup olive oil
3 cloves garlic, minced
1 large onion, minced
1 large bell pepper (green, red, yellow or orange), seeded and diced
2 teaspoons salt
½ teaspoon coarse black pepper
1 1 /2 pounds unsmoked pork tenderloin, cut into 1 inch cubes
¾ pound Mexican sausage (if available), or fresh pork sausage
(Note: I used Southern style bulk pork sausage and it worked well, but use the kind of sausage you enjoy)
2/3 cup orange juice
½ cup dry red wine
2 -3 fresh oranges

Wash, pick over beans. Either soak overnight in water to cover or do quick cook by covering with water in a saucepan, bringing to a boil, turning down heat and simmering for 2 minutes, turning off heat, covering and letting sit for at least two hours. With either method pour off the soaking water and rinse the beans. It helps remove the enzyme that leads to exess bean gas :)

Heat olive oil in a deep pot. Add garlic, onion and bell pepper and sauté’ until tender. Season with salt and pepper. Add the beans and enough water to cover them. Cover the pot, and simmer about 45 minutes, or until the beans are tender, adding more water if necessary.

Drain liquid from pot and reserve. Return the drained beans to the pot. Remove 2 cups of cooked beans from the pot. Cover remaining beans and keep them warm. Puree’ the 2 cups of cooked beans with as much bean liquid as necessary in a blender. Stir bean puree’ into cooked beans and keep warm.

Brown pork cubes and sausage in their own fat in a skillet. If very lean, use a little olive oil. Pour off fat when meats are golden all over, and, if in casing, cut sausage into 1 inch pieces. If not in casing, break up sausage into chunks. Add both meats to beans; season with additional salt and pepper if needed.

Pour orange juice and wine into the skillet that the meats were browned in, and cook over high heat until liquid is reduced to less than half, scraping any brown bits in the pan into the sauce. Pour into the bean mixture and stir to combine all flavors. Place in a preheated 350 degree F oven for 30 minutes.

While pork and beans are cooking, peel the oranges, slice an inch thick and separate into segments…you’ll have about 1 ½ cups of triangles of orange.

Serve over saffron or steamed rice. Garnish with orange segments.

Thursday, December 31, 2009

A Year of Blogging


What a year this has been! Looking back over the posts it seems like it was the year of BREAD for me. Even though I took a break from bread making (mostly) over the summer, there are still a large number of bread posts as well as all 26 posts on the Bread Baker's Dog blog,

which I started in March because all those bread posts seem to be overwhelming Feeding My Enthusiasms.

I found that I enjoy baking bread, especially yeasted bread, that I seem to have a knack for it, and that the creativity and mystery ('cuz 'ya never know if it will rise properly) appeal to me immensely. It's hard to hate the smell of freshly baked bread, either. Over the years I've posted over 50 bread recipes (not all yeasted, but many are) plus 26 more on the bread blog. Of special joy to me has been the fact that I gave yeast breads for Christmas gifts this year and that I spent a day teaching a dear friend how to bake bread from scratch ...helping her overcome the fear of yeast that is all too common. I also met two of my favorite Bread Baking Babes in Seattle this summer - Tanna and Lynn - which has encouraged me to keep going with bread baking.

An improvement to the blog this year has been the inclusion of an Index of recipes. Since I often use Feeding My Enthusiasm as my personal recipe box, and it has grown to have over 200 recipes, having an Index means I can find the recipe I'm looking for quickly...and so can you. Access the Index by clicking on the photo of a set table that is in the upper right on the blog. I tried to break recipes down by category to speed the search since I don't have an actual search engine. Hope it helps you try something new! Let me know if you tried something and enjoyed it, OK? If you post about it, I'm usually happy to have you link and can sometime provide additional photos...just e-mail me.

Many of the post this year were from cookbooks, often altered to suit my taste or cooking style. I usually borrow cookbooks from the library since my cookbook shelf is full to overflowing. Do you have any cookbooks you would recommend?

As often happens because I am blessed with very thoughtful family and friends, this year for the holidays I received a number of food goodies including yummy home made stollen, a gorgeous bay wreath, an assortment of farmers' market goodies ingeniously packaged with garden greenery instead of peanuts (with simply beautiful holly), a delicious persimmon bread, tasty candy and cookies, and little cakes. Mom's delicate and traditional crescent cookies are still being enjoyed! On top of that the generous gifts of kitchen scale, bread mat, instant thermometer, and King Arthur gift cert. will help with future bread baking and are much appreciated. I even received a monkey bread pan...so you know what I'll be baking soon! A cool gift that I used for the recipe below is a pair of herb shears from Sweetie's Super Second Sister...made the chopping of fresh rosemary very easy!

One of the best gifts has been the assurance by family and friends that even though they may not comment, they still enjoy reading the blog posts. Since I was beginning to lag on my enthusiasm for blogging that has made a difference. Thank you all.

Many thanks to readers who do comment...it really means a lot and encourages me to visit your blogs if you have them. You often inspire me and make me laugh and give me insight into other ways of cooking, baking and looking at the world.

I wish each of you a Happy New Year...another day to wake up and greet the morning...or afternoon :)

XOXO Elle

This recipe is a variation of one I've posted before, but this time I used some of the unique citrus from the farmers' market sent to us by Sweetie's Fabulous First Sister.

The orange like citrus had a pink-orange flesh so it wasn't a regular orange nor a blood orange, but it was delicious although milder than lemon, so the mustard flavor was more dominant than with lemon. I omitted the topping and it was still wonderful. The chicken gets very tender and moist by sitting in the marinade. This is a great recipe to make ahead and perfect for citrus season.

Orange Chicken with Rosemary and Garlic
Serves about 8

8-10 boneless skinless chicken pieces
1 tablespoon olive oil for coating pans
5-6 cloves garlic
2 oranges and their zest
1/3 cup Dijon mustard
3-4 branches fresh rosemary, each about 5 inches long, divided
2 tablespoons olive oil
Optional topping:
3 tablespoons cup Parmesan cheese (use the real thing for best flavor)
1/2 cup Italian seasoned bread crumbs
1 tablespoon finely chopped parsley

Arrange the boneless skinless chicken thighs (or substitute some boneless skinless chicken breasts if you wish) in an 11 x 13 inch baking pan where the bottom of the pan has been lightly oiled with the olive oil. Keep the chicken pieces touching each other. Place whole, unpeeled garlic cloves between some of the pieces.

In a mixing bowl, whisk together the Dijon mustard, the juice and zest of the oranges, and 3-4 tablespoons minced fresh rosemary. Whisk in the olive oil. Pour the mixture over the pan of chicken. Tuck a few sprigs of remaining fresh rosemary between some of the chicken pieces. Cover tightly with plastic wrap and chill 3-4 hours or overnight.

Preheat the oven to 350 degrees F. Uncover the chicken and place the pan in the oven. Bake for 40 minutes or until the juice runs clear when a piece of chicken is pierced.

If desired, about 10 minutes before the chicken is done, mix together the Parmesan cheese, bread crumbs and parsley; sprinkle this mixture evenly over the chicken. Return to oven to bake last 10 minutes.

Serve over rice, mashed potatoes, or boiled potatoes, which bread to sop up the sauce. The sauce is mighty good. The chicken is amazing.

Leftovers are delicious, too. You can also freeze this, well wrapped, for a month. Thaw in the refrigerator, then bake in a 350 degree oven until heated through, or in the microwave, reheating at no more than 50% power.

Saturday, August 15, 2009

Sweet, Light and Orange Cake

Times with family are such a delight and I especially enjoy Sweetie's family. Yesterday we had the treat of combining a gorgeous day in a bright, sunny San Francisco with both a picinic in Golden Gate Park and a delicious coppino dinner at Sweetie's sister's beautiful home.

His niece, her husband and their lovely daughters were visiting from Tennessee. It was fun to catch up with them and what is happening in their lives, plus we took the opportunity to join them in exploring the new Natural History building, including the cute penguins and the living roof (covered with regional drought tolerant plants). We also had the treat of seeing Sarah, Straight Shooter Man, and Sweetie's sister and her charming husband (who makes a superb cup of coffee).

Since this was a triple birthday celebration I brought a cake. Since the cake had to sit in the trunk of the car for a while, buttercream and chocolate and such were not an option. It helped that I had a request for something light and orange flavored.

Marion Cunningham had the perfect recipe in her book The Fannie Farmer Baking Book. For years I didn't have a plain tube pan since I never make angel food cakes, but a few months ago I found one at a thrift store for $1. It even has a removable bottom and those cute little "feet" for cooling the cake upside down.

With a great recipe and the right pan, the rest is easy. Eggs are separated, orange zest shaved off the oranges with my trusty microplane grater, oranges juiced and the juice strained through a fine mesh strainer, flour measured and sifted twice with salt, some of the sugar put in a bowl and half the zest rubbed into the sugar ( a trick from Dorie Greenspan), and then the fun begins with the whites beaten with some of the the sugar until firm but still a bit droopy.


In another bowl the yolks get beaten until lemon colored, then the rest of the zest and the juice is added and sugar and zested sugar. I used a hand whisk to stir the sifted drifts of flour, a little at a time, into the yolks, then switched back to the machine whisk to add the first part of the beaten whites. The last part is folding in the rest of the whites with a spatula, down the center, to the bottom, up the side, then turn the bowl a bit, repeat, repeat, repeat just until the whites combine with the batter but are still full of air. The air helps it to rise...see below...it rose pretty well!

I must admit I was a bit nervous since I don't usually make this kind of cake (I like those dense crumbed chocolate cakes the best), especially since we wouldn't know how it turned out until I was slicing and serving at the birthday dinner. When I turned the cake over to rest and cool on those little legs, I was sure the whole thing would fall out of the pan and deflate! Fortunately that didn't happen, the cake came out of the pan just fine, high and light, and the orange glaze added just the right touch of sweetness and fancy.

We served each slice with some of our locally grown, small and sweet and delectable strawberries. The combination was great and all the berries were eaten before I got a photo, so here it is garnished with grapes!

As you can see the crumb is light but much firmer than an angel food cake (because of the yolks). The sweetness is offset by the tang of the orange zest. All in all a lovely cake. Give it a try while fresh berries are around. It would be equally good with blueberries or blackberries.

Fresh Orange Sponge Cake
The Fannie Farmer Baking Book by Marion Cunningham

1 ¾ cups all-purpose flour
½ teaspoon salt
1 cup egg whites (about 8)
1 ¼ cups sugar, divided
2 tablespoons grated orange rind (orange part – zest only), divided
1/3 cup egg yolks (about 6)
1/3 cup strained freshly squeezed orange juice
Orange Glaze (recipe follows)

Have all ingredients at room temperature!

Preheat the oven to 350 degrees F.

Take ¼ cup of the sugar and put into a bowl. Add 1 tablespoon of the zest and rub them together with your fingers until thoroughly combined.

Combine the flour and salt and sift them together twice; set aside. Put the egg whites into a large mixing bowl and beat until foamy. Gradually add ½ cup of the sugar and continue beating until the whites are stiff but moist, and stand in peaks that droop slightly when the beater is lifted.

In a separate mixing bowl, beat the egg yolks until they have thickened slightly, then slowly add the remaining ½ cup sugar and the sugar-zest combo, and continue beating until the mixture is thick and lemon-colored. Add the remaining orange rind and the orange juice and blend well.


Sift the flour over the yolk mixture, and stir gently until smooth, with no drifts of flour visible. (I used a hand held whisk and sifted in some flour, whisked it gently, some more flour, whisked it gently, and so on instead of putting all the flour in at once.)

Gently stir one quarter of the beaten whites into the batter. (I used the whisk attachment and the stand mixer, only mixing until the whites were barely into the batter. Then I took the bowl away from the mixer and used a silicon spatula to finish folding in the whites.) Pour the remaining whites on top, and fold them into the yolk mixture, cutting down in the center with the spatula, taking it to the bottom and up the side of the bowl, then turning the bowl a bit and repeating until smooth and blended.

Spread the batter evenly in an ungreased 10-inch tube pan. Bake for about 40 minutes, or until a straw inserted in the middle of the cake comes out clean. Remove the cake from the oven and invert it. If it has little feet, invert onto those. If not, invert over a wine bottle or similar bottle with a thin neck.

Let cool completely before removing from the pan. Cover the top and sides of the cake with the Orange Glaze. Let glaze harden before serving. Marvelous with fresh berries.

Orange Glaze
1 1/3 cups sifted confectioners’ sugar
4 tablespoons (1/4 cup) freshly squeezed orange juice
2 teaspoons freshly grated orange rind (orange part – zest only)

Put the sugar in a medium bowl. Add the orange juice and zest and stir briskly until smooth and well blended. Pour or spoon over the cake once it is cool. (I poured, using a spatula to spread the glaze over the top of the cake and letting it drip down the sides.)

Friday, January 23, 2009

Good 'Nuf Chicken


The other evening it was chilly and dinner time was coming around too soon it seemed. I needed to make something with the chicken thighs that were in the fridge, but it had to be a quick recipe and I wanted it to be somewhat healthy, too. After all, I'm saving my calories for bread a lot of the time lately. Might as well have an entree that is easy on the heart and waistline, too.

This is the time of year for citrus in our part of the world. It is plentiful, juicy, and the sunny colors really brighten up a gray day.


This chicken dish is a variation of a favorite lemon chicken recipe I've posted in the past. This time I changed it a bit and included some finely minced orange peel, including some of the pith. It carries the citrus flavor even further and the pith adds a touch of bitterness that really complements the mustard and lemon flavors. I slimmed down the recipe by reducing the olive oil a fair amount, too.


The resulting chicken is moist, flavorful, sunny with citrus, sparked with the tang of mustard and mellow garlic and zesty rosemary. It goes well with rice or noodles or just soak up the sauce with some sourdough bread if you have some. Can you tell I'm obsessed with sourdough bread?? Haha!

I'm entering this dish in Ilva of Lucullian Delights's event Heart of the Matter - Slimming, a great event for this time of year!

Sunny Citrus Chicken
Serves about 4-6

10 boneless skinless chicken pieces
1 tablespoons olive oil for coating pans
6-8 cloves fresh garlic
2 lemons
¼ cup Dijon mustard
4 branches fresh rosemary, each about 5 inches long, divided
3 tablespoons olive oil
1 tablespoon finely minced fresh orange peel, some pith (white part just under skin) included.

Arrange the boneless skinless chicken thighs (or substitute some boneless skinless chicken breasts if you wish) in a 11 x 13 baking pans where the bottom of the pan have been lightly oiled with the olive oil, evenly divided. Keep the chicken pieces touching each other. Place whole, unpeeled garlic cloves between some of the pieces, about 6-8.


In a mixing bowl, whisk together Dijon mustard, the juice of 2 lemons, & 1 tablespoon minced fresh rosemary. Whisk in the olive oil. Pour the mixture over the pan of chicken. Tuck a few sprigs of remaining fresh rosemary between some of the chicken pieces in the pan. Sprinkle the orange peel evenly over the pan of chicken. Cover tightly with plastic wrap and chill 3-4 hours or overnight.

Preheat the oven to 350 degrees F. Uncover the chicken and place the pan in the oven. Bake for 40 minutes or until the juice runs clear when a piece of chicken is pierced. Be sure to serve the sauce as well as the chicken.

Serve over rice, mashed potatoes, or boiled potatoes, with bread to sop up the sauce. The sauce is mighty good. The chicken is amazing.

:) Leftovers are delicious, too. You can also freeze this, well wrapped, for a month. Thaw in the refrigerator, then bake in a 350 degree oven until heated through, or in the microwave, reheating at no more than 50% power.