Showing posts with label vanilla. Show all posts

Monday, April 04, 2016

Birthday Book Mini-Cakes


I received a late birthday gift in March from a favorite sister. She gave me Jocelyn Delk Adams's Grandbaby Cakes books, described as "modern recipes, vintage charm, soulful memories". I had gotten the book out of the library and decided that it was likely to provide lots of good recipes for future cake baking.

One of the recipes that caught my eye were the Neopolitan Mini-Cakelettes. Combining the wonderful flavors and colors of neapolitan ice cream, there is a chocolate batter, a vanilla batter, and the author's favorite, the strawberry batter. I have a Bundt cake pan that has larger cakes, so I think of mine as mini-cakes instead of cakelettes. I changed the recipe a little so that there was only yogurt for dairy and I only had a tiny part of one of them just to see how the flavors and textures worked. Sweetie is not a big fan of cake, but he liked this one because it is nicely moist and not too sweet.

The majority of the mini-cakes are being mailed to the dear sister who gave me the book, as a thank you and treat all in one. I can just see her and her wonderful husband enjoying a cake each with coffee in the late afternoon or into the evening, their favorite time.

Don't be put off the having to divide the batter into three parts and flavoring two of those with additional ingredients. If you have a small whisk or small spatula, it will be easy and fun. Imagine serving these cute cakes to family and friends...bet they will be impressed and will enjoy these delicious little cakes.


Neopolitan Mini-Cakes
from Grandbaby Cakes by Jocelyn Delk Adams

3/4 cup ( 1 1/2 sticks) unsalted butter, room temperature (I used non-dairy butter substitute)
1 1/4 cups granulated sugar
3 large eggs, room temperature
1 1/2 cups sifted cake flour (NOT all-purpose)
1/2 teaspoon salt
1/4 teaspoon baking soda
1/2 cup sour cream, room temperature (I used plain yogurt)
1 tablespoon vegetable oil
1 teaspoon vanilla extract
2 tablespoons unsweetened cocoa powder
3 tablespoons strawberry jam, melted 20-30 seconds in the microwave
2-3 drops red food coloring
Confectioners' sugar to decorate (optional)

Preheat oven to 325 degrees F. Prepare mini-Bundt pans with 5-cup to 6-cup capacity or one 6-cup small Bundt cake pan. (I used a six mini-Bundt cake pan and three of six small (fairy) cake cups, but part of a 6- cup muffin pan would do.) Use your choice of non-stick preparation. (I used a baking spray with flour.)

Use an electric mixer to cream the butter on high speed for 1 minute. Scrape bowl and beaters. Slowly add the granulated sugar and continue to cream them together for an additional 5 minutes, stopping every couple of minutes to scrape the bowl and beaters. The idea is to add air to the butter sugar mixture. It will be pale yellow and fluffy. Add the eggs, 1 at a time, scraping bowl and beaters after each has been incorporated.

Turn mixer to lowest speed and slowly add the flour in two batches. Add the salt and baking soda. Mix on low speed only until just combined. Scrape bowl and beaters. Add the sour cream, oil and vanilla extract, mix on low speed until just combined. Scrape bowl and beaters and mix just a few seconds to make sure batter is homogeneous.

Evenly separate the batter into 3 medium bowls (or two bowls and leave the third in the mixing bowl as I did).

Whisk the cocoa powder into one of the bowls and set aside.

Add the strawberry jam, strawberry extract, food color to another bowl and mix. The strawberry batter will be thinner than the other two. That is fine.

Place alternating tablespoons of all 3 batters into each cavity of your prepared pans, until each cavity is 2/3 full. For example, start with the vanilla, adding a tablespoon to each cavity, then add the chocolate, then the strawberry. Start again with the batters until each cavity is 2/3 full. You can always use greased muffin cups for any batter that doesn't fit in the 2/3 full Bundt cavities.

Bake for 24 - 28 minutes, or until a toothpick inserted into the center of a mini-cake comes out mostly clean but still moist.

Let the mini-cakes cool in the pan for 10 minutes, then invert onto a serving plate. Let cool to room temperature. Lightly cover the mini-cakes with foil or plastic wrap so they don't dry out.


To serve sprinkle lightly with confectioners' sugar and serve.

Wednesday, March 02, 2016

Crazy Good Cookies


When I was in the LA area my hostess gave me a photocopy of her favorite cookie recipe, grandly called The Best Cookie in the compilation book where it is found. I baked some up this morning for a contest prize at our scholarship meeting and they sure did smell wonderful and they looked delicious, too.


The batter is similar to toll house cookie, but enriched with coconut, oats and walnuts...but no chocolate chips. There is also the 'mystery' ingredient or maybe crazy ingredient...crushed corn flakes. I had to go out and buy those since they are not a usual item in my pantry. The only box I could find was huge, so now I need to find some other recipes that use corn flake cereal!

These are tasty cookies. They are crisp at the edges, a bit chewy if you cook them the shorter time, and delicious if you like coconut, oats and walnuts, plus brown sugar and vanilla. Who knows if they are the best, but they sure are darn good cookies!


The Best Cookies
P.E.O. California Chapter MH

1 cup butter (I used vegan butter substitute)
1 cup brown sugar
1 cup granulated sugar
1 cup vegetable oil
1 cup crushed corn flakes
1 cup rolled oats
1/2 cup shredded coconut
1/2 cup chopped walnuts (you could use pecans instead)
1 teaspoon vanilla
3  1/2 cups sifted all-purpose flour
1 teaspoon baking soda
1 teaspoon salt

Cream together butter and sugars. Add egg and mix well. Add next 6 ingredients (oil, corn flakes, rolled oats, coconut, walnuts, vanilla); mix well. Add the flour, baking soda and salt. Mix until combined.
Shape into small balls, place on ungreased cookie sheet and flatten with a wet fork. Bake 12 to 14 minutes at 325 degrees F.
Makes about 100 small cookies.
The recipe is from Edith Norton, Sebastopol, CA

Thursday, December 03, 2015

Fluffy Bourbon


One of the delightful things about being in the kitchen with my daughter is that she encourages e to try some things I wouldn't even consider making if left to my own devices. A good example of that is the weird science experiment that led us to create small red balls of flavor to put into mixed drinks.

Yesterday, since I wasn't the one cooking the turkey, there was a little time after making cornbread stuffing, apple crisp, a pecan pie and bacon wrapped stuffed dates. We used that time to whip up a batch of home made marshmallows. To make them even more interesting, she found a recipe by Jerry James Stone of Cooking Stoned for Bourbon Vanilla Marshmallows. I never thought that I would smell the heady fragrance of good bourbon while making fluffy marshmallows, but it was a great experience.


The finished marshmallows were cut and coated in a bit more of their powdered sugar/cornstarch mixture, then stacked in airtight containers. The little sweets were thinner than I expected, but next time we can make them in a smaller pan to get taller marshmallows. The flavor doesn't need any tweaking and they should be a great addition to a cup of cocoa which has a shot of good bourbon in it.


The whole process takes some time, but most of that is letting the marshmallows cure. The initial cooking takes less than an hour. Eggs are separated for the whites, gelatin takes a few minutes to soak, sugar and water gets heated, then some corn syrup is added and


then the soaked gelatin and the whole thing cooks to the hard ball stage (verified by using a candy thermometer). While the sugar syrup cooks, the egg whites get beaten with a little salt. If you have a helper they can sift together some cornstarch and confectioners' sugar for the pan. Otherwise you can do that yourself a little later.

The fun part is when the bourbon and vanilla gets added to the hot syrup and is stirred in. The heat makes the whole kitchen smell of bourbon and the hot mixture hisses and boils up a little bit! Once the egg whites get really fluffy, you slowly pour the hot syrup over them between the beater and the bowl while the stand mixer keeps on beating those egg whites. Be careful while handling the syrup. It can really burn if splashed on your skin, so keep a bowl of ice water handy. As the mixture fluffs some more, you can sift the cornstarch and confectioners' sugar together if it's not done already.

The confectioners' sugar mixture is sifted liberally over the bottom of the baking sheet. The fluffy, cooled marshmallow mixture is poured over that and the mixture is spread and leveled with an offset spatula, then more of the sugar mixture is sifted over it.


After that there's nothing more for you to do for at least 5 hours. We let ours sit on the counter overnight and in the morning they were ready to be cut, dredged in more sugar mixture to coat the cut edges, then packed for use. Takes a little time if you have a whole sheet pan worth, but if you use a smaller pan for taller marshmallows, it shouldn't take too much time and you will still have plenty of wonderful home made marshmallows. The directions are Jerry James's, not mine, but they work.

If you have a loved one who loves marshmallows, this could make a great holiday gift!


Vanilla Bourbon Marshmallows
Jerry James Stone of Cooking Stoned blog


·     3 envelopes unflavored gelatin
·     ½ cup cold water
·     2 cups granulated white sugar
·     ⅓ cup light corn syrup
·     ½ cup Bourbon
·     3 large egg whites
·     ¼ teaspoon salt
·     2 teaspoons vanilla extract
·     1 vanilla bean, halved and scraped
·     ½ cup cornstarch
·     ½ cup powdered sugar

In a small bowl, combine the 3 envelopes of unflavored gelatin and 1/4 cup of the water. Mix and let stand. Be forewarned, it’s gonna look pretty gross once it sets. Also, really, before you go any further, I suggest having all ingredients ready to go.

In a small sauce pan, combine 2 cups of sugar and the remaining water and warm it over a medium low heat. A minute later, add in ⅓ cup corn syrup and turn the heat up to medium-high. You’re going to bring the mixture to 240 degrees F. Corn syrup prevents the mallows from crystallizing and with the addition of bourbon, it is sorta needed.

While that is going on, let’s do some other stuff. Using a stand mixer, mix the three egg whites and ¼ teaspoon salt on low until they are just a bit foamy.

When the sugary syrup hits 240 degrees F, turn off the heat and add the following to the mix: ½ cup of bourbon and the gelatin mixture. While the gelatin melts, turn the stand mixer back on, this time to high, and start whipping those whites. Whip ‘em real good.
Once the whites have become fluffy and pillow-like, slowly pour the syrupy mixture into the mixer bowl where you’re spanking those egg whites. Do this slowly! You do not want to be splashed with boiling hot syrup.

Add in the 2 teaspoons of vanilla extract and scraped vanilla bean seeds and whip it until the mixture is fluffy, stiff and the outside of the bowl is cool to the touch.
While that is going on, using a large mixing bowl, sift together ½ cup cornstarch and ½ cup powdered sugar. This is the coating for the marshmallows.

Now heavily coat a baking sheet with some of the marshmallow coating. Seriously, no bare spots here! Pour the fluffy marshmallow creme onto the baking sheet, using a spatula to even it out. Dust it with some of the coating and then let it sit for about 5 hours, uncovered. Go watch Hulu or something.

Using a pizza cutter, dusted with some of the coating, cut the marshmallows into any shape or size you want. This is a great time to bust out some funky cookie cutters, right? Unicorns anyone? Toss the cut marshmallows into the mixing bowl with the coating, just a few at a time, and using a spoon, make sure they are fully powdered. Then using a wire strainer, give the mallows a good shake to remove the excess coating. These can be made up to a week in advance and stored in an airtight container. 


EAT!


Friday, November 14, 2014

Pecan Pie


The first pie is the classic Pecan Pie, made with dark cane sugar syrup, eggs, sugar, butter, vanilla and pecans. It is a translucent custard type of pie and is very sweet. The pecans float to the top of the filling so they get toasted along with the crust. It is Natasha's favorite thing to have for her birthday and a great addition to a Thanksgiving dessert array.


Pecan Pie
recipe originally from the Karo Syrup label
but this one is directly from my cookbook, Classic Comfort Food

3 eggs, beaten lightly
1 cup sugar
1 teaspoon vanilla
1 cup dark Karo corn syrup
2 tablespoons butter, melted
1½ cups pecans, shelled
one 9” unbaked pie shell

Preheat oven to 3500 F. Stir together the eggs, sugar, vanilla, corn syrup, and butter until well blended.


Stir in pecans.


Pour into unbaked pie shell.


Bake on a cookie sheet for 50 minutes or until a knife inserted into the center comes out clean. Do NOT overbake. Cool pie before serving.    

Very rich! To “gild the lily,” serve with whipped cream or vanilla ice cream.

Friday, October 10, 2014

Apples and Raisins Liven Bread Pudding


I love a good bread pudding. There is something comforting about the combination of sweet custard and old bread, cooked so the custard infuses and surrounds the bread with creamy delight while the top browns to a nice crisp crunchy crustiness. My traditional recipe marries the custard with lemon and adds a bit of fruit to the mix with raisins. The recipe was given to me in ancient days (1971) by a friend who used dark cherries as the fruit of choice. She said her bread pudding was always the first thing to go at church suppers.

Since it is wonderful autumn and since apples are seasonal right now, I decided to use up some stale French bread by making Apple Raisin Cinnamon Bread Pudding, based on that old recipe. I kept the lemon zest in the custard mixture and I think that made it even better. A good dose of Penzey's cinnamon and a grating of fresh nutmeg kept the fall theme going. I used Golden Delicious apples, which keep their shape and are mellow in flavor. I didn't peel them, but you could if you prefer. For milk I used whole milk because I had enough, but I often use nonfat evaporated milk and it is delicious and a bit healthier.

Sweetie served us extra large portions for dessert and then I had a much smaller portion for lunch today.  I think it may have been even better than last night. Of course that may have been because I had just finished painting the new laundry room wall with the drywall primer, so I was eating over an hour later than usual.

If you try this without the lemon could you let me know how you like it that way? Do try this. It is easy, delicious, and a great way to pretend that you are a thrifty French housewife, using up the stale bread. Bon apetit!


Bread Pudding with Apples and Raisins and Cinnamon      
A recipe from 1971, from a Fredricksburg, Maryland friend, Gale 

4 cups dry bread cubes          1/4 teaspoon salt           
3 cups milk, scalded               1/4 teaspoon freshly grated nutmeg
1 tablespoon butter                1/2 teaspoon cinnamon
4 slightly beaten eggs            1 teaspoon vanilla
3/4 cup sugar                         1 cup fresh apple, cut into small chunks (peel or not - I didn't)
½ teaspoon lemon zest          1/4 cup raisins                        
                       
1) Preheat oven to 350 degrees.

2) Melt the butter in the milk. Add a little of the milk to the beaten eggs, then add eggs to rest of milk. Stir in the sugar, lemon zest, salt, nutmeg, cinnamon and vanilla.

3) Put the bread cubes in a large bowl. Pour the egg/milk mixture over, stir gently, and let sit 15 minutes.

4) Butter a large baking pan. A deep one will give a softer center, a shallower one will give more crispy crust. Gently stir apples and raisins into bread mixture and pour into baking pan.


5) Bake in a pan of hot water until firm, about 1 hour. Serve warm.

Sunday, April 21, 2013

Fresh Strawberries Fill a Rolling Pin Cookie


Back when I was in college, my boyfriend's mom would sometimes interrupt our study time with something home baked. She was an excellent cook and baker, so I looked forward to the interruption. Besides, we were usually pouring over thick history books about 'Westward Expansion' or something and it was nice to take a break from that.

One time she had baked a lovely cookie that had a cherry baked in the middle. The cookie was crisp around the edges, soft in the middle and then you bit into the juicy cherry in the center...memorable! I didn't have much time for baking at that point in my life, so I never asked for the recipe. Wish I had.

Sweetie came home a couple of days ago with three pint baskets of gorgeous strawberries...the first of our local ones. They are not as sweet, nor as juicy as the ones that come later, in May especially, but they are still delicious. I decided that I wanted to make a cookie similar to the one I remembered so well, but with thinly sliced strawberries in the middle.

After looking in lots and lots of cookbooks it became clear that her cookies were not the usual kind at all. It didn't help that I wanted to include almonds and  maybe some lemon curd. Long story short, I started with an unusual spice cookie recipe and went on my own merry way. Although this dough isn't difficult to work with, you will give your rolling pin a workout by the time you are done.

One of the unusual things about this recipe is that it takes brown sugar, dark corn syrup and butter and boils them together for 2 minutes. Another unusual thing is that there are no eggs. I enjoyed figuring out how to change the recipe by eliminating the spices and adding vanilla extract. It already had the ground almonds and almond extract I wanted and some rum that mostly cooked off.


You could probably make these by wrapping some of the dough around a whole strawberry, but I wanted a cookie version of hand pies. I used a large cutter for starters, 4-5 slices of strawberry for each cookie and about 1/2 teaspoon of purchased Meyer lemon curd. I sealed between the top and bottom cookie with egg wash, then pressed down all around with a fork to seal it even better, cut a slit in the top, brushed egg wash over the whole cookie and sprinkled the middle with sparkling sugar. These cookies were so large that you really only needed one, but they smelled so great while baking that it was hard not to eat more than that.

In the end, it worked out to be just what I had in mind. The outer edges and bottom of the cookie were crispy, the inner cookie soft, but chewy with a true almond flavor, and the strawberries barely cooked, soft and juicy and fragrant and there was just a hint of citrus.


Next time I might try it with granulated sugar instead of the brown sugar for a more delicate cookie flavor but otherwise I'm very happy with this experiment. Since the strawberry season is just starting I'm sure I'll make 'em again, especially since they are perfect for taking on a picnic.


Fresh Strawberry Filled Rolling Pin CookiesBased on 'Swedish Spice Cookies' in Maida Heatter's Brand-New Book of Great CookiesMakes 10 filled 3" cookies

2/3 cup dark corn syrup
1/2 cup firmly packed light brown sugar
4 oz. (1 stick) unsalted butter
6 oz. (scant 1 1/4 cups) blanched almonds
2 cups unbleached flour
1/4 teaspoon baking soda
1/2 teaspoon salt
1 tablespoon plus 1 teaspoon dark rum
1/2 teaspoon almond extract
1/2 teaspoon vanilla extract
about 1/4 cup prepared lemon curd
6-8 fresh strawberries, washed, dried, hulled, and thinly sliced
egg wash of 1 egg beaten lightly with 1 tablespoon water
about 1 tablespoon sanding sugar

Place the corn syrup, sugar, and butter in a saucepan. Place over moderate heat and stir occasionally until mixture comes to a boil. Let boil for about 2 minutes. Then set aside to cool to tepid.

Place the almonds in a food processor fitted with a metal chopping blade. If desired, you can lightly toast the almonds in the middle of a 350 degree F oven for 10 - 12 minutes and then let cool before putting into the food processor. I made my cookies with untoasted almonds.

In the bowl of a stand mixer, sift together the flour, baking soda and salt. Place 1/4 cup of the mixture in the food processor with the almonds. Process the nuts and flour mixture for about 30 seconds, until fine. Add to the dry ingredient mixture in the bowl. Stir with a spoon to combine.

When the sugar/butter mixture has cooled to tepid, add the rum, the almond extract and the vanilla and stir to combine. Add this mixture to the flour/nut mixture in the bowl then stir or beat with the mixer until a dough forms.

Spread out three 12-inch lengths of plastic warp or wax paper, and place about one-third of the dough on each piece. Fold the sides of the wrap over the dough, flatten each piece slightly, and refrigerate the packet for an hour or more, and up to a week if you wish. If it has been refrigerated for more than an hour, it will be too firm to roll out; it should stand at room temperature for about a half hour or more, until it can be rolled out.

When you are ready to bake, remove the dough from the refrigerator long enough ahead of time so that it can be rolled out. Flour a pastry cloth and a rolling pin. Adjust two racks to divide your oven into thirds and preheat to 375 degrees F. Line cookie sheets with baking parchment, foil with the shiny side up, or silicon baking mats.

To roll out the dough, unwrap on piece of the dough and place it on the floured cloth. Roll out the dough carefully until it is very thin and even all over. Try for about 1/8 inch thick. During rolling, turn the dough and re-flour cloth and pin as necessary.

To make large cookies as I did, cut with 3-inch round cutters. I was able to get about 5 rounds from the first rolling out of one piece of dough, but this dough is easy to reform into a ball and then re-roll for more rounds. Once you have gotten some more rounds from the first piece, add what is left to the second piece, continue rolling out the dough and cutting out rounds and repeat with the scraps and the third piece. I used the final scraps to make a small plain cookie...this dough is too yummy to waste any.

Place half the rounds on the prepared sheets. Place 1/2 teaspoon lemon curd on each in the center and spread out, leaving at least 1/4 inch border plain. Place 4-5 strawberry slices in the center over the curd. Brush the egg wash around the plain border and top with another cookie dough round. Press gently around the border to seal, then seal fully by pressing with the tines of a fork. Use a sharp knife to make a slit in the center. Repeat until you have about 10 filled cookies. Brush egg wash over the tops of each, then sprinkle the centers lightly with sanding sugar.

Bake the prepared cookies for 5 minutes in the preheated oven, then switch the pans, top to bottom and bottom to top, plus have the side of the sheet that was toward the back of the oven face toward the front. (This is probably not necessary if you have a true convection oven.) Bake for another 5 minutes, then check to see if cookies are golden brown. If not, bake another minute or two.

Remove from oven to a cooling rack for 2-3 minutes, then use a spatula to lift the cookies onto the cooling rack itself. Let cookies cool before eating or storing. Centers will get softer if cookies are not eaten the same day. Store, covered, in the refrigerator...if there are any left. I warn you, they smell irresistibly good while baking.

Friday, July 20, 2012

Not Quite Health Food

Yes, you CAN eat your vegetables and get a chocolate fix at the same time. It still isn't exactly health food but with the right recipe it can be close (as long as you don't add icing like I did). A few days ago King Arthur Flour added its recipe to the many out there for Chocolate Zucchini Bread. It isn't often that I believe I have a better recipe than King Arthur Flour's kitchens have, but this time it's true. Thanks to amazing YA writer Tanita Davis and her friends, I have a super special chocolate zucchini bread that also has double chocolate due to the chocolate chips and is easy to jazz up with ingredients like dried or fresh cherries, dried cranberries, etc. It even makes a spectacular 'cake' to celebrate a round number birthday, which is how I used it this week. Trust me, that added fruit makes it an extra-special recipe as does the fact that it uses plain yogurt which adds tang, helps reduce the amount of oil needed and helps the bread stay moist. Recipe is below, along with an icing recipe.


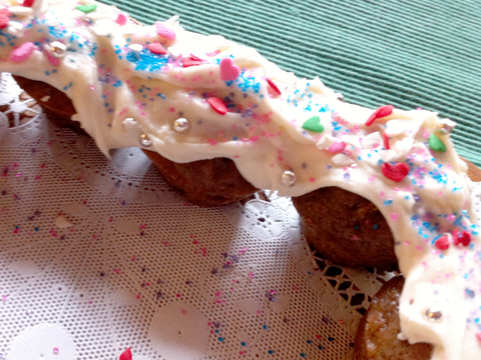
The owner of Cool Fitness in Santa Rosa, an inspirational and delightful personal trainer, coach, athlete and businesswoman, reached a round number birthday a few days ago. To celebrate I brought in a 'cake' made out of chocolate zucchini bread mini-muffins which were arranged in the shape of the birthday being celebrated, then frosted and decorated. It was almost as sparkly as she is. The idea of making a 'cake' this way was borrowed. I'm pretty sure I first saw it in a book about cupcakes, but since I do surf the web, it really could have been anyplace. You can make almost any shape that way, although this was the first time I tried it. I used the version of the chocolate zucchini bread with the dried cherries. Thanks to second sister down and her family for the great Michigan dried cherries!

One of the nice things about this week was that I also had some time to do some things that had been on my list for a while. One was making a new cover for the seat of a chair in the living room. Turned out that the base had broken down, so Sweetie fashioned another from some plywood. I covered that with multiple layers of batting and then the fashion fabric cover. I found the fabric in Monterey...it is sort of a batik style. It has always been a chair with a stiff seat and straight back, but sometimes that is the perfect chair. Grandma L loves sitting in it. Here is how it looks:


The other thing I've been meaning to do is to play around with a borrowed SLR camera, a Canon Rebel. Very cool camera! Here is the second photo I took with it:

Not bad for a beginner, right? Pi was, as usual, right by my side keeping me company. He really is a lovely dog, even if he STILL is chasing cats.


PHENOMENAL CHOCOLATE CHERRY ZUCCHINI BREAD or MINI-CAKES
based on a recipe by Tanita Davis & Robin Brande & Jama Rattigan

3 cups flour
1/4 cup unsweetened cocoa powder
1 tsp baking soda
1/2 tsp baking powder
1 tsp salt
1 ½ cups sugar
3 eggs or equivalent egg substitute
1/3 cup vegetable oil
½ cup plus 2 tablespoons plain yogurt
1 tsp vanilla
2 cups shredded zucchini (about 2-3 medium zucchini)
½ cup chopped nuts ( I used walnuts)
½ cup chocolate chips
½ cup sweet dried cherries (preferably from Michigan), chopped into about ¼ inch dice

Preheat oven to 350 degrees. Lightly grease two 9x5" loaf pans with canola spray. Alternatively, lightly grease 24 mini-muffin pans.

In a large bowl, combine flour, cocoa, soda, baking powder, and salt. Mix well. In a separate bowl, beat eggs (or egg substitute and water) with the sugar until well combined. Add oil, yogurt and vanilla. Beat to combine, then stir in zucchini. Add wet bowl to dry bowl and stir until just moistened. Stir in nuts and chocolate chips and cherries.

Spoon evenly into pans. Bake 55-60 minutes or until toothpick comes out clean if baking in loaf pans. If baking in mini-muffin pans, bake 15. Cool 10 minutes in pans, then turn onto racks. This bread is yummy when eaten still warm...the chips are melty and the fragrance is full chocolate!

To make a 'cake' out of the mini-cakes, line a flat serving plate or board with foil. Group the mini-cakes into a shape, then swirl on icing to join the cakes into the shape. Decorate as desired. I used the following buttercream icing:

Vanilla Easy Buttercream Icing

1/2 pound confectioners' sugar
4 tablespoons butter, softened
3 tablespoons hot milk
1/2 teaspoon pure vanilla extract

Sieve the sugar into a bowl. In another bowl beat the butter until soft and fluffy. Beat in the sugar.

In another, small, bowl mix together the hot milk and the vanilla. Add to the sugar mixture and beat until smooth. If mixture is too stiff, add a bit of hot milk. If too thin, add a bit more sugar.

Enough for 12 cupcakes or 24 mini-cupcakes.

Wednesday, May 30, 2012

End of May


What a amazingly full month May has been! Not only did I finish the first version of the Comfort Food cookbook of old family recipes, but I had it published and took it back to my Mom for Mothers' Day. Once I saw how it turned out I started thinking of ways to improve it. You can see that not only can I not leave recipes the way they were written, I have to tweak the cookbook that I wrote. The good news is that this next version is better in a number of ways, including the addition of more family stories about food. This time I'm going to get 20 copies printed up, so one of them might show up in a give away here and I might also have a few for sale. More on that later.

The month also included the final trim on the animal door so we are now ready to look for our newest dog. The actual selection will have to wait for a couple of weeks since we are blessed with a visit from my older sister and a trip to Monterey is also planned. That's it! Once we are back from Monterey we will find our doggie. More on that later, too.

The garden is looking good. Flowers are blooming, zucchini are coming in, chard leaves get large in just a few days, some of the herbs like cilantro are even going to seed. The tomatoes are getting bigger but cooler weather has slowed them a bit. Should be hot for a couple of days so I expect a growth spurt.

Have been doing some healthier eating. Made the lentil salad from a few years ago, and tonight had some of Next Sister Down's Barley Casserole for dinner. Have made sure to have a salad a day for something like two weeks. I do love salads!

Have not been baking as much. I did make some Cocoa Drops for photos for the cookbook and a Warm Buttermilk Vanilla Cake to use for the strawberry shortcake photo. This might be a good time to post that since strawberries are at their seasonal best.

This is based on a recipe that I found online...AllRecipes I think...but I changed it so much that it would be barely recognizable to the person who created the original. I'd never made a warm milk cake before. It makes a great spongy type cake but moister than the classic genoise...no need for moistening syrups. The juices from the sliced strawberries soaked into the cake nicely and the finished shortcake kept well, too.Somehow we managed to hide it behind pints of fresh strawberries and they were eaten as is before we finished off the cake. It wasn't due to anything being wrong with the cake...look at all that whipped cream and tell me how it could be...but plain freshly picked local sweet juicy strawberries are even better.

Warm Buttermilk Vanilla Cake
2 eggs
1/2 cup sugar
1/2 cup brown sugar
1 teaspoon pure vanilla extract
1 cup cake flour
1/2 teaspoon baking powder
1/2 teaspoon baking soda
1/4 teaspoon salt
2 tablespoons butter
1/2 cup plus 2 tablespoons buttermilk

In a large mixing bowl, beat eggs, sugar and vanilla on high until thick and lemon-colored, about 4 minutes. Combine flour, baking powder, baking soda and salt; add to egg mixture. Beat on low just until combined. Melt butter in a small saucepan until butter melts. Remove from heat and stir in the buttermilk. Add to batter; beat thoroughly (the batter will be thin). Pour into a greased 9-in. square baking pan. Bake in a preheated 350 degrees F oven for 20-25 minutes or until cake tests done. Cool 5 minutes in the pan, then turn out on a wire rack to cool completely.

To make a Strawberry Shortcake with this cake, slice the cooled cake in half horizontally. Lay the top layer aside. Spread sliced strawberries (hull and slice them in advance if possible so that the juice can be drawn out. Add a little sugar if they are not sweet enough) over the bottom layer.Top with the top layer of cake and frost the top with whipped cream. Garnish with a few fresh strawberries. Serve at once. If there is some left to store, store, tightly wrapped in plastic wrap, in the refrigerator.

Saturday, January 14, 2012

Cooking Influences


Many times the people who really like to cook have a special person, often a relative, who taught them the ways of the kitchen. In my case the influences were from both my Mom and Dad, although mostly from Mom. She didn't share her kitchen well, but I don't either. I remember that before she would show me how to make pie crust that I had to read about it. I think it was 3-4 pages in the Fannie Farmer cookbook. Then we talked about what I had read so she knew that I had actually read it and understood at least some of it. Finally we went into the kitchen and made the pie crust right down to measuring out the iced water in tablespoons. I can still make a pretty good pie crust from scratch, although I rarely do. Thanks Mom for all the cooking advice and instruction over the years. Do you, dear reader, have anyone who inspired you in the kitchen?

When my Dad died in 1994 one of the ways that I mourned was by putting together a cookbook with favorite family recipes. By then all of the children had learned to cook (some were more enthused than others) and often had collected recipes from friends and elsewhere that had little in common with the foods we grew up with. I wasn't sure that a collection of those old standards would be of much interest but went ahead anyway because I wanted to have them for myself.

Letters were exchanged with my Mom and interested siblings so that I included the most desired recipes and could include comments from Mom, too. Many hours were spent typing them up and organizing them by season. There was an index but it somehow was left out of the final booklets. When I was finished I made copies and took them to a printer who made up enough copies for Mom and me and the 7 others and they had a black plastic binding so that the book could be laid flat for use. The illustrations were copies from an old cookbook and all the illustrations were of children doing things like finding eggs on nests, tossing salad and eating birthday party ice cream.

Everyone received their copy at our family reunion the summer after Dad died.

Over the years since I've used my copy often and I'm pretty sure that the others have, too. Some of the recipes have shown up on this blog from time to time. When I visited my Mom last spring I found that her copy was in tatters from much use! Unable to find the originals (or the computer files) for the cookbook so that I could just have new copies made, I decided to create a new, updated version. That is one of the reasons that I took the InDesign class last semester. Now I know enough to do a good job with type and layout.

Yesterday I said I was going to have custard for dinner. Actually I had some leftover casserole, but then had custard, of a sort, for dessert...rice pudding. One of the recipes from the original Family Food cookbook is Rice Pudding. The recipe comes from The Boston Cooking School Cook Book and here is what my Mom said about it:
"When we were stationed in Boston during World War II, I bought my first cook book - The Boston Cooking School Cook Book by Fanny Farmer. It was my cooking bible for many years and provided the following 2 pudding recipes, Rice Pudding and Bread Pudding."

This rice pudding is the kind made with rice that has already been cooked. It also uses raw egg whites, folded in at the end. With eggs these days sometimes not being as bacteria free as we might like you may want to use a product like Best of the Egg - Whites instead of fresh egg whites. If the pudding were baked at the end there would be no problem to just use the whites from the separated eggs. Will have to try that sometime. In the meantime, here is the recipe for your enjoyment.


Rice Pudding

1 C cooked rice
2 C milk
1/4 t salt
1 or 2 eggs, separated
1/2 C sugar
1/2 t vanilla

Scald the milk with rice. Beat egg yolks with the sugar in the top of a double boiler.


Add the hot mixture slowly to the yolk mixture while stirring. Cook in top part of double boiler over simmering water until thick. Flavor with 1/2 t vanilla. Fold in the egg whites which have been beaten stiff with the salt. Chill.

(Notes: I folded the cooked mixture into the whipped egg whites instead of the other way around because my double boiler top couldn't hold both mixtures...it worked fine since I added the cooked mixture by the cupful and then folded. I also managed to overcook the rice slightly which gave the pudding a bit of a toasted rice flavor. I added three drops of orange oil which worked nicely in tandem with the toasted rice and vanilla flavors.) Serves 4 - 6.

Sunday, January 08, 2012

Just Past Their Prime Grapes Cake


Not everyone seeing a platter of tired looking grapes would think 'cake' but then not everyone loves to snack on fresh grapes and raw almonds. For some reason I just love that flavor combination. Now the grapes may be weary but they are still unspoiled, just a tiny bit dehydrated, not even close to being raisins. I picked through them carefully and ended up with enough to scatter fairly closely over the baking pan.

The second part is a recipe in Lauren Chattman's Cake Keeper Cakes. I baked a number of cakes from this lovely cookbook last year along with other Cake Slice Bakers. This year I needed a break, so cakes are few and far between since November. I'm pretty sure we never baked the Almond-Brown Butter Cake that I topped those grapes with but it provided that essential almond flavor, plus the topping is sliced almonds so I get actual almonds and grapes AND cake! Sweet.

I followed the recipe pretty closely with the exception of using 1 1/4 cups almond meal/flour (Bob's Red Mill brand) instead of processing the almonds and sugar. The rest was mostly as written, including the use of a vanilla bean. That and the browned butter added a great deal of flavor to the almond/grape pairing. Oh, I also skipped the rum & reduced the amount of sugar. Guess I really do have trouble keeping to a recipe.


So some afternoon when you have some fresh grapes, weary or not, try this cake. It goes great with a cup of hot tea on a winter afternoon. Sweetie thinks so, too. It was fine textured and moist and not too sweet although it was rich.


Almond-Brown Butter Cake with Grapes
Serves 8
10 tablespoons ( 1 1/4 sticks) unsalted butter, plus more for the pan
1/2 vanilla bean (I used a whole one since I wasn't using the rum)
about 1 cup seedless grapes
1 1/2 cup sliced almonds, divided
1 1/2 cups sugar, divided (I used 1/4 cup less)
1 cup plus 2 tablespoons unbleached all-purpose flour
8 large egg whites
pinch of salt
(2 tablespoons dark rum was in the original version)

Melt the butter in a small saucepan over medium-low heat. Split the vanilla bean and scrape the seeds into the butter. Add the scraped pod to the pan.


Heat until the butter is lightly brown and gives off a nutty aroma, stirring frequently, about 5 minutes. Watch carefully; it will burn quickly after it browns. Remove from the heat and let stand for 10 minutes. Discard the vanilla bean and pour the butter through a fine strainer to remove any burnt solids. Set aside to cool.

Preheat the oven to 350 degrees F. Grease a 9-inch round cake pan (I used a 2 inch deep one and I'm glad it did as the cake rose impressively). Line the bottom of the pan with a circle of parchment paper. Grease the parchment. Dust the pan sides and parchment with flour, tapping out any excess flour. Evenly distribute the grapes over the bottom of the prepared pan. Set aside.

Reserve 1/4 cup of the almonds. Place the remaining 1 1/4 cups almonds and 3/4 cup of the sugar in the bowl of a food processor and grind fine. Add the flour and pulse to combine. (I used 1 1/4 cup almond flour, 3/4 cup sugar and 1 cup plus 2 tablespoons of flour and whisked them together in a bowl.)

Place the egg whites in a large mixing bowl with the salt and beat until foamy. With the mixer on high, add the remaining 3/4 cup sugar (I only used 1/2 cup since I didn't want it to be so sweet) in a slow, steady stream and whip until the whites are shiny and hold stiff peaks. Fold in the flour mixture in three additions, alternating with the butter mixture and ending with the flour mixture. If using, fold in the rum.

Scrape the batter into the prepared pan, covering the grapes completely. Smooth with a spatula. Scatter the remaining 1/4 cup sliced almonds over the batter. Bake in the preheated oven until golden brown and a toothpick inserted into the center of the cake comes out dry, about 35 to 40 minutes.

Let the cake cool in the pan for 10 minutes. Invert the cooled cake onto a wire rack, then turn it right side up to cool completely. If desired, dust heavily with powdered sugar (I didn't and I'm glad because it was plenty sweet, even with the reduction in sugar).

Cut into wedges to serve. See those indentation in the photo at the bottom of the cake? Those are the grapes.


Store uneaten cake in a cake keeper or wrap in plastic and store at room temperature for up to 2 days.

Thursday, June 30, 2011

Berries Top the Cake


It's truly berry season around here. My fridge last night had fresh local organic blueberries that were fat and juicy, lovely large ripe ollalieberries, and some strawberries that were past their prime but still fine to eat. The first of the blackberries are ripening, too. Raspberries at the market smell wonderful and I'd buy some if I didn't already have so many berries.

Breakfast muesli with the fresh blueberries has been a special treat the last few mornings. For yesterday's lunch I added some of the blueberries and some of the ollalieberries to a nice green salad with chicken and avocados...yummy!

When I arrived home yesterday evening, I found that Grandma L had picked another quart of the ollalieberries. That was the final push I needed to bake a cake with berries. Thanks Grandma!


I looked through a few magazines and cookbooks and finally decided to modify a peach upside down cake recipe in the Cake Keepers book that the Cake Slice Bakers have been using this year. On top of the melted butter/brown sugar layer I placed two cups of sliced strawberries, spread them out, then dotted the spaces between with about a cup of the ollalieberries. The cake itself is a vanilla butter cake with buttermilk for tang. I added some cinnamon to the flour mixture to jazz it up a bit. It baked up with a nice moist crumb and a wonderful mixed berry topping. Sweetie had some more for breakfast, with some more fresh berries added. Yay for berry season! Enjoy this cake yourself while the berries are at their best.


Summertime Berry Buttermilk Upside-Down Cake
an adaptation of a recipe from Lauren Chattman's Cake Keeper Cakes

For the Topping:
1/2 cup (1 stick or 8 tablespoons) unsalted butter (I used 6 tablespoons instead of the 8 tablespoons)
3/4 cup brown sugar
about 2 cups sliced fresh strawberries
about 1 cup fresh blackberries or ollalieberries

For the Cake:
1 3/4 cup all-purpose flour
1 1/2 teaspoons baking powder
1/2 teaspoon baking soda
1/4 teaspoon salt
1/8 teaspoon cinnamon
2 large eggs
1 teaspoon vanilla extract
3/4 cup buttermilk
1/2 cup (1 stick) unsalted butter, softened
3/4 cup granulated sugar

Make the Topping
Preheat the oven to 375 degrees F. Grease a 9-inch round nonstick pan and dust with flour or use a seasoned cast iron skillet as I did.
Heat the butter in a medium saucepan over medium heat (or in the cast iron skillet) until foaming. Stir in the brown sugar, turn the heat to low, and cook, whisking, for 2 minutes. If baking in the cake pan, scrape the mixture into the prepared pan and smooth with a spatula. If using the skillet smooth out the butter/brown sugar mixture if needed.

Arrange the sliced strawberries evenly over the butter/brown sugar mixture. Place the ollalieberries or blackberries in between the slices, making sure they are touching the butter/brown sugar mixture. Set aside.

Make the Cake
Combine the flour, baking powder, baking soda, salt and cinnamon in a large bowl.

Combine the eggs,, vanilla and buttermilk in a large glass measuring cup and lightly beat.

Beat together the butter and granulates sugar in a large mixing bowl until fluffy, about 3 minutes on medium-high speed. Scrape down the sides of the bowl and the beater(s) as necessary.

With the mixer on medium-low speed, pour the egg mixture into the bowl in a slow stream, stopping the mixer once or twice to scrape down the sides of the bowl. Turn the mixer to low speed and add the flour mixture, 1/2 cup at a time, scraping down the sides as needed. After the last addition, mix for 30 seconds on medium speed.

Pour or spoon the batter over the berry mixture, gently spreading evenly with a spatula.

Bake in preheated oven until the cake is dark golden brown and a toothpick inserted into the center comes out clean, 35 - 40 minutes. Transfer the pan to a wire rack and let stand for 5 minutes.

Place a large plate over the pan and, using oven mitts, invert the cake onto the plate. If necessary, replace any fruit stuck to the pan. Let the cake cook for 20 minutes and serve, warm, or serve at room temperature. Store uneaten cake (if any!) in a cake keeper or wrap in plastic and store at room temperature for up to 2 days.

Elle's note: While this cake is excellent all by itself, I'll bet you can imagine how delicious it would be with a scoop of vanilla or berry ice cream. I suspect that you could substitute frozen berries for the fresh ones and the recipe would still be wonderful.

Sunday, April 25, 2010

Orange and Chocolate in a Cookie

The siren song of the garden has been drawing me out of doors, plus Sweetie and I celebrated a big anniversary this week (no, not the 50th! ...that one will require fireworks or something), plus clinic, so not much of interest has been going on in the kitchen lately. The exception is a bread I baked this week which will soon be revealed on the Bread Baker's Dog and the second exception are these cookies.

The other evening I made Orange Chicken with Mustard (which has been blogged about in its lemon and orange variations) and I grated way too much orange zest to use in that dish. I saved it because God punishes people who waste good things like fresh orange zest.

You probably think that I'm all organized and always know what I'm going to make or bake, good old Elle the competent one. Wrong! Some days I forget to brush my teeth. Others I forget to eat lunch. Sometimes I even put out butter to soften for baking but forget to bake anything...or don't know exactly what I want to bake.

These cookies were the result of such an experience. I knew I had butter, eggs and buttermilk. All were put out to soften/warm for baking but then the garden took over followed by extreme fatigue. Who knew that an urn full of potting soil and a rose bush could weigh so much? Same for bags of potting soil that needed moving.

I got my stairmaster workout by transfering the veggie flats from the sunspace to the deck for watering and sunbathing, which requires going up and down quite a few steps quite a few times. We won't even talk about the weeding, hauling pulled weeds to the compost area or green bin, more weeding, more hauling. The end result was no baking that day. Used the buttermilk the next day for the bread. Tried again with the re-chilled butter the following day. Then realized I didn't know what I wanted to make with it. See? I can be pretty disorganized.

Finally decided that I wanted to make chocolate chip cookies. That may have had something to do with a few bloggers like Lynn of Cookie Baker Lynn, Peabody of Culinary Concoctions by Peabody and the sweet blogger at Sinful Southern Sweets who have been making variants of chocolate chip cookies recently. It may have been because the idea of cc cookies with orange somehow sounded so appealing knowing that I had leftover orange zest waiting.

Whatever the reason, that's where the softened butter went, along with sugars, an egg, flours (including barley flour!) and both baking soda and apple cider vinegar. I used all the rest of the orange zest, which was more than a tablespoon, but a tablespoon would be sufficent to get that orange grove flavor and fragrance that goes so well with dark chocolate. I added chopped walnuts because I love 'em in cookies.

We have a picnic coming up at the end of the week. These cookies will be great picinic food...if there are any left! They are full flavored, crispy but with a soft middle, full of chocolate chips and the chocoalte is well balanced with the orange. Yummy!

Orange - Chocolate Chip Cookies
based on a recipe from King Arthur Flour website Makes about 33 cookies

¼ cup (1/2 stick, 2 oz.) unsalted butter
½ cup vegetable oil
(Note: I used 1 ¾ sticks of butter instead …it was softened, twice)
¾ cup granulated sugar
¾ cup dark brown sugar, firmly packed
2 teaspoons vanilla extract
1 tablespoon orange zest
3//4 teaspoon salt
1 large egg
1 tablespoon cider vinegar
½ teaspoon baking soda
½ teaspoon baking powder
1 cup whole barley flour (If no barley flour available, substitute unbleached all-purpose flour)
1 cup whole wheat flour, traditional or white whole wheat flour (I used ½ cup whole wheat and ½ cup unbleached all-purpose flour)
2 2/3 cups (16 oz) semisweet chocolate chips
1/2 cup chopped walnuts (optional)

Preheat the oven to 350 degrees F. Lightly grease (or line with parchment or a silicon baking mat) two baking sheets.

In a large bowl, beat together the butter, sugars, vanilla, orange zest, and salt until smooth.

Beat in the egg to combine. Beat in the cider vinegar. Beat in the baking soda and baking powder and as soon as they are beaten in add the barley flour and whole wheat flour, combine thoroughly, then add the chocolate chips. It looks like too many chips, but don’t worry. If using walnuts, add at the same time as the chocolate chips.

Drop the dough, by tablespoonfuls, onto the prepared baking sheets. Bake for 15 – 17 minutes, until the cookies are an even golden brown, without any hint of softness in the center. Remove from the oven, and allow to cool for 5 minutes before transferring to a rack to cool completely.

Sunday, January 24, 2010

Fresh Coconut Fantasy

Some days I read my horoscope for fun. I don't really take it seriously, but it provides a different perspective sometimes. Today's spoke about using your latent talents, among other things. That's a good way of looking at planning the day (or days) because we all have latent talents, sometimes more of them than we realize. I'll bet you can think of one or two talents of yours that are undeveloped or have gotten dusty with disuse. Maybe this week is the one where you experiment with strengthening a known talent or finding an unknown one.

For me frosting cakes is a poorly exercised talent. I did much better when I was a teen and made all the birthday cakes for our large family. Sweetie isn't a big cake fan, so the layer cake making talent is mostly unused. Fortunately the icing for this fantasy cake is easy to work with.

Shortly after Christmas I was looking through a library book on cake baking, just for fun. I'm always on the lookout for new or interesting techniques. This wonderful book, Perfect Cakes by Nick Malgieri, had a recipe for stand mixer fluffy white icing, perfect for making a coconut layer cake.Then my Mom mentioned that she had made a coconut layer cake for Christmas dinner. The idea of making one myself was now firmly fixed in my mind.

One of the things I remember about winter when I was small was that my Mom always made a fresh coconut cake for my older sister's birthday. The freshly grated coconut applied generously over fluffy white seven-minute frosting looked as pretty as fresh snow fall. Mom always used a white cake, sometimes from scratch and sometimes from a mix. The taste was light, delicate and very coconut. Perhaps it was that taste of the tropics combined with the snowy visual, but for whatever reason I always think of that cake around this time of year when we have rain instead of snow and the weather is far from tropical.

Wishing that she were here, I created this fantasy fresh coconut cake for my deep south sister. I think she would like the changes I made to her old birthday favorite. Since I love raspberry and think that it goes well with coconut, I added seedless raspberry jam to part of the cake batter. Since I also love lemon and it goes well with both raspberry and coconut, part of the cake batter has lemon zest and a bit of yellow food coloring. Vanilla is truly tropical and blends the rest of the flavors together, so the rest of the batter is vanilla.

The concept of creating rings of different batters is something I read on Peabody's blog Culinary Concoctions by Peabody. Hers was more dramatic and better executed. Mine is softer with the pastel colors. Having the three flavors of cake in each layer is brilliant. Peabody is so creative and original in her baking!
For filling I was going to use straight lemon curd, but found I didn't have enough, so I mixed in some of the fluffy frosting, creating a sort of marbled filling.

Finding the perfect frosting recipe in Nick Malgieri's book Perfect Cakes actually started the ball rolling for making the cake. Traditionally this cake is iced with Seven-minute Frosting where the egg and sugar mixture is beaten in the top of a double boiler over simmering water. A hand beater or, better yet, a hand held electric mixer are used at high speed for seven minutes to whip and thicken the frosting. Since I don't own either and couldn't imagine whisking for seven minutes, I long ago gave up the idea of making this kind of frosting.

Then I read about his version that uses a stand mixer. I had to try it! I'm here to tell you that it works beautifully. An added bonus is that you can be washing up and putting things away while the mixer does all the work (instead of standing over a hot stove with a hand held mixer getting warmer all the time). The icing is wonderfully thick and glossy and fluffy and just the right amount of sweet.

Finally there is the grated fresh coconut. Sweetie demonstrated how to pierce the eyes and empty the coconut water before cracking the husk with the back of a large knife. Once the shell has been breached, he pried out pieces of the coconut meat. I used a vegetable peeler to remove the tan inner shell from the pieces. Then the best part...I got to use my new Microplane rotary grater.


I grated nuts with it for Christmas cookies, but used the larger holes for the coconut to get those nice strands. Unlike my childhood memories of grating and grating and grating with a box grater (and having the coconut more of a pulp than strands), with the Microplane rotary it went quickly and easily...it was almost fun.

You can use packaged shredded coconut if you don't have fresh, but if you can find a fresh coconut and are able to take the time to create a wonderful pile of freshly grated coconut, you will find that the fresh stuff is absolutely wonderful...moist, fragrant, not too sweet, and full of true coconut flavor.

This sounds like a lot of work for a cake, especially when you read about putting the different flavored batters into the pans, but you can certainly make it more manageable by doing some of it ahead of the day you plan to serve. Coconut can be grated ahead and lemon curd can be made ahead (or you can used purchased coconut and/or lemon curd). Just make sure to ice and assemble the cake the same day you will be serving it.

This cake looks like a party, so consider having a party to enjoy it with friends and family...it's a great way to chase away the winter gloomies.


Fresh Coconut Cake Fantasy

Elements:
Classic White Cake with Embellishments
Fluffy White Frosting
Lemon Curd
Freshly grated fresh coconut
Note: You can make the lemon curd and grate the coconut in advance. You can make the cake the day before if necessary. Make the frosting and assemble the cake within an hour of serving the cake.

Classic White Cake with Embellishments
recipe from Culinary Concoctions by Peabody...embellishments are mine

12 tablespoons (1 1/2 sticks) unsalted butter, softened
1 1/2 cups sugar
2 ¼ cups all purpose flour
2 teaspoons baking powder
1/4 teaspoon salt
6 large egg whites (3/4 cup)
1/2 cup milk
¼ cup coconut milk

embellishments:
1/2 cup seedless raspberry preserves
red food coloring
¼ teaspoon lemon extract (optional)
¼ teaspoon lemon zest
yellow food coloring
1 teaspoon vanilla extract

Set rack at the middle level in the oven and preheat to 350 degrees.

Butter the bottom of two 9-inch round. Line bottom with parchment or waxed paper.

In a large bowl, beat butter and sugar for about 5 minutes, until light and fluffy. Stir together flour, baking powder and salt. Set aside. Combine egg whites, milk and coconut milk. Add 1/3 of the flour mixture to the butter mixture then add half the milk mixture. Continue to alternate beginning and ending with flour mixture. Scape the bowl and beater often.

Take about 1/2 of the batter out and place into a separate bowl and set aside. Take 1/3 out of the remaining batter and pace into a separate bowl and set aside. Add raspberry preserves and one drop red food coloring to remaining batter in the bowl and beat to combine thoroughly.

Take the smallest bowl of set aside batter and add the lemon zest, lemon extract and 2 drops yellow food coloring. Stir to combine fully.

Stir the vanilla extract into the larger amount of set aside batter until combined fully.

To make the cake:
Set out both prepared cake pans.

In the first pan scoop half of vanilla batter around the outside edges of the pan bottom, spread out with spatula to level. Next scoop half of the raspberry batter into the center of the pan. Spread out to form a circle. Lastly scoop ¼ of the lemon batter into the center of the pink batter. Spread to level. Place blobs of the next ¼ of the lemon batter around the edges and spread over the vanilla batter so that the pan full of batter is mostly level.

For the second pan. Scoop remaining raspberry batter into pan the same way you did the vanilla batter in the other pan, spread out with a spatula in a ring. Scoop remaining vanilla batter into the center of the raspberry batter, spread out with spatula to form a circle. Scoop half the remaining lemon batter into the center of the vanilla batter and spread to level. Place blobs of the remaining lemon batter around the edge of the pan and spread over the pink batter so that the pan full of batter is mostly level.

The batters will look sort of like the rings of a bulls-eye. Don’t worry if colors mix…this is a fantasy.

Bake for 30-35 minutes, OR until the center comes out clean. Remove from oven and let cool in pan for 15 minutes. Flip cake over onto a rack and remove parchment or waxed paper. Let cake cool completely before frosting.

Fluffy White Frosting
Note: If you have wanted to make Seven-Minute Frosting but have a stand mixer and no hand-held mixer, now you can! This recipe heats the icing elements over hot water, then uses the stand mixer to make it a fluffy white icing, perfect for coconut cake.

Fluffy White Icing – a version of 7-minute Icing

from Nick Maglieri's book Perfect Cakes

3 large egg whites (scant ½ cup)
1 cup sugar
pinch of salt
1/3 cup light corn syrup

Half fill a 1 ½ quart saucepan with water and bring to a boil. Lower the heat so the water simmers.

Use a hand whisk to combine the egg whites, sugar, salt and corn syrup in the bowl of a heavy-duty mixer. Place the bowl over the pan of simmering water and gently whisk until the ingredients are hot (about 130 degrees) and the sugar has dissolved.

Attach the bowl to the mixer and ship the icing with the whisk attachment on medium speed until cooled, about 5 minutes: touch the outside of the bowl – it should feel cool.

Use immediately to cover a cake. Can be used as filling, too.

Makes enough for filling and covering a 9-inch two-layer cake.

Elle’s Lemon Curd
Yields 3 Cups - Stores up to 3 months in fridge

3-4 fragrant, bright-skinned lemon
1/2 cup (1 stick) plus 2 tablespoons butter, cut up
Pinch of salt
4 egg yolks
1 whole egg
1 1/4 cups sugar

1) Run 2 inches of water into the base pan of a double boiler and set over medium heat to come to a brisk simmer.

2) Grate or shred enough lemon zest from washed & dried lemons to make 1 1/2 tablespoons, packed, lemon zest. Place the zest in the top pan of the double boiler. Juice the lemons and strain juice to make 1/2 Cup; add to the zest. Add the cut up butter & salt to the pan. Set aside.

3) Beat the egg yolks and whole egg together at high speed in the large bowl of an electric mixer until they are foamy; gradually add the sugar, continuing to beat the mixture until it is pale, fluffy, & very thick, about 5 minutes.

4) Scrape the egg mixture into the double-boiler top and set the top into the base containing simmering water. At once begin whisking the mixture; cook it, whisking constantly, until it has thickened smoothly and is steaming hot, about 10 minutes. Be careful not to overcook the cur; it is done when it will coat a metal or wooden spoon heavily. Remove the upper pan from the hot water.

5) Pour the curd into a fine-mesh sieve set over a bowl and press it through with a rubber spatula, leaving the shreds of zest behind (discard shreds). Scrape the curd into sterilized jars. Let it cool uncovered. Cap jars of cooled curd with sterilized lids. Refrigerate the curd.

Note: This can be made with lime zest & juice. Use 1 Tablespoon lime zest and 1/2 Cup lime juice and follow the recipe the same way for everything else.

Fresh Coconut

Buy a coconut that has ‘eyes’ that show no sign of leaks or darkness. Shake it to make sure there is liquid inside. Once you are ready to prepare, pierce two of the eyes with a small sharp knife. Drain out the coconut liquid. Using the back of a heavy knife, strike the coconut shell all around the ‘equator’, but closer to the eyes, about halfway between the eyes and the largest part of the coconut. As the shell cracks, pry the coconut open. Using a sharp knife, pry out pieces of the coconut meat. When the meat has been removed from the shell, use a paring knife or vegetable peeler to remove the tan inner shell. Use a grater to grate the coconut into shreds. You will most likely have more than enough to cover the top and sides of a nine inch layer cake. Leftovers can be used for other recipes or frozen.


To Assemble the Cake

Place one cake layer, bottom side up, on a cake plate. Spread with one cup lemon curd. Spoon on dollops of the fluffy icing and spread over the lemon curd...it will look marbled. Top with second cake layer, bottom side down.

Spread fluffy white frosting in swirls over top and sides of cake. Be generous. Sprinkle handfuls of the coconut over the top of the cake. Cup your hand containing lots of coconut as you apply a handful to the sides. Repeat until sides are fully covered with coconut. Brush excess coconut from cake plate. Serve as soon as possible.


Verdict: This is a fine textured, moist cake. You could really taste the different flavors in the layers and the lemon curd and coconut tied it all together and added richness. The pink and yellow colors were pretty subtle. I liked it that way, but you may want to increase the food coloring by a drop or two for more distinct colors. I plan on making this again...even Sweetie enjoyed it and he isn't a big cake fan.