Friday, November 15, 2013

A Tribute to the Queen of the Daring Bakers


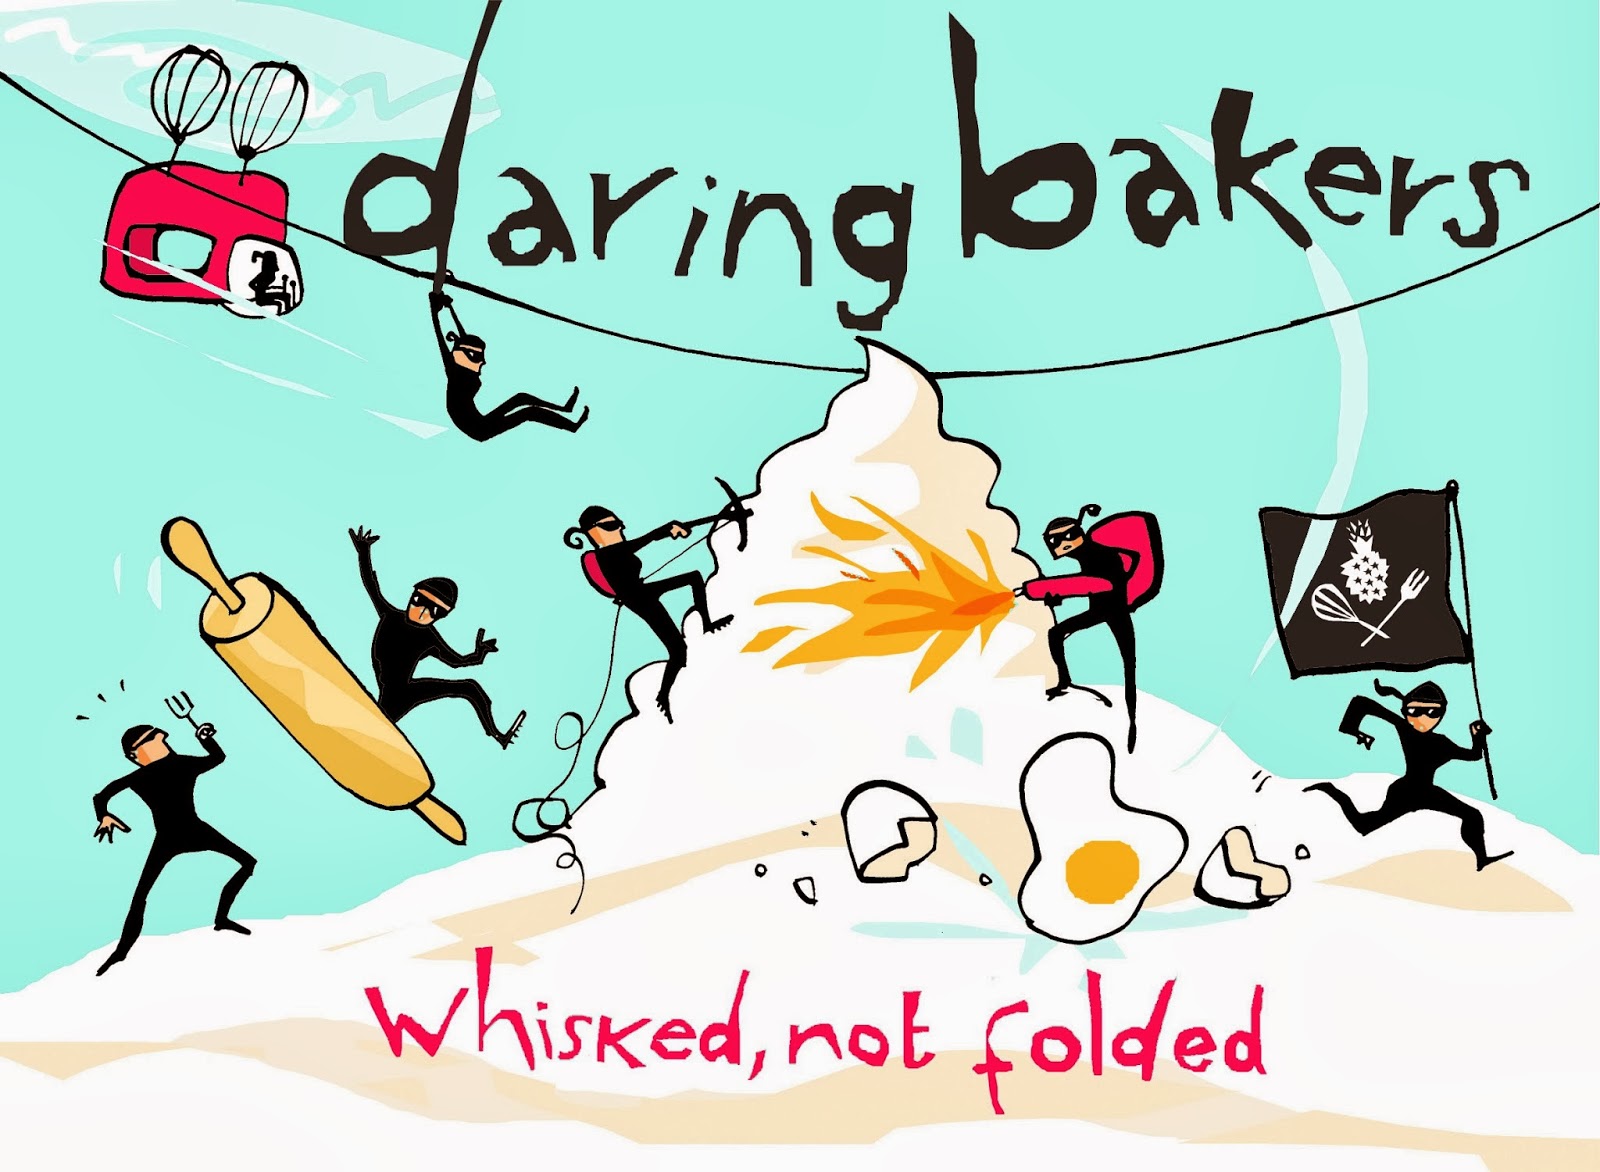
An era has come to an end, not because the Daring Bakers have gone away, but because the Queen of the Daring Bakers, Lisa C, shuffled off her mortal coil this week. A sad thing, indeed. She co-founded the baking group and was the den mother who kept it going, kept it open and welcoming, kept it organized, with the assistance of a few willing helpers, and watched it grow from two to about 8, then to 10, to 15, and on to hundreds of bakers both experienced and novice. Eventually it became the Daring Kitchen, there was a blog and blogroll, a few rules and some repetition of skills learned, but it was always fun because Lis was always, always fun and funny. On her blog La Mia Cucina  she posted some of the most hilarious posts anywhere, making both her kitchen errors and successes a source of belly laughs and encouragement. I mean, if she could be the Queen and screw up and have fun with it all, surely I could try, too, right?

As  a tribute, bloggers across the blogosphere are posting today. Some will make their favorite DB recipe or one that reminds them of Lis. Some will write stories and tell tales to keep her memory alive. Some will tell how being part of the Daring Bakers changed them.
Because I've had family visiting since I heard about her death, I'm stealing a little time to do the last.

Being a Daring Baker meant challenging yourself, trying new things, making new friends who also enjoyed baking. At first the group was small enough that we could visit all the blogs on posting day, but eventually there were many dozens.


One of the challenges was for Potato Bread given by Tanna of My Kitchen in Half Cups. I had never made such a wet bread dough before, so there was a lot of swearing going on in my kitchen as I fought to keep the dough contained and it fought to spread all over everything it could touch as I kneaded it. That, a recent review I had read of a new Disney movie, and the fact that there were a whole bunch of posts on the same day and I wanted mine to be a bit different, all combined and led me to create the Land of St. Honore', a fairy tale land where baking is a birthright. I had often wondered if I could write fiction, so these little stories were a challenge, too. The posts had the story and some graphics and the usual write-up about making the recipe, plus photos. Without the Daring Bakers, specifically the warm and welcoming group that it grew into, I would never have tried to write this way, nor felt the impulse to. I would never have attempted things like


Gateau St. Honore',


Strawberry Mirror Cake,


the infamous Chocolate Crepe Cake,

real buttercream, croissants, puff pastry from scratch, real pastry cream and so much more.

For many years of wonderful baking with Lis, Tartlette, Peabody, Brilynn, Helene, Mary, Breadchick, DaviMack and Tanita, Baking Soda, Tanna, Lynn, Ilva, Andrea, Deborah, Meeta, Dharm, and many more daring and delightful bloggers, I am grateful. A huge thank you to Lis for keeping the Daring Baker's group (and even bigger group when it became the Daring Kitchen) going even when it took on a life of its own and was probably more work than fun some of the time.

You will be missed by many Lisa and the Daring Kitchen is a fine legacy.

#tributetolis #daringbakers

Sunday, November 10, 2013

Gratitude


It's worth noting that attitude and gratitude rhyme, not because I'm thinking of writing poetry, but because it reminds me that gratitude is an attitude. It's easy to rail against the upsets of the day, to focus on the negative. It seems to me that doing so is a very popular attitude at the moment. Seeking to find blame elsewhere is fashionable, too.

Taking the time to be aware of the positive things in our lives is far more rewarding I think, but a road less taken a lot of the time. I'm as good at grousing about what isn't working, isn't available, isn't happening as anyone.


As I approach the time when I will need to choose a new health care provider, it seems that I'm feeling grouchier each time I go online to explore the options. It's not because I have no options (see, a thing to feel grateful for...right there), but because finding the one that fits seems to be like finding the way from one end of a maze to the other. I know there is a path, but the twists and turns are so confusing.
.


Leaving that fraught subject, let's turn to autumn, a source of great joy and something else to be grateful for. This year we have had perfect fall weather. The nights have been cold enough to bring out brilliant color on the leaves of the deciduous trees...bright scarlet, intense yellow and gold, deep burgundy and russet. As I drive around doing errands I've been making sure that I take time to appreciate that glory of autumn while it lasts. Soon the rains will come, the leaves fall, and life will get more hectic. Is that possible? Well, it does seem to happen each winter holiday season, so why not this year.


Our entry project, begun in the early days of May, is finally finished, inside and out. We will be welcoming my Mom and favorite sailing sister-in-law through the new russet door into the tiled and pillared entry very soon. That, perhaps, is the thing I am most grateful for today. My Mom hasn't been here for a few years, so I'm looking forward to cups of tea and lots of conversation with both Mom and Sailing Woman.

We'll be late getting home, so I made a nice pot of soup, which I can reheat once we get home. If you like the flavors of chicken pot pie, you'll love this soup. Full of veggies and chicken chunks, I even found a way to use some of the caramelized onions I made in the crock pot. It's a soup as comforting as a big hug. Sending a virtual big hug and my gratitude for her abundant love and caring to my favorite Lexington sister-in-law B. I'm very lucky to have her in my life, even if we live too far apart. In truth, I am very lucky as far as sister and brother in-laws go. Thanks y'all!


Chicken Pot Pie Soup
all the flavors of pot pie except the crust
2 medium red potatoes, cut in 1/2 inch dice
1 3/4 cups chicken stock
1 tablespoon olive oil
4 oz. sliced, cleaned mushrooms
1/4 teaspoon dried thyme
pepper to taste
1 stalk celery, sliced
1-2 medium carrots, halved and sliced
1/4 cup caramelized onion
2 large chicken breasts, cut in 1 inch dice
1 can low fat or non-fat evaporated milk

2 cups mixed frozen vegetables...I used frozen peas, frozen corn and frozen green beans

Ingredients for this recipe are cooked in two pots. In on heavy bottomed saucepan, place the red potatoes and chicken stock, bring to a boil, reduce heat, and simmer until potatoes are tender.


In the second saucepan, heat the olive oil over medium-high heat. Add the mushrooms, thyme and pepper. Stir to coat the mushrooms, cover, and reduce heat. Simmer 4 minutes, stirring once. Uncover and add the celery and carrots. Stir well, then cover and simmer 4 minutes. Uncover and add the caramelized onion, chicken pieces and the milk. Stir well, then cover and simmer 4 minutes.
Uncover. Add the cooked potatoes and stock. Stir well, then taste for seasonings, adding salt and pepper to taste.  Add the frozen vegetables, stir, and cover. Simmer 4 minutes. Serve, adding biscuits on the side if desired, to finish off the "pot pie" riff.

Sunday, November 03, 2013

Thankful


The Canadians are smart. They celebrate Thanksgiving when there is a true overflowing of bounty from the fields, with the season finally bringing all the remaining fruits and veggies to their peak ripeness. In the U.S.A. we don't celebrate this year until late November. I suspect that everything in my garden will be done before that, the plants pulled up and the mulch laid down, with just a few winter flowers keeping things cheerful as we head into the Christmas season.

I'm feeling thankful now, so why wait? I'm thankful for the gift of health, perhaps one of the most important ones to have. This has not been the best year in that regard, but at the moment all systems are go, I'm adding weight, gradually, at the gym when I work out, my body weight is slowly dropping and  by a number of other measures my health is good.

I'm grateful for time with my daughter and for being able to get together more frequently. She always amazes me with her creativity,


wonderful sense of humor, and ability to seize the day and have a good time, even when life is not easy and it would be easier to veg out or be dour. She doesn't even seem to know that she has a superior business sense, but it is evident when I listen to her talk about her work and the business systems and strategies. Once she becomes more experienced with her current field, it will be fun to watch her progress. We have a good time when we are together, so I'm glad that it is more than a few times a year.

Perhaps it is silly, but I'm really, really thankful that our latest project is winding up. The results are lovely and it looks like the house always had this entry.


Pi thinks that the sunny part of the deck by the front door was created just for him so that he could survey his domain. I know that the tiled floor will hold up well in the coming wet weather, with all those muddy boots and paws coming through. Learned a lot, too, but it's time to move on into late fall and all the celebrations that it holds. I'm also extremely grateful for Sweetie, his patience with me, his skill with tools, his extraordinary work ethic, and for all of the time and love he gives me. There are not enough words to express my gratitude for having him in my life.

This is only a few of the things that I am grateful for, but it is a start. What are you thankful for?

Saturday, November 02, 2013

It's Still Pumpkin Season


All Hallow's Eve, better known in the USA as Halloween, has always been one of my favorite holidays. Perhaps it's because it is one of the biggies of fall and because we get to dress up if we want to and be silly...plus, there is candy!

This past weekend my talented daughter came over and we invited a neighbor and her niece, too and had a pumpkin carving party. I'd never tried using those carving designs, but K showed us how to use them and punch dots to show where to carve,


and even the trick of cutting out the bottom of the pumpkin instead of a top hat, both to remove the seeds and stringy bits, but also so you can just pop the carved pumpkin over a candle or tea light. It was more challenging than I thought it would be, but the results were amazing! The pumpkin above has a leaf design that goes around the stem carved into the pumpkin, but not all the way through. I used some wood carving tools for that...very cool.
Here are some more:

Katia's Elmo...isn't he fun?

AM's howling wolf, carved on a green winter squash, which added depth and was harder to do.

K's scary jack o'lantern. Don't you love those curlicues at the top of the eyes?

And a wolf for J.

Plus a witch on a tall pumpkin.

This one K carved at home on Halloween, but it is a beauty, so I had to include it.


In keeping with the pumpkin theme, I made pumpkin muffins. They had a cream cheese/ricotta cheese filling and were delicious! We also had chili, mini carrots and crackers. Good times.

On Halloween I went to K's house and we decorated the front walk with the pumpkins,


 had more chili, and watched Wallace and Gromit and the Curse of the Wher-Rabbit. Followed by a Warriors game. I was pretty tired on Friday, so it's taken until today to post all this. Hope YOU had a great Halloween. She was costumed as an awesome cat woman.


Spicy Pumpkin Muffins with Creamy Filling
started with basic muffins in Joy of Cooking, then went wild

Batter:
2 ½ cups all-purpose flour
1 teaspoon baking powder
¼ teaspoon salt
1 teaspoon ground cinnamon
½ teaspoon ground cloves
¼ teaspoon ground allspice
1/8 teaspoon ground ginger
1/8 teaspoon ground nutmeg
2 large eggs ( or ½ cup egg substitute)
1 cup canned pumpkin – not pumpkin pie filling
¼ cup vegetable oil
¼ cup unsweetened applesauce
1/2 cup brown sugar
¼ cup molasses
¼ cup sour cream or plain yogurt
1 teaspoon pure vanilla extract
Filling:
4 oz. softened cream cheese
4 oz. ricotta cheese
1 tablespoon granulated sugar
Sparkling sugar (sanding sugar) for garnish


Preheat oven to 400 degrees F. Grease and flour (or use baking spray) one 12- cup muffin tin. Set aside.

In a large bowl or on a large sheet of waxed paper, measure out all of the dry ingredients and spices: flour, baking powder, salt, cinnamon, cloves, allspice, ginger, nutmeg. Mix together with a fork. Set aside.

In a large bowl, mix together the eggs, pumpkin, oil, applesauce, brown sugar, molasses, yogurt and vanilla.

Put the dry ingredients into the pumpkin mixture bowl. With as few strokes as possible, combine the wet and dry ingredients. Do not over mix


In a small bowl, stir the cream cheese, ricotta cheese and sugar together until thoroughly mixed.
Fill the muffin cups about one third full with the batter, then, dollop on about a teaspoon to a teaspoon and a half of the filling, then top the filling with more batter, dividing evenly among the cups. Sprinkle the tops with sparkling sugar.

Bake in the preheated oven 20 – 25 minutes, or until muffins spring back when the center is gently pressed. Filling may peek through. That's O.K.

Makes 12.

Sunday, October 27, 2013

Into Year 8


Recently I went back to look at some of the first entries in this blog, beginning October 22nd, in the ancient past of 2006. There were a lot fewer folks blogging then...I mean A LOT fewer. In fact, there were a whole lot fewer people on the Internet, especially older folks like me. That has changed as the baby boomers have more time on their hands as kids leave the nest and some of us retire. People of all ages have become more comfortable with technology during that time, too.

The fun thing about the Internet is that no one really knows anything about you, so when I started this blog I was accepted, or it seemed so, by bloggers all over the world and many years younger than I was. It has been fun to see the life changes that have taken place among many of the younger bloggers I met then. Some have married and have had kids, some have moved from amateur to professional photographers and writers, some have moved, change jobs and professions, discovered different ways to eat, different cuisines and culture, expanded their talents and skills, and more. We have lost some bloggers and gained many more. I've learned a lot and had virtual fun with them over the years.

My personal journey during these seven years has included new jobs, new skills from going back to school, a half dozen or more home improvement projects, a huge increase in cooking and baking skills and recipes, new virtual friends made, and a continued interest in food and how it can bring us together. I take lots more photos, and some of them are better than the ones from the first year. Now and then I throw in some photos of flowers (like above) or of a project or something else non-food, but mostly this blog is about food. My favorite thing still is to try a new recipe, often making changes to the recipe right off the bat, then to share the results with friends and family. Sharing good food around the table is one of the unfailing sources of joy. On occasion it is a flop and I resolve to try it again as written or make other corrections, but mostly I find a new recipe to keep, like the one I just posted for butternut squash and yam soup.

I get excited about discoveries, too, like the fact that you can make excellent caramelized onions in a crock-pot, with no stirring or watching to make sure they don't burn. You can make enough to use some and freeze some for later. These brown, savory, slightly sweet onions are made from inexpensive yellow onions and they add so much flavor to so many kinds of dishes...omelets, vegetables, savory tarts, pizza, in soups, over grilled meats or poultry, and so on. I bet you will find your own favorite ways to use them.

This is another one of the blessings of blogs...you can find amazing things like this. I was looking at one of the blogs on my sidebar (I forget which one) and it had a link to another blog, where I found a link to this recipe. I find that it's more fun to find recipes this way than just to use a search engine (if I have the time) because you never know what you will come across. Thank you Dorothy for the easy caramelized onion recipe!

Thanks for checking out my blog...do come back. You never know what you will find here, either. Onward...into year eight of blogging.


Dorothy’s Crock-Pot Caramelized Onions from the Shockingly Delicious blog

6 large regular yellow onions (3-4 pounds)
2-3 tablespoons good quality olive oil

Peel onions and cut them into thin slices; you should have about 6 cups (exact amount is not crucial, though). Mist the inside of the ceramic insert for the slow cooker, place onions in cooker and drizzle the oil over the slices. Cover and cook on high 10-12 hours, until the onions caramelize. They will have a deep brown color. Leftover caramelized onions may be refrigerated, covered, up to a week or two. They may be frozen up to 6 months. Makes 3 cups.

Friday, October 25, 2013

Soup's On!


With the coming of cooler weather, leaves are turning bright and muted shades of red, gold, bronze and orange. The summer crops are finishing up in the garden, with just a few cherry tomatoes still on the vines. I've harvested the butternut squash and have put them in storage, ready for winter cooking and baking, their sunflower color serving as a reminder that summer will come again.

Time, also, to make soup. A few days ago I made a quick soup with canned beef broth, celery, carrots, onions, corn, zucchini and some frozen meatballs and cheese-filled tortellini, plus herbs and spices. Four days ago I started some butternut squash soup based on a recipe from the Press Democrat October 9th newspaper. The recipe follows much of the one from Kay Baumhefner of Come Home to Cooking. I used half the amounts since it would take a week for us to finish 8 servings worth of this hearty soup. I used dried thyme instead of fresh, no bay leaf, Scotch whiskey instead of Grand Marnier and left out the spinach. For the onions I used some that I had cooked in the crockpot so there was no butter used, either, only a bit of olive oil. I'm going to post that crockpot caramelized onion recipe next because it is a keeper if you like your onions slow cooked, mellow, and brown.


This is a think ahead recipe; it takes two days before it's ready to eat. For this recipe you'll need either an immersion blender (preferred) or a food processor or blender, because part of the joy of this soup is the thick texture and creaminess. You make it over a couple of days, as I did. I roasted the squash and garnet yam first, then peeled and cut them into chunks (I cut the squash in half before roasting and used that opportunity to remove the seeds and stringy bits). They were stored overnight. The next morning I started the crockpot onions. That afternoon I used some of those onions, added them in a pot to the squash and yam pieces, added the herb and spices and stirred it all up with a cup of chicken broth. This sat in the fridge for a couple of hours until I had time to finish off the soup and fix the rest of the meal. I like to think that the passage of time helped meld the flavors, too.

The finished soup was fairly smooth, creamy, thick, beautifully flavored, hot and filling. I garnished each bowl with a dribble of heavy cream and a sprinkle of freshly chopped Italian parsley. Served up with a salad and grilled cheese sandwiches, it was a wonderful meal for a chilly evening in fall.


Butternut and Yam Soup with Crockpot OnionsBased on a recipe by Kay Baumhefner of Come Home to Cooking
Serves 4
2 1/2 pounds butternut squash
1 large garnet yam
1 tablespoon oil (I used only oil, no butter)
1 tablespoon butter
2 cups thinly sliced onions (1 large)
1 bay leaf (I didn't use this)
1/2 teaspoon dried thyme
1/2 teaspoon ground ginger
1/4 teaspoon freshly ground nutmeg
1 teaspoon salt
pepper to taste
1 tablespoon Grand Marnier (I used Scotch whiskey)
3-4 cups hot chicken stock, homemade if possible
1 can evaporated milk
drizzle heavy cream
garnish: finely chopped Italian parsley


Cut squash in half and remove seeds and stringy bits. Place cut side down on lightly oiled foil or parchment lined baking sheet with rim. Wash and pierce yam in a few places and place on baking sheet.

Bake in preheated 400 degree F. oven until tender (time will vary with size of squash). Remove from oven, let cool, peel both squash and yam, then cut each into small pieces. Set aside until onions are cooked.

Meanwhile, peel the onions, slice in half, then slice thinly. Spray the insides of a crockpot crock and add the onions. Drizzle with the oil (OK to use 2 tablespoons), cover tightly and cook on high for 6-8 hours. Onions will be light gold.

In a large, heavy bottomed pot, place the squash and yam pieces, the onions, one cup of stock, the dried thyme, ground ginger, and ground nutmeg. Stir, cover and let sit in fridge overnight. You can also cook the onions the following day and add them then, instead, but be sure to allow a few hours for the soup, including onions, to sit.

The next day, about 1/2 hour before serving time, add the salt, pepper and Scotch, then add 1 cup more of stock and the can of evaporated milk. Use an immersion blender to blend to a smooth consistency. If you don't have an immersion blender, process small batches in a food processor or regular blender.

When mixture is smooth, add additional stock until mixture is a little thinner than desired thickness. Set over low heat with a pot lid askew and heat gently, stirring often, until soup is heated through and thickens a little, about 15 - 30 minutes. Taste and adjust seasonings.

Ladle soup into soup bowls, drizzle with about a teaspoon heavy cream, swirl with a spoon, then sprinkle with parsley. Serve at once.

Monday, October 21, 2013

Pumpkin Season Treats


Have you ever been to a kitchen cabinet party? I've never even heard of such a thing, but Sweetie suggested the concept to our neighbors who are putting together their new kitchen and they ran with the idea. On Saturday there were eleven or twelve people spread out in the to-be-kitchen area putting together various Ikea cabinets. Our hostess brought out the parts and we did the assembly. Sweetie and I started with one of the more difficult ones (of course), but eventually we had it together and, in the process, learned how to put together the drawers and to adjust drawers and doors, so we were able to help others.

You can't have a party without food. Our host cooked up sausages and hot dogs on the grill and there were lots of condiments and go-withs. I had brought some pumpkin pie bars since they could be eaten as finger food. They were a hit and when I told G that I was leaving any leftovers with them, he assured me that I would have disappointed everyone if I took them home. Fortunately, these bars are baked in a 9" x 13" pan, so there were a few at home in the fridge.


These great little bars are from Very Best Baking blog and they have a thin cookie crust and a filling that is basically a pumpkin pie custard filling. The topping is a combination of chopped pecans and brown sugar. I think if I did these again I would just sprinkle on the nuts...didn't really need that extra sugar.


I cut these into fairly small bars for the party, but there were a few more that didn't fit on the serving plate for the party, so Sweetie was happy to have them for a snack the next day...and they were cut in slightly larger bars. Either way works and these are a great seasonal treat.


Pumpkin Pie Bars
from Very Best Baking
12 servings

1 cup all-purpose flour
1/2 cup old-fashioned or instant oats
1/2 cup packed brown sugar
1/2 cup butter or margarine, softened
3/4 cup granulated sugar
1 can (15 oz) pumpkin (I had a little extra pumpkin since I was using up leftovers from a larger can, so if you have more, add it. I added an extra 5 oz.)
1 can (12 fl. oz.) evaporated milk
2 large eggs

2 1/4 teaspoons pumpkin pie spice OR 1 1/4 teaspoon cinnamon, 1/2 teaspoon ginger, 1/4 teaspoon cloves and 1/2 teaspoon nutmeg
1/2 cup pecans, chopped
1/4 cup packed brown sugar

PREHEAT oven to 350° F.

COMBINE flour, oats, brown sugar and butter in small mixer bowl. Beat at low speed for 1 to 2 minutes or until crumbly. Press on bottom of ungreased 13 x 9-inch baking pan.

BAKE for 15 minutes.

COMBINE granulated sugar, pumpkin, evaporated milk, eggs and pumpkin pie spice in large mixer bowl. Beat at medium speed for 1 to 2 minutes; pour over crust.

BAKE for 20 minutes. Combine pecans and brown sugar in small bowl. Sprinkle pecan topping over filling. Continue baking for 15 to 25 minutes or until knife inserted in center comes out clean. Cool completely in pan on wire rack. Cut into bars.


Friday, October 18, 2013

Michigan Cherries in Soda Bread


On a recent visit, Big Sis brought a bag of wonderful, tangy, chewy, dark red dried cherries from Michigan. One of our sisters lives near Traverse City and they are famous for their cherries. It was an excellent hostess gift!

With such a bounty in hand, I had fun thinking about how to use those cherries. What I finally decided on was to use them in one of my favorite quick breads...Irish Soda Bread. Now my ancestors did use dried fruit in baking, but I think it was often raisins, currants, and prunes. Beautiful dried cherries like these would be pure luxury...and they were in this bread. I also added some golden raisins (more traditional) and the two went very well together.

Soda bread goes together quickly, especially because it does best with minimal handling. The craggy top is nice and crunchy while the interior is buttery and soft with bits of the fruit here and there. I was out of buttermilk, so I put some freshly squeezed lime juice in some milk to 'sour' it. Worked beautifully. In very little time I had some nice warm soda bread to go with a cup of Irish Breakfast tea. Now I'm going to think about what else I want to make with the rest of the cherries. Hmmm.


Irish Soda Bread with Golden Raisins and Dried Cherries
makes one medium loaf

1 cup (about) whole milk
1 tablespoon fresh lime juice
2 cups all-purpose flour
½ teaspoon baking soda
¼ teaspoon baking powder
½ teaspoon salt
3 tablespoons sugar
4 oz. (½ stick) cold butter, in thin slices
¼ cup golden raisins or currants
¼ cup roughly chopped dried cherries
 
In a small bowl combine the milk and the fresh lime juice. Let sit to 'sour' the milk, at least 5 minutes.
Sift the dry ingredients over the butter and cut in well with a fork or pastry blender. Add the raisins and dried cherry pieces; mix well.

Add the soured milk and mix just until moist - don’t over handle. You may need to add 2 - 4 more tablespoons of milk.  Some dry stuff is OK but the dough should be sticky.

Pat into a round on a parchment-lined cookie sheet. Cut a cross on top. Bake 45 minutes at 3500 F. Cool a bit before slicing.

By the way, today we painted the door for the front entry and installed it and the handle and lock set, so now the entry itself is finished!


Wednesday, October 16, 2013

Triple The Fun, Triple the Flours


The October bread for the always-up-for-something-new Bread Baking Babes, an awesome carrot bread brought to us by the adventuresome Heather at Kitchen of the Month Girlichef was a fun bread to make. It has three kinds of flour (rye, wheat and rice), and overnight sleep to add flavor, and a crunchy, crackly topping that I've heard called a tiger bread finish. Inside there are grated carrots, carrot juice, sunflower seeds (and, n some, parsley) so there is a lot going on with this bread. I love the texture of the topping and really love the tight crumb and mellow flavor. It is not overwhelmingly rye in flavor, nor carrot, nor wheat, just a nice combination of all those with some warmth and texture from the sunflower seeds. Great fresh from the oven and just lovely toasted. Have not tried it yet for grilled cheese, but I can see that it would be an excellent sandwich bread, especially grilled.
I only made half the recipe, using the measurements from Astrid. That was a great help having the measurements already halved, but I found that I needed a whole lot more water both for the poolish and for the dough. When I put together the rice flour topping, I decided that it was too thin with the measurements given, so I added more rice flour. I like how the topping turned out that way. It stayed on the loaves just fine and crackled when the shaped loaves rose, too. Baked, it was nice and crunchy.

I'll bet you want to be a Bread Baking Buddy this month and try out this wonderful, unusual bread, right? Once you do, send Heather an e-mail with your take on it, plus a photo or two. We'll be looking for you. While your are surfing the Internet, be sure to visit the other Bread Baking Babes. The links to their blogs are at the bottom of the post, and on the sidebar, too. Happy baking!

Carrot Bread, Half Recipe
adapted from Artisan Breads: Practical Recipes and Detailed Instructions for Baking the World's Finest Loaves by Jan Hedh
makes two medium loaves


Poolish:
3/8 teaspoon active dry yeast
118 grams lukewarm water (I used 200 grams, but start with less and add enough to make it a thick batter) 189 grams rye flour

Dough:
85 grams toasted sunflower seeds (I'm avoiding sesame seeds at the moment for health reasons, so I did extra sunflower seeds instead. Try not to almost burn them when toasting them as I did) 1 ¼ teaspoon active dry yeast
118 grams carrot juice lukewarm (I used a mixture of carrot baby food and water) 50 grams lukewarm water (I found I needed more liquid in order to have a decent dough) 85 grams grated carrots (about one large carrot)
450 - 500 grams bread flour (I used part bread flour and part whole wheat flour...which might be why my dough needed extra liquid!) 15 grams honey
2 tablespoons sunflower oil (I used canola oil)
1 ¼ teaspoons sea salt
Crackle Glaze (Topping)
1/2 teaspoon active dry yeast
100 grams lukewarm water
65 grams rice flour (I used a lot more, but didn't measure it, just kept whisking some in until I liked the texture)1 teaspoon sugar
1 teaspoon sunflower oil (I used canola oil)1/4 teaspoon sea salt

Day 1: Make the Poolish

Dissolve the yeast in the water, and let sit a few minutes to bloom. Whisk in the flour until smooth - if it is very thick, continue whisking in more water until it is the consistency of a thick batter. Cover with plastic wrap and let sit at room temperature for 24 hours; at this point it should be a bit bubbly.

Day 2: Baking Day

In a large bowl (or bowl of a stand mixer fitted with dough hook attachment), dissolve the yeast in the carrot juice and additional water, let sit a few minutes until it looks creamy (bloomed). Add the grated carrot, the lesser amount of bread flour, and the poolish to the bowl. Knead on low speed for 3 minutes. If the dough doesn't seem too sticky, then don't add any more of the flour; it will firm up as it is kneaded (plus you have more to add to it).

Add the oil to the bowl and knead for another 8 minutes. Add the salt, increase the speed, and knead until elastic, about 7 more minutes. At this point, the dough will not be sticky any longer. Use the extra flour, a tiny bit at a time, to remedy the dough if it is as you knead. Add the toasted seeds, and gently mix in.

Place the dough into a large, lightly oiled bowl or container and cover. Let sit for 60-90 minutes, knocking the dough back halfway through. To knock the dough back, remove it from the bowl and set it on a work surface. Use your hands to knock the air out of it. Fold the edges towards the center to form a cushion. Replace in the container, seam side down.

Day 2, later: Making the Crackle Glaze (Topping)
While the dough is rising, dissolve the yeast in the water in a medium bowl. Whisk in the remaining ingredients. It should be spreadable, but not runny, (which might mean whisking in more rice flour as I did). Cover with plastic wrap and allow to sit for at least 30 minutes before using.

Day 2, even later: Shaping and Baking
Turn the dough out onto a lightly floured work surface and divide into 2 equal parts. Form the portions into two round balls, and cover them with a clean tea towel. Let rest for 10 minutes.

After the rest, shape each circle of dough into an oblong loaf, by gently pressing ball down into a circle and then tucking/rolling into shape. Set loaves, seam side down, onto a lightly floured bread peel or thin cutting board. Glaze the loaves generously with the crackling glaze (you'll have a lot of leftover glaze), and leave to rise at room temperature for 60-75 minutes, or until the dough has doubled in size and the surface is crackled.

Place a baking stone into the oven, and preheat to 475° F during last 20 minutes or so of rise time.
Slide the loaves onto the stone (let them rise directly on a baking sheet or two if you don't have a stone - slide that into preheated oven) and spray generously with water. Close oven door. Lower the temperature to 400° F after 5 minutes. After another 10 minutes, open the oven door to let in a little air. Repeat two more times (every 10 minutes).(I skipped the spray of water and only opened the oven once, about halfway through baking to turn the pan in the oven. Crust was still awesome this way.) Total baking time will be about 45 minutes. Remove bread from oven (loaf will sound hollow if bottom is tapped) and cool on a wire rack.


THE BREAD BAKING BABES!
Bake My Day - Karen
Blog from OUR Kitchen - Elizabeth
Girlichef - Heather
Life's a Feast - Jaime
Living in the Kitchen with Puppies - Natashya 
Lucullian Delights - Ilva 
My Kitchen in Half Cups - Tanna
Notitie van Lien - Lien

Thyme for Cooking - Katie - our Round-up Babe   


Saturday, October 12, 2013

Fuzzy Quince Cake


Well, the quince are fuzzy, not the cake, but, except for the fuzz, from a distance, you might think quince are pears.


But then you get closer to the golden globes and you see the fuzz and smell the amazing scent that ripe quince has...and you wonder if they taste as great as they smell. Be sure to cook them because raw quince are inedible.

So you make an upside down cake and use lots of peeled, cored, sliced quince for the fruit, with a handful of chopped pecans sprinkled around them at the bottom of a cast iron skillet on top of a butter-brown sugar mixture. Before the cake is finished baking in that pan, the whole house smells amazing! Quince, butter, brown sugar all lend their fragrance.


Finally the cake is turned out onto a large plate, a few quince slices that tried to stay in the pan are returned to the cake and slices are cut and plated. The moment of truth has almost arrived...except with that melted sugar a few moments are needed so we don't burn our mouths.

Bliss! The quince still have some firmness but are sweet and delectable and have almost a floral taste. They go really well with the pecans and the slightly crunchy caramelized brown sugar. The buttery soft cake is the perfect complement to those tastes and textures. And it was easier to make than quince jelly!


This is the season for quince, but they are not easy to find. I'm lucky to have a very old quince tree at the end of the drive. This year there were lots of quince, but I truly didn't have enough time to really make use of them. I suspect that this cake will be it for this year. Quince take a bit more effort to prepare than apples (even though the prepared quince slices look a lot like apple slices) but it was worth it.

I used David Lebovitz's recipe for the upside-down cake and there was the perfect fruit-cake ration as he promised. The only changes I made were I used quince and pecans instead of apricots or plums and berries. I bet they would be outstanding, too. Maybe next time.


Quince Pecan Upside Down Cake
based on a recipe by David Lebovitz 
One 10-inch (25cm) cake, 8-10 servings

David says, "You have some latitude with the fruits that you use. Just make sure that whatever you use covers the bottom in a substantial layer, around double-thickness, since the fruit will cook down while baking and settle nicely into place. Berries" (or nuts) "...are good nestled in the gaps between the slices of fruits."
For the fruit layer:
3 tablespoons butter (45g), salted or unsalted
3/4 cup packed (135g) light brown sugar
fruit: 4  medium quince, peeled, cored and sliced thinly
a handful of pecans, roughly chopped (about 1/2 cup)
For the cake layer:
8 tablespoons (115g) unsalted butter
3/4 cup (150g) sugar
1 teaspoon vanilla extract
2 large eggs, at room temperature.
1 1/2 cups (210g) flour
1 1/2 teaspoon baking powder, preferably aluminum-free
1/4 teaspoon salt
1/2 cup (125ml) whole milk, at room temperature

1. Melt the 3 tablespoons (45g) of butter in a cast iron skillet, or cake pan Add the brown sugar and cook while stirring, until the sugar is melted and begins to bubble. Remove from heat and let cool.

2. Once cool, arrange the fruit in a pinwheel design and put the rest over that in a second layer, then scatter the pecans over, letting some settle in the gaps between the quince slices. Set aside.

3. To make the cake, preheat the oven to 350F. (190C)

4. Beat the 8 tablespoons 9115g) of butter and sugar until fluffy. Add the vanilla, then the eggs, one at a time, beating until smooth. Scrape bowl and beaters a few times during this step.

5. Whisk or sift together the flour, baking powder, and salt.

6. Stir in half of the flour mixture, then the milk, then the remaining dry ingredients. Do not overmix: stir just until the flour is barely incorporated into the batter.

7. Spread the batter over the fruit, then bake for 45 minutes to one hour (depending on the size of the pan, and the thickness of the batter.) The cake is ready when it begins to pull away from the sides of the pan and the center feels just set.

8. Remove from oven, let cool about 20 minutes, then place a cake plate on top, and wearing oven mitts, flip the cake out on to the plate, taking care, as there may be some hot caramel that might escape.

Serving: Upside Down Cake is best served warm, perhaps with whipped cream or vanilla ice cream. It can be made in advance, left in the pan, and rewarmed in the cake pan or skillet right before serving. It’s also very good rewarmed in a microwave, and served immediately.

Sunday, October 06, 2013

Pumpkin Zing


The yellow and brown leaves were swirling around this week in the brisk breezes. Autumn is such a great time of year. Pumpkins are showing up at the market and in front of the hardware store, ready to add their cheery color and wicked smiles once they become jack o'lanterns. Although this is the season of the year when things are ending in nature, it is often a time of new beginnings for me.

A couple of days ago a new stove and new dishwasher were installed. Any renovation of the kitchen that involves new cabinets or flooring or lighting or counter tops or new doorways or fewer wall will have to wait a while. The entry project has taken far longer than expected and Sweetie and I need a break from the stresses of construction. A new stove and dishwasher, however, are fine because they were installed in the very same places that the appliances they replaced lived. They are both stainless steel and quite beautiful in a way.


I decided that the best way to try out the new oven was to make a quick bread. Very little time is wasted if the loaf doesn't turn out well. We had some super ripe bananas, so banana bread went in first. Then I gave in to the rush of fall feelings and made pumpkin bread. Both were done in a much shorter time than in the recipe, probably because this oven has a convection feature. Unfortunately both were a little burnt on the bottom, too. I think I'll need to bake things on a rack that is higher in the oven.

Have you ever wanted to combine the flavors of pumpkin bread with the zing of a triple ginger molasses cookie? That's what I did and it is an exciting bread. The texture is moist from the pumpkin and the color is a nice deep orange, but the best part is the flavor. Pumpkin is the first note, but it is followed by spices of cinnamon and cloves and a burst of ginger. I sprinkled some sanding sugar on top as a reference to the sugar that the cookies are rolled in and it give a bit of a crunch which is really nice.

The banana bread was my usual one, so no recipe today, but I do want to give you the pumpkin bread recipe. It's a keeper.


Super Ginger Pumpkin Bread
a very gingery, molasses-y, nutty, pumpkin-y sweet bread

 2 cups all-purpose flour
½ teaspoon baking soda
2 teaspoons baking powder
½ teaspoon salt
1 teaspoon ground cinnamon
1½ teaspoon ground ginger
¼ teaspoon ground cloves
2 tablespoons chopped crystallized ginger
1 teaspoon finely grated peeled fresh ginger
1 cup canned solid pack pumpkin (not pumpkin pie filling)
1 cup brown sugar, packed
¼ cup milk
¼ light (mild) molasses
2 eggs
1 cup chopped walnuts
Sanding sugar topping

Preheat oven to 350 degrees F. Grease a 9x5x3 loaf pan.


Combine dry ingredients in a large bowl (both flours, soda and powder, spices).

Put the crystallized ginger, fresh ginger, pumpkin, brown sugar, milk, molasses and eggs in a mixing bowl and mix until well blended.

Add the dry ingredients and begin to combine. Add the nuts and mix just until all are well blended.

Pour into the prepared pan and smooth the top. Top with sanding sugar, sprinkled on thickly. Bake in preheated oven 45 to 55 minutes or until toothpick inserted in center comes out clean.

Cool in pan five minutes, then turn out of pan and cool on a cooling rack.