Sunday, September 20, 2015

A Seasonal Cake


The Cake Slice Bakers are winding down on our current book The Southern Cake Book by Southern Living Magazine. This month we were able to choose between a Black Forest themed cheesecake, a Caramel Coconut cake which used brown sugar to get the caramel flavor, Baby Sweet Potato Cakes with a sticky Pecan glaze, or my seasonal choice, Chocolate Zucchini Cake. "Adding fresh zucchini to the batter yields luxuriously dense, moist results."

Due the the extreme heat we had a little while ago, the zucchini production slowed down, but I still have plenty and this cake was perfect for making cupcakes for a potluck I attended. I didn't bother with making the batter gluten free nor dairy free since I wouldn't be eating these, so I made it following the recipe in the book, except for the icing. I used my food processor to grate the zucchini, so some of the threads of zucchini were a bit long, but they all broke down and disappeared into the cakes, creating a nicely moist crumb. There was on slight variation - I used chocolate chips instead of chopping the chocolate and no one seemed to mind. I made cupcakes for ease of serving...and because they are cute! Look at the great crumb on the cupcake below.


According to my taste tester (Sweetie) these are delicious little cakes and don't really need any icing. For the cupcakes for the potluck I used a modern version of 7-Minute Frosting because I was using it for the sheet cake I also baked for the potluck (as the birthday cake requested), so I had plenty for the cupcakes. The fluffy white frosting made a nice contrast to the deep, dark chocolate cake of the cupcakes. From the looks of it I would imagine that the chocolate icing in the book is delicious, too.


I think this is going to be my go-to recipe for chocolate zucchini cake. It has great flavor, excellent crumb and texture, and uses up some zucchini, too! I did use a high quality cocoa and recommend that you do that too if you have some on hand. Party on.


Friday, September 18, 2015

Almost A 'My Mother Used To Make This' Frosting


I made a birthday cake for a dear friend this week and decided that my cake icing skills were so rusty that the best bet was 7-Minute frosting. You may know of this stuff...fluffy, white like a marshmallow, soft and sweet, with a flavor mostly of sugar. My mom used to make it for my older sister's birthday cake, then cover the frosted cake with grated coconut. It was wonderful! I learned how to make it when I was about 10 and it wasn't my favorite because you had to hold a hand-held mixer over hot water for at least 7 minutes, which is a long time for a kid.

At my friend's party lunch, once the cake was served, I heard all around the table, "My Mom used to make this frosting...it's boiled frosting, right?" I assured them that it was very much like the frosting their Moms used to make, but with a wonderful difference. For this frosting, the ingredients (egg whites, sugar, corn syrup and a pinch of salt) are whisked over simmering water until the sugar melts, but then are put on a stand mixer and the whisk attachment gets put at medium speed to do the rest of the work. It's like magic I tell you...easy and beautiful frosting, too.

One of the delights of this frosting is that you almost automatically make beautiful swirls and peaks just by spreading it on the cake. I glammed it up by putting on multi-colored sprinkles, little silver dragees and Autumn Mix candy corns and pumpkins. There were even candles at serving time. Of course I forgot to take a photo of the full cake, but I did take a photo of the cupcakes that I also made and which had similar decorations on that fabulous frosting.

It may be a while before I post the cake, but I wanted my friends to have the frosting recipe now so that they can give their family a blast from the past by making this icing for their family's next cake.

We can all thank Nick Malgieri for the ease of his method for making this treat with modern appliances.


Fluffy White Frosting – a version of 7-Minute Icing

3 large egg whites (scant ½ cup)
1 cup sugar
pinch of salt
1/3 cup light corn syrup

Half fill a 1 ½ quart saucepan with water and bring to a boil. Lower the heat so the water simmers.
Use a hand whisk to combine the egg whites, sugar, salt and corn syrup in the bowl of a heavy-duty mixer. Place the bowl over the pan of simmering water and gently whisk until the ingredients are hot (about 130 degrees) and the sugar has dissolved.

Attach the bowl to the mixer and whip the icing with the whisk attachment on medium speed until cooled, about 5 minutes: touch the outside of the bowl – it should feel cool.

Use immediately to fill and cover a cake.

Makes enough for filling and covering a 9-inch two-layer cake.


Recipe from Perfect Cakes by Nick Malgieri

Wednesday, September 16, 2015

Babes Bake Shells


The wonderful Kitchen of the Month hostess, Heather of Girlichef, chose Conchas as the September bread for the Bread Baking Babes. Conchas are Mexican sweet rolls with a sort of sugar cookie topping that is incised in shell patterns. Although you can use natural colors including cocoa, finely ground freeze dried fruits and matcha tea, I went with gel food colors this time for my topping. The end result was so pretty!

I tried to make these in a gluten free version, but that was a washout. I used butter flavored shortening instead of butter and I guess the totality of the oil was too much for the little yeasties. They barely grew, even when I added more flours and yeast after the first rising time produced little result. The taste was OK and the topping was delicious, but the rolls themselves were the opposite of light and fluffy, more like dry and crumbly and pretty flat. I will probably try making them with butter and regular flour and just have Sweetie eat them. I'm beginning to think that the GF sandwich bread success was a fluke.


I'll almost guarantee that if you make these that they will be better than mine. The link for the full recipe on Girlichef is at the bottom of the Sugar Topping recipe. To become a buddy, bake the conchas, send a photo and link to your post to Heather and do it by September 29th. Would love to see your beautiful conchas! Also, be sure to check out all the other Babes sites. Will be trying to do the linky thing and if I am successful, links to Babes posts will be at the very bottom of this post.

I'm not going to give any recipe for the rolls because the results were so poor, but I will give my topping recipe, just in case you want to try GF topping. Here is what they looked like right after I added the toppings.


Sugar Shell Topping for Conchas: 

1/3 cup granulated sugar
2 tablespoons confectioners sugar

1/4 cup margarine or shortening (I used Earth Balance margarine)
1/2 cup all-purpose flour, plus more for dusting (1/4 cup almond flour and 1/4 cup tapioca flour)
1/2 teaspoon vanilla extract
Assorted gel food colors

While your conchas are doing the initial rise, make the sugar paste topping: Beat the sugars and margarine together until light and fluffy. Stir in flour and mix until a thick dough forms. Add additional flour if needed. Divide dough into 3 or 4 even pieces and tint each with food color. If the dough becomes sticky from the food color, add more flour. Cover the sugar toppings with plastic wrap so they won't dry out until you need them to top the formed conchas.

Making the Sugar Topping:
Divide your sugar topping into 12 or 16 equal pieces (same number as dough balls). Roll out the sugar paste pieces on a lightly floured surface (I used confectioners sugar instead of flour). Cut into 2 1/2-inch rounds with a cookie cutter (or pastry ring or ring with diameter to fit top of concha, covering whole of top). Use the pastry ring to score lines into the paste to resemble the ridges on a seashell (concha). Don't cut all the way through the paste if possible. Transfer the scored sugar paste rounds to the buns using an offset spatula. If the paste doesn’t want to adhere naturally, use a pastry brush to apply dots of water on the underside before applying to the buns.

Let buns rise as directed in the conchas recipe, bake, cool and enjoy.

Monday, September 14, 2015

Apricot Scone with Almond Flour


Although I had a really bad loaf of bread recently using gluten free sourdough starter and buckwheat flour, in general I'm starting to get the hang of gluten free baking. Recently I made some delicious scones with dried apricots. I used King Arthur Flour almond flour and white rice flour, plus some tapioca flour to replace the all-purpose wheat flour and I increased the baking soda to a teaspoon, plus used yogurt and water instead of buttermilk, but otherwise it was pretty much the same as one I baked before. I big difference was using very cold butter flavored vegetable shortening instead of butter. Needless to say, it doesn't taste like a wheat flour/butter scone, but it was tasty and the texture was pretty good, if just a bit gritty from the almond flour.

In case you are keeping track, I cut the last pieces today for Phil's stained glass piece and finished the copper foiling. Hope to work on it some more tomorrow.


Apricot Almond GF Scones

Heat oven to 425 degrees F. Grease a cookie sheet.

3 cups all-purpose flour (substitute equal parts almond flour, white rice flour and tapioca flour)
½ cup sugar
2 ½ teaspoons baking powder
1 teaspoon salt
1 teaspoon baking soda
¾ cup unsalted butter, at room temperature  (substitute equal amount very cold butter flavored vegetable shortening)
¾ cup finely diced dried apricots
1 cup buttermilk (substitute 3/4 cup plain yogurt mixed with 1/4 cup water)
1/2 teaspoon almond extract
2 egg yolks

Combine flours, sugar, baking powder, salt, and baking soda in a large bowl. With pastry blender or two knives, cut in vegetable shortening until mixture resembles coarse crumbs. Add diced dried apricots.
Combine yogurt mixture and almond extract in a bowl or measuring cup. Whisk in the egg yolks. Pour over crumb mixture. Stir together with fork just until mixture comes together. Gather dough gently into a ball; knead 4 or 5 times to make sure all components are combined well.

Cut dough in half and transfer pieces to prepared cookie sheets. Shape each piece into a 6 inch x 1/4 inch thick circle. Using floured knife, cut each circle into 8 wedges.

Optional: Brush top with egg beaten with 1 tablespoons water, then sprinkle with sugar.

Bake 15 – 20 minutes until toothpick inserted in the center comes out clean. Serve warm or at room temperature.
Makes 16 scones.

Friday, September 11, 2015

Almost Salad Nicoise


Classic Salad Nicoise has tuna, potatoes, green beans, hard cooked egg, black olives and salad greens with a garlic dressing. For dinner one evening this week I made my own version which had many of those elements, but I decided on a citrus-mustard dressing. Sweetie had bought some beautiful tuna steaks and grilled them so that they were still very pink inside, then he sliced them to put on top of the salad.

I cooked red potatoes and green beans and kept them hot while I made the dressing. The salad greens were comprised of romaine, iceberg, red cabbage. There were also some non-traditional carrot slices. When the tuna slices were ready I drained the potatoes and green beans and put them on top of the salad greens in a large bowl. The dressing when on next and it was all tossed together. Because I forgot to cook them ahead of time we didn't have hard cooked egg. Because I really don't care for olives, those were not included either. As you can see, not a classic at all, but still an interesting dinner for a hot evening. Our plates were piled with the dressed greens mixture and the tuna slices placed on top, to one side. I really enjoyed the contrast between the icy salad greens and the warm potatoes, beans, and tuna. An additional salad of fresh tomatoes, sliced, then dressed with balsamic vinegar, olive oil, and pepper completed the plate. It was delicious!

We have been having a heat wave with three straight days of 102 degree highs, preceded by a couple of days around 100 degrees and followed today by a high in the 90s. It should be in the 80s tomorrow and I am very grateful. Hot weather has never been my thing.

Citrus Mustard Dressing

grated zest of 1/2 medium orange
grated zest of 1/2 lemon
grated zest of 1/2 lime
juice of 1 lemon
juice of 1/2 lime
2 teaspoons Dijon style mustard
salt and pepper to taste
about 1/4 cup good quality olive oil

Place the grated zests and the citrus juice in a small bowl. Whisk in the mustard, salt and pepper. Continue whisking and very slowly add in the olive oil.

Thursday, September 03, 2015

A Bread For Zucchini Madness


It happens every year...too many zucchini. It may be from your own plant, it may be the sneaky neighbor who deposited a big bag of them on your porch early in the morning, or maybe you got carried away at the farmer's market. Now you are looking for ways to use them up...look no further.

My great good friend NoHandle sent another wonderful guest post. You are going to want to make this zucchini bread my friend. If you really like it, maybe I can get some of my extra zucchini to you (just kidding). The best part about this bread is there is no chocolate. Although I love chocolate, it doesn't love me at present. Thanks NoHandle!

Zucchini Bread Again?

Perhaps the only thing more pervasive than the excessive production of the zucchini plant (it would be considered a weed if the fruits weren't edible) is the profusion of recipes you find about now to create uses for the aforementioned excessive production. Leaving bags of the stuff on neighbor's porches can go undetected for only so long, and then they force you to stop. And no fair setting the bag on fire; that is a different prank. 

At any rate, I noticed, in my hour of need, that  my favorite blog (this one) had almost all chocolate zucchini bread recipes, and so cried out for a non-chocolate rendition. (I'm a big fan of chocolate, but not everyone in the household is, and I don't want to be the only consumer of the bread; that would partially defeat the purpose. She really likes this one.) So, I cast about and found a decent looking one on the Food and Wine site. It had only one ingredient that I didn't currently have in the cupboard (and that was just a matter of timing) so I printed a copy and off I went.


To begin with, most recipes say a “medium” zucchini produces 1 cup of shredded (and squeezed out) flesh. I must have had a monster then. It produced a bit over three cups, so although the (doubled) recipe called for two cups, three cups it was to be. The remaining quarter of a cup or so went to compost.


The next issue was with the yogurt, for which the recipe the recipe called “non-fat” which in my mind meant “not really food” and the grocery store was apparently in the former camp. I ended up with a honey-flavored full-fat product, which meant there was a measure of sugar in it. The amount of sugar called for in the recipe seemed excessive, so I didn't feel bad about cutting it back in this case. I also ended up a bit short on the flour, so in included a half-cup or so (I didn't measure it) of whole wheat flour to round it out. With the extra zucchini, I wasn't too concerned with exact measurement, I just added a bit to just about everything (except sugar and oil; with full-fat yogurt, I slacked off on the oil too). And of course this was double the recipe (two loaves instead of one) which led to needing an extra large bowl to combine everything where the recipe called for only a large bowl. I think we've all been there when scaling up recipes. Mine was a glass salad bowl.


Oh, the recipe calls for coarse chopped walnuts, but we prefer smaller bits, so I used my trusty nut grinder, which produces bits about the size of half of a lentil, and smaller.


My other departure was to not consider sugar a “wet” ingredient, and including it with the dry. I mixed the eggs and oil first to create an emulsion, then added the yogurt, which preserved it. The dry (plus sugar) ingredients were already combined, so I added some shreds, and some of the liquid, to the dry, mixed that up, and added the rest. I don't have a stand mixer, but I recommend one for this application. Mix at slow speed, as the flour and batter tend to fly. My heavy-duty hand mixer was adequate to the task, but a lesser one might have started smoking, quite literally, from the strain, and that would have ruined the aroma from baking. It is a very, very dense batter. I also poured the batter alternately into the pans to keep the results consistent. I weighed them both to ensure they had about the same amounts. It was about 56 ounces each (including the weight of the pan, a bit over a pound) in case you were wondering. 

The baking time is a rather lengthy hour and ten minutes, and with two moist cakes in the same oven, a bit longer is better. I was satisfied at one hour and fifteen minutes, but another five or so wouldn't hurt. There is another long wait as the loaves cool, at least a half-hour. This is quick bread for the patient.


Note that even with surplus zucchini the pans were not quite full when baking was done. Freeze at least one to bring back memories of the closing days of summer (and the bounty of the zucchini plant) in the midst of winter, and enjoy the other while still warm (and for a few days thereafter). 

Your neighbors will appreciate this more than the raw fruit, so bake some more! (You have more zucchini, don't you?)

Here is the recipe as I did it. The measurements are approximate, but this is forgiving one.

Zucchini Bread

Ingredients:
1 ½ cup walnut halves
4 cups all-purpose flour (substituting about ½ cup whole wheat flour works too)
1 tsp. baking powder
1 tsp. baking soda
1 ½ cup sugar (scant)
4 large eggs
¾ cup vegetable oil (I used pure olive oil; not extra virgin nor even virgin. It has nearly no olive taste.)
1 cup honey-flavored Greek yogurt
3 cups coarsely grated zucchini, squeezed in a ta towel to remove as much liquid as you can

Directions:
Preheat the oven to 325 degrees. Butter (or cooking spray) and flour two 9-by-4 ½ inch metal loaf pans. Spread the walnut halves on a small (cookie) sheet pan, and toast them for about 10 minutes, until they are fragrant. Cool them in the freezer for 5 minutes while you make the batter, then chop in fine pieces.

In a very large bowl, whisk the flower with baking powder, baking soda, and salt. If you combine the sugar at this point the dish still works. In a medium (medium is still big enough) bowl, beat the eggs and vegetable oil together until well combined, and then beat in the yogurt. Add the wet ingredients to the dry ingredients, along with the grated zucchini and toasted, chopped walnuts. I found adding about 1/3 first of both, beating, and then the remaining made the process easier and the result smoother. Beat until the batter is evenly moistened.


Pour the batter into the prepared pans and bake for 1 hour 15 minutes, until the loaf is risen and a toothpick inserted in the center comes out clean (about 195 degrees in an instant read thermometer).

Let the loaf cool on a rack for 30 minutes before un-molding and serving. A few additional minutes cooling of the released loaf will make slicing easier, as the center is still fairly moist.


Enjoy, NoHandle.

Tuesday, September 01, 2015

Harvest Time Combo


September is finally here. That means a number of things, but two that thrill me are that fall is just around the corner and that the garden is producing at capacity, with lots and lots of delicious veggies, herbs and fruits to enjoy.

The smaller tomatoes have been prolific for weeks, but the large tomato plants (this year only three plants-because of the drought-and all the Black Krim variety) are just now providing ripe fruit to enjoy. My favorite way to enjoy them is sliced, with some olive oil and balsamic vinegar splashed on, a grinding of black pepper, and a sprinkle of chopped basil lending both fragrance and flavor.

One of my favorite recipes using the smaller grape tomatoes is Mediterranean Couscous with Chicken, but wheat couscous is off my list of foods at the moment. I was pleasantly surprised to find Lundberg's brown rice couscous at the store Monday morning. They are a California company that grows all sorts of rice, so I bought a box and immediately thought of making that recipe. I had some chicken, the lemon, basil and small tomatoes and, although it would effect the flavor, I decided to forgo the feta cheese since cheese is also off the list. The pine nuts would come from my fridge, not the couscous box, and would be for Sweetie...yes, another food not on the list. Actually we never did get the pine nuts on this dish but I did get a nice phone visit with our daughter instead.

It has been very warm around here for the last week or so and I have been sort of hibernating, especially in the afternoons. If we cool down the house overnight and then close the downstairs windows and connecting doors, the downstairs keep pretty cool until dinner time. I have been doing a lot of reading. In the mornings when it is cooler, I've been working on a stained glass piece I'm making for my younger brother's round number birthday. It's been ten years since I've done any stained glass work, so my skills are rusty, but I finally have all the pieces ready and on the lightbox and it looks pretty nice. Now for foiling, fluxing and soldering. It may not end up being a perfect piece, but I think it will be lovely and suit my brother, too...although he may be perfect.


The brown rice couscous is prepared differently than regular couscous, which is basically steamed. With the brown rice version you begin by simmering the broth and couscous, then taking it off the heat and letting it steam. It adds about 15 minutes to the process, so build that into your meal prep plan. You can increase the lemon zest and lemon juice and it will be even better. I decided that about 2/3 of the tomatoes (picked right before dinner) were plenty but go for the whole amount if you just love cherry tomatoes.


Mediterranean Chicken Couscous
Serves 8 (more if part of a buffet or potluck)

1 1/4 cups low-sodium fat-free chicken broth
1/4 teaspoon dried thyme
1/4 teaspoon poultry seasoning
1 (5.6 oz.) package Lundberg brown rice couscous
3 cups chopped cooked chicken (or turkey - I used roasted turkey thigh meat)
1/4 cup chopped fresh basil
1 pint cherry or grape tomatoes, halved
1 1/2 tablespoon fresh lemon juice
1 teaspoon grated lemon rind
1/4 teaspoon freshly ground pepper
Garnish: fresh basil leaves

(Note: You'll need to buy a 2/3 oz. package of fresh basil and 1 rotisserie chicken to get the right amount of basil and chicken for this recipe. Substitute 3-4 teaspoons (I used 3) dried basil if you can't get fresh. 3 cups of leftover cooked chicken or turkey in large dice works fine, too.)

Place chicken broth in a medium saucepan and bring to a boil. Add the dried thyme and the poultry seasoning.  Place couscous in the pot, and stir. Cover and simmer over low heat for 11 minutes, then remove from the heat, keep covered, and let stand 10 minutes. Fluff couscous with a fork, stir in chicken and next 5 ingredients. Serve warm or cold. Garnish with fresh basil leaves or a sprinkle of toasted pine nuts, if desired.

Monday, August 31, 2015

Peach Cobbler


Summer time and the kitchen is peachy. After months of trying to find ripe peaches at the market I finally found some freestone ones and have been enjoying them in their glorious, peeled, juicy perfection with lunch. No embellishments are necessary when peaches are this good. Each slice was a small miracle of sweet peach flavor, juicy, just firm enough, each with a little tang to offset the sweet.

So why did I make cobbler? Well, Sweetie pointed out to me that there were four or five large peaches and they were perfectly ripe. Since I had been eating one a day, soon there would be a number of peaches that were over-ripe and mushy and not worth bothering with. The solution was to bake with them and eat the cobbler over two or three days.

For this dessert I tried the Bisquick gluten free mix, adding some butter flavored shortening, sugar, egg yolks (because I had two leftover egg yolks) and vanilla, plus water instead milk for the liquid. It made a pretty nice topping, although very yellow from the yolks. If I did it again, I would either make less topping or use more peaches because the proportion felt wrong. Otherwise, a win! As you can see from the photo, the topping was softly biscuit-y and had nice crisp bits where the crust had browned, plus soft, sweet silky peaches, lightly scented with nutmeg. Summer in a bowl.


Peach Cobbler -GF
Elle's own recipe

4-5 large, ripe peaches - peeled, pitted & slices
sugar to taste - if very ripe will not need any
1/4 teaspoon freshly grated (if possible) nutmeg
1/4 cup water
1 cup Bisquick Gluten Free Mix
2 tablespoons sugar
1/4 cup butter flavored shortening
1/4 cup water (add more if topping is too dry)
2 egg yolks
1/2 teaspoon vanilla

Heat oven to 400 degrees F.

In a small bowl, mix the peaches, sugar if using, and nutmeg. Place in a greased 8 x 8-inch baking pan. Pour in the water. Cover tightly with foil and bake 10-15 minutes, or until fruit releases its juices.

When peach baking time is almost finished, mix the Bisquick GF mix and sugar in a small bowl. Cut in the shortening with a pastry cutter or two knives, until fat is in pea sized pieces.

In another small bowl, mix together the water, egg yolks and vanilla. Add to the baking mix mixture and stir with a fork until just mixed. Mixture should be consistency of biscuit dough.

Remove the hot fruit from the oven and dollop the biscuit dough over the hot fruit, distributing over all the fruit, but leaving small places where you can see the fruit, and letting the topping be very uneven.

Bake for 15 minutes, or until topping is golden brown, especially at the highest places. Cool. Serve warm or at room temperature. Garnish with dairy free ice cream, blackberry sauce, or other topping of your choice.

Monday, August 24, 2015

Old Favorite Anzac Cookies A New Way


This has been a summer of integrating old and new. On the new deck we used some of the old framing, but then used lots of new lumber for the decking and railings. We have a new outdoor carpet anchoring an outdoor living room with a very old wicker couch and chair and an almost new rocker.
Here is Sweetie enjoying the rocker and some dragonfly lights from our daughter.


Some treasure from my Mom's home arrived a few weeks ago and I have been finding them new homes around the house so reminders of her are everywhere. It makes me smile.

I made Straight Shooter Anzac Cookies for his birthday. Since I wanted to be able to eat some of them myself, I made them gluten and dairy free...old and new again. The old recipe was given to me by MaryEllen from Perth, Australia, the wife of an old friend of Sweetie's. Since ANZAC stands for Australia and New Zealand Army Corps and since Anzac cookies were sent to the Australian and New Zealand troops during (I believe) the first and second World Wars, and also sold to raise money for veterans between the wars, getting a recipe for the cookie from an Australian born and bred is special. I hope she is OK with having a gluten free version.

To make the change, I substituted butter flavored Crisco for the butter. Since both get melted I don't think it makes a big difference in the texture and the flavor will be a little different with any butter substitute. I was amazed at how the butter flavored Crisco kept most of the buttery flavor in the cookies. The other change was to substitute gluten free baking mix for the all-purpose flour and self-rising flour. I also added some baking powder and salt since I wasn't using self-rising flour. I left out the nuts, but did put in some golden raisins. Straight Shooter was quite please and, except for the cookies being a little more crumbly than usual, he said they were just like his favorite old Anzacs.

So why should you make these? Well, they are fully flavored and chewy with the coconut, just a little sweet with the brown sugar, golden syrup and raisins, and really delicious, plus they are a great cookie with milk, tea, or coffee...or by themselves.


ANZAC Cookies Gluten Free
based on a recipe from MaryEllen Godfrey

1/2 cup (1 stick) non-dairy butter, melted (I used butter flavor Crisco shortening
2 tablespoons hot water
2 tablespoons golden syrup
3/4 cup brown sugar
1 cup gluten free rolled oats or regular rolled oats
1/2 cup gluten free flour mix (I used a mixture of brown rice flour, white rice flour, tapioca flour, and cornstarch)
1/4 cup gluten free oat flour
1/2 teaspoon baking powder
1/4 teaspoon salt
1/2 teaspoon baking soda
3/4 cup coconut
1/2 cup golden raisins
1/2 cup chopped nuts (optional)

Preheat oven to 350 degrees F. Grease a cookie sheet, mini-muffin pans, or decorative small cake pans.

Melt the butter or shortening in a large pot and mix in the hot water and the golden syrup and brown sugar.

In a bowl mix together the rolled oats, flour mixture, oat flour, baking powder, salt, baking soda. Add this mixture to the pot, along with the coconut, raisins and nuts (if using). Stir until well blended.

Form cookies by dropping by teaspoonfuls onto the baking sheet or by filling the mini-muffin pans or small decorative cake pans. Cookies don't rise much but they spread a little so space them a couple inches apart on the baking sheet if using.

Bake in preheated 350 degree F oven for 10-15 minutes or until golden brown.

Cool on a rack 5 minutes, remove from pan and cool on a rack until completely cool. Enjoy. Store any not eaten in an airtight container.

Saturday, August 22, 2015

GF Pasta With 'Too Many Zucchinis' Sauce


It's that time of the harvest season again when the zucchinis are producing like crazy and challenging cooks to find ways to use them up. Although I enjoy zucchini cookies and quick breads/tea cakes, my favorite way to eat them is just grilled with a spritz of olive oil to keep them from sticking to the grill grates.

My second favorite way is to use them in this pasta sauce. This recipe is almost 40 years old and comes from the food section of the Oakland, CA newspaper the Oakland Tribune. It was originally a vegetarian recipe but since the men I marry are meat and potato kinds of guys, I soon figured out a way to add some ground meat. First I went with ground beef, but for about 30 years I've used ground turkey instead and I like it better that way. You can also just skip the meat, add more squash and tomato sauce and a little extra olive oil to the pan, and it makes a wonderful vegan sauce. The great thing about zucchini is that it soaks up whatever flavors you put with it. Make this sauce a half hour before you eat and it almost tastes like you have been simmering it for hours, especially with the no meat version.

You can also make a lot of this without the meat and freeze it for future meals. If you are really handy you can take fresh tomatoes and peel, core and seed them, chop the tomato that is left and use it instead of the canned diced tomatoes. That's what I did this time and it gave it an intense, end of summer tomato flavor and color.

Now that I am eating gluten free I took some time and found a wonderful rice based pasta to serve the sauce with. It is not vegan since it has eggs, but if that isn't a concern for you it might be worth finding out if it is sold in a store near you, or check out the online link HERE. The brand is jovial and I used their tagliatelle traditional whole grain egg pasta. It seemed to take a little longer to cook than I had expected, but you would never know it was gluten free...the taste and texture were just like the best wheat based pasta.


Too Much Squash Pasta Sauce

1/2 lb ground meat (beef or turkey - I use turkey)
1-2 tablespoons olive oil
1/2 medium onion, chopped
2 cloves garlic, minced
2 medium squash, cut into chunks (any summer squash, but zucchini works best)
1 15 oz. can tomato sauce
1 15 oz can diced tomatoes in juice
2 teaspoons oregano
1 teaspoon dry basil
1/4 teaspoon dry rosemary
note - fresh oregano, basil and rosemary can be used - use twice as much, or more, to taste
1 teaspoon salt
1/4 teaspoon pepper


In large skillet heat oil over medium high heat. Brown ground meat. Set aside.

Using same pan, cook onion and garlic until translucent and barely brown, about 5 minutes, stirring now and then.

While meat and then onions/garlic cook, put half of squash in a blender. Add 1/2 of the can of tomato sauce and 1 tablespoon of water. Pulse blender, removing top and stirring every couple of pulses, until mixture is broken down but still chunky. Once onions have finished, pour this mixture into the pan. Lower heat to simmer and deglaze the pan with the tomato mixture, scraping up the browned bits.

Return browned meat to the pan and stir. Put the rest of the squash into the blender, add rest of tomato sauce, pulse the same way the first batch was done. Add this batch to the pan of meat mixture and stir.

Add diced tomatoes, herbs, salt and pepper to pan, stir.

Return to boil, cover, turn down heat and simmer at least 2 minutes, stirring about every 10 minutes to avoid scorching. (The longer the sauce simmers, the better it will taste. Cooking it the day before it is served, chilling overnight and reheating right before serving, is even better.)

While sauce is simmering, bring large pot of water to a boil. Add pasta and cook according to directions on package, until al dente. Drain pasta well.

Put generous serving of pasta on plate. Top with pasta sauce and garnish with fresh basil and/or good Parmesan cheese shards.

note - this sauce tastes even better if allowed to cool and left in the refrigerator overnight to blend the flavors. Reheat over low heat until simmering.

Thursday, August 20, 2015

Getting Peachy With The Cake Slice Bakers


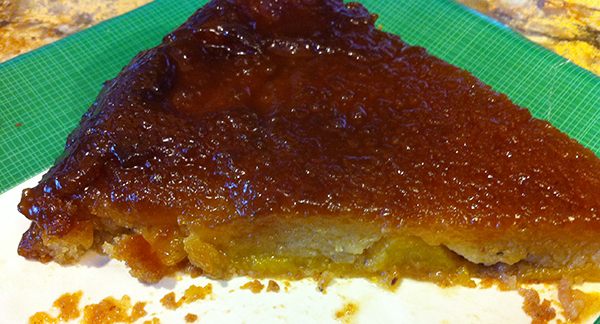
There is something so summery about a cake topped with peaches. This one has a slightly chewy super sweet caramel topping that surrounds the peaches, plus a nutmeg scented very moist cake. 

When I decided to eliminate gluten and dairy from my diet I knew that baking would be a challenge but sort of forgot that baking a recipe with my wonderful baking group, the Cake Slice Bakers would be even more challenging because there are four recipes to choose from, not a whole book's worth, and some recipes really depend on good butter or sour cream or on the gluten's elastic properties.

Fortunately this month the Peach Upside Down Cake is the perfect recipe to make and all I had to do was substitute non-dairy butter in the batter and the topping and to use a GF flour mix that is light and similar to cake flour, which I decided meant white rice flour and cornstarch and some tapioca flour. As it turned out, I probably should have added some egg replacer or maybe oat flour because the cake was a really thin layer...I think some of it dissolved into the topping.


The topping of caramelized brown sugar and sliced peaches was awesome and really made the cake. Baking it in the cast iron skillet worked really well and it came out of the pan easily.


 Sweetie and I shared with a couple of neighbors one evening and then with our daughter the next day and everyone really liked this version of the cake.

Do check out the bottom of the post which should have links to other Cake Slice bakers and consider visiting their blogs to see which cake they chose this month! Sure to be fun.


GF Peach Upside Down Cake
based on The Southern Cake Book

3 - 4 peaches, (about 1.5 pounds)peeled and cut into 1/3-inch thick wedges
1/4 cup cornstarch
1/4 cup tapioca flour
1/2 cup white rice flour
3/4 teaspoon baking powder
1/4 teaspoon baking soda
1/2 teaspoon salt
1/4 teaspoon freshly grated nutmeg
1 1/4 cups granulated sugar, divided
3/4 cup non-dairy butter (like Earth Balance), room temperature, divided
1/2 cup firmly packed brown sugar
1 teaspoon vanilla extract
2 large eggs
1/2 cup yogurt

Preheat oven to 350 degrees F. Line a baking sheet with parchment paper.

Sift together cornstarch, tapioca flour, white rice flour, baking powder, baking soda, salt and nutmeg.
In a 10-inch cast-iron skillet cook 1/2 cup granulated sugar over medium heat 10 minutes or until sugar melts and turns a deep amber color. Remove from heat. Immediately add 1/4 cup non-dairy butter and stir vigorously until incorporated with the melted sugar. Coat bottom of the skillet evenly with the mixture and arrange peaches over the mixture, overlapping as needed. Sprinkle the brown sugar over the peaches. Set aside.

In a stand mixer bowl beat the remaining 1/2 cup non-dairy butter until fluffy. Add the vanilla and remaining 3/4 cup granulated sugar and beat until smooth. Add eggs, 1 at a time, beating until blended after each addition. Scrape sides and bottom of bowl and beater as you go along. Add sour cream, beating until blended. Gradually add sifted flour mixture, beating at low speed just until blended and stopping to scrape bowl as needed. Spoon batter over peaches in skillet. Place skillet on prepared baking sheet.

Bake at 350 degrees F for 40-50 minutes, or until golden brown and a toothpick inserted in center comes out clean. Cool in skillet on a wire rack for 10 minutes. Loosen around the edge of the skillet with a knife and carefully invert the cake onto a serving plate, spooning any remaining liquid over the cake.

Cool a bit before serving as molten sugar can burn.


Garnish with fresh peach slices, whipped cream and/or ice cream.

Check out the August Cake Slice Bakers:


Monday, August 17, 2015

Baking Center Experiment #3 - Gluten Free Sandwich Loaf


Well over a dozen days without gluten, dairy (except for yogurt), caffeine, seeds and nuts (except for almond flour and peanut butter), alcohol, red meat and all the foods eliminated a couple of years ago due to need to reduce oxalate intake...and yes, there are still plenty of things to eat...and I am feeling much better, with more energy and the 'plumbing' is working close to normal. To this point I have used a purchased GF sandwich loaf when I wanted a slice of bread, but it is pretty much like cardboard in texture. I went online and did some research and combined a few recipes trying to create one that has elasticity as well as a nice crumb and crust. Hoping that it tastes good, too.

I thought a bit about what makes artisan bread taste so good and one thing is the flavor you can get if you let the dough or a poolish or starter sit for a day or two in the fridge, so I decided to ignore the recipes I had seen that did it all on one day, to allow for that. I used a cup of water and put that in a small bowl along with the yeast. Once it had proved, I stirred in a cup of a brown rice flour mixture that was similar to ones I had seen online. It sat on the counter for about an hour and I could see that it was active, so I punched it down a bit and covered it in plastic wrap and put it in the fridge for a little over 24 hours. Once it came back to room temperature I continued on with my recipe, adding another cup of water and the starter after I had mixed some honey, eggs, butter and vinegar together. After the starter had incorporated, I put in the rest of the flour mixture which I had enriched with xanthan gum for stability and an egg replacer for elasticity. I beat the batter even though there isn't really gluten to develop, but a lot of recipes seem to do that.

I put all the batter into one big bread pan so that the slices would be big enough for sandwiches. It did dip in the middle as it cooled after baking as it seems these GF breads often do, but not a lot and the slices are nice and large and the crust is great! Once the loaf had risen and was ready to bake I sprinkled a little GF flour mixture at random on the top for an artisan look.

I had a half slice plain once it had cooled off and was happy with the texture and mostly happy with the flavor, but there was a sort of metallic aftertaste that I don't care for. More experiments may be needed to figure out how to get rid of that. It wasn't too noticeable the next day, so maybe I can keep using this recipe as is. It makes great toast, too. Overall it is a much nicer bread than the stuff from the grocery store. Future loaves will probably include GF oats, mashed real potatoes, potato water, and buckwheat and/or spelt flour for more flavor.

By the way, the bread wasn't ready until quite late because Sweetie, Pi and I went to the beach for lunch and the afternoon because it was so beautiful and we wanted some fun time together. A happy day was enjoyed by all. I'm glad we went because it turned hot a couple of days later and smoky and very hot (100+) over the weekend and today. Glad it is supposed to cool off tonight and be only in the mid-80s tomorrow.


GF Sandwich Bread

1 1/2 cups brown rice flour
1 1/2 cups tapioca flour
1 1/2 cups cornstarch
3 tablespoons potato flour (not potato starch)
2 /14 teaspoons (1 package) dry yeast
1 cup warm water (tepid)
1 tablespoon xanthan gum
1 tablespoon egg replacer
2 teaspoons salt
1/2 cup powdered milk
2 teaspoons cider vinegar
1/3 cup honey
3 large eggs, room temperature
1/4 cup non-dairy butter (like Earth Balance), room temperature
1 cup warm water (tepid)

In a large bowl whisk together the brown rice flour, tapioca flour, cornstarch, and potato flour. Remove 1 cup of this mixture and set the rest aside, covered with plastic wrap.

In a small bowl mix together the warm water and dry yeast. Let sit 10 minutes to prove the yeast...it will be foamy if yeast is viable. Stir in the cup of flour mixture. Spray one side of a piece of plastic wrap with spray oil (pan spray) and place oil side down over the bowl of dough. Let sit on counter 1 hour, then place in refrigerator (punching down a little first if dough has risen a lot) until the next day. This give the dough additional flavor over bread made the same day as it is started.

The next day let the bowl of dough come to room temperature. While it is doing that, mix the xanthan gum and egg replacer , salt and powdered milk into the flour mixture. Set aside.

In a stand mixer bowl whisk together the honey and vinegar. Beat in the eggs and then the soft butter with the paddle attachment for 30 seconds. If the butter looks a little chunky, that's O.K. Add the warm water and beat 15 seconds. Add the room temperature dough and beat 30 seconds. Add the dry ingredients and beat just until blended. Scrape down bowl, let rest 30 seconds and blend on medium-high for 4 minutes. Dough should look like thick cake batter.

While dough does final mixing, grease a bread pan. After the 4 minutes are up, spoon the dough into the prepared pan. With a wet finger smooth the top. Set in a warm draft free place to rise for 50-60 minutes and while that is happening, preheat the oven to 375 degrees F.

When the dough is about 1 inch over the top of the pan, bake on the middle rack of preheated oven for 45-55 minutes to an internal temperature of 200 degrees F. An instant read thermometer really helps here.

Cool in the pan for 10 minutes. Remove from the pan and cool completely. Once totally cool, slice with a saw motion, back and forth but with no downward pressure with a serrated knife.


Makes one full size loaf or two smaller loaves. (Smaller loaves may need less baking time.)

Sunday, August 09, 2015

Baking Center Experiment #2 - Tart Shell


It is a nice compliment that when we are invited to dinner the hostess often asks me to bring a dessert (because I always ask what I can bring). I love to bake and they know it. Now that I am avoiding quite a few foods, including gluten and butter, it is quite a challenge to figure out what to bring, but also fun given the many sites that have gluten free and vegan recipes. The cookies from the last post graced two dinner parties, the second one being a family affair. I knew the kids would love the cookies and I think a Dad and a Granddad also enjoyed some.

For the adults last night I spent all of my Saturday energy (and at the moment I don't have a lot of energy) making a gluten free tart shell, then filled it with a mixture of Gravenstein apples from our tree and peaches since this is that brief time when both are at their peak. Because I wasn't really sure if those flavors would mesh by themselves, even with the addition of some spice, I also picked a pint of blackberries by the lower garden and made a blackberry sauce for garnish. A can of the whipped cream that squirts out was mostly for the kids, but it was nice on the tart, too.

I had never made a tart that didn't have a wet filling and perhaps I should have made some applesauce to put on the bottom or created a custard to pour over the fruit because, despite being tented with aluminum foil to retain moisture, the fruit in the tart remained somewhat uncooked and became dry on the surface by the time they should have been cooked. I had put foil under the tart pan to catch any juices that might come through and save my oven bottom from scorched fruit juices, but that didn't help either.

The extra fruit that wouldn't fit into the tart had been put into a small ceramic baking dish, tightly covered with foil and cooked in the oven along with the tart. When I removed the foil I found that those slices of peach and apple were perfectly cooked and juicy, too. Since there was room at the top of the tart for additional fruit, I carefully used tongs to lift each cooked piece and lay it in a pattern on top of the drier fruit in the tart. Once I finished, I baked the whole thing another 18 minutes and it was perfect! the moist fruit on top acted as a lid, so the fruit below finally cooked and softened.


After the tart cooled a couple of minutes, I glazed the fruit with some homemade nectarine jam given to me by a friend. Once it had cooled completely, I filled in the spaces at the sides and between slices of the fruit with more of the jam, then refrigerated the whole thing.

Because this was a brand new, experimental gluten free tart base I had no idea how the tart would turn out, but it was great with a shortbread kind of tart dough (perhaps just a bit less tender and more crumbly than one with regular flour) and juicy, delicious fruit filling. As I suspected, the fresh blackberry syrup pulled the flavors together in a lovely way. The essence of August in our neck of the woods.

Here is the Tart Dough recipe I used. For the filling I used two large peaches, peeled, pitted and slices, three medium apples, peeled, cored and sliced, some cinnamon, some nutmeg, some cornstarch and a pinch of salt. If I did it again I think I would cook all the fruit before putting it in the tart, then glaze with the nectarine (or peach or apple) jam or jelly.


The tart dough production uses a technique that I had never tried. You put pieces of the dough around the rim and across the bottom of the pan and push them together to form the dough. Worked well, but I would have frozen the shell longer or filled it with pie weights because it shrank significantly. Even though I didn't do it this time, I put that into the recipe below so I won't forget to do it next time since I often use my blog as my recipe box for all the 'next times'. I also forgot to save a small piece of uncooked dough to patch gaps once almost baked. It's always a good idea to do that with tart dough so you can make repairs and then bake it a little more.


GF Tart Dough
adapted from a recipe at Serious Eats blog, Elizabeth Borbone, from her recipe for Roasted Asparagus Tart
1 cup white rice flour
2 tablespoons oat flour
1/4 cup almond flour
1/4 cup tapioca flour
1/2 teaspoon salt
2 oz - 1/2 stick- 4 tablespoons chilled dairy free butter substitute
2 tablespoons brown sugar
1 large egg
1/4 cup ice water

In the bowl of a food processor combine white rice flour, oat flour, almond flour, tapioca flour and salt by pulsing briefly.

Add the butter, cut into small cubes, to the dry ingredients, distributing evenly over the inside work bowl area. Pulse until pieces of butter are no longer large. You may get a mix of small and very small butter pieces. That's O.K.

In a small bowl combine the brown sugar, egg and water. Whisk or beat with a fork until well combined.

Add a small amount to the flour/butter mixture through the food processor feed tube, then run the processor and pour in the rest of the egg mixture. Process until dough forms a ball. It doesn't take long.

Grease an 11" tart pan with removable bottom with cooking spray. Pinch of tablespoon sized pieced of the dough and put around the edge of the tart pan and then all over the middle of the pan. Use a measuring cup or your fingers to smoosh the dough pieces together so that the bottom is covered with a fairly even layer of dough, then push the dough up the sides and joining the dough in the bottom of the pan. This dough is easy to work with and not sticky, so no need to flour your hands. Trim off excess dough at the top rim with a knife. Use the tines of a fork to prick all over the bottom of the pan. Wrap in plastic and freeze 45 minutes.

While tart is in the freezer, preheat the oven to 400 degrees F with the oven rack in the middle of the oven. After the 45 minutes of freezing, take a large piece of parchment paper and crunch it into a ball, then spread it out again and use to line the tart, trimming off excess. Use pie weights of beans or lentils that you only use for blind baking to fill the parchment. Blind bake until light golden brown, about 20 minutes, then remove the parchment and weights and continue baking another 5 minutes until golden brown.

Let cool and use as you would any other baked tart shell.

Friday, August 07, 2015

Experiment #1


Well, the GI situation has encouraged me to try some diet changes, including going caffeine free, dairy free and gluten free, plus no red meat. Although this is a pretty dramatic change for me, I'm looking on it as a chance to expand my baking skills.

Yesterday I tried my first GF cookie recipe. I took the Giant Party Cookies recipe and substituted non-dairy margarine for the butter and made up a GF mix which included white and brown rice flours, tapioca flour, cornstarch, oat flour, millet flour and xanthan gum. I didn't remember to write down the amounts I used, so I can't actually give you the recipe for it, but you can used a GF mix...just be sure it contains xanthan gum or add your own...about 2 tablespoons.

I also took out the nuts, substituted white chocolate chips for half the dark chocolate ones, added 1/4 cup dried cranberries and 1/3 cup golden raisins, plus increased the oatmeal by 3/4 cup so that the cookies wouldn't spread too thin.

The cookies were great and Sweetie, who can eat anything, really liked them. I even made some individual sized cookies ( 6 to a baking sheet) that are still oversized, but perfect for those non-party snack attacks. Yay for #1 GF recipe. Will probably try making bread next.


GF Giant Party Cookies

Preheat oven to 375 degrees F

2 ½ cups Gluten Free flour mix
1 tsp. baking soda
1 tsp. salt
1 cup (2 sticks) non-dairy margarine, softened
¾ cup granulated sugar
¾ cup brown sugar, light or dark, packed
2 tsps. vanilla extract
2 large eggs
1½ cup quick rolled oats
1 cups (6-oz. package) semi-sweet chocolate chips
1 cup  white chocolate chips/chunks
½ cup golden raisins
1/4 cup dried sweetened cranberries (sub dried apricot pieces and raisins for nuts)


Combine flour, salt and baking soda in a small bowl. Beat butter, granulated sugar, brown sugar and vanilla extract in a large mixing bowl and beat until creamy. Add eggs, one at a time, beating well after each addition. Scrape bowl and beaters. Gradually beat in flour and beat until mixed. Beat in oatmeal. Mixture will be stiff. Stir in chocolate chips and nuts.

Line a 12” pizza pan or large baking sheet with foil. Spray with cooking spray. Put 2 cups of the dough on the foil. Using floured fingers, shape dough into desired shape, circle or heart, square or oval. Make shape about 10” in diameter. Exaggerate the shape since cookie will spread.

Bake one sheet at a time in middle of oven for 15 - 18 minutes until golden brown. Let sit on sheet for 10 minutes, then slide shape on foil onto a cooling rack. Continue to bake the rest of the dough. You can make regular drop cookies with the remainder of the batter if desired.

If desired, once the cookie has cooled, decorate for a party! Mix 1/2 cup confectioners' sugar and enough milk to make a thin icing and drizzle over the cookie in a random pattern. While it is still wet, sprinkle cake decorations (sprinkles, dragees, mini chocolate chips,colored sanding sugar) over as desired.

Saturday, August 01, 2015

The Puzzle Continues


The last six or seven months have been some of the worst of my life as far as health goes. UTIs, the flu, surgery on my eyes, amoebic dysentery have all played their part. Yesterday I had a colonoscopy as a method to help discern more pieces of the puzzle of my GI troubles. No results yet but I suspect that there will be changes coming up, some of them dietary. Might mean going gluten free. Might mean giving up nuts and seeds or dairy or maybe just fatty foods. Still thinking about it, but I might continue to bake with gluten and just not eat it myself...more for Sweetie, friends, firefighters, etc.


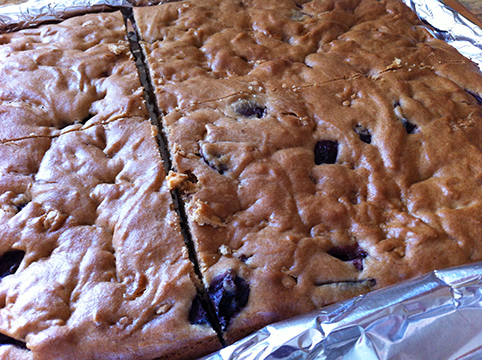
Earlier in the week I baked one of my favorite cookies, butterscotch bar cookies. No puzzle this time. I love the butterscotch flavor, the cake type crumb and the addition of chocolate and fruit. It makes a big pan of cookies, with plenty to share. This time  I substituted white chocolate chips for the chocolate chips and put in fresh pitted, chopped dark sweet cherries instead of the nuts. These cookies were yummy, but next time (if there is one) I think I would reduce the brown sugar to 3/4 cup and use white sugar for the additional sugar needed so there would be a bit less of the butterscotch flavor. Still, a delicious cookie and made in one pot, so hardly any washing up, especially if you line the cookie sheet with heavy aluminum foil like I did! Do be sure to check often at the end of baking. I left mine in the oven a tad too long and they do get dry.


Chocolate-Butterscotch Bars or Squares
Makes 40 squares - not sure how many bars

2/3 cup butter, margarine, or vegetable shortening, melted
1 1/4 cups brown sugar, packed
3 eggs
2 3/4 cups all-purpose flour
1/2 teaspoon salt
2 1/2 teaspoons baking powder
6 oz chocolate chips (I used white chocolate chips)
1 cup chopped, pitted fresh cherries 
1 teaspoon vanilla

Melt butter in a large pot. Add the sugar. Mix melted butter and sugar thoroughly. Let cool a bit. Add eggs one at a time, beating well after each addition. Add sifted dry ingredients, white chocolate, cherries and vanilla and mix well to combine. Spread in a greased 15" x 10" x 1" pan. Bake in moderate oven (350 degrees F) for about 25 minutes. A toothpick inserted in center of pan will come out with a few crumbs stuck to it.


Cut into 40 squares (or some bars if you prefer) while warm. Store in airtight container. Will keep a week if you don't eat them all long before that as I do.

Sunday, July 26, 2015

Ripe Tomatoes


As happens almost every year, this winter I started seeds for most of the garden I planted. Some years I do a vast number of tomato varieties, but this year I only planted three kinds. One is a grape tomato, sort of an elongated cherry tomato. Although I expected them to ripen first the one that actually is giving me enough tomatoes for salads is called Stupice. The tomatoes are about golf ball size and have a nice strong tomato flavor. Some of them have green shoulders at the stem end even when the rest of the tomato is fully ripe, but I just cut that part off and put it in the compost pile. A few of the grape tomatoes are ripe, too, but not many. The third tomato is my favorite Black Krim. They are lobed and get larger and are a brownish red and super delicious. I also planted the seed for them later than the others, so I probably won't harvest any until next month at the earliest.

Tonight we'll be having three kinds of grilled squash: white scallop, yellow scallop and zucchini. There will be sliced Stupice tomatoes with basil from the garden and Sweetie and Straight Shooter will enjoy grilled rib eye steaks from a local farm while I enjoy chicken thighs from a local market. A summery meal for a summers evening.


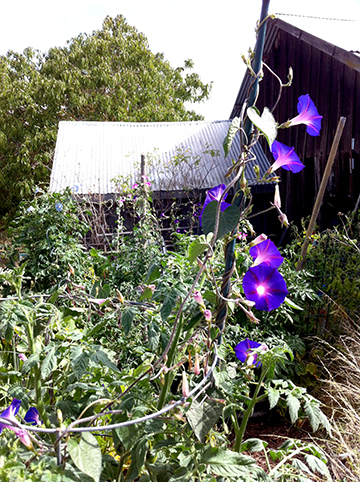
The morning glories are running rampant in the garden, climbing anything they can climb, including the tomato plants.


The lilies have just started to bloom, too.


I didn't really plant too many other flowers this year, devoting my water mostly to veggies. I'd like a few more cucumbers, too, but they have slowed down production. Only got one this week.

We finished our deck repair on the front of the house and even moved some wicker furniture and a rocker to the most recently repaired part near the door to the baking center. I just finished having a cup of tea while enjoying the rocker, a nice breeze and the company of Sweetie and Pi doggie. Bliss.

Hope you are having your own kinds of summer good times.