Showing posts with label whipped cream. Show all posts

Wednesday, July 16, 2025

Let's Hear It for the Chocolate Version


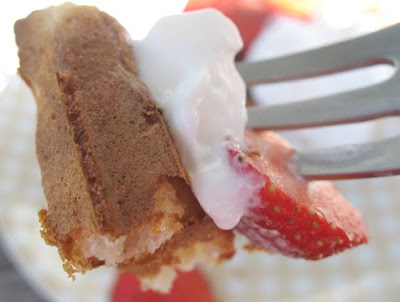
Sweetie isn't usually a cake person, but he really liked the Warm Buttermilk Vanilla Cake that I made in May and then again, in a larger version, in June. Monday night we had guests for dinner and we also had some raspberries from the Hwy 12 farm stand, so I decided to see if I could make the same cake in a chocolate version. A square of the chocolate cake, some whipped cream, a handful of fresh raspberries and another dollop of whipped cream not only looked pretty, but it was delicious! Now I want to share that chocolate version with you so that you, too, can try a yummy, moist chocolate cake that is easy to make. On Wednesday I made the same dessert, but used a cherry compote I made, plus ripe, sweet, pitted dark red cherries. I liked that version better. 

Probably the most unusual thing about this recipe, in either the vanilla or the chocolate versions, is that you melt some butter and then add buttermilk to that. The buttermilk combines with the butter and also gets warm.  I does mean that you have a pot to clean along with the mixing bowl and beater(s), but the results are worth the extra effort...you'll see.

I was planning on serving this cake with some fresh cherries on Monday, but ran out of time, so the raspberries worked well. The only thing that I wished I had done was to have a sauce...or even some raspberry syrup...to add along with the berries and cream. It would have tied it all together and added some extra juiciness. Good without, but probably better with. Next time!

The cherry version (which I took photos of...but no photos of the raspberry version...sorry) benefited by the cherry compote being added. It not only offset the slightly dry chocolate cake, but it really carried the cherry flavor throughout the dessert.

To make this dessert place a square of cake on a plate or in a shallow bowl. Top with the warm Cherry Compote (about 1/4 cup per serving if serving 4), top the compote with a large dollop of whipped cream, then top the whipped cream with about 1/2 cup of the fresh cherries. It's fine that the cherries fall off the cake and down to the plate or bowl. Serve at once.


Warm Buttermilk Chocolate Cake
2 eggs
1/2 cup sugar
1/2 cup brown sugar
1 teaspoon pure vanilla extract
1 cup cake flour
1/2 teaspoon baking powder
1/2 teaspoon baking soda
1/4 teaspoon salt

!/4 cup dark cocoa powder
2 tablespoons butter
1/2 cup plus 2 tablespoons buttermilk

In a large mixing bowl, beat eggs, sugar and vanilla on high until thick and lemon-colored, about 4 minutes. Combine flour, baking powder, baking soda, salt and cocoa powder and sift together twice; add flour mixture to egg mixture. Beat on low just until combined. Melt butter in a small saucepan until butter melts. Remove from heat and stir in the buttermilk. Add to batter; beat thoroughly (the batter will be thin). Pour into a greased 9-in. square baking pan. Bake in a preheated 350 degrees F oven for 20-25 minutes or until cake tests done. If top browns too quickly, tent with foil. Cool 5 minutes in the pan, then turn out on a wire rack to cool completely. Cut into 9 squares.   

Warm Cherry Compote

1 cup cherries (I used about 1/4 Rainier cherries and 3/4 Bing cherries), pitted and cut into quarters
1 teaspoon cornstarch
1 tablespoon granulated sugar
1/4 cup water

In a small pot combine all the ingredients, stirring well so that all the cornstarch is mixed in. Place the pot over very low heat, cover, and cook for 1 minute. Uncover, stir, cover and cook for 3 minutes. Uncover, stir, and continue cooking, stirring occasionally, until sauce thickens and cherries are warmed through. It is now ready to serve or store until needed. Rewarm over low heat to bring out the cherry flavor and to have the sauce be more liquid.

Whipped Cream

In a chilled mixer bowl pour 1 pint heavy whipping cream. Attach the whisk attachment. Start on low and gradually increase speed to highest setting. Beat until the cream is thick enough to dollop. Use at once.

Cherries

Pit and chunk 2 cups of fresh ripe Bing cherries. Use at once on top of the dessert.


Monday, July 20, 2015

Smooth and Chocolate For The Cake Slice Bakers


As usual there were great choices this month for baking with the Cake Slice Bakers. We are still baking from the Southern Living's The Southern Cake Book.

Lane Cake seemed too wintery to me and the Tiramisu Layer Cake too rich, but the Icebox Lime Cake was appealing. In the end I decided to go with the Mexican Chocolate Pound Cake, but I only made half the recipe and I baked it in a loaf pan. My plan was to create some ice cream sundaes with a slice of cake for the base. This would be rich, too, but it has been so hot here (mid 90's yesterday) that I wanted ice cream. While I was thinking about that I decided to swap out the cinnamon for espresso and bourbon. That would go well with some coffee ice cream, bourbon whipped cream, salted chocolate sauce (thanks Barrel House lady!) and chocolate sprinkles on top for the sundaes.


This cake has both semisweet chocolate, melted, and chocolate syrup. Since our kids have been gone we have not had a reason to buy chocolate syrup, so I had to ask where it could be found in our local market...sort of embarrassing, but it is by the potato chips and mixed nuts. Seems a strange place to me.

This is a simple cake to make. You melt the chocolate and let it cool while you give both the butter and the butter/sugar mixture a good long beating to make it thick and fluffy. In go the eggs, then the cooled melted chocolate and the espresso/bourbon and vanilla. The last step is the alternate the flour mixture with the buttermilk. The batter, once it's finished, is silky and thick. I did increase the flour by 1/4 cup since I dissolved the espresso powder in 2 tablespoons of bourbon which increased the liquid in the recipe.


I love this cake! It is moist and tender with a dense crumb and good chocolate flavor. It made a great base for those sundaes, having enough flavor to stand up to chocolate sauce and coffee ice cream and a lovely sturdiness in contrast to the melting ice cream, fluffy whipped cream and drippy sauce.  Our guests loved them and so did Sweetie. Maybe next time I'll make the whole recipe and have chocolate pound cake for days. We'll need a bigger container of ice cream....


Monday, September 02, 2013

Strawberry Moon


Summer is still with us, in warm breezes and hot afternoon sun, sultry evenings on the porch, and ripe fruit, too.

On this past Saturday, plain Jane strawberries were transformed by my amazing daughter into boozy, juicy Moonshine Strawberries by the judicious addition of some Strawberry Moonshine, a bit of sugar, and a touch of lemon zest.

On Sunday we enjoyed a summery dessert of butter pound cake slices, softly whipped cream and some of those slightly softened and decadent, just-sweet-enough strawberries. The alcohol had dispersed by then but it added a hint of daring to this lovely dish. There was a tang of lemon here and there to add interest.You could make this with peaches or nectarines, instead and it would still be wonderful.

Moonshine Strawberries Shortcake

2 pints hulled, sliced strawberries
1 shot glass of Strawberry Moonshine
1/2 teaspoon fresh lemon zest
1 teaspoon sugar
1 pint heavy cream
1 loaf pound cake

Combine the strawberries, moonshine, lemon zest and sugar. Let sit in the 'fridge overnight.

In a chilled bowl with chilled beaters or whisk, whisk the cream until soft peaks form. If desired, add a bit of sugar towards the end.

When ready to serve, slice the pound cake. Place a slice on each dessert plate, spoon on some of the strawberries and their juices, dollop on some whipped cream and put a bit more of the strawberries on top. Serve at once.

Saturday, December 22, 2012

Let's Hear It For Gingerbread!


Lots of emotions going on recently. I was remembering school Christmas nativity plays and all of the costumes and songs. I was painfully shy after about age 7, so never acted in any that I can remember, but a friend remembered being an angel and she said something interesting: "The tinsel made my shoulders itch." At first I thought she meant literally, but she was talking about feeling not worthy to be such a higher being as an angel. I know that feeling myself.

At this time of year I alternate between feeling good about myself as I choose just the right gift or make some quick bread as a gift and feeling inadequate when I realize that I don't have a gift for a friend who just made a lunch date with me or when I can't even seem to find the time to see someone I really enjoy spending time with.

I get a warm glow sending out cards to good friends and a sinking feeling that I'm going to forget to send cards to people I care about since my list hasn't been updated and I'm terrible at keeping my database clean with up to date addresses and phone numbers.

Then there is the well of sadness that lives just below the surface of my emotions and has for 13 years. Mostly it stays below the surface and I'm happy, even joyful, as I prepare for the holidays. Then something will poke a hole in that happy and the missing of my son wells up. It's OK. I ride with it, shed a few tears sometimes, and then the happy is all around me again.

It's part of the season for lots of people I think. Many of us have lost a loved one, are worried about the illness a loved one is dealing with, have to face loneliness or the death of a dream. So day by day I remind myself to live the meaning of the season. Be kind to those around me, be kind to myself, and patient, be grateful for my blessings. Share my love as generously as possible. It works. All the lights on the Christmas tree help, too.


Last, but not least, I find that making and sharing good food is my way of finding the happy. This morning we had a great breakfast with dear friends and I made Gingerbread Waffles. I'll bet you can imaging just how wonderful my house smelled as they cooked! There were topping of pure maple syrup, applesauce, an apple that had been sauteed, then mixed with some cinnamon and chopped pecans. For Sweetie there was a bowl of whipped cream which he even shared with the rest of us. Good man! Our friends brought a lot of fantastic candied bacon which also had some rice wine vinegar in the basting sauce to cut the sweetness a bit. It was a hit and I'll share the recipe if I get it. Could not have been a happier time.

The Gingerbread Waffles were based on the Amazing Overnight Waffles I love so much, but with the addition of some spices and substitution of molasses for the sugar. They were crispy and spicy and just wonderful!

Amazing Overnight Gingerbread Waffles

adapted for gingerbread flavor
from Mollie Katzen's Sunlight Cafe' Cookbook
Sponge:
1 packet dry yeast
½ cup all-purpose flour
1 tablespoon sugar
½ cup water

Whisk together and let sit, uncovered, at room temperature for 2 hours


Batter:
1 cup unbleached all-purpose flour
1 cup whole wheat flour
2 teaspoons ground ginger
1½ teaspoons ground cinnamon
1/4 teaspoon ground nutmeg
1/4 teaspoon ground cloves
½ teaspoon salt

all of the sponge
1/8 teaspoon instant yeast
½ cup molasses
2 cups milk
6 tablespoons unsalted butter, melted
2 large eggs

Nonstick spray
Butter (and bread) for the waffle iron
Sliced apples
Whipped cream if you are feeling decadent or maple syrup if you prefer

Combine the flour, spices, yeast, and salt in a medium bowl. Add the sponge that has sat for 2 hours waiting for this moment, and whisk to combine. Add the molasses, milk and whisk until blended. Cover the bowl tightly with plastic wrap and let stand overnight at room temperature (or put in the fridge if room temp. is over 70 degrees F.)

The next morning, preheat the waffle iron. Melt the 6 tablespoons butter and let cool a bit. Beat the eggs in a small bowl (unnecessary if using egg substitute) then beat into the batter along with the melted butter.

Lightly spray the hot waffle iron with non stick spray, top and bottom plates, and then butter a piece of bread and use that to rub some butter on top and bottom plates.

Add just enough batter to cover the cooking surface…this varies by waffle iron…about 2/3 cup. Lower the top and cook until dark brown…it’s OK to check now and then. It takes about 2-3 minutes and it's usually when the steam starts to diminish. You want it medium-dark brown but not burnt.

Serve hot, right away, with sautéed apples, whipped cream or maple syrup, or toppings of your choice.

Note; If you have too many waffles for the number of people you are feeding, bake the leftover batter a little less than the ones you are eating, let cool on a baking rack, then freeze and store in the freezer tightly wrapped. Re-heat in the toaster.

Tuesday, February 14, 2012

Personal Party Cake

A few years ago the Daring Bakers made Dorie Greenspan's Perfect Party Cake, a wonderful lemon flavored confection with raspberry jam and lemon buttercream. A few days ago I was wondering what kind of cake to make for my birthday. Since I love to bake and have few occasions when I can bake cakes these days, naturally I wanted to make my own cake for the occasion.

My usual cake obsession is with chocolate cake but this year for some reason I was drawn to lemon as a flavor. I thought I'd make a repeat of that Perfect Party Cake, but instead I took another Dorie recipe called Dressy Chocolate Loaf Cake and turned it into the lemon cake of my dreams. In true Dorie fashion I rubbed the lemon zest from a whole lemon into the sugar before adding it to the creamed butter. To increase the lemon factor without using lemon extract, I also added the juice of that same lemon to the sour cream before adding it to the batter. Since I took out the cocoa powder that would have made it chocolate, I replaced it with all-purpose flour and added a couple extra tablespoons to offset the additional liquid of the lemon juice.

As you can see this became another cake altogether, a personal party cake. I did split it into three layers and raspberry jam, slightly thinned and then warmed, was spread on the two cut layers. Instead of ganache or chocolate buttercream, I used whipped cream to frost the loaf and placed row upon row of fresh, enormous raspberries on the top. Sorry I forgot to take a photo of the candle (at my age one candle is plenty to represent all the other years) but I can tell you that it was a wonderful cake. The cake itself was firm with a nice tight texture, just as a pound cake type cake should be. The lemon flavor had just the right amount of assertiveness. The whipped cream was a nice textural contrast with the cake because it was creamy and soft. A bite which had some cake, some whipped cream and one of those glorious red, fully flavored raspberries was a bite of heaven! Happy Birthday to me.

A key tip for making this cake is to be sure to be patient and beat the ingredients for a long time if the recipe calls for it...no short cuts or you'll be sorry. Everything should be at room temperature. I did end up tenting the cake with foil for the last 15 minutes, so do check it at that point. Make sure your berries are dry and that you whip the cream enough for it to hold its shape, but not so long it turns to butter. Just keep a close watch on it as it whips and you'll be fine.


Lemon and Raspberry Personal Party Cake
inspired by a cake in Dorie Greenspan's Baking, From My Home to Yours

2 cups + 2 tablespoons all-purpose flour
1 teaspoon baking powder
1/4 teaspoon baking soda
1/4 teaspoon salt
2 sticks (8 oz.) unsalted butter at room temperature
1 1/3 cups granulated sugar
Zest of 1 lemon, colored part only
2 large eggs, at room temperature
1 cup sour cream at room temperature
juice of 1 lemon
1/2 cup best-quality raspberry am
1 teaspoon water
8 oz. heavy whipping cream, chilled
1 teaspoon sugar
6 oz. fresh raspberries, washed and dried gently

Preheat the oven to 350 degrees F, with a rack in the center of the oven space.
Butter a 9 1/2 x 5-inch loaf pan, dust with flour, and tap out the extra flour. Set aside.

Sift together the flour, baking powder, baking soda and salt. Set aside.

Using a stand mixer, beat the butter in a large bowl. While the butter is creaming, rub the lemon zest into the sugar in another bowl. Add the sugar to the butter and continue beating at medium speed for 3 minutes, until very light and fluffy. Add the eggs one at a time, beating well after each addition for about a minute. Reduce mixer speed to low and add the sour cream and the lemon juice. Mix for a minute to fully combine. With the mixer still on low speed, add the dry ingredients and continue mixing only until most of the dry ingredients have been incorporated into the batter. Use a spatula to scrape down the sides and beater and to finish blending any remaining dry ingredients into the batter. Use the spatula to put the batter into the prepared pan and spread it evenly.

Bake for about 60 minutes, checking at 45 minutes to see if the top is getting too brown. If it is, tent with foil loosely. When cake is done a knife inserted into the center will come out clean. Remove from the oven and let cool on a rack for 5 minutes, then turn out of the pan onto the rack. Cool to room temperature.

Heat the jam and water over low heat or in the microwave just until boiling, stirring to combine. Let cool.

Slice the cake into three layers. Place the bottom layer on a rectangular cake or board and spread half the jam mixture over the layer (1/4 cup). Top with the next layer and repeat with the rest of the jam. Top with the final layer. Chill in the 'fridge while whipping the cream.

Whip the cream at high speed in a chilled bowl with chilled beaters, adding the sugar after the cream has started to thicken (I drape a tea towel over the mixer at the beginning to stop spattering, then remove it when the cream starts to thicken). When the cream is thick enough to hold its shape use an offset spatula to frost the sides and then the top of the cake, swirling if you like. Take the prepared raspberries and decorate the top of the cake. Chill finished cake for at least an hour to firm everything up.

To serve, cut with serrated knife. Makes 12 servings.

Sunday, July 10, 2011

Waffles and Musings on Blogging


Have you ever wondered what goes into a food blog post? If you have your own blog you already know, but if you mainly visit food blogs you might be interested in my process. If not you can skip down to the photo of the waffle with strawberries and cream and start reading there. I'm sure that there are as many variations on creating food blog posts as there are recipes for chocolate chip cookies...or even more than that, but the basics still are pretty universal. To me a good food blog post includes some writing about food or food related topics, there are almost always photographs and often a recipe.

The process actually starts with a lot of thought, as is true with many arts and crafts (and I leave it to you to decide if this is art or craft or a combination) because it helps to have an idea of what you want to cook, make, bake or explore in the vast topic of 'food'. Since I have a tendency to cook the same recipes over and over with minor variations, and since I usually avoid repeating recipes, my posts are usually baking ones. For some reason I feel more drawn to experiment with and write about baking. Many days as I drive to work I'll be thinking about possible variations on a recipe as I drive. At this time of year my thought stray to berries and what I love best about them and what new-to-me recipe I can bake using them.

After a decision is made about what to make then comes the recipe comparison time. Since baking is based on proportions that work well together I often compare basic recipes for what I have in mind, using recipes in cookbooks, magazines and on the Internet to help me make sure I understand the methods as well as quantities of ingredients. After that I play (again) with variations in my head and then head to the store if I'm missing ingredients or want super fresh ones.

Next comes my favorite part...making and baking. Although I know that mis en place - gathering all the ingredients and implements and pans together before starting - is the most professional, often I only gather stuff for the first part and then gather the rest while some of the recipe is beating or cooling or rising, etc. Same goes for preheating the oven. If the steps to take will take longer than 10 minutes I leave off preheating the oven until about 10 minutes before stuff goes into the oven. Saves on fuel and keeps me from feeling so rushed.

Before the actual making and baking begins I read the recipe all the way through and then read it again while checking for ingredients that are not ones commonly in my kitchen or pans or implements I don't usually use. Trust me, you don't want to be in the middle of a recipe and discover than you're all out of parchment, or vanilla or only have an 8 pan muffin tin when you need a 12 pan one.

Following a recipe might seem simple but if you stop to answer the phone and can't remember if you added that teaspoon of salt you might end up with a flat tasting cake or bread. If you are prone to making changes to any recipe you meet like I am, knowing which part to follow and which part to change requires even closer attention. I try to type up recipes, including the variations but have been know to scrawl variations on a sticky note stuck to the recipe that most closely resembles what I'm making. In general I give credit to the creator of that recipe.

If some part of the making and baking are visually interesting I'll take photos. I love the look of fruits and veggies and like to photograph them often. I'll also take photos to make it easier to understand a complicated recipe. I know food bloggers who take dozens and dozens of photos for one post...and their results are are awesome...but I try to stick to about 12 per post so that I end up with three or four in the post. It helps the post load faster if there aren't a lot of photos and I don't wish to take the time to go through dozens to find the best three. Maybe when I'm retired in 10 years or so :).

The finished dish always gets photographed and often there is a photo of the dish plated, too. If you decide to try food blogging the best thing to do is to visit lots and lots of food blogs and see what style and type of food photo suits you.

The food has been made, photographed and enjoyed. My next step is usually to process the photos. I'm pretty adept with Photoshop so it usually doesn't take me too long. I suppose if I were more picky I'd get better photos and it would take longer, but my enthusiasms extend to many other areas in my life so blogging gets its due share and no more. I always save the photos at 72 dpi which is low resolution. What you see on the Internet really doesn't look any better in high resolution than at 72 dpi and the lower resolution helps photos load faster, plus they take up less space on your hard drive. I often save them in a folder which is labeled with the name of the dish.

Now comes my favorite part (after eating the food) which is writing the post. Usually I have something I want to share with you about the food I've made...so that's what I write. Sometimes I include tidbits of what is going on in my life and every now and then we visit the Land of St. Honore' for story time and pure fiction. No matter what the rest of the post contains, I try to make sure to mention anything that will help you re-create the recipe for yourself and your family. Posting the recipe also means that I can go back to it when I want to make it again...a digital recipe book of the best kind!

Although there are many ways to create a post I usually write the content, add the photos, add the links, check the spelling (if I'm not in a hurry to post) and then put it up. Usually I'll then check what you see and make changes or corrections if needed (and again if I have time). Lots of times I'm posting at night and too tired to be as diligent as I should be.

So that's what I do and the post itself, including taking the photos and processing them, takes about an hour to two hours. Research for the recipe is ongoing so I have no idea how long I spend on it. The recipes usually give some indication of how much time they require, but often I would be making them even if I didn't blog so I don't pay attention to that either.

If you are thinking of food blogging or already doing it and want to exchange ideas and information, feel free to comment or e-mail me. I can be a fun hobby which combines the creativity of cooking and baking, photography and writing.


So now that you have some idea on how my blog posts are created, for today the post will be about waffles. Unlike many recipes I post, this one is a variation of a recipe that I've posted before. There is something about the combination of fresh strawberries and crisp, airy hot sourdough waffles that calls to me every year. For this year's variation I let the starter sit for a few days before making the batter (and the batter sits overnight) so there was a lovely pronounced sourdough flavor and aroma to these beauties. I also used some of the Irish wholemeal style flour from King Arthur for half of the flour. The resulting waffles had a nice nuttiness from that flour, plus darling little flecks wheat goodness.

You can make these without a sourdough starter, too. You'll find that recipe at the end of this post: http://feedingmyenthusiasms.blogspot.com/2009/06/ancient-church-meeting-tommy-waffles.html

You can serve these waffle with any toppings you like but they really don't need any additional butter. If you do want to top 'em with butter they will probably be even more delicious. Berries are my delight right now and we had some whipped cream handy, too. One version of total decadence is to sit in the sun next to the sweet peas and morning glories eating these luscious waffles, ripe sliced local strawberries and some whipped cream. Wish I could have shared.

NOTE: For those of you who can’t imagine having a single purpose item like a waffle iron, perhaps it helps that mine was from a garage sale and is eons old. It’s smallish and round and fits inside of a stew pot so it doesn't take up extra room in the cupboard. If it is still working when I die, my survivors will probably discard it, but for now it does the trick and produces nice circles of yummy, crispy waffles.


Amazing Overnight Wholemeal Waffles
adapted for sourdough starter
from Mollie Katzen's Sunlight Cafe' Cookbook

Sponge:
1 cup sourdough starter
½ cup all-purpose flour
1 tablespoon sugar
½ cup water
Whisk together and let sit, uncovered, at room temperature for 2 hours

Batter:
1 cup unbleached all-purpose flour
1 cup Irish wholemeal wheat flour
all of the sponge
1/8 teaspoon instant yeast
1 tablespoon sugar
½ teaspoon salt
2 cups milk
6 tablespoons unsalted butter, melted
2 large eggs

Nonstick spray
Butter (and bread) for the waffle iron
Sliced strawberries
Whipped cream if you are feeling decadent or maple syrup if you prefer


Combine the flour, yeast, sugar, and salt in a medium bowl. Add the sponge that has sat for 2 hours waiting for this moment, and whisk to combine. Add the milk and whisk until blended. Cover the bowl tightly with plastic wrap and let stand overnight at room temperature (or put in the fridge if room temp. is over 70 degrees F.)

The next morning, preheat the waffle iron. Melt the 6 tablespoons butter and let cool a bit. Beat the egg is a small bowl (unnecessary if using egg substitute) then beat it into the batter along with the melted butter. Whisk the egg white until it forms soft peaks. Fold into the batter with a spatula.

Lightly spray the hot waffle iron with non stick spray, top and bottom plates, and then butter a piece of bread and use that to rub some butter on top and bottom plates.

Add just enough batter to cover the cooking surface…this varies by waffle iron…about 2/3 cup. Lower the top and cook until golden brown…it’s OK to check now and then. It takes about 2-3 minutes and it's usually when the steam starts to diminish. You want it golden brown, but not dark brown.

Serve hot, right away, with strawberries, whipped cream or maple syrup, or toppings of your choice.

Note; If you have too many waffles for the number of people you are feeding, bake the leftover batter a little less than the ones you are eating, let cool on a baking rack, then freeze and store in the freezer tightly wrapped. Re-heat in the toaster.

Friday, September 17, 2010

Fall is Coming and So It's Pumpkin Time

Fall is my absolute favorite season. There is something about the cooler air, the leaves turning crimson and orange, gold and brown. I love the flavors of the fall from butternut squash and pumpkin to tart apples and cranberries. Many of the spices that have sat on the shelf through the summer, including cinnamon, cloves, ginger and nutmeg, are the perfect additions to fall cakes and cookies, muffins and pies.

I'm starting with pumpkin! Last Christmas my daughter brought home a recipe from Southern Living for an outrageously good pumpkin pie. It had a layer of gingersnap crumble on top of the regular pie crust, rich pumpkin filling and a streusel topping...plus whipped cream for garnish! Last winter one of our favorite restaurants served a pumpkin dessert that was delicious...a bit lighter than regular pumpkin pie, with a streusel topping and, of course, whipped cream. I looked for a recipe that would give similar results but came up empty.

Recently I borrowed a book from the library called Block Parties and Poker Nights by Peggy Allen. It had lots of dishes to bring to potlucks and poker nights, including one that sounded a lot like that restaurant pumpkin dessert. Never being one to leave well enough alone, I decided to combine aspects of the Christmas pie and the potluck pumpkin dessert by putting a gingersnap crust under the pumpkin dessert layer. I'm here to tell you that this is one spectacular and awesome and excellent dessert! Just ignore your diet when you take your serving. After having a generous portion and giving one to Sweetie I decided that we really couldn't let this dessert remain in the house.

It doesn't look like anything special in the pan or even when you put a portion in the bowl. The whipped cream makes it look more special, but it is still a timid looking sweet. Then you taste it!It is rich, spicy, light but creamy and probably addictive. The gingersnaps at the bottom gives it zing and goes perfectly with the spicy pumpkin filling. I think the walnuts on top are crucial because they add needed crunch. You can leave them out, but I wouldn't.

The remaining dessert was taken to the lovely folks at the local library...after all without the library I would never have found the recipe! Besides, they are always a pleasure to speak with, always helpful, knowledgeable and hard working, too. Now they want my recipe...and who can blame them?

So for Jennifer and the other lucky librarians who had a taste of this dessert, and for anyone who wants a wicked good pumpkin dessert that will feed quite a few people, here it is!

Pumpkin Dessert with Gingersnap Crust– Better Than Pumpkin Pie
Inspired by Block Parties and Poker Nights by Peggy Allen

40 gingersnap cookies, finely crushed (about 2 cups)
½ cup finely ground nuts (I used walnuts, but pecans work well, too)
½ cup butter, melted
2 ½ cups (28 oz can) pumpkin puree
2 cups milk
6 large eggs
1 ½ cups sugar
1 teaspoon salt
2 teaspoons ground cinnamon
1.2 teaspoon ground cloves
1 teaspoon ground ginger
1 (18-oz) package yellow cake mix
¼ pound (1 stick) butter
½ cup chopped nuts, optional

Preheat oven to 350 degrees F.

In a medium bowl mix the gingersnap crumbs, ground nuts and melted butter. Pat into the bottom of a 9 x 13 inch baking pan. Bake for 10 minutes. Remove from oven and set aside.

In a mixer bowl, combine the pumpkin, milk, eggs, sugar, salt, and spices. Beat at medium speed until blended. Pour the mixture over the gingersnap crust in the 9 x 13 inch baking pan.

In a separate bowl, pour the dry cake mix. Cut the butter into the cake mix until it is crumbly (or use a food processor).

Sprinkle the crumb mixture over the pumpkin mixture. Top the crumbs with the chopped nuts, if using.

Bake until the crumbs are golden, about 50 minutes to 1 hour .

Serve this dessert warm or cool. Can be garnished with whipped cream or ice cream.

Serves 18

Thursday, June 10, 2010

Strawberry Shortcake If You Really Like Cake

I love cake. It's not that I don't enjoy cookies, pie, ice cream and other treats, but I really, really like cake.

When strawberries are at their peak of perfection each year I make every effort to have strawberry shortcake. Some years I go with the cream scone or sweet biscuit type of base but my favorite is always a cake base. The cake soaks up the glorious berry juices and mixes well with rich, freshly-whipped heavy cream and provides another texture as well. Some years if I'm in a hurry I go with a yellow cake mix. Mostly I try out different white or yellow cake recipes. This year I think I've figured out a recipe that will be my go-to for future years when strawberry season rolls around.

My friend Green Thumb was being the hostess for a meeting of the Ways and Means committee. We needed to plan ways to raise money this coming year for scholarships. She had the great idea of serving Strawberry Shortcake, even though we were meeting at 10 am! I guess if we can have strawberries, whipped cream and waffles and call it breakfast that Strawberry Shortcake can be a seasonal coffee cake, too.

She provided the strawberries...those local, sweet, juicy ones, all sliced and ready to go. I provided whipped cream...only the real stuff with fresh strawberries, please...and squares of a moist and buttery buttermilk cake flavored with vanilla and brown sugar. It started as a Dorie recipe but, as is often the case, I played with it so much that she might have trouble recognizing it. I'll give my recipe below and you can check out her recipe for Cocoa-Buttermilk Birthday Cake in Baking:from my home to yours and see what changed. The reason I chose to make this cake, aside from the fact that I had buttermilk in the fridge (often I don't) was that I wanted to make a cake with the dry-wet-dry mixing method because I usually like the results.

So we finished our business meeting and then put squares of this springy cake that hinted of brown sugar and lemon into bowls. On top we spooned on generous servings of those sweet berries and their juice. A dollop of whipped cream and a whole strawberry on top finished each serving. This dessert was such a hit that a couple of the ladies who always are careful about what they eat even had seconds!

Try it while strawberry season is here, but remember it will work just as well as a base for sliced fresh peaches, juicy blackberries or blueberries or raspberries or even add some cocoa powder and top with fresh pitted cherries and a swirl of chocolate sauce over the whipped cream for a take on Black Forest cake.

Buttermilk Shortcake Cake
A moist and buttery single layer cake using the dry-wet-dry mixing method
1 ¼ cup all-purpose flour
2 teaspoons baking soda
¼ teaspoon salt
1 stick (8 oz) unsalted butter, at room temperature
¾ cup brown sugar, packed
1 large egg
1 egg white
½ teaspoon pure vanilla extract
grated zest from ½ a lemon
½ cup buttermilk

Butter a 9 inch square baking pan and dust the inside with flour, tapping out any excess. Center a rack in the oven and preheat to 350 degrees F.

Whisk together the flour, baking soda, and salt. Set aside.

In the bowl of a stand mixer, fitted with a paddle attachment, beat the butter on medium speed until soft and creamy. Add the brown sugar and beat for about 2 minutes, until sugar is completely blended into the butter.

Add the egg and beat for one minute. Scrape sides of bowl and beater. Add the egg white and beat for 2 minutes. Beat in the vanilla and lemon zest until incorporated.

Reduce mixer speed to low and add the dry ingredients alternately with the buttermilk; add the dry ingredients in 3 portions and the buttermilk in two (begin and end with dry ingredients). Mix only until each addition is barely blended in to the batter. Scrape down the bowl and take a few turns with the spatula to finish mixing the batter quickly.

Put the batter in the prepared pan and level the top. Place on a baking sheet and put into the preheated oven.

Bake for 25 -30 minutes, or until the cake feels springy to the touch and starts to pull away from the sides of the pan.

Transfer cake to a cooling rack and cool 5 minutes. Run a knife around the sides of the cake and turn out onto a plate. Place an inverted plate over the cake and turn right side up. Cool to room temperature.

Cut the cake into 9 squares if using for strawberry shortcake or similar dessert. This cake will keep, wrapped air tight, overnight or you can freeze it for up to 2 months for a quick dessert.

Tuesday, February 09, 2010

Happy Birthday to Me


I won't tell you the exact date, but I will tell you that my lovely and talented daughter has given me a trip to Seattle for my birthday so there will be few posts until next Monday. I'm really excited! We will be seeing Avatar in IMAX and I've been waiting to see it with her. I'll get to meet one or more of her friends, do some glass fusing, do some shopping and eating out and walking around her neighborhood. She and I are also slated to have breakfast with two of my favorite bloggers...Lynn of Cookie Baker Lynn (now a blogazine author at Simple Bites) and Peabody of Culinary Concoctions by Peabody, one of the most drool worthy sites you will ever find and home to excellent photography, too. Even if it rains...and it probably will...I will be having a blast!

As far as birthdays go, my take on it is every year I celebrate a birthday means that I have lived and experienced another year...and usually learned wonderful things and had fun with great people and often helped some other human beings along the way.
Bread has been baked, delicious dishes cooked and photographed and posts made on this blog. Other blogs have been visited, often with delight and laughter...most bloggers seem to be far funnier than I am. Walks will have been taken with Sweetie and the bread baker's dog. Project will have been undertaken and time spent in hardware stores (almost as much fun as cookware stores :) Books have been read and conversations taken place. This year has included a new haircut, too, after many years of more or less the same old same old. Life is a never ending source of amusement and fascination to me. Ever year I want another one, so here's to my next birthday, too!

Some days at work I get a surprise like I did today. I didn't bake my birthday cake, or even a Valentines cake, but I did get to bake a cake for Walter. He wanted a cake with pineapple and whipped cream. I went online and looked at a lot of pineapple cakes. Although some were similar, none were exactly like the one I ended up making, so I'm calling it Walter's Pineapple Cloud Cake.

Since I wasn't expecting to bake today I didn't bring my mixer with me. It seemed best, since all the batter would be hand mixed, that I use cake mix from a box. I changed it a bit by using melted butter and Greek yogurt instead of vegetable oil. That provided both moisture and fat. Considering all of the whipped cream, it was probably gilding the lily, but should taste wonderful that way!

Speaking of the whipped cream, I'm here to tell you that a whisk will do the trick quite well, but my wrist was tired by the time I did two batches. If you are using an electric or stand mixer, you can beat it all at once and then divide it.

This cake is a vanilla cake baked in a baking pan (normally I would use a 9" x 13" pan, but this was going to the home of an ill man and I didn't want them to have to worry about keeping track of the pan). A can of crushed pineapple in juice is drained while the cake bakes, and the juice is used to moisten the baked cake while it is still warm. The remaining pineapple is folded into half of the whipped cream (one of my batches) and spread over the cake...it ends up being about an inch thick. Then the remaining whipped cream is spread over the pineapple mixture and given some pretty swirls. Once it has chilled for a while it is ready to eat.

Since I didn't have an opportunity to either cut a piece of this cake or to photograph or taste a piece, you'll have to go with my photo of the top of the cake and the assurance that it is a delicious cake, simple and elegant and light as a cloud!

Walter's Pineapple Cloud Cake

1 box yellow cake mix
1/2 pint Greek style yogurt, plain
2 tablespoons butter, melted and cooled
1 1/4 cups water
1 can pineapple in it's own juice (about 15 oz)
1 pint heavy whipping cream, chilled
1/2 teaspoon vanilla extract

Prepare the cake mix according to package directions, but use the yogurt and butter in place of oil. Bake in a preheated 350 degree oven about 30 minutes, or until cake springs back when you poke the center.

While cake is baking, drain the pineapple, reserving the juice.

When the baked cake is removed from the oven, use a skewer to poke holes all over the top, about 1/2 inch apart. Pour the drained pineapple juice evenly over the cake, letting it seep into the poked holes. Set pan in the refrigerator to cool while you whip the cream.

In a large bowl whip the cream. Divide in half.

To one half of the whipped cream add the drained crushed pineapple and fold in with a spatula until well blended. Spread this mixture over the top of the cake and smooth the top evenly.

To the second half of the whipped cream, add the vanilla extract and beat that in until combined.
Place dollops of the whipped cream over the pineapple mixture on the cake and spread over the cake, making decorative swirls or peaks as desired.

Chill cake for at least an hour to combine flavors and set the whipped cream. Keep refrigerated if there is any left to store after serving.

Sunday, September 27, 2009

September 2009- Vol au Vents

The September 2009 Daring Bakers' challenge was hosted by Steph of A Whisk and a Spoon. She chose the French treat, Vols-au-Vent based on the Puff Pastry recipe by Michel Richard from the cookbook Baking With Julia by Dorie Greenspan. Before we get to the recipe, let us return to the Land of St. Honore’ to see what they are up to this month.

Once upon a time in the Land of St. Honore’, the Princess of Hearts was bored. Her father was off playing cards, her mother was baking tarts and her brother was up to some mischief or other. She looked through the toys on the shelf and had an idea.

Years ago she had been given a solid gold apple by a visiting dignitary. Now she was much too old to enjoy such a plaything, so she would offer it as a prize. The heralds were sent far and wide announcing that a prize would be given to the person who could make the princess laugh.

Many tried and the princess grew tired of those who made funny faces, juggled melons, and tried with Punch and Judy antics to make her laugh. At length a squire approached with a plate he had been asked to deliver to her. On the plate were small rounds of flaky pastry, filled with whipped cream and topped with berries.

She was so annoyed with the man telling jokes that she barely looked at the pastries.

The squire, hoping to catch her attention, in a rounded voice asked her. “Would you like a vol au vent?”

The princess turned toward him and giggled a bit. “Put one of those in your mouth and then ask me” she said. He did just that and this time it came out sounding like ‘wowel awe went” and his cheeks were distended like a chipmunks as he tried to talk and not show the food in his mouth, all the while enjoying the full buttery flavor of the pastry, complimented by the sweet cream and juicy berries.

The princess couldn’t help herself…she laughed out loud, and then continued to laugh as tears streamed down her cheeks. Once she stopped laughing she popped one of the vol au vents into her own mouth and the squire was rewarded with a charming smile as she enjoyed the treat and the fact that she was no longer bored.

She presented the squire with the golden apple and then asked, “Do you know any more strange and funny words?”


Find all the charming vol au vents around the blogosphere today as the Daring Bakers make these cunning puff pastry cases and fill them with all sorts of delicious things. The Blogroll is here and the recipe is here at Steph's blog. Thank you Steph for a great challenge!

I enjoyed making these little morsels of butter and was surprised at how much my puff pastry puffed. I guess all that rolling and turning and rolling and turning works! Fortunately the day I made the pastry it was cold in the kitchen so I was able to do four turns before chilling the dough for the last turns. The day I baked the vol au vents was much warmer and that may have led to the somewhat wobbly sides on some of them…the dough may have been too warm.
These vol au vents were enjoyed with whipped cream and late harvest blackberries. The photos just below are of the ones that sort of slumped over. I'm filling the pretty ones today to eat after Sunday dinner, so the pretty photos will be added (have been added - see top and below). The ones we ate, misshapen though they were, were a hit at my house and likely would be enjoyed at yours, too. Straight Shooter liked that they weren't too sweet.
It is worth the effort and life is always good when you have an excuse to beat some dough with a rolling pin! The little circles that you cut out of the pieces that become the sides can also be baked and become these cute pastries:

They make a fun snack as Sweetie will be happy to tell you.

Speaking of Sweetie, he has been working for quite a while now on ship models, most of them from the World War II era. He recently made a beautiful display case so that we can better admire them and all the detail work. I promised my Mom that I would include a photo of that on the blog. Here it is, Mom. As you can see it really did come out beautifully. The lower two sections have plexiglas over the opening to keep the ships from being hit by the baker's dog's tail. :)

Sunday, April 26, 2009

Daring Bakers' April Magic

It’s the end of April and the Daring Bakers are out in force. Time for another visit to the Land of St. Honore’. The April 2009 challenge is hosted by Jenny from Jenny Bakes. She has chosen Abbey's Infamous Cheesecake as the challenge.


Not so long ago in the Land of St. Honore’, the fairy godmother received an urgent summons from the castle.

Cinderella, now called Ella to distance her from her sordid past, was on the board of a charity. As is often the case these days just being a do-gooder wasn’t enough. She had been “asked” to provide a “Spectacular” dessert for an upcoming event and it was supposed to be something that she had baked herself. Now she had been a whiz at cleaning everything from the chamber pots to the fireplaces at her stepmother’s place, but no one had trusted her with baking since the fiasco of the well burnt cookies.

Her fairy godmother arrived and heard her tale of woe. “What did you have in mind”, she asked?

“Well, the only things in the castle kitchen include some plain cream cheese, plain cream, plain sugar, plain eggs, plain butter and the usual pantry items like crackers. I suppose there are some fresh strawberries, too. I can’t imagine that anything grand enough to be a centerpiece could come of all that.”

Ah, she certainly was a forgetful princess, wasn’t she? Didn’t she remember the transformations necessary to get her to the ball, all those years ago?

Wasting no time, “Bibity-bobbity-boo!”, cried the fairy godmother with a swirl of her magic wand. This time there were no gourds involved, but instead Ella saw a glorious cheesecake, crowned with strawberries and decorated with whipped cream stars appear on the counter in the kitchen.


“I’m sorry I doubted you”, she said breathlessly. “Now how do you suppose I’m going to carry that to the event in my Pumpkin SUV?”

But her fairy godmother had flown off to her yoga class, leaving Ella to call for her footmen. Surely they would figure it out. A cheesecake like this isn’t created every day.


If you’d like to work a little magic of your own, the recipe for the cheesecake can be found here.

The additions I used to make Ella’s fairy godmother’s version include adding 1 teaspoon of lemon zest to the batter, not using any liquor, and adding ½ teaspoon cinnamon to the crust mixture. The top is decorated with sliced strawberries.


Small stars of whipped cream are piped on the sides


and a swirl is piped on the top near the center. I didn’t wave a wand or cry any magic words, but this cheesecake is an easy one and really doesn’t require magic, just careful attention to the recipe and a few hours of your time.

For the water bath part, I used a double layer of heavy duty foil to wrap the bottom and sides of the springform pan and that was successful. No water infiltrated the foil, so the crust was dry and delicious.


This is a truly spectacular cheesecake, not just because it looks awesome, but because it isn’t too sweet, it has a rich, soft and creamy texture and, if left almost plain, has true cheesecake flavor. Try it and see!


Since the challenge this month encourages imagination, do visit other Daring Bakers’ blogs to see what magic has been created in hundreds of ways! Click here for the blogroll.

A huge ‘Thank you!’ to Jenny for choosing such a great challenge recipe!


Tuesday, June 10, 2008

This Could Happen To You, Too

Been bitching and moaning about how much life has been a roller coaster since right after Christmas up until a few weeks ago. BUT the problem is that I know all of that to be true...after all I lived it...but the actual memory of specifics that made it such a roller coaster are scattered like thistle down. This could happen to you (or might have already).

I'd like to think that it is the fast paced life I live that caused this situation, but the truth is probably that my brains is too stuffed to accept any more...and I can't find the delete key. The good news is that I know a lot of the experiences were very positive ones, the bad news is that there were some difficulties and stresses and sad happenings thrown in, too. Driving home from work today I decided to do a mini-journal to tack on the end of posts as a way to keep a little better track of the day to day passing scene.

Before we get to today's mini-journal, it's time to revisit the Sin City Cake. This recipe is based upon one in the book Chocolate Cake by Michele Urvater. This book has bunches of great chocolate cake recipes, plus icings, sauces, decorations...the works! I made a half recipe last November and made a few changes, reflected in the recipe below.

It was so memorable that Dr. Wise requested a full cake as part of the party last Saturday. The reviews were all positive and so I thought it might be good to post it again. This time I made it with some of the quince jelly that I made last fall. There was no poached fruit this time, just cake, jelly, whipped cream, cake, jelly, whipped cream, cake, chocolate ganache. Just! I'm still drooling days later just at the thought of how wonderful it was. The cake was dense and fudgy, but still tender. The jelly brought out the best in the semi-sweet and bitter-sweet chocolate. Whipped cream is always a treat. When you want to impress, make this cake!


Sin City Cake

2 ½ cups cake flour
2 teaspoons baking powder
¼ teaspoon baking soda
¼ teaspoon salt
2 sticks (8 ounces) unsalted butter, softened
2 cups plus 1 tablespoon (1 pound) superfine sugar
4 large eggs
8 ounces unsweetened chocolate, melted and cooled
2 cups water or regular coffee

Ganache
8 ounces bittersweet or semisweet chocolate, finely chopped
8 ounces heavy cream

Quince jelly – about 6-8 ounces

1 pint heavy whipping cream, whipped


For the cake:
Position a rack in the center of the oven and preheat to 325 degrees F. Lightly grease and flour three 9 x 1.5-inch round cake pans, tap out the excess, and line the bottoms with parchment or greased and floured waxed paper circles. (Note from Elle: If you combine some cocoa with the flour for dusting the pans, your cake will have a nice chocolate edge to it.)

Sift the flour with the baking powder, baking soda, and salt twice, and set it aside.
With an electric mixer on low speed (or with a stationary mixer fitted with the paddle attachment), beat the butter for 1 minute, or until light. Slowly add the sugar, about 2 tablespoons at a time, and when all of it has been added, continue to beat on medium speed for about 2 minutes, scraping down the beaters and sides of the bowl as needed. The mixture will look like fluffy wet sand.

Add the eggs one at a time, beating for 10 seconds between additions, or until absorbed by the butter. Add the chocolate, scrape down the beaters and sides of the bowl, and beat for 1 minute longer, or until light and smooth.

With a large rubber spatula, fold the sifted ingredients into the batter in four additions, alternating with the water (or coffee) in three additions. Beat with an electric mixer on low speed for 1 minute, or until the mixture looks smooth.

Transfer the batter to the prepared pans, smooth the tops with a rubber or small offset spatula, and rap the pans sharply on the counter to break up any large air bubbles. Bake for 25 to 30 minutes, or until a tester inserted in the center comes out dry.

Remove the cakes from the oven and cool them to room temperature in their pans on a wire rack. Unmold, peel off the paper circles, and frost when the cakes are cool. Serves 16.

For the Ganache
Set the chopped chocolate in a mixing bowl.

Pour on the cream and mix well.

At half power in the microwave, heat the mixture for a minute. Stir well. Repeat until the chocolate is melted and the mixture is smooth. Let the ganache stand and come to room temperature before using.

Elle’s notes: As usual I didn’t follow the recipe exactly. as it was written. I added the jelly and the whipped cream between each of the layers. The top and sides were covered with ganache. It was so hot in the kitchen on Saturday that the ganache was too thin at first.

So you had cake layer, jelly and whipped cream, cake layer, jelly and whipped cream, cake layer, and ganache. I beat the whipped cream fairly stiff so that it would hold up under the weight of the cake. I piped it on top of the jelly, then spread it out to the edges.

Monday, December 10, 2007

A Delicious Gift

This weekend we drove a couple of hours to finally celebrate Natasha's birthday. It was a beautiful, sunny, cold day in River City area, but the warmth of the welcome received made it a special day.

As a special birthday treat, we brought a Swedish Princess Cake made at nearby bakery, Village Bakery in Sebastopol. The owner is from Scandinavia and their version is light, rich and delicious. The traditional Princess Cake is covered in a pale green cloak of marzipan, but for the holidays the bakery is decorating the cake like a gorgeous present, right down to the bow. It was almost too pretty to cut into, but too delicious not to.

The Princess Cake is a Swedish national passion. It seems that the cake was created in the 1930s for the birthday of a Swedish princess. It is often served as a graduation cake, but apparently can be found throught the country and can be found as a treat to go with tea or coffee, usually as a slice of cake. The distinctive thing about this cake, other than the marzipan, is the rounded top of the cake, usually created by mounding pastry cream or whipped cream in the center of the top layer, then smoothing the cream to make a dome shape on the top.

Although we did reserve a piece to bring home to our nephew, somehow the four of us managed to polish off the rest. It was the small version, but still quite a dose of cake, jam, cream and marzipan. You would think that it would be very sweet, but it isn't. With some coffee and good conversation, it was the perfect dessert for celebrating the birthday of a wonderful sister.

Friday, November 02, 2007

Sinfully Chocolate

One of my co-workers is half a hundred, so I made half a cake to help her celebrate. Since Sweetie and I had to make sure that it wasn't poisoned, the birthday celebration included less than half a cake, but it was a spectacular cake nonetheless.

This cake is the one I promised you, after tantalizing you with that photo of the batter on the paddle with lots of bittersweet chocolate all over it. Make it for a special day, make it for someone you care for, make it to cheer yourself up, or for no good reason other than the need to have a rich, fudgy, very chocolate cake with hints of fruit and cream. Even the batter looks decadent.

This recipe is based upon one in the book Chocolate Cake by Michele Urvater. This book has bunches of great chocolate cake recipes, plus icings, sauces, decorations...the works! As usual, I played around a bit with the recipe (details can be found after the recipe) but I'm sure it would be great as written, too. It was even better the next day, chilled, but do keep it closely wrapped to keep that moist, dense crumb.

The recipe in the book didn't include the jelly and fruit and whipped cream additions. You can use poached apple or pear for this, or even fresh raspberries or strawberry slices, but I'd use strawberry jam in that case. Instead of the jelly you could use apple butter with apple slices...you get the idea...be creative. You can see in the photo below how lovely the crumb was...it was almost falling apart...in a good way.

Sin City Cake

2 ½ cups cake flour
2 teaspoons baking powder
¼ teaspoon baking soda
¼ teaspoon salt
2 sticks (8 ounces) unsalted butter, softened
2 cups plus 1 tablespoon (1 pound) superfine sugar
4 large eggs
8 ounces unsweetened chocolate, melted and cooled
2 cups water or regular coffee

Ganache
8 ounces bittersweet or semisweet chocolate, finely chopped
8 ounces heavy cream

Raspberry or current jelly – about 6-8 ounces
Poached fruit, sliced thin – pears work well

For the cake:
Position a rack in the center of the oven and preheat to 325 degrees F. Lightly grease and flour three 9 x 1.5-inch round cake pans, tap out the excess, and line the bottoms with parchment or greased and floured waxed paper circles. (Note from Elle: If you combine some cocoa with the flour for dusting the pans, your cake will have a nice chocolate edge to it.)

Sift the flour with the baking powder, baking soda, and salt twice, and set it aside.
With an electric mixer on low speed (or with a stationary mixer fitted with the paddle attachment), beat the butter for 1 minute, or until light. Slowly add the sugar, about 2 tablespoons at a time, and when all of it has been added, continue to beat on medium speed for about 2 minutes, scraping down the beaters and sides of the bowl as needed. The mixture will look like fluffy wet sand.

Add the eggs one at a time, beating for 10 seconds between additions, or until absorbed by the butter. Add the chocolate, scrape down the beaters and sides of the bowl, and beat for 1 minute longer, or until light and smooth.

With a large rubber spatula, fold the sifted ingredients into the batter in four additions, alternating with the water (or coffee) in three additions. Beat with an electric mixer on low speed for 1 minute, or until the mixture looks smooth.

Transfer the batter to the prepared pans, smooth the tops with a rubber or small offset spatula, and rap the pans sharply on the counter to break up any large air bubbles. Bake for 25 to 30 minutes, or until a tester inserted in the center comes out dry.

Remove the cakes from the oven and cool them to room temperature in their pans on a wire rack. Unmold, peel off the paper circles, and frost when the cakes are cool. Serves 16.

For the Ganache
Set the chopped chocolate in a mixing bowl.

Pour on the cream and mix well.


At half power in the microwave, heat the mixture for a minute. Stir well. Repeat until the chocolate is melted and the mixture is smooth. Let the ganache stand and come to room temperature before using.

Elle’s notes: As usual I didn’t follow the recipe exactly.

I cut the recipe in half (because with cake this rich, who needs a full recipe?) and baked it as one layer in a 9 inch spring form pan. After it had cooled, I cut that layer in half horizontally with a long serrated knife. I took off the top layer and set it aside. When I was ready to frost the cake, I spread raspberry jelly on the cut layer, added some poached fruit, sliced very thin, then put the other layer on top. I used the same knife to cut the cake in half to make two half moons. I beat up some whipping cream with a little sugar, spread that on one of the half moons, then topped it with the other half moon. So you had cake layer, jelly and fruit, cake layer, whipped cream, cake layer, jelly and fruit, cake layer, just half a cake instead of a full round.

Then I made the ganache and let it cool until it was thick enough to spread. Although the cake listed slightly since I can’t make a horizontal cut to save my soul, the ganache covered a multitude of sins and the cake as a whole lived up to it’s name…very dense and fudgy, sweet from the chocolate ganache and rich, too. The fruit and heavy dairy flavor from the whipped cream helped tone down the sweetness a bit but the jelly added to it . Still, it was a delicious cake and the piece I took to my boss had him on a real sugar high since he usually does not eat things that are sweet, rich, or so chocolate. I made the cake so that I could do a little birthday party for my co-worker who will be leaving soon. She seemed pleased. She is a sweet person, so a sweet cake seemed just right.