Sunday, December 20, 2015

Cinnamon Bun Transformation


For the December Cake Slice Bakers, we had the choice of Walnut Raisin Rum Cake which looked wonderful but sounded too much like what I baked last month, Ginger Ginger Cake which was too much like the Gingerbread Cake I had recently made, and Zugar Kirchtorte, a cake I would have loved to make when I was still enjoying butter, but, sadly, butter is no longer my friend.

The fourth choice is the one I chose, Cinnamon Buns, a fine yeast recipe made with fresh mashed potatoes and potato water. I suppose it can be considered, if you stretch the term a bit, as a cake, but I think of it as a sweet bread. I had to make this one as a tip of the hat to my friend Tanna of My Kitchen In Half Cups. She had me make my first potato bread ever, back when we were both Daring Bakers, and I have loved potato breads ever since. Yeast seems to just love potatoes and the dough, once you get past the initial stickiness (which has been known to cause me to swear), potato dough is supple and feels wonderful to work with. It takes a few more minutes to make these with freshly cooked and mashed potatoes, but it is worth the trouble because the yeast bread is superior to that make with reconstituted mashed potatoes. Just be sure to let the water and potatoes cool enough so that your yeast are happy and not cooked.

Because it's the holiday season I decided to transform the standard pan of buns into a wreath shape. I made two of them and gave one as a gift to a friend. Sweetie and some neighbors enjoyed the other. To make this bread properly, you do need to use milk and butter. It's also a good idea to use fresh cinnamon since that is a key ingredient. I used Penzy's Vietnamese Cinnamon. It is full flavored and so fragrant that it was perfect for this bread. I also decided to add some chopped walnuts, which I sprinkled on top of the butter and cinnamon before I rolled up the dough.

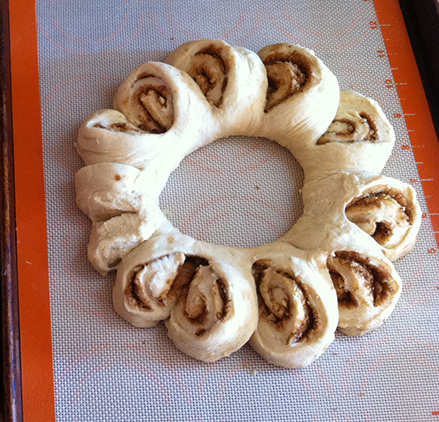
Once the dough is rolled up, which you do for both the buns and the wreath, to make the wreath, form the dough log into a circle and connect the ends together by pinching them. You then take a pair of clean kitchen scissors/shears and cut almost all the way through about every two inches around the circle. You leave the dough connected (uncut) at the inner side of the circle. Once that is done, you turn each of those pieces a bit so that you can see the spiral of bread dough and spice/sugar
.

After that you let the dough rise again and bake it at the same temperature as the buns. I like a bit of decoration, so I mixed together some hot milk and confectioners sugar and drizzled it over the wreath in a decorative pattern. Pretty as a picture and a nice gift, too.

These buns (for those pieces you turned on the wreath become buns when the wreath is cut) are soft and tender with a wonderful taste of cinnamon and sugar. It smells like the best kitchen in the world while they are baking!


Cinnamon Bun Wreaths
and adaption of a recipe from Maida Heatter's Cakes

Dough:
1 cup mashed potatoes (see Notes)
1 cup milk
1/2 cup plus 1 tablespoon granulated sugar, divided
1/2 teaspoon salt
2 oz. (1/2 stick) unsalted butter, cut up
1/4 cup warm water (105-110 degrees F)
1 envelope active dry yeast
1 egg at room temperature
1 teaspoon vanilla extract
About 4 1/4 cups unsifted all-purpose flour or bread flour,
plus additional flour, mostly for kneading
(bread flour is excellent in bread where there is a lot of butter and sugar)

Notes: The mashed potatoes can be made with instant dry mashed potatoes or fresh potatoes.
It takes about 3/4 pound fresh potatoes to make 1 cup mashed. Peel, cut into chunks, place in a small saucepan with water, boil, partially covered, until tender, drain, and then mash the potatoes. Be sure to save the water the potatoes were boiled in and use some of it for dissolving the yeast. Since yeast loves potatoes so much, this will make it extra happy.

Filling:
2 tablespoons granulated sugar (I used brown sugar)
1 1/2 teaspoons cinnamon
1/4 teaspoon nutmeg
1 oz (1/4 stick) unsalted butter, melted
1/2 cup finely chopped walnuts

Instructions:
Generously butter a 4-6 quart bowl or other container for the dough to rise in. Set it aside.

Place the mashed potatoes (which may be warm or cool, as long as below 111 degrees F) in a saucepan and, stirring constantly, add the milk very gradually. Stir in 1/2 cup of the sugar and the salt and butter. Place over low heat and stir occasionally until the mixture is warm (105-110 degrees F).It is not necessary for the butter to have melted completely, but OK if it does.

Meanwhile, in a 1-cup glass measuring cup, stir the warm water (can be potato water) with the remaining 1 tablespoon sugar, sprinkle on the yeast, stir briefly with a knife, and set aside for about 10 minutes until the mixture rises to about the 3/4 cup line.

In a small bowl, beat the egg to mix and add the vanilla.

When the potato-and-milk mixture is warm enough, transfer it to the large bowl of an electric mixer. Beat in the yeast mixture and the egg. On low speed, gradually add about 3 cups of the flour. Beat on low speed for a minute or two. Remove the bowl from the mixer. The dough will be wet and sticky now. With a heavy wooden spoon, gradually stir in the remaining 1 1/4 cups of flour. Dough will still be sticky.

Flour a large work surface. Turn the dough out onto the floured surface. The dough will still be too sticky to knead. Add a bit of additional flour and, with a dough scraper or a wide metal spatula, turn the dough over and over with the additional flour - adding still a bit ore if necessary - until you can handle the dough. (a glass of wine to the side and/or some swearing help when getting through this part - Elle's notes.) You might have to add 1/2 to 3/4 cup additional flour. Remember, though, that potato based dough has a tendency to remain a bit sticky even when enough flour has been added, so do not use more than you must...err on the side of sticky dough.
After about five minutes active kneading, the dough should be smooth and feel alive. If you can be really careful to not add too much flour, you can also do the kneading with your stand mixer.

Place the dough in the buttered bowl, turn it around in the bowl to butter all sides, cover the bowl with plastic wrap (or a clean shower cap) and place it in a clean, draft-free spot to rise for 1 to 1 1/2 hours, until the dough is at least double in volume.

Once dough had doubled in volume, make a fist and punch it down in the middle, then fold in and press down the sides of the dough to deflate all of it. Turn the dough out onto a lightly floured surface and use a knife or bench scraper to divide the dough in half.  Return half the dough to the rising bowl and re-cover.

Take the half dough still on the lightly floured surface and roll it out in a rectangle about 16-18 inches by 10 inches.
The dough may fight you...if so, let it sit for a few minutes while you make the filling components, then return to it and continue shaping.

For the filling, in a small bowl, mix the sugar with the cinnamon and nutmeg. Make sure the walnuts are finely chopped. Brush half the melted butter over the rolled out dough, leaving about 1/2-inch clear around all edges. Sprinkle on half the cinnamon sugar mixture evenly over the butter, then sprinkle half the walnuts over that evenly. Roll up on the long side like a jelly-roll, pinching the edges together once it is all rolled.

Carefully lift the rolled dough onto a parchment lined baking sheet (or use a silicon mat lined baking sheet) and form into a wreath shape. Pinch the ends together. Use a pair of clean scissors or kitchen shears to cut the dough about every two inches, leaving the dough attached at the inner edge of the roll. Carefully take each cut section and turn it so that you can see the filling. Do that with each cut section around the wreath. See the photo above in the beginning of the post to see how it looks at the end, before rising.

Repeat the rolling, filling, rolling up, cutting and turning with the other half of the dough and filling. I used two baking sheets so that they wouldn't stick together.

Set the wreaths in a warm, draft free place and let rise until puffy, about 1 hour. Towards the end of that time, preheat the oven to 375 degrees F. Before preheating, adjust the rack one-third up from the bottom of the oven.

Bake the risen wreaths for about 10 minutes, then reverse the pan from front to back and continue to bake until the wreaths are light golden brown. I baked one pan at a time, but you could probably bake both pans at once if you switched them around half way through baking. Ovens vary, but it will probably take about 25-30 minutes total. Once baked, remove from the oven and let cool on a rack five minutes while you prepare the icing.

Optional Icing
In a small bowl mix together 1 tablespoon warm milk and enough confectioners sugar (about 3/4 cup) to make an icing that is the thickness you like. Drizzle the icing over the cooled wreaths.

A cooled, iced wreath makes a nice gift and is also a lovely addition to your holiday table, especially at breakfast or brunch!
Check out the other Cake Slice Baker creations too.
Saturday, December 19, 2015

Three Kinds of Ginger


Although I've always loved gingerbread, I was an adult before I discovered the joys of fresh ginger and candied ginger. Of late I've been increasing the amount of ginger in my diet since it is not only an effective anti-inflammatory, but it tastes wonderful. Fresh ginger does have some natural heat to it, but I find that I enjoy that much more than the heat from, say, hot peppers.

One way to enjoy three kinds of ginger; fresh, candied and ground dried ginger; is by making gingerbread cake. I recently tried a new recipe that uses all three and it works really well in a Bundt cake pan. It's called the Gramercy Tavern Gingerbread and it's a recipe from Epicurious. I think I decided to try it because the first ingredient is one cup of stout (like Guinness). It also has lots of spices, not just ginger. Cinnamon, nutmeg, cloves and cardamom are also used. The strong flavor of molasses comes from molasses itself, but also from dark brown sugar. The only think it was lacking was the candied ginger, so I chopped up a tablespoon of that and added it anyway. It tended to go to the bottom of the pan, which became the top of the cake. I found that out because it got in the way of slicing the beginning of some slices, but I still think it adds a necessary element to the cake.

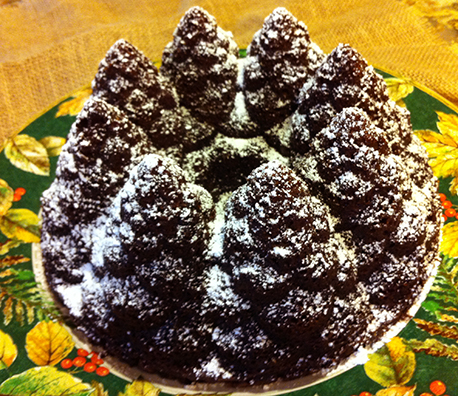
This makes a full Bundt cake, so make sure that your pan is a full sized one, which I think is a ten-cup capacity or larger one. I baked mine in a pan that looked like a circle of Christmas trees. For decoration I sifted on just a little powdered sugar, so they looked like snowy trees. Very pretty and perfect for a party, or your own holiday table.

This gingerbread is moist, spicy, mouthwatering (perhaps due to the wonderful fragrance of the stout and all those spices), with a fine crumb and sturdy form. Everyone who tried it was delighted, especially those who added a dollop of whipped cream to their serving.

Be sure to check back tomorrow to see what I made for the Cake Slice Bakers!


Adapted from
Gramercy Tavern Gingerbread
from Epicurious

1 C stout (like Guinness which is what I used)
1 C dark molasses
1/2 t baking soda
2 C all-purpose flour
1 1/2 t baking powder
1 1/2 T ground ginger
1 t ground cinnamon
1/4 t ground cloves
1/4 t freshly grated nutmeg
pinch ground cardamom
1 T freshly grated fresh, peeled ginger root
1 T finely diced moist candied ginger
3 large eggs
1 C packed dark brown sugar
1 C granulated sugar
3/4 C vegetable oil

Preheat oven to 350 degrees F. Generously butter a 10-inch (10-12 cups) Bundt pan and dust with flour, knocking out excess.

Bring stout and molasses to a boil in a large saucepan and remove from heat. Whisk in baking soda, then cool to room temperature.

Sift together flour, baking powder, and spices in a large bowl. Whisk together eggs and sugars and fresh ginger. Whisk in oil, then molasses mixture. Add to flour mixture and whisk until just combined.

Pour batter into Bundt pan and rap pan sharply on counter to eliminate air bubbles. Bake in the middle of the oven until a tester comes out with just a few moist crumbs adhering, about 50 minutes. Cool cake in pan on a rack 5 minutes. Turn out onto rack and cool completely.

Serve cake, dusted with confectioners' sugar, or serve with whipped cream.

As a reward for reading to the end, here is a recent shot of the sunset in our wintery sky. We have been having rain on and off, which is such a blessing!, so there are often clouds in the sky at sunset. Winter sunsets seem to have a wonderful fragile quality to them that I love.


Wednesday, December 16, 2015

The Babes And An Old New England Bread


This month I have the honor of being the Kitchen of the Month and have asked my fellow Bread Baking Babes to gather around the kitchen table and to have fun with Anadama Bread, an old New England favorite. Sweetie enjoys this bread because of the molasses and I enjoy the seeds and the fact that it makes great toast. It has corn meal in it for body and mine was a fairly compact bread which rose well enough as it was proofing, but didn't have much oven spring either time I made it. You can have fun with this bread by changing out the seeds. The first time I made it I didn't have many seeds on hand, so I used mostly flax and poppy seeds. 


The second time I used those, but also used sesame seeds and sunflower seeds, plus I used regular flour and just a bit of millet flour. I'm pretty sure that traditional Anadama Bread doesn't have much in the way of seeds, so this is a good recipe to have fun with, knowing that you are giving and old New England bread a new way of being.

Anadama bread is an old time bread, baked at least since 1850. This recipe is from the March 2015 Bon Appetit magazine.
 
 I tried it out in a semi-gluten free version, replacing 1/2 cup of the wheat flour with buckwheat flour and the King Arthur Flours gluten free flour mix so I could actually try a slice and not suffer for it. I also used a non-dairy butter substitute instead of the butter. For seeds I used 3 tablespoons whole brown flax seeds and 4 teaspoons poppy seeds.  I baked it in a long, thin bread pan, which is usually good for gluten free baking, so it made a long, narrow loaf. I think a regular sized loaf pan would make nicer bread for sandwiches. 

This dough made a pretty dense loaf with wonderful flavor and fragrance. I would recommend using regular flour (unbleached or whole wheat), real butter and whichever seed mixture you like, staying pretty close to the same seed proportions. Do allow time for the three risings.
 
No one really knows how this bread got its name. Wikipedia says, "An apocryphal story told about the origin of the bread goes like this: Every day a local worker would find cornmeal mush in his tin lunch pail, despite asking his wife for an occasional piece of bread. One day, because of weather or other circumstances, he came home just prior to lunch time. His wife, Anna, was out. He sat down and opened his lunch box to find the usual cornmeal mush. He sighed and said, "Anna, damn her," as he resolutely reached for the flour, molasses and yeast which he added to the cornmeal mush. His resulting bread became a local favourite."
 
 King Arthur Flour has this explanation: "There are many versions of how this bread came into being. They're all similar, but each varies slightly. The general consensus is that a New England woman named Anna provoked her husband — some say through laziness, others say from baking the same bread daily, or for not finishing her bread-baking. The husband either threw a bag of cornmeal at her and missed, but spilled it into the dough; or he grabbed cornmeal instead of flour and tried to finish her bread. He muttered, "Anna, damn her!"
 
So you can freely swear while making this bread (it's tradition, right?), have some wine while it rises and rises again...and again, and enjoy it as the weather grows ever colder.

Be sure to visit the other Babes sites to see what their version is and since this is a wonderful bread to go with a pot of hot soup, there is likely to be a good day to make it between now and December 29th. Make the bread, send me an e-mail with a photo and a note about your experience with it, and I'll send you a Buddy badge created by our talented Babe Lien. My e-mail is elle dot lachman at gmail dot com. Looking forward to seeing your beautiful, seedy Anadama Bread.


Anadama Bread - Makes one loaf

2 tablespoons unsalted butter, room temperature, plus more for the pan
1 - 1/4 oz. envelope active dry yeast (about 2 1/4 tsp.)
1 cup stone ground medium cornmeal
1/4 cup mild-flavored molasses
2 tablespoons help seeds or white sesame seeds
1 tablespoon nigella seeds or black sesame seeds
2 tsp. golden flaxseed
2 tsp. brown flaxseed
2 tsp. poppy seeds
1 1/4 tsp. kosher salt
2 cups all-purpose flour, plus more for kneading, etc.
1 large egg, beaten to blend
Salted butter, for serving

Preheat oven to 375 degrees F. Lightly butter an 8" x 4" loaf pan and line with parchment paper, leaving a generous overhang. (I skipped the parchment and baked the bread in a narrower and longer pan.)

Place yeast in a medium bowl or the bowl of a stand mixer. Add 1 cup warm water; stir to dissolve the yeast. Add the cornmeal, molasses, help seeds, nigella seeds, golden and brown flax seeds, poppy seeds and salt. Stir to combine using a wooden spoon. Continue stirring with the wooden spoon or use the dough hook if using the stand mixer. Add 2 cups of flour and 2 tablespoons of butter and mix until no dry spots remain.

Turn the dough out onto a lightly floured surface and knead until the dough is smooth and elastic, 10-15 minutes OR mix in stand mixer on medium speed 8-10 minutes.

Lightly butter a medium bowl. Transfer dough to bowl and turn to coat. (Elizabeth might skip the butter part.) Cover with plastic wrap or shower cap and let rise in warm, draft-free spot until almost doubled in size, about 1 hour.

Punch down dough to deflate; cover. Let rise again until about doubled in size, about 1 hour.

Turn dough out onto a lightly floured surface and pat into and 8' x 4' rectangle. Starting at the short side furthest from you, roll up dough, pinching the seam as you go to create a tight roll. Pinch seam to close and tuck ends under, pinching to seal. Place seam side down in the prepared loaf pan. Cover with plastic and let dough rise. Uncover before it crests the top of the pan and wait for it to spring back slightly when pressed, about 1 hour.

Brush top of dough with egg. Bake, rotating halfway through, until bread is baked through and the top is a deep golden brown, 45-50 minutes. Let cool slightly in the pan on a wire rack before turning out. Let cool on the rack before slicing (if you can wait that long). Serve with salted butter.

Bread can be made 5 days ahead. Store tightly wrapped at room temperature.

Saturday, December 12, 2015

A Time To Remember


I know that today is Frank Sinatra's 100th birthday, but for me the day is special because I'm remembering my mom, who died just a year ago today.

I come from a large family...seven siblings!...and they are all handling the memories and sense of loss in different ways today, and so am I. I did a Facebook post and shared an e-mail round robin with family. I made sure that as many siblings as possible had mom's signature cookie, crescent cookies with powdered sugar coating. They will be enjoyed with cocoa, tea, Irish Mist and any number of other libations. Tomorrow some family members who are gathering at my home for an early Christmas, as well as a late birthday, will get their crescents and we'll toast a wonderful woman...my Mom! You are missed Mother.


Monday, December 07, 2015

Bacon and Dates


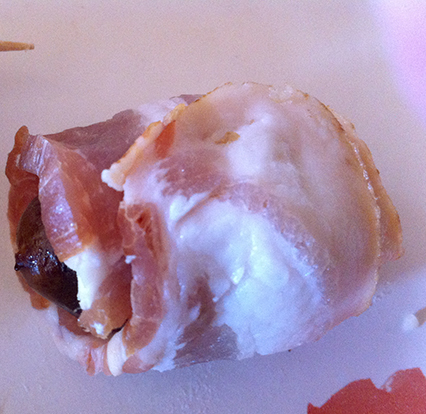
According to my sources, bacon wrapped stuffed dates have been a popular appetizer for a while, but I guess I missed that. Perhaps I don't eat at the right restaurants.

For Thanksgiving I was asked to bring stuffing and an apple crisp. I also brought a pecan pie because pie and Thanksgiving just go together. My lovely daughter brought the stuffed dates, although I helped heavily with the making of them.

We started with moist, large, pitted dates. If your dates aren't moist you may want to steam them briefly before starting, because some of the moisture is cooked off while the bacon cooks.

I like blue cheese with walnuts and since the recipe called for walnuts, we included a nubbin of good quality blue cheese, too. Warm melty cheese is always a treat. Each slice of bacon was cut in thirds and used to wrap three stuffed dates, so make sure you have enough bacon. If your bacon strips are short ones, you may even need to only wrap two dates per strip of bacon...extra bacon can be used for other purposed, right?

I pre-heated some cast iron skillets in the oven and added the stuffed dates to them which helped crisp up the bacon. They weren't fully cooked because we re-warmed them at the home where we were dining.

I warn you, these can be addictive! Who can resist warm and crisp bacon, soft and sweet date, crisp and mellow walnut and piquant blue cheese, all in one bite? Not me.


Bacon Wrapped Stuffed Dates

24 large moist medjool dates
8 or so walnuts, broken
1 oz. blue cheese
8-12 strips bacon - cut in two or three pieces depending on the length

Preheat the oven to 375 degrees F. If you have them, place two cast iron skillets in to preheat.

If dates have pits, remove the pits by slicing carefully from one end to the other with a paring knife and then removing the pit with the tip of the knife. Be sure to only cut the top of the date, NOT all the way through to the bottom. If your dates are not moist, steam them briefly before starting.

Stuff where the pits usually live with pieces of walnut and a nubbin of the blue cheese. You can use goat cheese if you prefer it to blue cheese.


Wrap a strip of bacon around the date, putting the stuffed part face down onto the bacon, overlapping the ends of the bacon on the opposite side. Secure with a toothpick.


If not using a cast iron skillet for baking, line a baking sheet with parchment paper and place the finished dates on the parchment.

Bake on the baking sheet or in the preheated skillets for about 8-10 minutes, turning over halfway. Bacon will start to turn golden and get slightly crispy on the edges. If you prefer, cook for another minute to cook the bacon a bit more.

Remove from the oven and allow to cool for at least 10-15 minutes before serving. Dates should be warm, not hot. They can also be served cold.


If you make them in advance, reheat them for a minute or two in the microwave if you prefer them warm.

Thursday, December 03, 2015

Fluffy Bourbon


One of the delightful things about being in the kitchen with my daughter is that she encourages e to try some things I wouldn't even consider making if left to my own devices. A good example of that is the weird science experiment that led us to create small red balls of flavor to put into mixed drinks.

Yesterday, since I wasn't the one cooking the turkey, there was a little time after making cornbread stuffing, apple crisp, a pecan pie and bacon wrapped stuffed dates. We used that time to whip up a batch of home made marshmallows. To make them even more interesting, she found a recipe by Jerry James Stone of Cooking Stoned for Bourbon Vanilla Marshmallows. I never thought that I would smell the heady fragrance of good bourbon while making fluffy marshmallows, but it was a great experience.


The finished marshmallows were cut and coated in a bit more of their powdered sugar/cornstarch mixture, then stacked in airtight containers. The little sweets were thinner than I expected, but next time we can make them in a smaller pan to get taller marshmallows. The flavor doesn't need any tweaking and they should be a great addition to a cup of cocoa which has a shot of good bourbon in it.


The whole process takes some time, but most of that is letting the marshmallows cure. The initial cooking takes less than an hour. Eggs are separated for the whites, gelatin takes a few minutes to soak, sugar and water gets heated, then some corn syrup is added and


then the soaked gelatin and the whole thing cooks to the hard ball stage (verified by using a candy thermometer). While the sugar syrup cooks, the egg whites get beaten with a little salt. If you have a helper they can sift together some cornstarch and confectioners' sugar for the pan. Otherwise you can do that yourself a little later.

The fun part is when the bourbon and vanilla gets added to the hot syrup and is stirred in. The heat makes the whole kitchen smell of bourbon and the hot mixture hisses and boils up a little bit! Once the egg whites get really fluffy, you slowly pour the hot syrup over them between the beater and the bowl while the stand mixer keeps on beating those egg whites. Be careful while handling the syrup. It can really burn if splashed on your skin, so keep a bowl of ice water handy. As the mixture fluffs some more, you can sift the cornstarch and confectioners' sugar together if it's not done already.

The confectioners' sugar mixture is sifted liberally over the bottom of the baking sheet. The fluffy, cooled marshmallow mixture is poured over that and the mixture is spread and leveled with an offset spatula, then more of the sugar mixture is sifted over it.


After that there's nothing more for you to do for at least 5 hours. We let ours sit on the counter overnight and in the morning they were ready to be cut, dredged in more sugar mixture to coat the cut edges, then packed for use. Takes a little time if you have a whole sheet pan worth, but if you use a smaller pan for taller marshmallows, it shouldn't take too much time and you will still have plenty of wonderful home made marshmallows. The directions are Jerry James's, not mine, but they work.

If you have a loved one who loves marshmallows, this could make a great holiday gift!


Vanilla Bourbon Marshmallows
Jerry James Stone of Cooking Stoned blog


·     3 envelopes unflavored gelatin
·     ½ cup cold water
·     2 cups granulated white sugar
·     ⅓ cup light corn syrup
·     ½ cup Bourbon
·     3 large egg whites
·     ¼ teaspoon salt
·     2 teaspoons vanilla extract
·     1 vanilla bean, halved and scraped
·     ½ cup cornstarch
·     ½ cup powdered sugar

In a small bowl, combine the 3 envelopes of unflavored gelatin and 1/4 cup of the water. Mix and let stand. Be forewarned, it’s gonna look pretty gross once it sets. Also, really, before you go any further, I suggest having all ingredients ready to go.

In a small sauce pan, combine 2 cups of sugar and the remaining water and warm it over a medium low heat. A minute later, add in ⅓ cup corn syrup and turn the heat up to medium-high. You’re going to bring the mixture to 240 degrees F. Corn syrup prevents the mallows from crystallizing and with the addition of bourbon, it is sorta needed.

While that is going on, let’s do some other stuff. Using a stand mixer, mix the three egg whites and ¼ teaspoon salt on low until they are just a bit foamy.

When the sugary syrup hits 240 degrees F, turn off the heat and add the following to the mix: ½ cup of bourbon and the gelatin mixture. While the gelatin melts, turn the stand mixer back on, this time to high, and start whipping those whites. Whip ‘em real good.
Once the whites have become fluffy and pillow-like, slowly pour the syrupy mixture into the mixer bowl where you’re spanking those egg whites. Do this slowly! You do not want to be splashed with boiling hot syrup.

Add in the 2 teaspoons of vanilla extract and scraped vanilla bean seeds and whip it until the mixture is fluffy, stiff and the outside of the bowl is cool to the touch.
While that is going on, using a large mixing bowl, sift together ½ cup cornstarch and ½ cup powdered sugar. This is the coating for the marshmallows.

Now heavily coat a baking sheet with some of the marshmallow coating. Seriously, no bare spots here! Pour the fluffy marshmallow creme onto the baking sheet, using a spatula to even it out. Dust it with some of the coating and then let it sit for about 5 hours, uncovered. Go watch Hulu or something.

Using a pizza cutter, dusted with some of the coating, cut the marshmallows into any shape or size you want. This is a great time to bust out some funky cookie cutters, right? Unicorns anyone? Toss the cut marshmallows into the mixing bowl with the coating, just a few at a time, and using a spoon, make sure they are fully powdered. Then using a wire strainer, give the mallows a good shake to remove the excess coating. These can be made up to a week in advance and stored in an airtight container. 


EAT!


Friday, November 20, 2015

Cake Slice Bakers Bake From A New Book


I've really enjoyed being part of the Cake Slice Bakers baking group. Each month we choose from four recipes from our current book. This month we are beginning a new book...Maida Heatter's Cakes. It has plain cakes, fancy cakes, chocolate cakes, layer cakes, cheesecakes, fruitcakes and nut cakes, cakes with fruits or vegetables, yeast cakes and more.

Although the other three recipes sounded wonderful, I chose to bake The Irish Whiskey Cake, leaving out the caraway seeds. I baked the recipe in a small Bundt pan instead of a loaf pan. It makes small slices, so you can have more than one and still feel virtuous. It's the perfect size to share, so it's going on my weekend journey with me. I would have included the oh-so-Irish caraway seeds, but I was out of them. I also forgot to smear extra butter on the hot cake once it came from the oven and I didn't add extra whiskey via wrapping or cheesecloth in the center. Still, it is a lovely cake which Maida describes as having less fruit than the usual fruitcake. I froze mine for a few days, so it was very easy to slice.


This cake was a dream to bake. Although the list of ingredients is long, the making really is comprised of four steps: creaming the butter and sugar, then alternately adding the sifted together dry ingredients and the whiskey, followed by stirring in citrus, raisins, seeds and nuts, then folding in beaten egg whites. I beat the egg whites before starting the creaming since I only have on stand mixer bowl. I set them aside in a different bowl, rinsed out the stand mixer bowl and dried it, then got on with the recipe. The whites were still just fine for folding in by the time I got to them and this way the baking powder had less time to react before the pan of batter was in the oven, too.


Do give this cake a try. Sweetie says that it has a medium density, is not too sweet, and was nicely balance between fruity and nutty. I think that it would go well with a glass of wine or some coffee or tea because, although it isn't dry, it isn't terribly moist either...I guess it's just right.

Not sure I'll have time to type up the recipe, but check out the other bakers at the bottom of the post. The photos link to their posts and one of them may have typed it all up. I'm trying to get this post up at the same time that I'm loading the car to drive to the Sacramento area to visit Natasha and her hubby and do some painting at last. When I get back I'll try to type up the recipe for future reference and so that you, too, can make this delicious cake. I might have some more photos, too. You can also buy the book...it's a great one.

In the meantime, do check out the post of the other Cake Slice Bakers and see which recipe they chose to make.

Monday, November 16, 2015

Babes Bake Flowering Bread


I've never been to Russia, but if the bread there is as delicious as this month's Russian Chrysanthemum Bread, perhaps I should try to get there. Our dear Babe Lien invited us to gather around her kitchen table and make this bread which ends up looking a bit like a flower. It's a filled bread and takes some time, but once you figure out how to fill each dough circle and fold it, it is pretty easy. Just remember, the pointed end goes towards the middle. Do that and don't over-fill the dough circle and you, too, will make a gorgeous, impressive and wonderful treat. The Bread Baking Babes enjoy this sort of bread baking...do you?


The recipe we were given calls for a savory filling, but I recently received a jar of cranberry-orange marmalade. It's almost Thanksgiving, one of the few times I have cranberry conserve on the table, so think of this as a seasonal and sweet variation. I included some cream cheese mixed with this year's crop of walnuts from the back yard, chopped fine. They made a great flavor combination. The finished bread is lovely to look at but the star is the dough. According to my Sweetie, the dough is buttery. moist and rich tasting, even though there isn't any butter in it...just milk, egg and olive oil.


The links at the bottom of the post will lead you to at least a couple of pizza savory flavored versions and some closer to the traditional meat-herbs-cheese version. Take your pick, but do try making this. Imagine think slices as a starter for a dinner party, especially a savory version. I think my version would be wonderful for Thanksgiving morning because the house will have some of the fragrance of the Thanksgiving meal but early in the day...sort of a teaser.


The tip to roll out the dough (1/3 at a time) and then let it sit 10 minutes is important. It means that the dough circle will stay at 7.5 cm (about 3 inches) which will allow you to put in enough filling that there will be a nice filling-bread balance. This is what my flower looked like right after I had filled all the petals and put them into place. Because it is a smaller pie plate than standard, I had enough dough left over to make a small tea ring with the rest of the fillings, but if you make a nine-inch one you will probably have about 1/4 of the dough left over or less. You could still make something like a turnover or two with it and the left over fillings, or a sausage roll if you have savory filling left.


Be sure to let Lien know if you bake as a Buddy by November 29th. You e-mail her a photo and a short bit about your experience baking this beautiful bread and she will send you a Buddy badge (very like the badge above) and include you in the round-up.


Russian Chrysanthemum Bread
(1 large round loaf)

Filling: (this is an example. You can make up your own savory or sweet filling. If you want to go vegetarian, think mushroom, bean mash, etc.

500-600 g minced meat (beef, lamb, turkey, etc.)
1 medium onion, chopped fine
1 garlic clove, chopped
140 g cheese, coarsely grated
30 g butter
100 ml cold water
salt and pepper to taste
spices, to taste
(Note: if you mix everything up and then fry up about a tablespoonful in a small pan, you can see if you life the seasonings or if they need to be changed. )

Dough:
500 g strong flour/bread flour (with some extra for dusting the board when you roll out the dough)
7 g dry instant yeast
125 ml milk, lukewarm (1/2 cup)
125 ml kefir or yogurt (1/2 cup)
1 tablespoon sugar
1 teaspoon salt
1 egg
90 ml olive oil (3 oz.)

Glaze:
1 tablespoon milk
1 egg yolk

Also Needed:
1 round cookie cutter or glass (7.5 cm - about 3-inches in diameter)
large shallow pie dish 28 cm in diameter

Making the Dough:
Mix the yeast and sugar in the lukewarm milk. Mix the yogurt or kefir with the salt, egg, and oil, then add the flour and the yeast mixture. Knead into a supple dough. Shape into a ball and let rest in a lightly greased bowl, cover with plastic wrap or a shower cap. Let dough rise for about an hour or until doubled. Keep going...see what you will end up with!


Make the Filling:
Cook the chopped onions and garlic in a frying pan until translucent. Leave to cool. Mix all the ingredients for the filling well (really knead it through). Set aside. (For the filling I used, see the end of the recipe...no cooking needed.)

Shaping the Flower:
Work with about 1/3 of the dough at a time. Roll it out to a thickness of  about 3 mm. Cover with a clean tea towel and let rest for 10 minutes. This will prevent the dough from shrinking once the circles are cut. Cut out rounds with the cookie cutter. Place 1 tablespoon of filling on each round, spread it out, leaving about  1/2 cm free around the border and sprinkle with some cheese. Fold the circle in half, and fold the two points together. It now looks like a petal. Place in the pie dish, starting around the border with the point of the petal facing to the center. Repeat until there is just a little space left in the middle. Cut three smaller circles and fill them and use that for the center of the flower. Cover with lightly greased plastic wrap or a shower cap and leave the flower to rest and rise for about 45 minutes. Patience...soon you will be eating a tasty flower.


Preheat the oven to 180 degrees C (just a little over 350 degrees F).

Whisk egg yolk and milk for the glaze and brush the bread with it. Place the pan in the oven directly on a rack and bake for 25 minutes. Lower the temperature to 170 degrees C (about 325 degrees F) and bake for another 10-15 minutes until golden brown.

When the loaf is done, take it out of the oven and the pan, place on a wire rack and let cool. If desired, brush with melted butter while still warm. Let cool or eat lukewarm.


For filling I used 2 oz. soft cream cheese mixed with 2 tablespoons finely chopped walnuts, plus about 4 oz cranberry orange marmalade.


Friday, November 13, 2015

Family Recipe Banana Nut Bread


The family cookbook began when my Dad died, over 20 years ago. As part of my grieving for him I began to gather old family recipes and to ask my Mom and siblings to contribute ones they had and to tell me if there were ones they wanted. A little less than a year later we had a family reunion at the beach and I brought a copy for each sibling and one for my Mom. Unfortunately I had neglected to give the printer the page for the index, but Mom solved that by making her own index on the inside of the back cover.

The next version came about because I noticed that Mom's copy was getting tattered and a few other family members told me that theirs were, too. This was not surprising since the books were about 17 years old! Since I was working in graphic arts at the time I decided to create a fancy version with color photos and organized around types of food. The original had been organized around seasons. I like this book a lot except for the paper. It is a pretty glazed paper which makes the photos look great but is hard to write on for changes I might make to the recipes. My solution has been to use sticky notes for changes, which works well.


Some of the recipes in the book, which I called Classic Comfort Food for the newer version (2012) and Family Food in the original version (1995), have been written about in this blog, but some have never been posted in their original form.

This Banana Nut Bread is an example of a great recipe that I have posted variations of but not the original. Even this one is a tiny bit different because the original used all vegetable oil and I used some butter and some oil. Otherwise it is the same and it makes a very fragrant, slightly sweet, very moist bread. I used pecans but walnuts are wonderful in this bread. When I took the loaves from the oven and smelled the lovely warm banana fragrance I was transported back to my Mom's kitchen.

This is an easy quick bread. Make sure to really cream the butter, oil and sugar before adding the eggs and bananas. Mix the batter just until combined once you add the flour mixture. Fold in the nuts with a spatula and you are ready to use the same spatula to scoop the batter into the prepared pans!

Classic Comfort Food Banana Nut Bread

½ cup vegetable oil
1 cup sugar
2 eggs, lightly beaten
3 ripe medium bananas, mashed
2 cups all-purpose flour
1 teaspoon baking soda
½ teaspoon baking powder
½ teaspoon salt
1 tablespoon wheat germ
3 tablespoons milk
½ teaspoon vanilla extract
½ cup chopped nuts

Beat the oil (I used half soft butter and half oil) and sugar together. Add the eggs and banana pulp, and beat well. Sift the dry ingredients together. Add the sifted dry ingredients, milk and vanilla. Mix well and stir in the nuts.

Pour the batter into a greased and floured loaf pan (9” x 5” x 3”). Bake in a preheated 3500 F oven about 1 hour. Toothpick inserted in center will come out clean or with a few crumbs on it when bread is done. Cool well. Makes one loaf.

Monday, November 09, 2015

Feeling My Oats


Today's bake is for Sweetie. He has been such a staunch supporter as I have worked on the puzzle of what to eat and drink and what to avoid putting in my gut. Things are improving in that area and I'm feeling my oats, walking more, gardening again, and even putting a coat of paint on an outdoor structure. Oats are also the star ingredient in the cookies I made for Sweetie today.

He has always loved oatmeal cookies, especially chewy ones, so that's what I made. I used a recipe from the old standby cookbook Joy of Cooking, with (of course) a few tweaks. I added some chocolate chips and some dried cranberries and some chopped walnuts. Beyond that, it was just the recipe in the book. Classics become classics because they are good enough to stand the test of time.

So for this fairly flat, chewy cookie the dominant flavors are butter, brown sugar, oats, chocolate, vanilla, cranberry and walnuts. The edges are crisp, but otherwise it is a fairly soft cookie. Sweetie really doesn't enjoy crisp, crunchy cookies.

I made the cookies pretty large, so I ended up with 26 of them and he ate five as soon as he got home!They are that good (and almost gluten free, with only 1/2 cup regular all-purpose flour...since I've decided that I can have a little gluten now and then with no harm...and it does help with the cookie structure.)


Quick Oatmeal Cookies
Makes 36 2-inch cookies
A variation of a recipe in Joy of Cooking cookbook

Preheat oven to 350 degrees F.
Measure:
   1/2 cup brown sugar, firmly packed
   1/2 cup granulated sugar
Cream with:
   1/2 cup butter at room temperature
Combine and beat in until smooth:
   1 egg
   1 teaspoon vanilla
   1 tablespoon milk
Sift together and add to the above ingredients:
   1 cup all-purpose flour (I used 1/2 cup gluten free flour mix and 1/2 cup all-purpose flour)
   1/2 teaspoon baking soda
   1/2 teaspoon baking powder
   1/2 teaspoon salt
When beaten smooth, add:
   1 cup uncooked quick rolled oats
   1/2 cup chocolate chips
   1/2 cup dried cranberries
   1/2 cup chopped walnuts
Beat the mixture well. Drop cookies 2 inches apart on well-greased cookie sheet and bake until light brown. Remove to a cooling rack soon after taking cookies from oven.

Tuesday, November 03, 2015

Fresh Cranberries Are Here


There is nothing quite like the taste of a fresh, crisp, very tart cranberry. I hear they grow in bogs in New England, but I find them every fall, like clockwork, in the produce section in one pound bags. There are lots of fine things to do with them from sweet to savory but today I wanted to make cookies, so I found a recipe for fresh cranberry cookies that also have the essence of an orange via freshly grated orange zest and also the mellow counterpoint of white chocolate. Since these are made with butter and regular flour I let Sweetie be the taste tester and he pronounced them to be very good.

The cookie dough itself is similar to what you would find with a chocolate chip cookie, with butter, brown and white sugars, egg and vanilla. When you add the orange zest it changes everything because you get both the fragrance and the taste from that fresh orange oil contained in the zest.

I cut the fresh cranberries with a sharp knife, but I suspect you could also put them into a food processor and pulse a few times and get the same results. But then you have to clean the food processor pieces...a knife and cutting board clean up super fast. I was getting ready to make dinner when I was making these, so quick clean up was more important than ease of cutting.

The white chocolate could be chunks, but I had the chips I buy from the market, so in they went. I used a disher to scoop up the dough...like a small ice cream scoop with a curved blade that pushes the dough off the tool so it falls on the cookie sheet. I used parchment paper on one sheet and a silicone mat on the other. It didn't seem to make much difference, so use what you have. Greasing the sheet works fine, too.

These charming cookies are tart from the cranberries, sweet from the chocolate and sugars, crunchy on the edges and soft in the middle. They are an altogether fine autumn cookie for you to enjoy, so make a batch, OK?


Fresh Cranberry White Chocolate Cookies - about 36 cookies
from Betty Crocker's website
Ingredients
1/4    cup butter, softened
1/2    cup sugar
1/2    cup packed brown sugar
Grated zest of 1 orange 
1        egg
2       teaspoons vanilla
1 1/2  cups Gold Medal™ all-purpose flour
1/2    teaspoon baking powder
1/2    teaspoon baking soda
1/4    teaspoon salt
1        cup fresh or frozen (unthawed) cranberries, coarsely chopped or left whole
1/2    cup white chocolate chunks or chips

Directions
·         1 Heat oven to 350°F. Spray cookie sheets with nonstick cooking spray or line with parchment paper. In a large bowl, beat butter, sugar, brown sugar and orange zest on medium speed of the electric mixer until well blended. (The mixture will have the consistency of wet sand.) Add the egg and vanilla and beat until smooth.
·         2 In a small bowl, stir together the flour, baking powder, baking soda and salt. Add to the sugar mixture and stir by hand until almost combined; add the cranberries and white chocolate and stir just until blended.

·         3 Drop spoonfuls of dough about 1 inch apart on a cookie sheets. Bake 12 to 14 minutes, until light golden and set around the edges but still soft in the middle. Let set on cookie sheet 1 to 2 minutes. Transfer to a wire rack to cool.

Monday, November 02, 2015

Fall Walnut Honey Cake


We are finally getting some autumn rain, which is a true blessing considering that we have been short on rain for at least four years now. I love autumn and the cooler weather it brings. It has been late coming this year, with lots of days in the mid-80s recently.

While the sun was still shining a week or so ago I gathered walnuts on our back deck. Although I do want the limb of the walnut tree that hangs over the deck to be pruned back, it really is handy that so many walnuts collect on the deck and get properly dried out by the sun, then are easy to collect. After gathering the nuts I just sweep the leaves and husks and broken shells (from the ones that our silly dog cracks with his teeth and somehow gets the nutmeats from) off the deck, ready for the next batch of nuts to drop.

Yesterday I watched some back episodes of Fixer Upper (HGTV) while shelling the nuts. I ended up with about three cups of fresh walnuts!


Since I also had a nice bottle of honey, I decided to make a honey walnut cake and serve it with apple slices that had been cooked in a little more honey. I'm glad that the apples released some juice as they simmered because then I had a little honey-apple juice mixture to drizzle over the top of each serving. The cake is delicious, with just a hint of orange, but it is dry. I just made up a honey syrup with a little orange liqueur in and brushed it on the cake to add some moisture. Will try it this evening and see if it improves the cake.

This is an easy cake to make if you have a food processor. The nuts get toasted, then rubbed in a clean towel to loosen some of the skin. I didn't find that much skin was loosened, so may skip the rubbing part next time, but the toasting add a depth of flavor, so don't skip that part.

I used non-dairy butter instead of the real thing and added a bit of the flour mixture (yes, gluten free flour) to the creaming butter, sugar, and honey so that it would whip better. I also put a tablespoon of the granulated sugar into the food processor, with the rest going into the butter mixture. That extra grit with the nuts helps in getting the nuts to be finely ground but not walnut butter.

This makes a single layer but you could probably double the recipe to make a stunning layer cake, maybe frosted with some maple or caramel frosting. You could also make the syrup (I think it would still be a good idea to brush some on, even for a layer cake) honey-orange and then use an orange buttercream. If you stick with one layer like I did, a side of cooked fruit is nice, but so is a dollop of whipped cream or scoop of ice cream. The recipe called for honey coated walnuts to decorate the top, but I skipped that. It would be a nice garnish if you like.


Honey Walnut Cake
from The Vineyard Kitchen by Maria Helm Sinskey
Serves 8-10

1 1/2 cups walnut pieces
1 cup all-purpose flour (I used King Arthur Flour's gluten-free mixture)
1 1/2 teaspoons baking powder
1/4 teaspoon salt
12 tablespoons (1 1/2 sticks) unsalted butter, at room temperature
1/2 cup honey
1/4 cup sugar
3 large eggs
1 teaspoon freshly grated orange zest
1/2 teaspoon pure vanilla extract
Optional: 10 nice walnut halves and 2 tablespoons honey for garnish

Preheat the oven to 350 degrees F.

Butter and flour a 9-inch cake pan.

Spread the walnuts on a sheet pan and toast in the preheated oven for 6 minutes. Cool and rub the nuts in a towel to remove the loose skins.

Grind the nuts in a food process with 1/2 cup of the flour (and 1 tablespoon of the sugar if doing it my way) until very fine. In a medium bowl, combine the ground nuts, remaining flour, baking powder, and salt. Reserve.

In a standing mixer bowl, with a paddle attachment (or with an electric hand mixer) beat the room temperature butter with the honey and the sugar (remaining sugar if doing it my way) until light and fluffy, about 3 minutes. Scrape down the sides of the bowl.

In a small bowl, beat the eggs lightly with the orange zest and vanilla. Add it in thirds to the butter mixture, beating well to incorporate egg mixture after each addition. Scrape down the sides of the bowl. Add the dry ingredients and mix until fully incorporated.

Spread the batter evenly in the prepared cake pan. Bake in the preheated oven for 35 - 40 minutes, until a toothpick inserted into the center comes out clean.

For the optional walnut topping: while the cake is baking, toast ten walnut halves on a sheet pan for 8 minutes . While they are still warm, rub the nuts in a towel to remove the excess skin and place them in a small bowl. Add the 2 tablespoons of honey and stir until the walnuts are coated. Reserve the walnut halves at room temperature to garnish the cake when it is finished.

Cool the cake in the pan for 5 minutes, and then run a knife around the edges and turn the cake out on to a cooling rack, then carefully turn over so that the top side is up. Cool completely. Garnish the edges of the cake with the walnut halves. This cake is nice served with a dollop of whipped cream.

Honey Orange Syrup: If desired, place 1/4 cup sugar and 1/4 cup water in a small saucepan. Heat over medium-high heat until mixture boils and sugar dissolves completely. Add 1/4 cup honey. Heat another 2 minutes, stirring often. Remove from heat and add 2 tablespoons orange liqueur (I used Cointreau) and stir to combine. Pour slowly over the cake or brush on with a pastry brush until all the syrup is absorbed. Cover with plastic wrap and let sit at least an hour to allow syrup to moisten the cake.